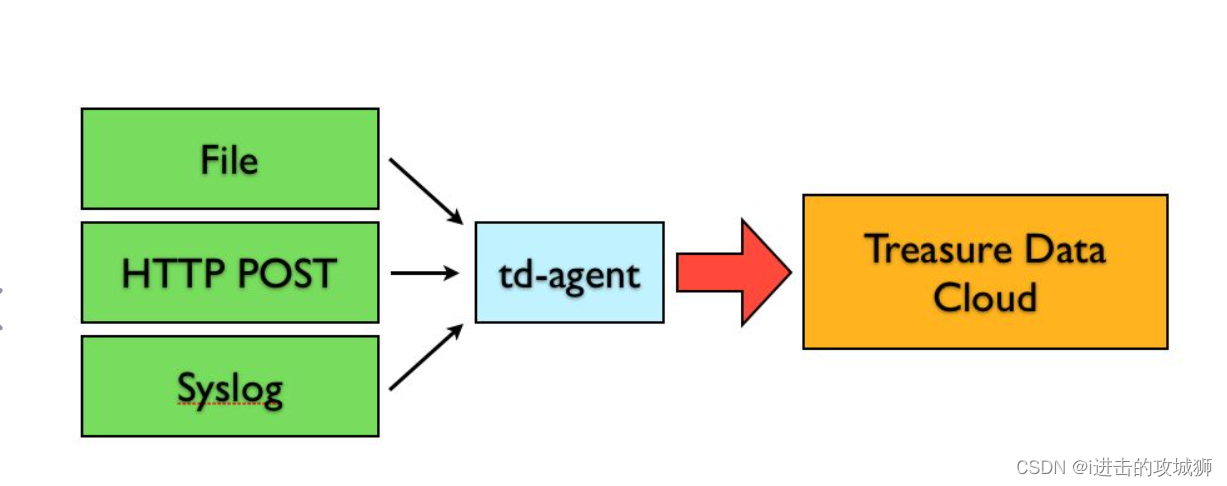
Fluentd (td-agent) 日志处理
1、td-agent是什么
td-agent是一个日志采集器,提供了丰富的插件来适配不同的数据源、输出目的地等
在使用上,我们可以把各种不同来源的信息,通过简单的配置,将日志收集到不同的地方,首先发送给Fluentd,接着Fluentd根据配置通过不同的插件把信息转发到不同的 地方,比如文件、SaaS Platform、数据库,甚至可以转发到另一个Fluentd。

2、如何安装td-agent
Linux系统:centos
2.1 执行脚本
curl -L https://toolbelt.treasuredata.com/sh/install-redhat-td-agent3.sh | sh
2.2 查看是否安装
rpm -qa|grep td-agent

2.3 启动命令
启动td-agent systemctl start td-agent
启动服务   /etc/init.d/td-agent start
查看服务状态   /etc/init.d/td-agent status
停止服务  /etc/init.d/td-agent stop
重启服务  /etc/init.d/td-agent restart
2.4 默认配置文件路径
/etc/td-agent/td-agent.conf
2.5 默认日志文件路径:
/var/log/td-agent/td-agent.log
3、 名词解释
source:指定数据源
match:指定输出地址
filter:指定了一个事件处理过程
system:用来设置系统的配置
label:为output和filter分组
@include:使用它可以在配置文件里面包含其他的配置文件
插件:fluentd采集发送日志时要使用插件,一些插件是内置的,要使用非内置的插件需要安装插件
4、配置文件解析
# Receive events from 20000/tcp
# This is used by log forwarding and the fluent-cat command
<source>
  @type forward
  port 20000
</source>

# http://this.host:8081/myapp.access?json={"event":"data"}
<source>
  @type http
  port 8081
</source>

<source>
  @type tail
  path /root/shell/test.log
  tag myapp.access
</source>

# Match events tagged with "myapp.access" and
# store them to /var/log/td-agent/access.%Y-%m-%d
# Of course, you can control how you partition your data
# with the time_slice_format option.
<match myapp.access>
  @type file
  path /var/log/td-agent/access
</match>
sources 配置日志文件的来源
@type :指定配置文件来自哪里
forward:来自另一个fluent
http: 来自一个http请求传的参数
tail:来自一个日志文件
port:读取其他机器传的数据时,开发的数据传输端口
path: 读取的数据位置
tag: 数据的标签,和 match配置的标签进行匹配
match 数据转发配置
myapp.access:输出的标签,和输入的标签进行匹配
@type:输出位置,可以输出到kafak,本地文件,数据库,monggo得到
path:输出到文件时,文件的路径,如果输出到其他位置,还会有其他的专项的配置,比如下面这个配置,因为是转发到Kafka,所以match标签中还配置了很多关于Kafka的配置,
[外链图片转存失败,源站可能有防盗链机制,建议将图片保存下来直接上传(img-wU9d5qLk-1642839362691)(img/1642670826444.png)]
<match>里的store标签,每个store表示这个tag属性的数据的存储方向,我们可以配置往Kafka存储,可以配置本地文件存储
<source>
 type tail
 format none

 path /var/log/apache2/access_log
 pos_file /var/log/apache2/access_log.pos
 tag mytail
</source>
5、部分参数解释
format:配置表达式,去过滤数据,只有满足format表达式的字符串才能在match中进行store存储。

type tail: tail方式是 Fluentd 内置的输入方式,其原理是不停地从源文件中获取增量日志,与linx命令tail相似,也可以使用其他输入方式如http、forward等输入,也可以使用输入插件,将 tail 改为相应的插件名称 如: type tail_ex  ,注意tail_ex为下划线。

format apache: 指定使用 Fluentd 内置的 Apache 日志解析器。可以自己配置表达式。

path /var/log/apache2/access_log: 指定收集日志文件位置。

Pos_file /var/log/apache2/access_log.pos:强烈建议使用此参数,access_log.pos文件可以自动生成,要注意access_log.pos文件的写入权限,因为要将access_log上次的读取长度写入到该文件,主要保证在fluentd服务宕机重启后能够继续收集,避免日志数据收集丢失,保证数据收集的完整性。
6、配置文件案例
6.1、通过http的方式,同时往日志和Kafka传输数据
# http://this.host:8888/mytail?json={"event":"data"}
<source>
  @type http
  port 8081
 </source>


<match mytail>
 @type copy
  <store>
  @type kafka
  brokers localhost:9092
  default_topic test1
  default_message_key message
  ack_timeout 2000
  flush_interval 1
  required_acks -1
  </store>
  <store>
   @type file
   path /var/log/td-agent/access
  </store>
</match>
6.2 通过读取文件文件,同时往日志和Kafka传输数据
<source>
type tail
 format none
 path /var/log/apache2/access_log
pos_file /var/log/apache2/access_log.pos
 tag mytail
</source>

<match mytail>
 @type copy
  <store>
  @type kafka
  brokers localhost:9092
  default_topic test1
  default_message_key message
  ack_timeout 2000
  flush_interval 1
  required_acks -1
  </store>
  <store>
   @type file
   path /var/log/td-agent/access
  </store>
</match>
- 点赞
- 收藏
- 关注作者


评论(0)