202206-3|EasyUI+SpringBoot二维码查详情

【摘要】 主页:小王叔叔的博客支持:点赞👍关注✔️收藏💖1 效果2 实现方法2.1.引入easyui基本插件及相关js文件easyui 官网 进入官网下载最新版的js文件 <!-- EASYUI --> <link type="text/css" rel="stylesheet" href="/js/jquery-easyui-1.7/themes/default/easyui.css...
主页:小王叔叔的博客
支持:点赞👍关注✔️收藏💖
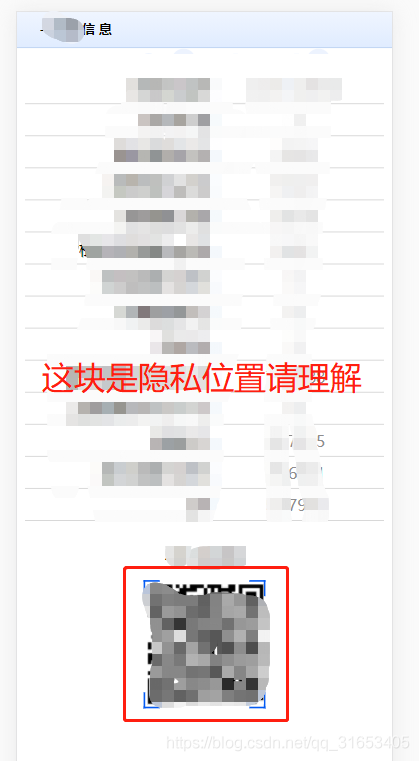
1 效果

2 实现方法
2.1.引入easyui基本插件及相关js文件
easyui 官网 进入官网下载最新版的js文件
   <!-- EASYUI -->
 	<link type="text/css" rel="stylesheet"  href="/js/jquery-easyui-1.7/themes/default/easyui.css">
    <link rel="stylesheet" type="text/css" href="/js/jquery-easyui-1.7/themes/mobile.css">
    <link type="text/css" rel="stylesheet"  href="/js/jquery-easyui-1.7/themes/icon.css">

    <script type="text/javascript" src="/js/jquery-3.3.1.min.js"></script>
    <script type="text/javascript" src="/js/jquery-easyui-1.7/jquery.easyui.min.js"></script>
    <script type="text/javascript" src="/js/jquery-easyui-1.7/jquery.easyui.mobile.js"></script>
2.2搭建基础版本的web端管理页面
3.搭建java端
3.1 pom.xml文件
		<dependency>
			<groupId>org.springframework.boot</groupId>
			<artifactId>spring-boot-starter-data-jpa</artifactId>
		</dependency>

		<dependency>
			<groupId>mysql</groupId>
			<artifactId>mysql-connector-java</artifactId>
			<scope>runtime</scope>
		</dependency>
		<dependency>
			<groupId>org.springframework.boot</groupId>
			<artifactId>spring-boot-starter-test</artifactId>
			<scope>test</scope>
		</dependency>

		<dependency>
			<groupId>org.springframework.boot</groupId>
			<artifactId>spring-boot-starter-data-jpa</artifactId>
		</dependency>
		<dependency>
			<groupId>org.springframework.boot</groupId>
			<artifactId>spring-boot-starter-freemarker</artifactId>
		</dependency>
		<dependency>
			<groupId>org.mybatis.spring.boot</groupId>
			<artifactId>mybatis-spring-boot-starter</artifactId>
			<version>1.3.0</version>
		</dependency>
		<dependency>
			<groupId>org.springframework.boot</groupId>
			<artifactId>spring-boot-starter-web</artifactId>
		</dependency>


		<dependency>
			<groupId>commons-codec</groupId>
			<artifactId>commons-codec</artifactId>
		</dependency>

		<!-- https://mvnrepository.com/artifact/com.liferay/org.apache.commons.fileupload -->
		<dependency>
			<groupId>com.liferay</groupId>
			<artifactId>org.apache.commons.fileupload</artifactId>
			<version>1.2.2.LIFERAY-PATCHED-1</version>
		</dependency>
				 <dependency>
            <groupId>net.sf.json-lib</groupId>
            <artifactId>json-lib</artifactId>
            <version>2.4</version>
            <classifier>jdk15</classifier>
        </dependency>
        <!-- 热部署组件 -->
		<dependency>
			<groupId>org.springframework.boot</groupId>
			<artifactId>spring-boot-devtools</artifactId>
			<optional>true</optional>
			<scope>true</scope>
		</dependency>
		<!-- thymeleaf模板引擎 -->
		<dependency>
			<groupId>org.springframework.boot</groupId>
			<artifactId>spring-boot-starter-thymeleaf</artifactId>
		</dependency>

		 <dependency>
            <groupId>net.sf.json-lib</groupId>
            <artifactId>json-lib</artifactId>
            <version>2.4</version>
            <classifier>jdk15</classifier>
        </dependency>

         <!-- Gson -->
         <dependency>
			<groupId>com.google.code.gson</groupId>
			<artifactId>gson</artifactId>
		</dependency>


		<!-- 二维码 -->
        <!-- https://mvnrepository.com/artifact/com.google.zxing/core -->
        <dependency>
            <groupId>com.google.zxing</groupId>
            <artifactId>core</artifactId>
            <version>2.1</version>
        </dependency>
        <!-- https://mvnrepository.com/artifact/com.google.zxing/javase -->
        <dependency>
            <groupId>com.google.zxing</groupId>
            <artifactId>javase</artifactId>
            <version>2.1</version>
        </dependency>

        <!-- 条形码 -->
        <dependency>
			<groupId>net.sf.barcode4j</groupId>
			<artifactId>barcode4j-light</artifactId>
			<version>2.0</version>
		</dependency>
3.2配置生成二维码的 工具类
/**
 * 二维码生成和读的工具类
 *
 */
public class QrCodeUtil {
    /**
     * 生成包含字符串信息的二维码图片
     * @param outputStream 文件输出流路径
     * @param content 二维码携带信息
     * @param qrCodeSize 二维码图片大小
     * @param imageFormat 二维码的格式
     * @throws WriterException
     * @throws IOException
     */
    public static boolean createQrCode(String  filePath, String content, int qrCodeSize, String imageFormat) throws WriterException, IOException{
            //设置二维码纠错级别MAP
            Hashtable<EncodeHintType, ErrorCorrectionLevel> hintMap = new Hashtable<EncodeHintType, ErrorCorrectionLevel>();
            hintMap.put(EncodeHintType.ERROR_CORRECTION, ErrorCorrectionLevel.L);  // 矫错级别
            QRCodeWriter qrCodeWriter = new QRCodeWriter();
            //创建比特矩阵(位矩阵)的QR码编码的字符串
            BitMatrix byteMatrix = qrCodeWriter.encode(content, BarcodeFormat.QR_CODE, qrCodeSize, qrCodeSize, hintMap);
            // 使BufferedImage勾画QRCode  (matrixWidth 是行二维码像素点)
            int matrixWidth = byteMatrix.getWidth();
            BufferedImage image = new BufferedImage(matrixWidth-200, matrixWidth-200, BufferedImage.TYPE_INT_RGB);
            image.createGraphics();
            Graphics2D graphics = (Graphics2D) image.getGraphics();
            graphics.setColor(Color.WHITE);
            graphics.fillRect(0, 0, matrixWidth, matrixWidth);
            // 使用比特矩阵画并保存图像
            graphics.setColor(Color.BLACK);
            for (int i = 0; i < matrixWidth; i++){
                for (int j = 0; j < matrixWidth; j++){
                    if (byteMatrix.get(i, j)){
                        graphics.fillRect(i-100, j-100, 1, 1);
                    }
                }
            }
            OutputStream outputStream=new FileOutputStream(new File(filePath));
            return ImageIO.write(image, imageFormat, outputStream);
    }
    /**
     * 读二维码并输出携带的信息
     */
    public static void readQrCode(InputStream inputStream) throws IOException{
        //从输入流中获取字符串信息
        BufferedImage image = ImageIO.read(inputStream);
        //将图像转换为二进制位图源
        LuminanceSource source = new BufferedImageLuminanceSource(image);
        BinaryBitmap bitmap = new BinaryBitmap(new HybridBinarizer(source));
        QRCodeReader reader = new QRCodeReader();
        Result result = null ;
        try {
         result = reader.decode(bitmap);
        } catch (ReaderException e) {
            e.printStackTrace();
        }
        System.out.println(result.getText());
    }


    /**
     * @param content
     * @return
     * @throws WriterException
     * @throws IOException
     */
    public static String createTeachQRCode(String id) throws WriterException, IOException {
    	String qrCodeUrl="/qrcode/"+id+".jpg";
    	createQrCode("src\\main\\webapp\\qrcode\\"+id+".jpg",id,900,"JPEG");
    	return qrCodeUrl;
    }

}
3.3编写需要生成二维码的业务方法
   @RequestMapping(value = "/saveInfo", method = RequestMethod.POST)
	@ResponseBody
	public Code saveInfo( Model  model ,Code code , HttpSession session ) throws Exception {
		String randoms = String.valueOf(UserNoStr.GenerateRandom(10));// 生成随机14位数字
		//本地生成文件夹
		File file = new File(systemConfig.imagesPathNew+"imagesQrcode");
		file.mkdirs();
		File file1 = new File(systemConfig.imagesPathNew+"imagesBarcode");
		file1.mkdirs();
        // 二维码路径(本地图片路径)D:/image/imagesQrcode/6498766294.jpg
		String qrcodeImgUrl = systemConfig.imagesPathNew+new BigInteger( randoms ) + ".jpg";
		//本地地址
		String localPath = systemConfig.ImagesPath+"/"+new BigInteger( randoms )+ ".jpg";
		String qrUrl = systemConfig.imagesurl+"/code/suyuanInfo/"+new BigInteger( randoms );
		//System.out.println(qrUrl);
		// 生成二维码
		boolean is = QrCodeUtil.createQrCode(qrcodeImgUrl, qrUrl,900, "JPEG");
		code.setImgUrl(localPath);
		code.setSuyuan_code(randoms);
		codeService.save(code);
		model.addAttribute("suyuan_code", code.getSuyuan_code());
		model.addAttribute("imgUrl", localPath);
		model.addAttribute("code", code);
		//return "addCode";
		return code;
	}
3.4 配置 服务器加载图片工具
@Configuration
public class WebAppConfig extends WebMvcConfigurerAdapter {

	    @Value("${cbs.imagesPath}")
	    private String mImagesPath;

	    //访问图片方法
	    @Override
	    public void addResourceHandlers(ResourceHandlerRegistry registry) {
	        if(mImagesPath.equals("") || mImagesPath.equals("${cbs.imagesPath}")){
	            String imagesPath = WebAppConfig.class.getClassLoader().getResource("").getPath();
	            if(imagesPath.indexOf(".jar")>0){
	                imagesPath = imagesPath.substring(0, imagesPath.indexOf(".jar"));
	            }else if(imagesPath.indexOf("classes")>0){
	                imagesPath = "file:"+imagesPath.substring(0, imagesPath.indexOf("classes"));
	            }
	            imagesPath = imagesPath.substring(0, imagesPath.lastIndexOf("/"))+"/image/";
	            mImagesPath = imagesPath;
	        }
	        LoggerFactory.getLogger(WebAppConfig.class).info("imagesPath="+mImagesPath);
	        registry.addResourceHandler("/image/**").addResourceLocations(mImagesPath);
	        registry.addResourceHandler("/image/**").addResourceLocations("file:/d:/image/");//前台加载图片
	        super.addResourceHandlers(registry);
	    }

}
 3.5 基本功能模块写好后,配置返现代理
解释:因为微信二维码开发,需要https的请求方式,因此服务器开发这块要有https的域名,那我们这里就做一个测试的https域名,这样就用到这个反向代理工具:本地域名映射工具NATAPP
基本的域名映射工具NATAPP配置方法请参考博客,这个博客中详细的说明了NATAPP工具的注册,登录,使用及详细的使用方法。
3.6 二维码使用
二维码生成后,以正常的img方式加载到页面中即可。
3.7 二维码外框设计
介于页面布局效果,将二维码放置到一个框框中,这样显着布局合理并且漂亮些。
二维码背景框的代码
<div style="margin:0 auto;margin-top:10px;height: 160px; width: 152px; background: linear-gradient(#035af3, #035af3) left top, linear-gradient(#035af3, #035af3) left top, linear-gradient(#035af3, #035af3) right top,linear-gradient(#035af3, #035af3) right top, linear-gradient(#035af3, #035af3) right bottom, linear-gradient(#035af3, #035af3) right bottom,  linear-gradient(#035af3, #035af3) left bottom,linear-gradient(#035af3, #035af3) left bottom; background-repeat: no-repeat; background-size: 2px 20px, 20px 2px;">
		  <img id="simg" th:src="${codeInfo.imgUrl}" style="height:150px;width:145px;margin-top:5px;margin-left: 3px;"/>
 </div>
3.8 二维码的使用
在页面中,放入下面内容,浏览器将判断是否为微信浏览器,进行提示跳转了。
    <script>
    	var ua = navigator.userAgent.toLowerCase();
    	var isWeixin = ua.indexOf('micromessenger')!=-1;
        if(!isWeixin){
        	window.location.href = "https://open.weixin.qq.com/connect/oauth2/authorize?appid=888";
        }
    </script>
⚠️注意 ~
💯本期内容就结束了,如果内容有误,麻烦大家评论区指出!
如有疑问❓可以在评论区💬或私信💬,尽我最大能力🏃♀️帮大家解决👨🏫!
如果我的文章有帮助到您,欢迎点赞+关注✔️鼓励博主🏃,您的鼓励是我分享的动力🏃🏃🏃~

【版权声明】本文为华为云社区用户原创内容,未经允许不得转载,如需转载请自行联系原作者进行授权。如果您发现本社区中有涉嫌抄袭的内容,欢迎发送邮件进行举报,并提供相关证据,一经查实,本社区将立刻删除涉嫌侵权内容,举报邮箱:
cloudbbs@huaweicloud.com
- 点赞
- 收藏
- 关注作者
评论(0)