【第77题】JAVA高级技术-多线程11(创建线程的5种方式)
回城传送–》《JAVA筑基100例》
零、前言
今天是学习 JAVA语言 打卡的第77天,每天我会提供一篇文章供群成员阅读( 不需要订阅付钱 ),读完文章之后,按解题思路,自己再实现一遍。在小虚竹JAVA社区 中对应的 【打卡贴】打卡,今天的任务就算完成了。
因为大家都在一起学习同一篇文章,所以有什么问题都可以在群里问,群里的小伙伴可以迅速地帮到你,一个人可以走得很快,一群人可以走得很远,有一起学习交流的战友,是多么幸运的事情。
学完后,自己写篇学习报告的博客,可以发布到小虚竹JAVA社区 ,供学弟学妹们参考。
我的学习策略很简单,题海策略+ 费曼学习法。如果能把这100题都认认真真自己实现一遍,那意味着 JAVA语言 已经筑基成功了。后面的进阶学习,可以继续跟着我,一起走向架构师之路。
一、题目描述
题目:
Java创建线程的几种方式:
Java使用Thread类代表线程,所有线程对象都必须是Thread类或者其子类的实例。Java可以用以下5种方式来创建线程:
1)继承Thread类创建线程;
2)实现Runnable接口创建线程;
3)实现Callable接口,通过FutureTask包装器来创建Thread线程;
4)使用ExecutorService、Callable(或者Runnable)、Future实现由返回结果的线程。
5)使用CompletableFuture类创建异步线程,且是据有返回结果的线程。 JDK8新支持的
实现:使用这5种方式创建线程,体验其中的妙处。
二、解题思路
继承Thread类创建线程
Thread类本质上是实现了Runnable接口的一个实例,代表一个线程的实例。启动线程的唯一方法就是通过Thread类的start()实例方法。start()方法是一个native方法,它将启动一个新线程,并执行run()方法。这种方式实现多线程很简单,通过自己的类直接extends Thread,并复写run()方法,就可以启动新线程并执行自己定义的run()方法。
实现Runnable接口创建线程
如果自己的类已经extends另一个类,就无法直接extends Thread,此时,可以实现一个Runnable接口
实现Callable接口,通过FutureTask包装器来创建Thread线程
实现一个Callable接口(它是一个具有返回值的)
使用ExecutorService、Callable(或者Runnable)、Future实现由返回结果的线程
Executors类,提供了一系列工厂方法用于创建线程池,返回的线程池都实现了ExecutorService接口:
//创建固定数目线程的线程池。
public static ExecutorService newFixedThreadPool(int nThreads) ;
//创建一个可缓存的线程池,调用execute 将重用以前构造的线程(如果线程可用)。如果现有线程没有可用的,则创建一个新线程并添加到池中。终止并从缓存中移除那些已有 60 秒钟未被使用的线程。
public static ExecutorService newCachedThreadPool();
//创建一个单线程化的Executor。
public static ExecutorService newSingleThreadExecutor();
//创建一个支持定时及周期性的任务执行的线程池,多数情况下可用来替代Timer类。
public static ScheduledExecutorService newScheduledThreadPool(int corePoolSize);
- 1
- 2
- 3
- 4
- 5
- 6
- 7
- 8
ExecutoreService提供了submit()方法,传递一个Callable,或Runnable,返回Future。如果Executor后台线程池还没有完成Callable的计算,这调用返回Future对象的get()方法,会阻塞直到计算完成。
使用CompletableFuture类创建异步线程,且是据有返回结果的线程
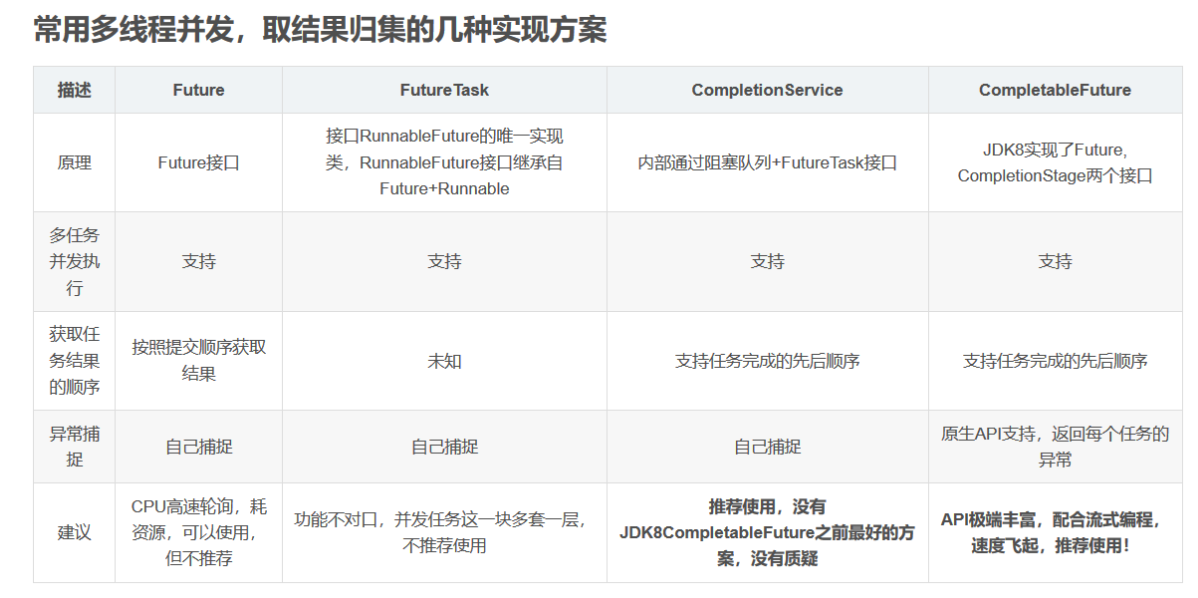
Future模式的缺点
Future虽然可以实现获取异步执行结果的需求,但是它没有提供通知的机制,我们无法得知Future什么时候完成。
要么使用阻塞,在future.get()的地方等待future返回的结果,这时又变成同步操作。要么使用isDone()轮询地判断Future是否完成,这样会耗费CPU的资源。
CompletableFuture介绍
JDK1.8新加入的一个实现类CompletableFuture,实现了Future, CompletionStage两个接口。
CompletableFuture中4个异步执行任务静态方法:
public static <U> CompletableFuture<U> supplyAsync(Supplier<U> supplier) {
        return asyncSupplyStage(asyncPool, supplier);
    }

public static <U> CompletableFuture<U> supplyAsync(Supplier<U> supplier,Executor executor) {
    return asyncSupplyStage(screenExecutor(executor), supplier);
}

public static CompletableFuture<Void> runAsync(Runnable runnable) {
    return asyncRunStage(asyncPool, runnable);
}

public static CompletableFuture<Void> runAsync(Runnable runnable, Executor executor) {
    return asyncRunStage(screenExecutor(executor), runnable);
}
- 1
- 2
- 3
- 4
- 5
- 6
- 7
- 8
- 9
- 10
- 11
- 12
- 13
- 14
- 15
其中supplyAsync用于有返回值的任务,runAsync则用于没有返回值的任务。Executor参数可以手动指定线程池,否则默认ForkJoinPool.commonPool()系统级公共线程池
三、代码详解
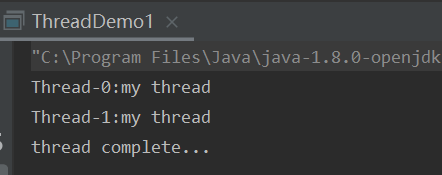
第一种:继承Thread类创建线程
package com.xiaoxuzhu;

import java.util.concurrent.CountDownLatch;

/**
 * Description:继承Thread类创建线程
 *
 * @author xiaoxuzhu
 * @version 1.0
 *
 * <pre>
 * 修改记录:
 * 修改后版本	        修改人		修改日期			修改内容
 * 2022/5/15.1	    xiaoxuzhu		2022/5/15		    Create
 * </pre>
 * @date 2022/5/15
 */
public class ThreadDemo1 extends Thread {
    CountDownLatch countDownLatch;

    public ThreadDemo1(CountDownLatch countDownLatch) {
        this.countDownLatch = countDownLatch;
    }

    @Override
    public void run() {
        try {
            Thread.sleep(2000);
            System.out.println(Thread.currentThread().getName() + ":my thread ");
        } catch (InterruptedException e) {
            e.printStackTrace();
        } finally {
            countDownLatch.countDown();
        }
    }

    public static void main(String[] args) {
        // 第一种:使用extends Thread方式
        CountDownLatch countDownLatch1 = new CountDownLatch(2);
        for (int i = 0; i < 2; i++) {
            ThreadDemo1 myThread1 = new ThreadDemo1(countDownLatch1);
            myThread1.start();
        }

        try {
            countDownLatch1.await();
            System.out.println("thread complete...");
        } catch (InterruptedException e) {
            e.printStackTrace();
        }
    }


}
- 1
- 2
- 3
- 4
- 5
- 6
- 7
- 8
- 9
- 10
- 11
- 12
- 13
- 14
- 15
- 16
- 17
- 18
- 19
- 20
- 21
- 22
- 23
- 24
- 25
- 26
- 27
- 28
- 29
- 30
- 31
- 32
- 33
- 34
- 35
- 36
- 37
- 38
- 39
- 40
- 41
- 42
- 43
- 44
- 45
- 46
- 47
- 48
- 49
- 50
- 51
- 52
- 53
- 54
- 55
- 56
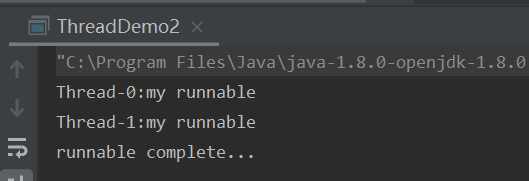
第二种:实现Runnable接口创建线程
package com.xiaoxuzhu;

import java.util.concurrent.CountDownLatch;

/**
 * Description: 实现Runnable接口创建线程
 *
 * @author xiaoxuzhu
 * @version 1.0
 *
 * <pre>
 * 修改记录:
 * 修改后版本	        修改人		修改日期			修改内容
 * 2022/5/15.1	    xiaoxuzhu		2022/5/15		    Create
 * </pre>
 * @date 2022/5/15
 */
public class ThreadDemo2  implements Runnable{
    CountDownLatch countDownLatch;

    public ThreadDemo2(CountDownLatch countDownLatch) {
        this.countDownLatch = countDownLatch;
    }
    @Override
    public void run() {
        try {
            Thread.sleep(2000);
            System.out.println(Thread.currentThread().getName() + ":my runnable ");
        } catch (InterruptedException e) {
            e.printStackTrace();
        } finally {
            countDownLatch.countDown();
        }
    }

    public static void main(String[] args) {
        // 第二种:使用implements Runnable方式
        CountDownLatch countDownLatch2 = new CountDownLatch(2);
        ThreadDemo2 myRunnable = new ThreadDemo2(countDownLatch2);
        for (int i = 0; i < 2; i++) {
            new Thread(myRunnable).start();
        }

        try {
            countDownLatch2.await();
            System.out.println("runnable complete...");
        } catch (InterruptedException e) {
            e.printStackTrace();
        }
    }
}
- 1
- 2
- 3
- 4
- 5
- 6
- 7
- 8
- 9
- 10
- 11
- 12
- 13
- 14
- 15
- 16
- 17
- 18
- 19
- 20
- 21
- 22
- 23
- 24
- 25
- 26
- 27
- 28
- 29
- 30
- 31
- 32
- 33
- 34
- 35
- 36
- 37
- 38
- 39
- 40
- 41
- 42
- 43
- 44
- 45
- 46
- 47
- 48
- 49
- 50
- 51
- 52
- 53
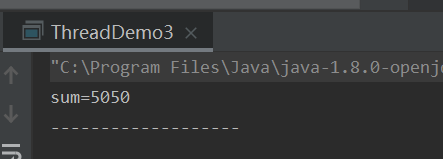
第三种:实现Callable接口,通过FutureTask包装器来创建Thread线程
计算1~100的叠加
package com.xiaoxuzhu;

import java.util.concurrent.Callable;
import java.util.concurrent.ExecutionException;
import java.util.concurrent.FutureTask;

/**
 * Description: 实现Callable接口,通过FutureTask包装器来创建Thread线程
 *  跟Runnable比,不同点在于它是一个具有返回值的,且会抛出异常
 *  //用futureTask接收结果
 *
 * @author xiaoxuzhu
 * @version 1.0
 *
 * <pre>
 * 修改记录:
 * 修改后版本	        修改人		修改日期			修改内容
 * 2022/5/15.1	    xiaoxuzhu		2022/5/15		    Create
 * </pre>
 * @date 2022/5/15
 */
public class ThreadDemo3 implements Callable<Integer> {

    public static void main(String[] args) {
        ThreadDemo3 threadDemo03 = new ThreadDemo3();
        //1、用futureTask接收结果
        FutureTask<Integer> futureTask = new FutureTask<>(threadDemo03);
        new Thread(futureTask).start();

        //2、接收线程运算后的结果
        try {
            //futureTask.get();这个是堵塞性的等待
            Integer sum = futureTask.get();
            System.out.println("sum="+sum);
            System.out.println("-------------------");
        } catch (InterruptedException e) {
            e.printStackTrace();
        } catch (ExecutionException e) {
            e.printStackTrace();
        }
    }

    @Override
    public Integer call() throws Exception {
        int sum = 0;
        for (int i = 0; i <101 ; i++) {
            sum+=i;
        }
        return sum;
    }
}
- 1
- 2
- 3
- 4
- 5
- 6
- 7
- 8
- 9
- 10
- 11
- 12
- 13
- 14
- 15
- 16
- 17
- 18
- 19
- 20
- 21
- 22
- 23
- 24
- 25
- 26
- 27
- 28
- 29
- 30
- 31
- 32
- 33
- 34
- 35
- 36
- 37
- 38
- 39
- 40
- 41
- 42
- 43
- 44
- 45
- 46
- 47
- 48
- 49
- 50
- 51
- 52
- 53
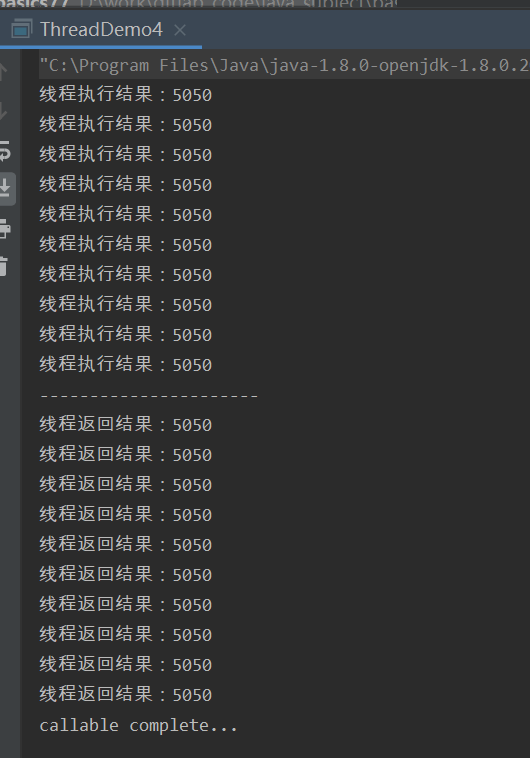
第四种:使用ExecutorService、Callable(或者Runnable)、Future实现由返回结果的线程
package com.xiaoxuzhu;

import java.util.ArrayList;
import java.util.Iterator;
import java.util.List;
import java.util.concurrent.Callable;
import java.util.concurrent.CountDownLatch;
import java.util.concurrent.ExecutionException;
import java.util.concurrent.ExecutorService;
import java.util.concurrent.Executors;
import java.util.concurrent.Future;

/**
 * Description: 使用ExecutorService、Callable(或者Runnable)、Future实现由返回结果的线程
 *
 * @author xiaoxuzhu
 * @version 1.0
 *
 * <pre>
 * 修改记录:
 * 修改后版本	        修改人		修改日期			修改内容
 * 2022/5/15.1	    xiaoxuzhu		2022/5/15		    Create
 * </pre>
 * @date 2022/5/15
 */
public class ThreadDemo4 {

    static class MyCallable implements Callable<Integer> {
        private CountDownLatch countDownLatch;

        public MyCallable(CountDownLatch countDownLatch) {
            this.countDownLatch = countDownLatch;
        }

        public Integer call() {
            int sum = 0;
            try {

                for (int i = 0; i <= 100; i++) {
                    sum += i;
                }
                System.out.println("线程执行结果:"+sum);

            } finally {
                countDownLatch.countDown();
            }
            return sum;
        }

    }

    public static void main(String[] args) throws ExecutionException, InterruptedException {
        // 第四种:使用使用线程池方式
        // 接受返回参数
        List<Future> resultItems2 = new ArrayList<Future>();
        // 給线程池初始化5個线程
        ExecutorService executorService = Executors.newFixedThreadPool(5);
        CountDownLatch countDownLatch4 = new CountDownLatch(10);

        for (int i = 0; i < 10; i++) {
            MyCallable myCallable = new MyCallable(countDownLatch4);
            Future result = executorService.submit(myCallable);
            resultItems2.add(result);
        }

        // 等待线程池中分配的任务完成后才关闭(关闭之后不允许有新的线程加入,但是它并不会等待线程结束),
        // 而executorService.shutdownNow();是立即关闭不管是否线程池中是否有其他未完成的线程。
        executorService.shutdown();
        try {
            countDownLatch4.await();
            Iterator<Future> iterator = resultItems2.iterator();
            System.out.println("----------------------");
            while (iterator.hasNext()) {
                try {
                    System.out.println("线程返回结果:"+iterator.next().get());
                } catch (ExecutionException e) {
                    e.printStackTrace();
                }
            }
            System.out.println("callable complete...");
        } catch (InterruptedException e) {
            e.printStackTrace();
        }
    }
}
- 1
- 2
- 3
- 4
- 5
- 6
- 7
- 8
- 9
- 10
- 11
- 12
- 13
- 14
- 15
- 16
- 17
- 18
- 19
- 20
- 21
- 22
- 23
- 24
- 25
- 26
- 27
- 28
- 29
- 30
- 31
- 32
- 33
- 34
- 35
- 36
- 37
- 38
- 39
- 40
- 41
- 42
- 43
- 44
- 45
- 46
- 47
- 48
- 49
- 50
- 51
- 52
- 53
- 54
- 55
- 56
- 57
- 58
- 59
- 60
- 61
- 62
- 63
- 64
- 65
- 66
- 67
- 68
- 69
- 70
- 71
- 72
- 73
- 74
- 75
- 76
- 77
- 78
- 79
- 80
- 81
- 82
- 83
- 84
- 85
- 86
- 87
第五种:使用CompletableFuture类创建异步线程,且是据有返回结果的线程
package com.xiaoxuzhu;

import java.util.concurrent.CompletableFuture;
import java.util.concurrent.ExecutionException;
import java.util.concurrent.ExecutorService;
import java.util.concurrent.Executors;
import java.util.concurrent.TimeUnit;

import org.junit.Test;

/**
 * Description:  使用CompletableFuture类创建异步线程,且是据有返回结果的线程。
 *
 * @author xiaoxuzhu
 * @version 1.0
 *
 * <pre>
 * 修改记录:
 * 修改后版本	        修改人		修改日期			修改内容
 * 2022/5/15.1	    xiaoxuzhu		2022/5/15		    Create
 * </pre>
 * @date 2022/5/15
 */
public class ThreadDemo5 {

    /**
     * A任务B任务完成后,才执行C任务
     * 返回值的处理
     * @param
     *@return void
     **/
    @Test
    public void completableFuture1(){
        CompletableFuture<String> future1 = CompletableFuture.supplyAsync(() -> {
            try {
                Thread.sleep(10);
            } catch (InterruptedException e) {
                e.printStackTrace();
            }
            System.out.println("future1 finished!");
            return "future1 finished!";
        });

        CompletableFuture<String> future2 = CompletableFuture.supplyAsync(() -> {
            System.out.println("future2 finished!");
            return "future2 finished!";
        });

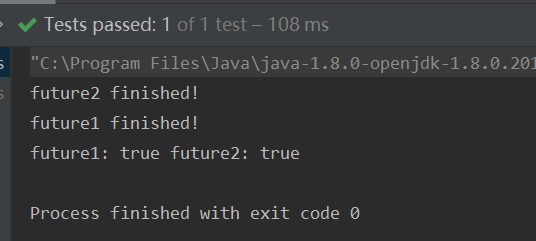
        CompletableFuture<Void> future3 = CompletableFuture.allOf(future1, future2);
        try {
            future3.get();
        } catch (InterruptedException e) {
            e.printStackTrace();
        } catch (ExecutionException e) {
            e.printStackTrace();
        }
        System.out.println("future1: " + future1.isDone() + " future2: " + future2.isDone());

    }

    /**
     * 在Java8中,CompletableFuture提供了非常强大的Future的扩展功能,可以帮助我们简化异步编程的复杂性,
     * 并且提供了函数式编程的能力,可以通过回调的方式处理计算结果,也提供了转换和组合 CompletableFuture 的方法
     *
     *  注意: 方法中有Async一般表示另起一个线程,没有表示用当前线程
     */
    @Test
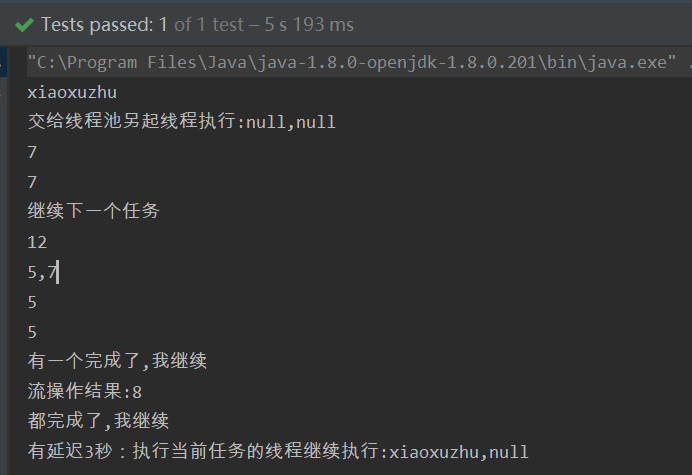
    public void test01() throws Exception {
        ExecutorService service = Executors.newFixedThreadPool(5);
        /**
         *  supplyAsync用于有返回值的任务,
         *  runAsync则用于没有返回值的任务
         *  Executor参数可以手动指定线程池,否则默认ForkJoinPool.commonPool()系统级公共线程池
         */
        CompletableFuture<String> future = CompletableFuture.supplyAsync(() -> {
            try {
                Thread.sleep(3000);
            } catch (InterruptedException e) {
                e.printStackTrace();
            }
            return "xiaoxuzhu";
        }, service);
        CompletableFuture<Void> data = CompletableFuture.runAsync(() -> System.out.println("xiaoxuzhu"));
        /**
         * 计算结果完成回调
         */
        future.whenComplete((x,y)-> System.out.println("有延迟3秒:执行当前任务的线程继续执行:"+x+","+y)); //执行当前任务的线程继续执行
        data.whenCompleteAsync((x,y)-> System.out.println("交给线程池另起线程执行:"+x+","+y)); // 交给线程池另起线程执行
        future.exceptionally(Throwable::toString);
        //System.out.println(future.get());
        /**
         * thenApply,一个线程依赖另一个线程可以使用,出现异常不执行
         */
        //第二个线程依赖第一个的结果
        CompletableFuture<Integer> future1 = CompletableFuture.supplyAsync(() -> 5).thenApply(x -> x);

        /**
         * handle 是执行任务完成时对结果的处理,第一个出现异常继续执行
         */
        CompletableFuture<Integer> future2 = future1.handleAsync((x, y) -> x + 2);
        System.out.println(future2.get());//7
        /**
         * thenAccept 消费处理结果,不返回
         */
        future2.thenAccept(System.out::println);
        /**
         * thenRun  不关心任务的处理结果。只要上面的任务执行完成,就开始执行
         */
        future2.thenRunAsync(()-> System.out.println("继续下一个任务"));
        /**
         * thenCombine 会把 两个 CompletionStage 的任务都执行完成后,两个任务的结果交给 thenCombine 来处理
         */
        CompletableFuture<Integer> future3 = future1.thenCombine(future2, Integer::sum);
        System.out.println(future3.get()); // 5+7=12
        /**
         * thenAcceptBoth : 当两个CompletionStage都执行完成后,把结果一块交给thenAcceptBoth来进行消耗
         */
        future1.thenAcceptBothAsync(future2,(x,y)-> System.out.println(x+","+y)); //5,7
        /**
         * applyToEither
         * 两个CompletionStage,谁执行返回的结果快,我就用那个CompletionStage的结果进行下一步的转化操作
         */
        CompletableFuture<Integer> future4 = future1.applyToEither(future2, x -> x);
        System.out.println(future4.get()); //5
        /**
         * acceptEither
         * 两个CompletionStage,谁执行返回的结果快,我就用那个CompletionStage的结果进行下一步的消耗操作
         */
        future1.acceptEither(future2, System.out::println);
        /**
         * runAfterEither
         * 两个CompletionStage,任何一个完成了都会执行下一步的操作(Runnable
         */
        future1.runAfterEither(future,()-> System.out.println("有一个完成了,我继续"));
        /**
         * runAfterBoth
         * 两个CompletionStage,都完成了计算才会执行下一步的操作(Runnable)
         */
        future1.runAfterBoth(future,()-> System.out.println("都完成了,我继续"));
        /**
         * thenCompose 方法
         * thenCompose 方法允许你对多个 CompletionStage 进行流水线操作,第一个操作完成时,将其结果作为参数传递给第二个操作
         * thenApply是接受一个函数,thenCompose是接受一个future实例,更适合处理流操作
         */
        future1.thenComposeAsync(x->CompletableFuture.supplyAsync(()->x+1))
                .thenComposeAsync(x->CompletableFuture.supplyAsync(()->x+2))
                .thenCompose(x->CompletableFuture.runAsync(()-> System.out.println("流操作结果:"+x)));
        TimeUnit.SECONDS.sleep(5);//主线程sleep,等待其他线程执行
    }
}
- 1
- 2
- 3
- 4
- 5
- 6
- 7
- 8
- 9
- 10
- 11
- 12
- 13
- 14
- 15
- 16
- 17
- 18
- 19
- 20
- 21
- 22
- 23
- 24
- 25
- 26
- 27
- 28
- 29
- 30
- 31
- 32
- 33
- 34
- 35
- 36
- 37
- 38
- 39
- 40
- 41
- 42
- 43
- 44
- 45
- 46
- 47
- 48
- 49
- 50
- 51
- 52
- 53
- 54
- 55
- 56
- 57
- 58
- 59
- 60
- 61
- 62
- 63
- 64
- 65
- 66
- 67
- 68
- 69
- 70
- 71
- 72
- 73
- 74
- 75
- 76
- 77
- 78
- 79
- 80
- 81
- 82
- 83
- 84
- 85
- 86
- 87
- 88
- 89
- 90
- 91
- 92
- 93
- 94
- 95
- 96
- 97
- 98
- 99
- 100
- 101
- 102
- 103
- 104
- 105
- 106
- 107
- 108
- 109
- 110
- 111
- 112
- 113
- 114
- 115
- 116
- 117
- 118
- 119
- 120
- 121
- 122
- 123
- 124
- 125
- 126
- 127
- 128
- 129
- 130
- 131
- 132
- 133
- 134
- 135
- 136
- 137
- 138
- 139
- 140
- 141
- 142
- 143
- 144
- 145
- 146
- 147
- 148
- 149
- 150
- 151
- 152
多学一个知识点
四、推荐专栏
五、示例源码下载
关注下面的公众号,回复筑基+题目号
筑基77
文章来源: xiaoxuzhu.blog.csdn.net,作者:小虚竹,版权归原作者所有,如需转载,请联系作者。
原文链接:xiaoxuzhu.blog.csdn.net/article/details/125138176
- 点赞
- 收藏
- 关注作者


评论(0)