SpringBoot中配置绑定的三种方法(@ConfigurationProperties注解)

properties配置文件如下:
human.name=Mr.Yu
human.age=21
human.gender=male
- 1
- 2
- 3
如何把properties里面的配置绑定到JavaBean里面,以前我们的做法如下:
public class PropertiesUtil {
    public static void getProperties(Person person) throws IOException {
        Properties properties = new Properties();
        properties.load(new FileInputStream("src/main/resources/demo.properties"));
        //得到配置文件key的名字
        Enumeration enumeration = properties.propertyNames();
        while (enumeration.hasMoreElements()){
            String key =(String)enumeration.nextElement();
            String value = properties.getProperty(key);
            System.out.println("key="+key+"——————value="+value);
            //封装到JavaBean
            //以下内容省略
        }
    }
}
- 1
- 2
- 3
- 4
- 5
- 6
- 7
- 8
- 9
- 10
- 11
- 12
- 13
- 14
- 15
输出结果:
key=human.name——————value=Mr.Yu
key=human.age——————value=21
key=human.gender——————value=male

Process finished with exit code 0
- 1
- 2
- 3
- 4
- 5
- 6
可以看到这个过程十分繁杂,但是在SpringBoot中这个过程将会变得非常简单。
在SpringBoot中有如下3种方法:
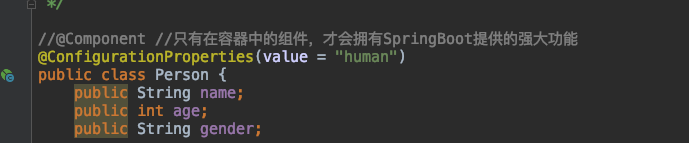
1.@ConfigurationProperties注解+@Component(或@Controller或@Service或@Repository)注解
- 只有在容器中的组件,才会拥有SpringBoot提供的强大功能,也就是如果我们需要使用到@ConfigurationProperties注解,那么我们首先要保证该对JavaBean对象在IoC容器中,所以需要用到Component注解来添加组件到容器中。
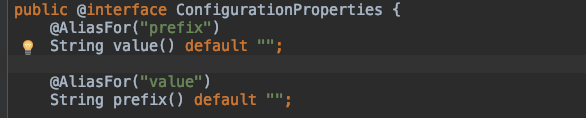
- @ConfigurationProperties注解中prefix与value互相都是别名

- 也就是说
@ConfigurationProperties(value = "human")与@ConfigurationProperties(prefix = "human")是一样的 - prefix和value指的是前缀的意思
代码测试:
properties配置文件:
human.name=Mr.Yu
human.age=21
human.gender=male
- 1
- 2
- 3
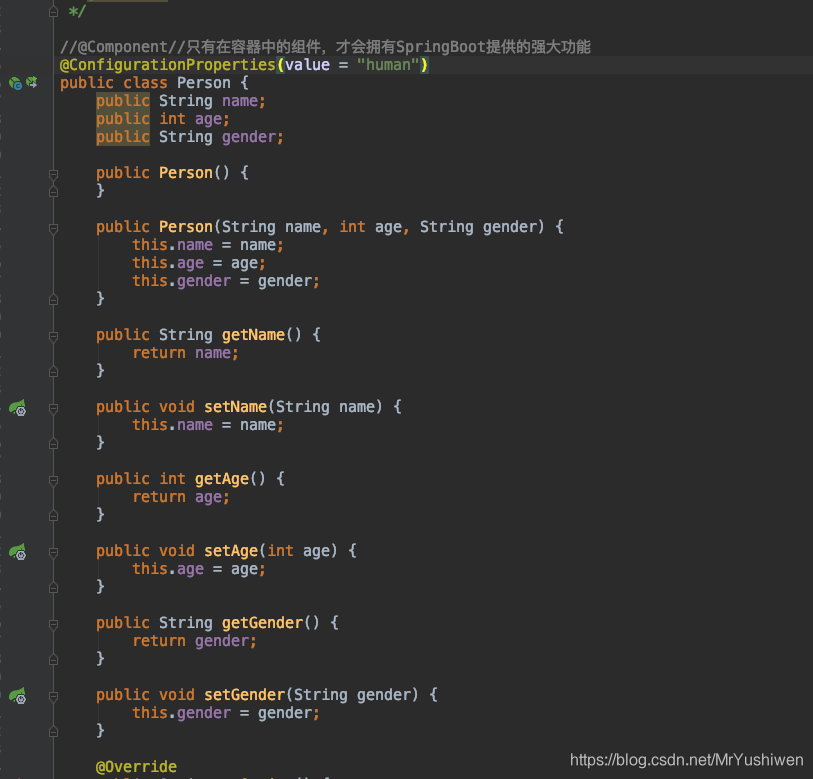
Person类:
@Component 只有在容器中的组件,才会拥有SpringBoot提供的强大功能
@ConfigurationProperties(value = "human")
public class Person {
    public String name;
    public int age;
    public String gender;

    public Person() {
    }

    public Person(String name, int age, String gender) {
        this.name = name;
        this.age = age;
        this.gender = gender;
    }

    public String getName() {
        return name;
    }

    public void setName(String name) {
        this.name = name;
    }

    public int getAge() {
        return age;
    }

    public void setAge(int age) {
        this.age = age;
    }

    public String getGender() {
        return gender;
    }

    public void setGender(String gender) {
        this.gender = gender;
    }

    @Override
    public String toString() {
        return "Person{" +
                "name='" + name + '\'' +
                ", age=" + age +
                ", gender='" + gender + '\'' +
                '}';
    }
}
- 1
- 2
- 3
- 4
- 5
- 6
- 7
- 8
- 9
- 10
- 11
- 12
- 13
- 14
- 15
- 16
- 17
- 18
- 19
- 20
- 21
- 22
- 23
- 24
- 25
- 26
- 27
- 28
- 29
- 30
- 31
- 32
- 33
- 34
- 35
- 36
- 37
- 38
- 39
- 40
- 41
- 42
- 43
- 44
- 45
- 46
- 47
- 48
- 49
- 50
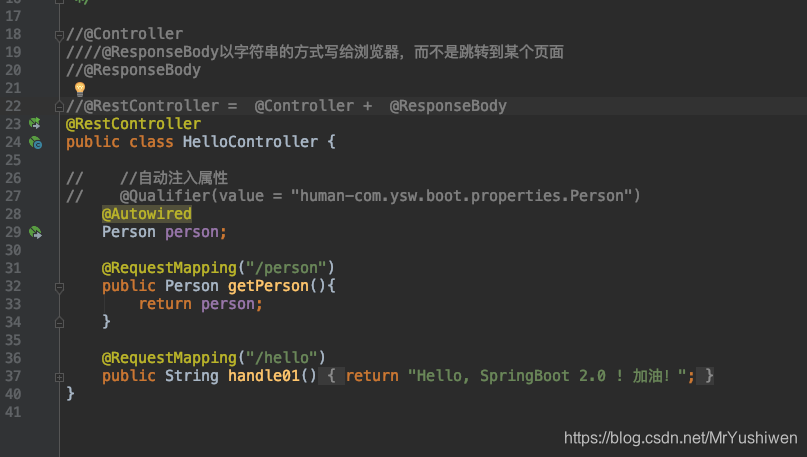
测试类如下:
//@Controller
@ResponseBody以字符串的方式写给浏览器,而不是跳转到某个页面
//@ResponseBody

//@RestController =  @Controller +  @ResponseBody
@RestController
public class HelloController {

    //自动注入属性
    @Autowired
    Person person;

    @RequestMapping("/person")
    public Person getPerson(){
        return person;
    }

}
- 1
- 2
- 3
- 4
- 5
- 6
- 7
- 8
- 9
- 10
- 11
- 12
- 13
- 14
- 15
- 16
- 17
- 18
- 19
测试结果:

2.@ConfigurationProperties注解+@EnableConfigurationProperties注解
这种方式@EnableConfigurationProperties注解一定要在配置类上写,@EnableConfigurationProperties的意思是开启属性配置功能,开启谁的属性配置功能呢,因为我们上面的Person类想进行配置绑定,所以我们在后面加上参数Person.class:@EnableConfigurationProperties(Person.class)
@EnableConfigurationProperties(Person.class)的作用就是把这个Person组件注册到容器中,对象的名称为:human-com.ysw.boot.properties.Person 其中human是@ConfigurationProperties(value = “human”)中前缀value的值
在Person类上还是有@ConfigurationProperties注解,这种方式把Person类上的@Component注解换成了配置类上的@EnableConfigurationProperties(Person.class)注解

这种方式主要用在引用第三方包时,比如第三方包中有一个Person类,该类中没有使用@Component,我们也不能够给第三方包中的类加上@Component,这个时候就可以使用在配置类上加上@EnableConfigurationProperties注解的方法。
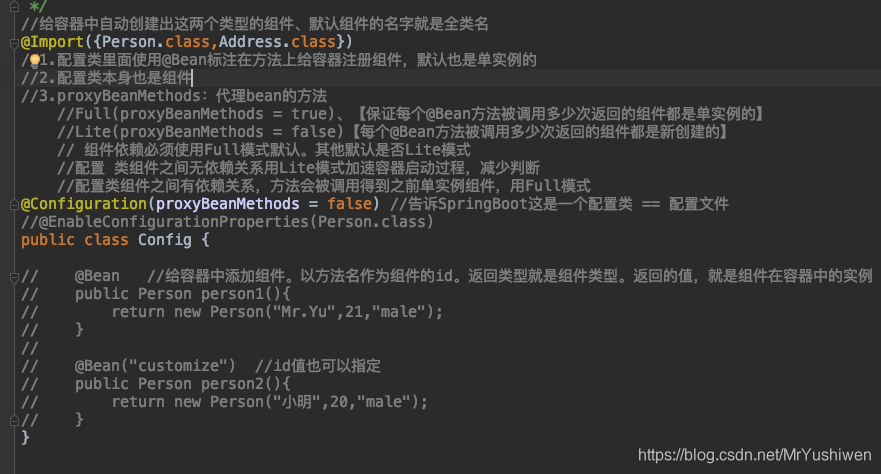
3.@ConfigurationProperties注解+@Import注解
- 使用@Import给容器中自动创建出这个类型的组件、默认组件的名字就是全类名
- @Import注解与2中的@ConfigurationProperties注解效果是一样的
- 只不过他们注册到容器中的名称不同:
- @ConfigurationProperties注解注册到容器中对象的名称为:human-com.ysw.boot.properties.Person 其中human是@ConfigurationProperties(value = “human”)中前缀value的值
- @Import注解注册到容器中对象的名称为:com.ysw.boot.properties.Person
配置类:
Person类:
测试类:
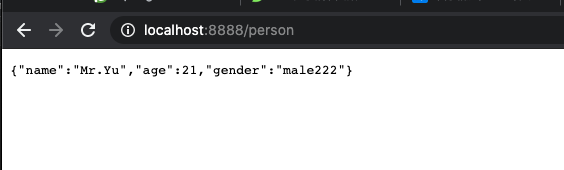
application.properties文件:
server.port=8888
human.name=Mr.Yu
human.age=21
human.gender=male222
- 1
- 2
- 3
- 4
测试结果:
文章来源: blog.csdn.net,作者:Mr.Yushiwen,版权归原作者所有,如需转载,请联系作者。
原文链接:blog.csdn.net/MrYushiwen/article/details/111985310

- 点赞
- 收藏
- 关注作者
评论(0)