SpringDataRedis介绍

【摘要】
实际项目中我们一般都会使用Redis来作为我们的缓存组件,往往又会和Spring一块使用,虽然Redis官方提供的有Jedis等客户端工具,但是使用的时候还是有些不方便,这时SpringDataRed...
实际项目中我们一般都会使用Redis来作为我们的缓存组件,往往又会和Spring一块使用,虽然Redis官方提供的有Jedis等客户端工具,但是使用的时候还是有些不方便,这时SpringDataRedis出现了。
Redis相关单独介绍参考:https://dpb-bobokaoya-sm.blog.csdn.net/column/info/33752
SpringDataRedis
一、什么是SpringDataRedis
SpringDataRedis是Spring大家族中的一个成员,提供了在srping应用中通过简单的配置访问redis服务,对reids底层开发包(Jedis, JRedis, and RJC)进行了高度封装,RedisTemplate提供了redis各种操作、异常处理及序列化,支持发布订阅,并对spring 3.1 cache进行了实现。
spring-data-redis针对jedis提供了如下功能:
- 连接池自动管理,提供了一个高度封装的“RedisTemplate”类
- 针对jedis客户端中大量api进行了归类封装,将同一类型操作封装为operation接口
| 接口 | 说明 |
|---|---|
| ValueOperations | 简单K-V操作 |
| HashOperations | 针对map类型的数据操作 |
| ListOperations | 针对list类型的数据操作 |
| SetOperations | set类型数据操作 |
| ZSetOperations | zset类型数据操作 |
- 提供的有相关的序列化器
| 序列化器 | 说明 |
|---|---|
| JdkSerializationRedisSerializer | POJO对象的存取场景,使用JDK本身序列化机制,将pojo类通过ObjectInputStream/ObjectOutputStream进行序列化操作,最终redis-server中将存储字节序列。是目前最常用的序列化策略。 |
| StringRedisSerializer | Key或者value为字符串的场景,根据指定的charset对数据的字节序列编码成string,是“new String(bytes, charset)”和“string.getBytes(charset)”的直接封装。是最轻量级和高效的策略。 |
| JacksonJsonRedisSerializer | jackson-json工具提供了javabean与json之间的转换能力,可以将pojo实例序列化成json格式存储在redis中,也可以将json格式的数据转换成pojo实例。因为jackson工具在序列化和反序列化时,需要明确指定Class类型,因此此策略封装起来稍微复杂。【需要jackson-mapper-asl工具支持】 |
| OxmSerializer | 提供了将javabean与xml之间的转换能力,目前可用的三方支持包括jaxb,apache-xmlbeans;redis存储的数据将是xml工具。不过使用此策略,编程将会有些难度,而且效率最低;不建议使用。【需要spring-oxm模块的支持】 |
二、怎么使用
1.创建maven项目并添加相关依赖
创建普通的maven项目,然后添加如下依赖
<dependencies>
    <dependency>
        <groupId>org.springframework</groupId>
        <artifactId>spring-context</artifactId>
        <version>4.3.21.RELEASE</version>
    </dependency>
    <dependency>
        <groupId>org.aspectj</groupId>
        <artifactId>aspectjweaver</artifactId>
        <version>1.9.4</version>
    </dependency>
    <dependency>
        <groupId>aopalliance</groupId>
        <artifactId>aopalliance</artifactId>
        <version>1.0</version>
    </dependency>
    <dependency>
        <groupId>org.springframework.data</groupId>
        <artifactId>spring-data-redis</artifactId>
        <version>1.6.0.RELEASE</version>
    </dependency>
    <dependency>
        <groupId>redis.clients</groupId>
        <artifactId>jedis</artifactId>
        <version>2.7.0</version>
    </dependency>
    <dependency>
        <groupId>org.springframework</groupId>
        <artifactId>spring-tx</artifactId>
        <version>4.3.21.RELEASE</version>
    </dependency>
    <dependency>
        <groupId>org.springframework</groupId>
        <artifactId>spring-test</artifactId>
        <version>4.3.21.RELEASE</version>
    </dependency>
    <dependency>
        <groupId>org.apache.commons</groupId>
        <artifactId>commons-pool2</artifactId>
        <version>2.3</version>
    </dependency>
    <dependency>
        <groupId>junit</groupId>
        <artifactId>junit</artifactId>
        <version>4.12</version>
    </dependency>
    <dependency>
        <groupId>com.fasterxml.jackson.core</groupId>
        <artifactId>jackson-core</artifactId>
        <version>2.8.5</version>
    </dependency>
    <dependency>
        <groupId>com.fasterxml.jackson.core</groupId>
        <artifactId>jackson-annotations</artifactId>
        <version>2.8.5</version>
    </dependency>
    <dependency>
        <groupId>com.fasterxml.jackson.core</groupId>
        <artifactId>jackson-databind</artifactId>
        <version>2.8.5</version>
    </dependency>
</dependencies>

- 1
- 2
- 3
- 4
- 5
- 6
- 7
- 8
- 9
- 10
- 11
- 12
- 13
- 14
- 15
- 16
- 17
- 18
- 19
- 20
- 21
- 22
- 23
- 24
- 25
- 26
- 27
- 28
- 29
- 30
- 31
- 32
- 33
- 34
- 35
- 36
- 37
- 38
- 39
- 40
- 41
- 42
- 43
- 44
- 45
- 46
- 47
- 48
- 49
- 50
- 51
- 52
- 53
- 54
- 55
- 56
- 57
- 58
- 59
- 60
- 61
- 62
2.添加相关的配置
添加Spring的配置文件和Redis连接信息的配置文件,如下
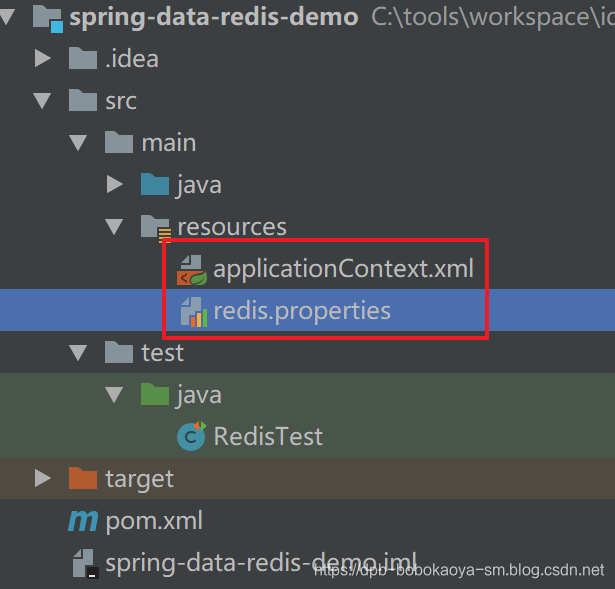
redis.properties
redis.pool.maxTotal=20
redis.pool.maxIdle=10
redis.pool.minIdle=5

redis.conn.hostName=192.168.88.120
redis.conn.port=6379
- 1
- 2
- 3
- 4
- 5
- 6
applicationContext.xml
注意相关的序列化器的设置,设置使用的是StringRedisSerializer
<?xml version="1.0" encoding="UTF-8"?>
<beans xmlns="http://www.springframework.org/schema/beans"
       xmlns:xsi="http://www.w3.org/2001/XMLSchema-instance"
       xmlns:context="http://www.springframework.org/schema/context"
       xmlns:aop="http://www.springframework.org/schema/aop"
       xmlns:tx="http://www.springframework.org/schema/tx"
       xsi:schemaLocation="http://www.springframework.org/schema/beans
http://www.springframework.org/schema/beans/spring-beans.xsd
http://www.springframework.org/schema/context
http://www.springframework.org/schema/context/spring-context.xsd
http://www.springframework.org/schema/aop
http://www.springframework.org/schema/aop/spring-aop.xsd
http://www.springframework.org/schema/tx
http://www.springframework.org/schema/tx/spring-tx.xsd">
    <!-- 配置读取 properties 文件的工具类 -->
    <context:property-placeholder
            location="classpath:redis.properties"/>
    <!-- Jedis 连接池 -->
    <bean id="poolConfig" class="redis.clients.jedis.JedisPoolConfig">
        <property name="maxTotal" value="${redis.pool.maxTotal}"/>
        <property name="maxIdle" value="${redis.pool.maxIdle}"/>
        <property name="minIdle" value="${redis.pool.minIdle}"/>
    </bean>
    <!-- Jedis 的连接工厂 -->
    <bean id="jedisConnectionFactory" class="org.springframework.data.redis.connection.jedis.JedisConnectionFactory">
        <property name="hostName" value="${redis.conn.hostName}"/>
        <property name="port" value="${redis.conn.port}"/>
        <property name="poolConfig" ref="poolConfig"/>
    </bean>
    <!-- Redis 模板对象 -->
    <bean id="redisTemplate"
          class="org.springframework.data.redis.core.RedisTemplate">
        <property name="connectionFactory"
                  ref="jedisConnectionFactory"/>
        <!-- 序列化器:能够把我们储存的 key 与 value 做序列化处理的对象 -->
        <!-- 配置默认的序列化器 -->
        <!-- keySerializer、valueSerializer 配置 Redis 中的 String 类型 key与 value 的序列化器 -->
        <!-- HashKeySerializer、HashValueSerializer 配置 Redis 中的 Hash类型 key 与 value 的序列化器 -->
        <property name="keySerializer">
            <bean class="org.springframework.data.redis.serializer.StringRedisSerializer"/>
        </property>
        <property name="valueSerializer">
            <bean  class="org.springframework.data.redis.serializer.StringRedisSerializer"/>
        </property>
    </bean>
</beans>
- 1
- 2
- 3
- 4
- 5
- 6
- 7
- 8
- 9
- 10
- 11
- 12
- 13
- 14
- 15
- 16
- 17
- 18
- 19
- 20
- 21
- 22
- 23
- 24
- 25
- 26
- 27
- 28
- 29
- 30
- 31
- 32
- 33
- 34
- 35
- 36
- 37
- 38
- 39
- 40
- 41
- 42
- 43
- 44
- 45
- 46
3.数据存储操作
3.1 string类型操作
/**
 * @program: spring-data-redis-demo
 * @description: Redis单元测试
 * @author: 波波烤鸭
 * @create: 2019-05-19 23:45
 */
@RunWith(SpringJUnit4ClassRunner.class)
@ContextConfiguration("classpath:applicationContext.xml")
public class RedisTest {

    @Autowired
    private RedisTemplate<String,Object> redisTemplate;

    /**
     * 存储键值对
     */
    @Test
    public void test1(){
        this.redisTemplate.opsForValue().set("key","bobo kaoyao");
    }

    /**
     * 获取信息
     */
    @Test
    public void test2(){
        String msg = (String) this.redisTemplate.opsForValue().get("key");
        System.out.println("获取的值:"+msg);
    }

    /**
     * 测试连接
     */
    @Test
    public void test3(){
        Jedis jedis = new Jedis("192.168.88.120",6379);
        System.out.println(jedis.ping());
    }
}
- 1
- 2
- 3
- 4
- 5
- 6
- 7
- 8
- 9
- 10
- 11
- 12
- 13
- 14
- 15
- 16
- 17
- 18
- 19
- 20
- 21
- 22
- 23
- 24
- 25
- 26
- 27
- 28
- 29
- 30
- 31
- 32
- 33
- 34
- 35
- 36
- 37
- 38
- 39

3.2 自定义对象
/**
 * 存储自定义对象
 */
@Test
public void test4(){
    // 获取自定义对象
    Users user = new Users(1,"张三",18);
    // 更换序列化器
    this.redisTemplate.setValueSerializer(new JdkSerializationRedisSerializer());
    this.redisTemplate.opsForValue().set("users",user);
}

/**
* 获取自定义对象
*/
@Test
public void test5(){

   // 更换序列化器
   this.redisTemplate.setValueSerializer(new JdkSerializationRedisSerializer());
   Object users = this.redisTemplate.opsForValue().get("users");
   System.out.println(users);

}
- 1
- 2
- 3
- 4
- 5
- 6
- 7
- 8
- 9
- 10
- 11
- 12
- 13
- 14
- 15
- 16
- 17
- 18
- 19
- 20
- 21
- 22
- 23
- 24

3.3 存储为JSON数据
/**
 * 存储自定义对象为json数据
 */
@Test
public void test6(){
    // 获取自定义对象
    Users user = new Users(1,"张三",18);
    // 更换序列化器
    this.redisTemplate.setValueSerializer(new Jackson2JsonRedisSerializer<>(Users.class));
    this.redisTemplate.opsForValue().set("usersjson",user);
}

/**
 * 获取自定义对象数据
 */
@Test
public void test7(){

    // 更换序列化器
    this.redisTemplate.setValueSerializer(new Jackson2JsonRedisSerializer<>(Users.class));
    System.out.println(this.redisTemplate.opsForValue().get("usersjson"));
}
- 1
- 2
- 3
- 4
- 5
- 6
- 7
- 8
- 9
- 10
- 11
- 12
- 13
- 14
- 15
- 16
- 17
- 18
- 19
- 20
- 21
- 22

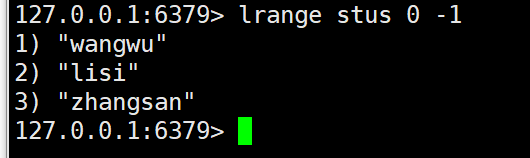
3.4 List操作
就给出了lpush命令对应的leftpush方法,其他的参考名称操作~
/**
 * @program: spring-data-redis-demo
 * @description: Redis单元测试
 * @author: 波波烤鸭
 * @create: 2019-05-19 23:45
 */
@RunWith(SpringJUnit4ClassRunner.class)
@ContextConfiguration("classpath:applicationContext.xml")
public class RedisList {

    @Autowired
    private RedisTemplate<String, Object> redisTemplate;

    /**
     * List 类型
     */
    @Test
    public void test1() {
        this.redisTemplate.boundListOps("stus").leftPush("zhangsan");
        this.redisTemplate.boundListOps("stus").leftPush("lisi");
        this.redisTemplate.boundListOps("stus").leftPush("wangwu");
    }
}
- 1
- 2
- 3
- 4
- 5
- 6
- 7
- 8
- 9
- 10
- 11
- 12
- 13
- 14
- 15
- 16
- 17
- 18
- 19
- 20
- 21
- 22
- 23
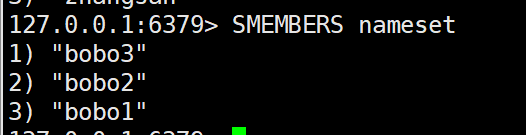
3.5 Set操作
 /**
  * Set 类型
  */
 @Test
 public void test2() {
     redisTemplate.boundSetOps("nameset").add("bobo1");
     redisTemplate.boundSetOps("nameset").add("bobo2");
     redisTemplate.boundSetOps("nameset").add("bobo3");
 }
- 1
- 2
- 3
- 4
- 5
- 6
- 7
- 8
- 9
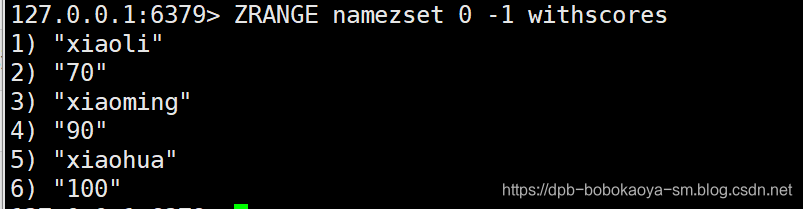
3.6 ZSet操作
 /**
  * ZSet 类型
  */
 @Test
 public void test3() {
     redisTemplate.boundZSetOps("namezset").add("xiaoming",90);
     redisTemplate.boundZSetOps("namezset").add("xiaohua",100);
     redisTemplate.boundZSetOps("namezset").add("xiaoli",70);
 }
- 1
- 2
- 3
- 4
- 5
- 6
- 7
- 8
- 9
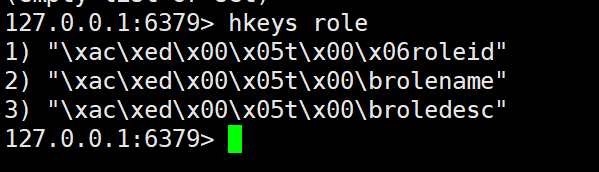
3.7 Hash操作
/**
* Hash 类型
*/
@Test
public void test4() {
redisTemplate.boundHashOps("role").put("roleid",1001);
redisTemplate.boundHashOps("role").put("rolename","test role");
redisTemplate.boundHashOps("role").put("roledesc","role desc");
}
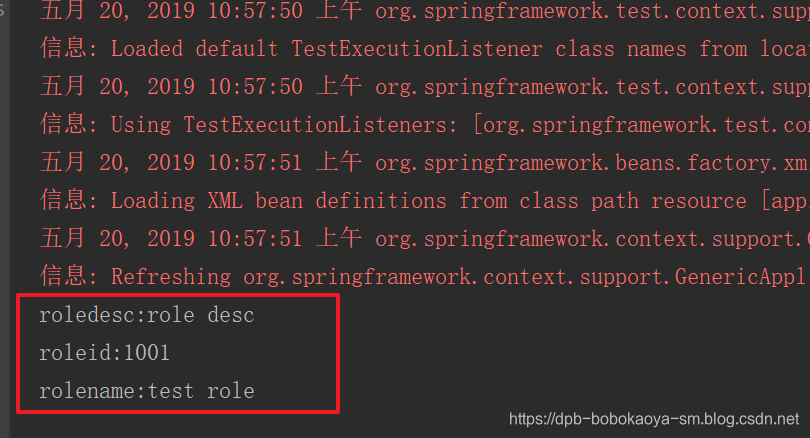
/**
* Hash 类型 获取field对应的值
*/
@Test
public void test6() {
Set<Object> keys = redisTemplate.boundHashOps("role").keys();
for (Object o: keys) {
System.out.println(o+":"+redisTemplate.boundHashOps("role").get(o));
}
}
- 1
- 2
- 3
- 4
- 5
- 6
- 7
- 8
- 9
- 10
- 11
- 12
- 13
- 14
- 15
- 16
- 17
- 18
- 19
- 20
文章来源: dpb-bobokaoya-sm.blog.csdn.net,作者:波波烤鸭,版权归原作者所有,如需转载,请联系作者。
原文链接:dpb-bobokaoya-sm.blog.csdn.net/article/details/90371110

【版权声明】本文为华为云社区用户转载文章,如果您发现本社区中有涉嫌抄袭的内容,欢迎发送邮件进行举报,并提供相关证据,一经查实,本社区将立刻删除涉嫌侵权内容,举报邮箱:
cloudbbs@huaweicloud.com
- 点赞
- 收藏
- 关注作者
评论(0)