【Unity3D日常开发】Unity3D中实现箭头指向目标点的效果
推荐阅读
大家好,我是佛系工程师☆恬静的小魔龙☆,不定时更新Unity开发技巧,觉得有用记得一键三连哦。
一、前言
最近开发的时候遇到了箭头指向的需求,本来想用我这篇文章中的代码来着:
【Unity3D日常开发】Unity中实现箭头指向效果实现
但是想到这个代码是在Update里面运行,对效率影响比较大,正好看到这个同学给我留言:

我看了一下他这个是通过Shader和MeshRenderer进行实现的,效率应该会更好。但是文章的步骤就我来说有点简单了,可能不知道怎么用,所以就将他的内容再细分一下。
效果图:
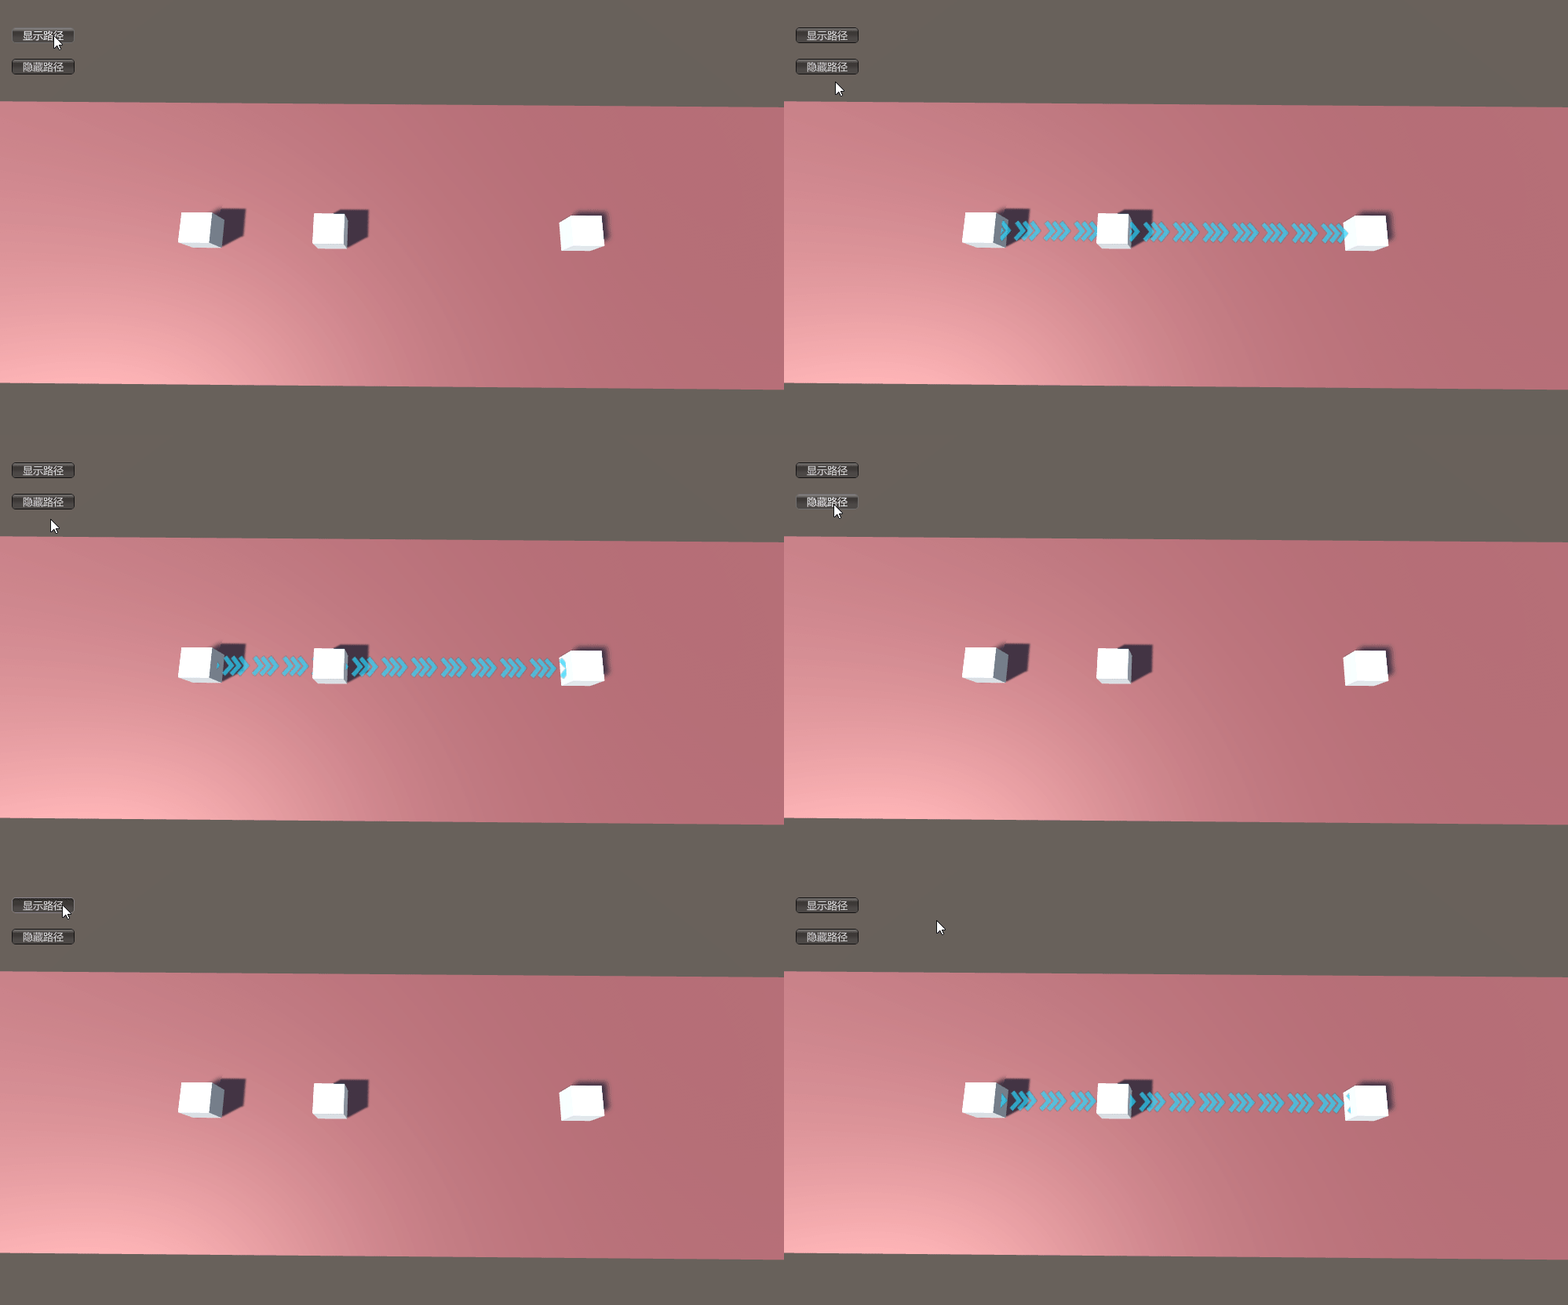
原文链接:http://www.devacg.com/?post=1415
作者:追风剑情
首发于:个人博客http://www.devacg.com/
二、正文
2-1、制作Shader
(1)首先,将我们的图片导入:

右键另存为,保存到项目中。
(2)新建Shader,在Project视图中选择Create→Shader→Standard Surface Shader
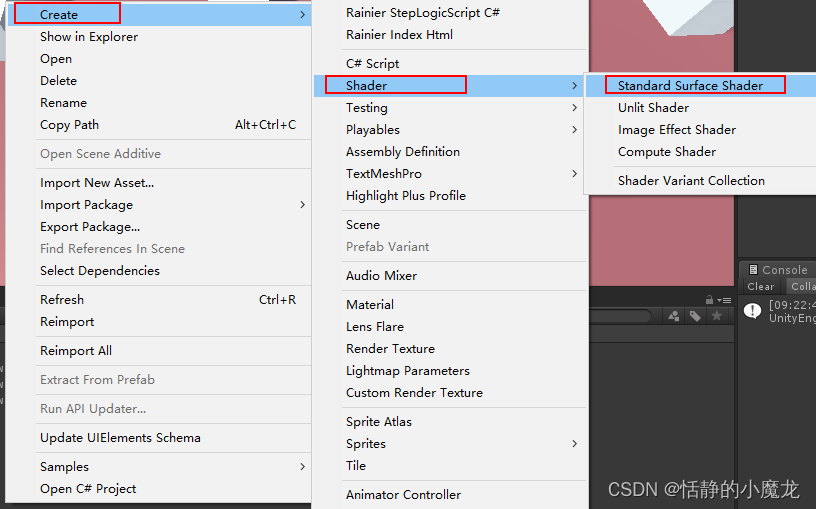
将代码复制粘贴进去:
Shader "Custom/NavPathArrow"
{
    Properties
    {
        _MainTex("Texture", 2D) = "white" {}
        _ScrollYSpeed("Y Scroll Speed", Range(-20, 20)) = 2
    }
        SubShader
        {
            Tags { "Queue" = "Transparent" "RenderType" = "Transparent" }
            LOD 100
            //双面渲染
            Cull Off
            //Alpha混合
            Blend SrcAlpha OneMinusSrcAlpha

            Pass
            {
                CGPROGRAM
                #pragma vertex vert
                #pragma fragment frag

                #include "UnityCG.cginc"

                struct appdata
                {
                    float4 vertex : POSITION;
                    float2 uv : TEXCOORD0;
                };

                struct v2f
                {
                    float2 uv : TEXCOORD0;
                    float4 vertex : SV_POSITION;
                };

                sampler2D _MainTex;
                float4 _MainTex_ST;
                fixed _ScrollYSpeed;

                v2f vert(appdata v)
                {
                    v2f o;
                    o.vertex = UnityObjectToClipPos(v.vertex);
                    o.uv = TRANSFORM_TEX(v.uv, _MainTex);
                    return o;
                }

                fixed4 frag(v2f i) : SV_Target
                {
                    fixed2 uv = i.uv;
                    uv.y += _ScrollYSpeed * _Time;
                    fixed4 col = tex2D(_MainTex, uv);
                    return col;
                }
                ENDCG
            }
        }
}
- 1
- 2
- 3
- 4
- 5
- 6
- 7
- 8
- 9
- 10
- 11
- 12
- 13
- 14
- 15
- 16
- 17
- 18
- 19
- 20
- 21
- 22
- 23
- 24
- 25
- 26
- 27
- 28
- 29
- 30
- 31
- 32
- 33
- 34
- 35
- 36
- 37
- 38
- 39
- 40
- 41
- 42
- 43
- 44
- 45
- 46
- 47
- 48
- 49
- 50
- 51
- 52
- 53
- 54
- 55
- 56
- 57
- 58
- 59
2-2、制作材质球
新建材质球,在Project视图中选择Create→Material,命名为NavPathArrow:
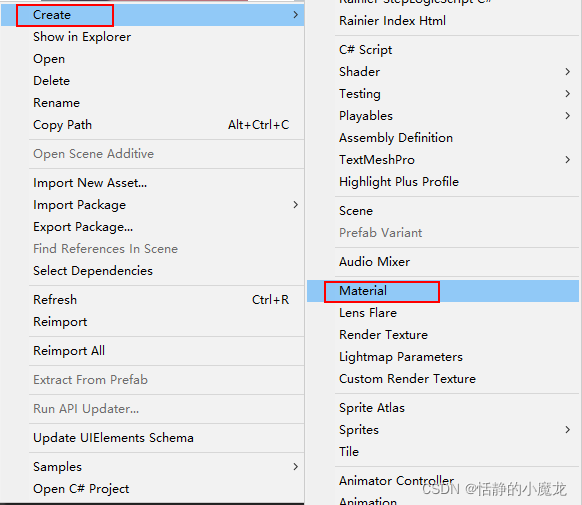
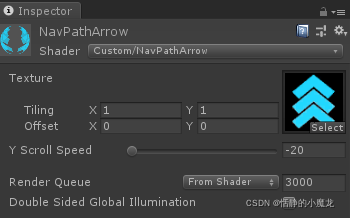
设置材质球的属性,将Shader设置为Custom/NavPathArrow,将贴图拖进去:
2-3、制作预制体
(1)新建一个Quad对象,在Hierarchy视图,右击选择Create→Quad:

将它的材质球换成刚才我们制作的材质球:

拖到Project视图,做成预制体:
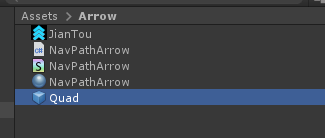
2-4、实现代码
新建脚本NavPathArrow.cs,双击打开脚本,编写代码:
using System.Collections;
using System.Collections.Generic;
using UnityEngine;

/// <summary>
/// 导航箭头
/// </summary>
public class NavPathArrow : MonoBehaviour
{
    public MeshRenderer meshRenderer;//箭头3D对象Quad
    public List<Transform> points = new List<Transform>();//路径点
    private List<MeshRenderer> lines = new List<MeshRenderer>();//显示的路径

    public float xscale = 1f;//缩放比例
    public float yscale = 1f;

    void Start()
    {
        //箭头宽度缩放值
        xscale = meshRenderer.transform.localScale.x;
        //箭头长度缩放值
        yscale = meshRenderer.transform.localScale.y;
    }

    //画路径
    public void DrawPath()
    {
        if (points == null || points.Count <= 1)
            return;
        for (int i = 0; i < points.Count - 1; i++)
        {
            DrawLine(points[i].position, points[i + 1].position, i);
        }
    }

    //画路径 参数为路径点数组
    public void DrawPath(Vector3[] points)
    {
        if (points == null || points.Length <= 1)
            return;
        for (int i = 0; i < points.Length - 1; i++)
        {
            DrawLine(points[i], points[i + 1], i);
        }
    }

    //隐藏路径
    public void HidePath()
    {
        for (int i = 0; i < lines.Count; i++)
            lines[i].gameObject.SetActive(false);
    }

    //画路径
    private void DrawLine(Vector3 start, Vector3 end, int index)
    {
        Debug.Log(transform.gameObject.name);
        MeshRenderer mr;
        if (index >= lines.Count)
        {
            mr = Instantiate(meshRenderer);
            lines.Add(mr);
        }
        else
        {
            mr = lines[index];
        }

        var tran = mr.transform;
        var length = Vector3.Distance(start, end);
        tran.localScale = new Vector3(xscale, length, 1);
        tran.position = (start + end) / 2;
        //指向end
        tran.LookAt(end);
        //旋转偏移
        tran.Rotate(90, 0, 0);
        mr.material.mainTextureScale = new Vector2(1, length * yscale);
        mr.gameObject.SetActive(true);
    }

    void OnGUI()
    {
        if (GUI.Button(new Rect(20, 40, 80, 20), "显示路径"))
        {
            DrawPath();
        }
        if (GUI.Button(new Rect(20, 80, 80, 20), "隐藏路径"))
        {
            HidePath();
        }
    }
}
- 1
- 2
- 3
- 4
- 5
- 6
- 7
- 8
- 9
- 10
- 11
- 12
- 13
- 14
- 15
- 16
- 17
- 18
- 19
- 20
- 21
- 22
- 23
- 24
- 25
- 26
- 27
- 28
- 29
- 30
- 31
- 32
- 33
- 34
- 35
- 36
- 37
- 38
- 39
- 40
- 41
- 42
- 43
- 44
- 45
- 46
- 47
- 48
- 49
- 50
- 51
- 52
- 53
- 54
- 55
- 56
- 57
- 58
- 59
- 60
- 61
- 62
- 63
- 64
- 65
- 66
- 67
- 68
- 69
- 70
- 71
- 72
- 73
- 74
- 75
- 76
- 77
- 78
- 79
- 80
- 81
- 82
- 83
- 84
- 85
- 86
- 87
- 88
- 89
- 90
- 91
- 92
- 93
2-5、实现功能
新建三个Cube作为路径点,一个Plane作为地板,摄像机直接使用命令Ctrl+Shift+F对齐到窗口就行:

把脚本附给Plane,然后把路径点也就是三个Cube,然后预制体Quad拖进去:

运行程序:

三、后记
你的点赞就是对博主的支持,有问题记得留言:

博主还有跟多宝藏文章等待你的发掘哦:
| 专栏 | 方向 | 简介 |
|---|---|---|
| Unity3D开发小游戏 | 小游戏开发教程 | 分享一些使用Unity3D引擎开发的小游戏,分享一些制作小游戏的教程。 |
| Unity3D从入门到进阶 | 入门 | 从自学Unity中获取灵感,总结从零开始学习Unity的路线,有C#和Unity的知识。 |
| Unity3D之UGUI | UGUI | Unity的UI系统UGUI全解析,从UGUI的基础控件开始讲起,然后将UGUI的原理,UGUI的使用全面教学。 |
| Unity3D之读取数据 | 文件读取 | 使用Unity3D读取txt文档、json文档、xml文档、csv文档、Excel文档。 |
| Unity3D之数据集合 | 数据集合 | 数组集合:数组、List、字典、堆栈、链表等数据集合知识分享。 |
| Unity3D之VR/AR(虚拟仿真)开发 | 虚拟仿真 | 总结博主工作常见的虚拟仿真需求进行案例讲解。 |
| Unity3D之插件 | 插件 | 主要分享在Unity开发中用到的一些插件使用方法,插件介绍等 |
| Unity3D之日常开发 | 日常记录 | 主要是博主日常开发中用到的,用到的方法技巧,开发思路,代码分享等 |
| Unity3D之日常BUG | 日常记录 | 记录在使用Unity3D编辑器开发项目过程中,遇到的BUG和坑,让后来人可以有些参考。 |
文章来源: itmonon.blog.csdn.net,作者:恬静的小魔龙,版权归原作者所有,如需转载,请联系作者。
原文链接:itmonon.blog.csdn.net/article/details/123811819
- 点赞
- 收藏
- 关注作者


评论(0)