【前端】网页多平台桌面打包工具 electron 和 electron-packager 的使用

【摘要】
前言
现在很多平台上的桌面应用,都是直接通过js项目打包的。我在一个项目桌面项目的源码中,找到了一个打包工具,叫做electron。
下面通过实际部署,学习下这个工具的使用。
教程
electro...
前言
现在很多平台上的桌面应用,都是直接通过js项目打包的。我在一个项目桌面项目的源码中,找到了一个打包工具,叫做electron。
下面通过实际部署,学习下这个工具的使用。
教程
electron是什么
Electron是由Github开发,用HTML,CSS和JavaScript来构建跨平台桌面应用程序的一个开源库。 Electron通过将Chromium和Node.js合并到同一个运行时环境中,并将其打包为Mac,Windows和Linux系统下的应用来实现这一目的。
Electron于2013年作为构建Github上可编程的文本编辑器Atom的框架而被开发出来。这两个项目在2014春季开源。
确认当前开发环境
 node -v
v8.5.0

 npm -v
5.8.0
- 1
- 2
- 3
- 4
- 5
- 6
- 7
- 8
### 安装你的第一个应用
初始化项目
 npm init
This utility will walk you through creating a package.json file.
It only covers the most common items, and tries to guess sensible defaults.

See `npm help json` for definitive documentation on these fields
and exactly what they do.

Use `npm install <pkg>` afterwards to install a package and
save it as a dependency in the package.json file.

Press ^C at any time to quit.
package name: (f) demo1
version: (1.0.0)
description:
entry point: (index.js) main.js
test command:
git repository:
keywords:
author:
license: (ISC)
About to write to /xiaoyu/web打包/f/package.json:

{
  "name": "demo1",
  "version": "1.0.0",
  "description": "",
  "main": "main.js",
  "scripts": {
     "start": "electron .",
    "test": "echo \"Error: no test specified\" && exit 1"
  },
  "author": "",
  "license": "ISC"
}

 ```

 修改文件

 ```json
{
  "name": "demo1",
  "version": "1.0.0",
  "description": "",
  "main": "main.js",
  "scripts": {
     "start": "electron .",
    "test": "echo \"Error: no test specified\" && exit 1"
  },
  "author": "",
  "license": "ISC"
}
- 1
- 2
- 3
- 4
- 5
- 6
- 7
- 8
- 9
- 10
- 11
- 12
- 13
- 14
- 15
- 16
- 17
- 18
- 19
- 20
- 21
- 22
- 23
- 24
- 25
- 26
- 27
- 28
- 29
- 30
- 31
- 32
- 33
- 34
- 35
- 36
- 37
- 38
- 39
- 40
- 41
- 42
- 43
- 44
- 45
- 46
- 47
- 48
- 49
- 50
- 51
- 52
- 53
- 54
- 55
安装electron
npm install --save-dev electron
- 1
- 2
- 3
- 4
创建main.js
const electron = require('electron')
// Module to control application life.
const app = electron.app
// Module to create native browser window.
const BrowserWindow = electron.BrowserWindow

const path = require('path')
const url = require('url')

// Keep a global reference of the window object, if you don't, the window will
// be closed automatically when the JavaScript object is garbage collected.
let mainWindow

function createWindow () {
  // Create the browser window.
  mainWindow = new BrowserWindow({width: 800, height: 600})

  // and load the index.html of the app.
  mainWindow.loadURL(url.format({
    pathname: path.join(__dirname, 'index.html'),
    protocol: 'file:',
    slashes: true
  }))

  // Open the DevTools.
  // mainWindow.webContents.openDevTools()

  // Emitted when the window is closed.
  mainWindow.on('closed', function () {
    // Dereference the window object, usually you would store windows
    // in an array if your app supports multi windows, this is the time
    // when you should delete the corresponding element.
    mainWindow = null
  })
}

// This method will be called when Electron has finished
// initialization and is ready to create browser windows.
// Some APIs can only be used after this event occurs.
app.on('ready', createWindow)

// Quit when all windows are closed.
app.on('window-all-closed', function () {
  // On OS X it is common for applications and their menu bar
  // to stay active until the user quits explicitly with Cmd + Q
  if (process.platform !== 'darwin') {
    app.quit()
  }
})

app.on('activate', function () {
  // On OS X it's common to re-create a window in the app when the
  // dock icon is clicked and there are no other windows open.
  if (mainWindow === null) {
    createWindow()
  }
})
- 1
- 2
- 3
- 4
- 5
- 6
- 7
- 8
- 9
- 10
- 11
- 12
- 13
- 14
- 15
- 16
- 17
- 18
- 19
- 20
- 21
- 22
- 23
- 24
- 25
- 26
- 27
- 28
- 29
- 30
- 31
- 32
- 33
- 34
- 35
- 36
- 37
- 38
- 39
- 40
- 41
- 42
- 43
- 44
- 45
- 46
- 47
- 48
- 49
- 50
- 51
- 52
- 53
- 54
- 55
- 56
- 57
- 58
- 59
- 60
创建index.html
“`html
Hello World!
Hello World!
 <script>
 </script>
- 1
- 2
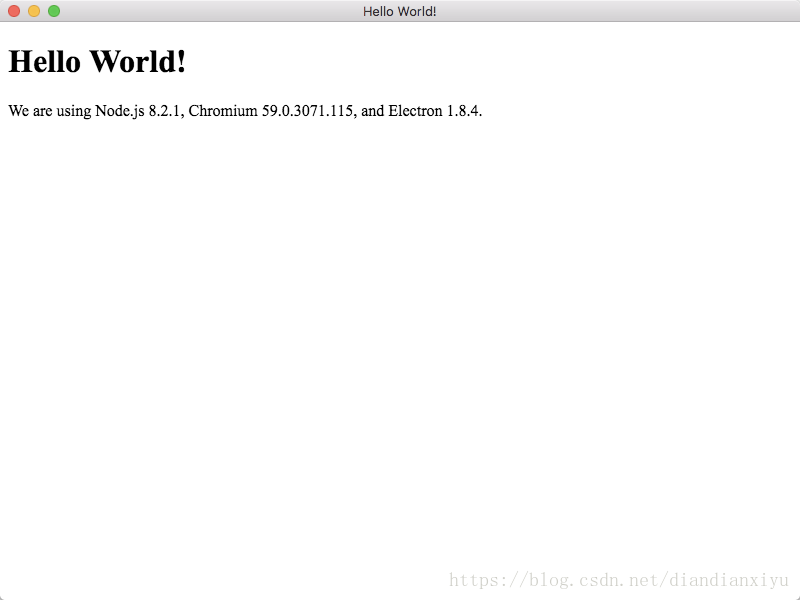
运行项目
- 1
- 2
- 3
npm start
demo1@1.0.0 start /xiaoyu//f
electron .
这时候会强制打开窗口,展示为定义的网页内容。
### 打包
安装打包工具
```
npm install electron-packager --save-dev
npm WARN demo1@1.0.0 No description
npm WARN demo1@1.0.0 No repository field.
+ electron-packager@12.0.1
added 75 packages from 50 contributors in 11.562s
- 1
- 2
- 3
- 4
- 5
- 6
- 7
- 8
- 9
- 10
- 11
- 12
- 13
- 14
- 15
- 16
- 17
- 18
- 19
- 20
- 21
修改package.json文件,我的环境是MacOS,在scripts里增加下面的内容。
"package": "electron-packager . 'Hosts' --platform=darwin --arch=x64 --out=./dist --asar --app-version=1.0.0"
- 1
- 2
- 3
运行命名,就能打包了。
npm run-script package

> demo1@1.0.0 package /xiaoyu/web打包/f
> electron-packager . 'Hosts' --platform=darwin --arch=x64  --out=./dist --asar --app-version=1.0.0

Packaging app for platform darwin x64 using electron v1.8.4
Wrote new app to dist/Hosts-darwin-x64
- 1
- 2
- 3
- 4
- 5
- 6
- 7
- 8
- 9
- 10
然后在项目的根目录的dist文件夹中找到安装文件。
到此,简单的打包工作就完成了~
## 参考资料
- https://electronjs.org/
- https://github.com/electron-userland/electron-packager
- https://www.cnblogs.com/zwhbk/p/6396500.html
文章来源: coderfix.blog.csdn.net,作者:小雨青年,版权归原作者所有,如需转载,请联系作者。
原文链接:coderfix.blog.csdn.net/article/details/80150836

【版权声明】本文为华为云社区用户转载文章,如果您发现本社区中有涉嫌抄袭的内容,欢迎发送邮件进行举报,并提供相关证据,一经查实,本社区将立刻删除涉嫌侵权内容,举报邮箱:
cloudbbs@huaweicloud.com
- 点赞
- 收藏
- 关注作者
评论(0)