【树莓派】使用DHT11连接树莓派读取传感器数字并通过0.96寸屏展示

【摘要】
设备
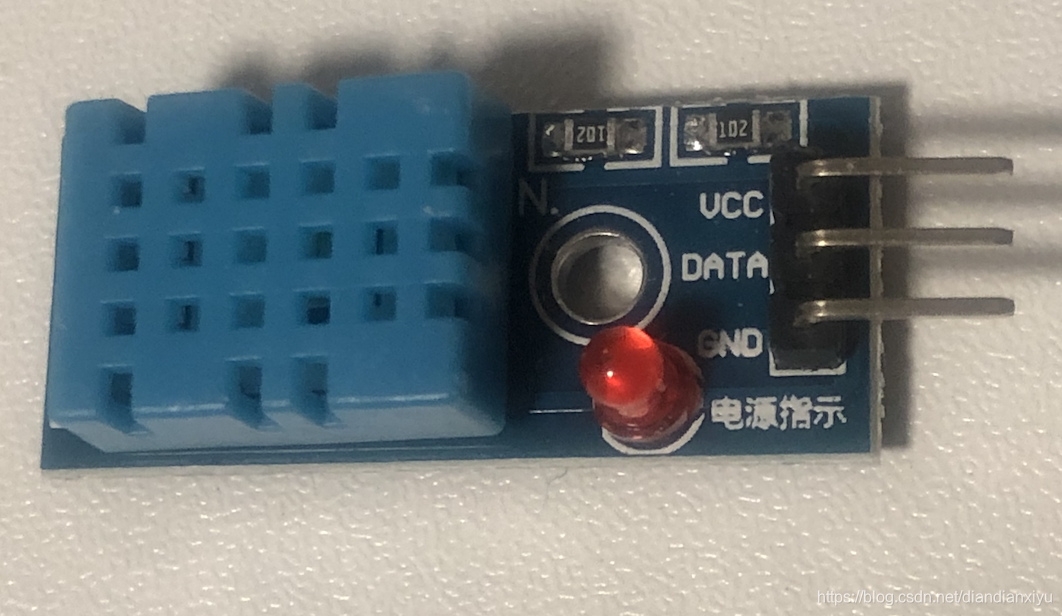
树莓派3b+温湿度传感器DHT11
接线
VCC - 电源3.3v或者5v data - 数据读取 GND - 接地
这个的接线方式和上次的接线很像,其实其他的也都差不多,电源正负和数据...
设备
- 树莓派3b+
- 温湿度传感器DHT11
接线
VCC - 电源3.3v或者5v
data - 数据读取
GND - 接地
这个的接线方式和上次的接线很像,其实其他的也都差不多,电源正负和数据读取写入
读取
在上面的接线中,我把DHT11放在了22号针脚上,所以下面的针脚号都是22,如果你接在了其他部分,注意修改~
使用官方库
官方的安装方式和上次用显示屏的方式一样,都是clone,安装,执行
git clone git://github.com/adafruit/Adafruit_Python_DHT.git
cd Adafruit_Python_DHT/
sudo python setup.py install
cd examples/
python AdafruitDHT.py 11 22
- 1
- 2
- 3
- 4
- 5
最终的结果是
Temp=25.0* Humidity=22.0%
- 1
如果是用python3,就把上面的python改成python3即可。
sudo python3 setup.py install
python3 AdafruitDHT.py 11 22
- 1
- 2
也是可以执行的。
AdafruitDHT.py文件内容如下
#!/usr/bin/python
# Copyright (c) 2014 Adafruit Industries
# Author: Tony DiCola

# Permission is hereby granted, free of charge, to any person obtaining a copy
# of this software and associated documentation files (the "Software"), to deal
# in the Software without restriction, including without limitation the rights
# to use, copy, modify, merge, publish, distribute, sublicense, and/or sell
# copies of the Software, and to permit persons to whom the Software is
# furnished to do so, subject to the following conditions:

# The above copyright notice and this permission notice shall be included in all
# copies or substantial portions of the Software.

# THE SOFTWARE IS PROVIDED "AS IS", WITHOUT WARRANTY OF ANY KIND, EXPRESS OR
# IMPLIED, INCLUDING BUT NOT LIMITED TO THE WARRANTIES OF MERCHANTABILITY,
# FITNESS FOR A PARTICULAR PURPOSE AND NONINFRINGEMENT. IN NO EVENT SHALL THE
# AUTHORS OR COPYRIGHT HOLDERS BE LIABLE FOR ANY CLAIM, DAMAGES OR OTHER
# LIABILITY, WHETHER IN AN ACTION OF CONTRACT, TORT OR OTHERWISE, ARISING FROM,
# OUT OF OR IN CONNECTION WITH THE SOFTWARE OR THE USE OR OTHER DEALINGS IN THE
# SOFTWARE.
import sys

import Adafruit_DHT


# Parse command line parameters.
sensor_args = { '11': Adafruit_DHT.DHT11,
                '22': Adafruit_DHT.DHT22,
                '2302': Adafruit_DHT.AM2302 }
if len(sys.argv) == 3 and sys.argv[1] in sensor_args:
    sensor = sensor_args[sys.argv[1]]
    pin = sys.argv[2]
else:
    print('Usage: sudo ./Adafruit_DHT.py [11|22|2302] <GPIO pin number>')
    print('Example: sudo ./Adafruit_DHT.py 2302 4 - Read from an AM2302 connected to GPIO pin #4')
    sys.exit(1)

# Try to grab a sensor reading.  Use the read_retry method which will retry up
# to 15 times to get a sensor reading (waiting 2 seconds between each retry).
humidity, temperature = Adafruit_DHT.read_retry(sensor, pin)

# Un-comment the line below to convert the temperature to Fahrenheit.
# temperature = temperature * 9/5.0 + 32

# Note that sometimes you won't get a reading and
# the results will be null (because Linux can't
# guarantee the timing of calls to read the sensor).
# If this happens try again!
if humidity is not None and temperature is not None:
    print('Temp={0:0.1f}*  Humidity={1:0.1f}%'.format(temperature, humidity))
else:
    print('Failed to get reading. Try again!')
    sys.exit(1)
- 1
- 2
- 3
- 4
- 5
- 6
- 7
- 8
- 9
- 10
- 11
- 12
- 13
- 14
- 15
- 16
- 17
- 18
- 19
- 20
- 21
- 22
- 23
- 24
- 25
- 26
- 27
- 28
- 29
- 30
- 31
- 32
- 33
- 34
- 35
- 36
- 37
- 38
- 39
- 40
- 41
- 42
- 43
- 44
- 45
- 46
- 47
- 48
- 49
- 50
- 51
- 52
- 53
- 54
使用GPIO读取
我们也可以直接通过python直接读取GPIO针脚的数据
import RPi.GPIO as GPIO
import time

channel = 22			#引脚号
data = []			#温湿度值
j = 0				#计数器

GPIO.setmode(GPIO.BCM)		#以BCM编码格式

time.sleep(1)			#时延一秒

GPIO.setup(channel, GPIO.OUT)

GPIO.output(channel, GPIO.LOW)
time.sleep(0.02)		#给信号提示传感器开始工作
GPIO.output(channel, GPIO.HIGH)

GPIO.setup(channel, GPIO.IN)

while GPIO.input(channel) == GPIO.LOW:
	continue

while GPIO.input(channel) == GPIO.HIGH:
	continue

while j < 40:
	k = 0
	while GPIO.input(channel) == GPIO.LOW:
		continue

	while GPIO.input(channel) == GPIO.HIGH:
		k += 1
		if k > 100:
			break

	if k < 8:
		data.append(0)
	else:
		data.append(1)

	j += 1

print("sensor is working.")
print(data)				#输出初始数据高低电平

humidity_bit = data[0:8]		#分组
humidity_point_bit = data[8:16]
temperature_bit = data[16:24]
temperature_point_bit = data[24:32]
check_bit = data[32:40]

humidity = 0
humidity_point = 0
temperature = 0
temperature_point = 0
check = 0

for i in range(8):
	humidity += humidity_bit[i] * 2 ** (7 - i)				#转换成十进制数据
	humidity_point += humidity_point_bit[i] * 2 ** (7 - i)
	temperature += temperature_bit[i] * 2 ** (7 - i)
	temperature_point += temperature_point_bit[i] * 2 ** (7 - i)
	check += check_bit[i] * 2 ** (7 - i)

tmp = humidity + humidity_point + temperature + temperature_point		#十进制的数据相加

if check == tmp:								#数据校验,相等则输出
	print ("temperature : ", temperature, ", humidity : " , humidity)
else:										#错误输出错误信息,和校验数据
	print ("wrong")
	print ("temperature : ", temperature, ", humidity : " , humidity, " check : ", check, " tmp : ", tmp)

GPIO.cleanup()
- 1
- 2
- 3
- 4
- 5
- 6
- 7
- 8
- 9
- 10
- 11
- 12
- 13
- 14
- 15
- 16
- 17
- 18
- 19
- 20
- 21
- 22
- 23
- 24
- 25
- 26
- 27
- 28
- 29
- 30
- 31
- 32
- 33
- 34
- 35
- 36
- 37
- 38
- 39
- 40
- 41
- 42
- 43
- 44
- 45
- 46
- 47
- 48
- 49
- 50
- 51
- 52
- 53
- 54
- 55
- 56
- 57
- 58
- 59
- 60
- 61
- 62
- 63
- 64
- 65
- 66
- 67
- 68
- 69
- 70
- 71
- 72
- 73
- 74
执行之后也可以得到传感器结果
pi@xiaoyupi:~/RaspberryPiScript $ python3 DHT11.py
sensor is working.
[0, 0, 0, 1, 0, 0, 0, 0, 0, 0, 0, 0, 0, 0, 0, 0, 0, 0, 0, 1, 1, 0, 0, 1, 0, 0, 0, 0, 0, 0, 1, 0, 0, 0, 1, 0, 1, 0, 1, 1]
temperature :  25 , humidity :  16
- 1
- 2
- 3
- 4
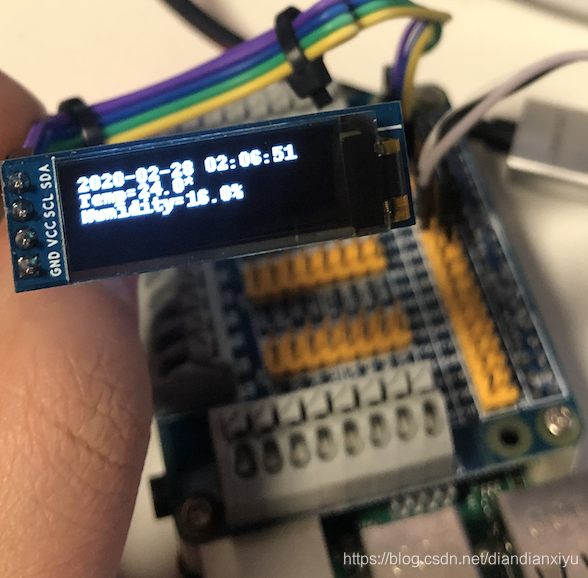
使用0.96寸oled屏展示温湿度
代码如下
#!/usr/bin/python
import time

import Adafruit_GPIO.SPI as SPI
import Adafruit_SSD1306
import Adafruit_DHT

from PIL import Image
from PIL import ImageDraw
from PIL import ImageFont

import subprocess

# Raspberry Pi pin configuration:
RST = None     # on the PiOLED this pin isnt used
# Note the following are only used with SPI:
DC = 23
SPI_PORT = 0
SPI_DEVICE = 0

disp = Adafruit_SSD1306.SSD1306_128_32(rst=RST)

# Initialize library.
disp.begin()

# Clear display.
disp.clear()
disp.display()

# Create blank image for drawing.
# Make sure to create image with mode '1' for 1-bit color.
width = disp.width
height = disp.height
image = Image.new('1', (width, height))

# Get drawing object to draw on image.
draw = ImageDraw.Draw(image)

# Draw a black filled box to clear the image.
draw.rectangle((0,0,width,height), outline=0, fill=0)

# Draw some shapes.
# First define some constants to allow easy resizing of shapes.
padding = -2
top = padding
bottom = height-padding
# Move left to right keeping track of the current x position for drawing shapes.
x = 0


# Load default font.
font = ImageFont.load_default()

# Alternatively load a TTF font.  Make sure the .ttf font file is in the same directory as the python script!
# Some other nice fonts to try: http://www.dafont.com/bitmap.php
# font = ImageFont.truetype('Minecraftia.ttf', 8)

while True:
    # Draw a black filled box to clear the image.
    draw.rectangle((0,0,width,height), outline=0, fill=0)

    sensor  = 11 # 传感器型号
    pin = 22 # 针脚

    humidity, temperature = Adafruit_DHT.read_retry(sensor, pin)

    if humidity is not None and temperature is not None:
        Temp = 'Temp={0:0.1f}*'.format(temperature)
        H = 'Humidity={0:0.1f}%'.format(humidity)

    now = time.strftime("%Y-%m-%d-%H:%M:%S", time.localtime())
    draw.text((x, top),       str(now),  font=font, fill=255)
    draw.text((x, top+8),     str(Temp), font=font, fill=255)
    draw.text((x, top+16),     str(H), font=font, fill=255)

    # Display image.
    disp.image(image)
    disp.display()
    time.sleep(1)
- 1
- 2
- 3
- 4
- 5
- 6
- 7
- 8
- 9
- 10
- 11
- 12
- 13
- 14
- 15
- 16
- 17
- 18
- 19
- 20
- 21
- 22
- 23
- 24
- 25
- 26
- 27
- 28
- 29
- 30
- 31
- 32
- 33
- 34
- 35
- 36
- 37
- 38
- 39
- 40
- 41
- 42
- 43
- 44
- 45
- 46
- 47
- 48
- 49
- 50
- 51
- 52
- 53
- 54
- 55
- 56
- 57
- 58
- 59
- 60
- 61
- 62
- 63
- 64
- 65
- 66
- 67
- 68
- 69
- 70
- 71
- 72
- 73
- 74
- 75
- 76
- 77
- 78
- 79
- 80
最终实现效果如图
文章来源: coderfix.blog.csdn.net,作者:小雨青年,版权归原作者所有,如需转载,请联系作者。
原文链接:coderfix.blog.csdn.net/article/details/104547804

【版权声明】本文为华为云社区用户转载文章,如果您发现本社区中有涉嫌抄袭的内容,欢迎发送邮件进行举报,并提供相关证据,一经查实,本社区将立刻删除涉嫌侵权内容,举报邮箱:
cloudbbs@huaweicloud.com
- 点赞
- 收藏
- 关注作者
评论(0)