关于vagrant一个虚拟机搭建多个项目配置(总结)

【摘要】
问题1:执行vagrant status命令,报错,没有找到命令,翻译;“vargrant bash命令没有找到。”
解答:因为在/home目录中,所有无法执行该命令,需要切换到外部进行执行
问题2:在一个虚拟机中,添加多个项目
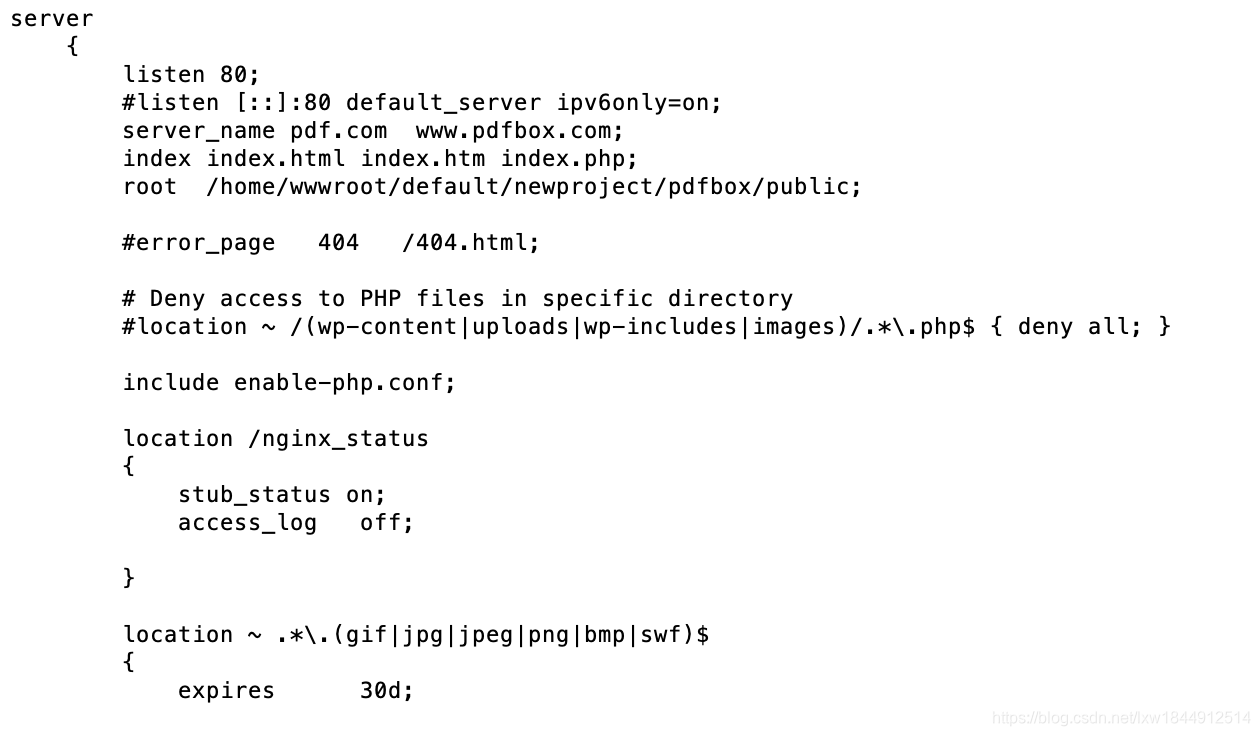
lxw.com.conf配置
server { li...
问题1:执行vagrant status命令,报错,没有找到命令,翻译;“vargrant bash命令没有找到。”

解答:因为在/home目录中,所有无法执行该命令,需要切换到外部进行执行
问题2:在一个虚拟机中,添加多个项目
lxw.com.conf配置
-
server
-
{
-
listen 80;
-
#listen [::]:80;
-
server_name lxw.com www.lxw.com;
-
index index.html index.htm index.php default.html default.htm default.php;
-
root /vagrant/2019bak;
-
-
include rewrite/none.conf;
-
#error_page 404 /404.html;
-
-
# Deny access to PHP files in specific directory
-
#location ~ /(wp-content|uploads|wp-includes|images)/.*\.php$ { deny all; }
-
-
include enable-php.conf;
-
-
location /nginx_status
-
{
-
stub_status on;
-
access_log off;
-
}
-
-
location / {
-
try_files $uri $uri/ /index.php?$query_string;
-
}
-
-
location ~ .*\.(gif|jpg|jpeg|png|bmp|swf)$
-
{
-
expires 30d;
-
}
-
-
location ~ .*\.(js|css)?$
-
{
-
expires 12h;
-
}
-
-
location ~ /.well-known {
-
allow all;
-
}
-
-
location ~ /\.
-
{
-
deny all;
-
}
-
-
access_log off;
-
}

test.com.conf配置文件
-
server
-
{
-
listen 80;
-
#listen [::]:80;
-
#server_name _;
-
server_name 192.168.10.250 test.com www.test.com
-
index index.html index.htm index.php default.html default.htm default.php;
-
root /vagrant/laizheer/public;
-
-
include rewrite/none.conf;
-
#error_page 404 /404.html;
-
-
# Deny access to PHP files in specific directory
-
#location ~ /(wp-content|uploads|wp-includes|images)/.*\.php$ { deny all; }
-
-
include enable-php.conf;
-
-
location /nginx_status
-
{
-
stub_status on;
-
access_log off;
-
}
-
-
location / {
-
try_files $uri $uri/ /index.php?$query_string;
-
}
-
-
location ~ .*\.(gif|jpg|jpeg|png|bmp|swf)$
-
{
-
expires 30d;
-
}
-
-
location ~ .*\.(js|css)?$
-
{
-
expires 12h;
-
}
-
-
location ~ /.well-known {
-
allow all;
-
}
-
-
location ~ /\.
-
{
-
deny all;
-
}
-
-
access_log off;
-
}
本地host文件配置,“192.168.10.250”需要与Vagrantfile文件中配置的public_network,IP一致,192.168.10.250等同于远程服务器的IP,
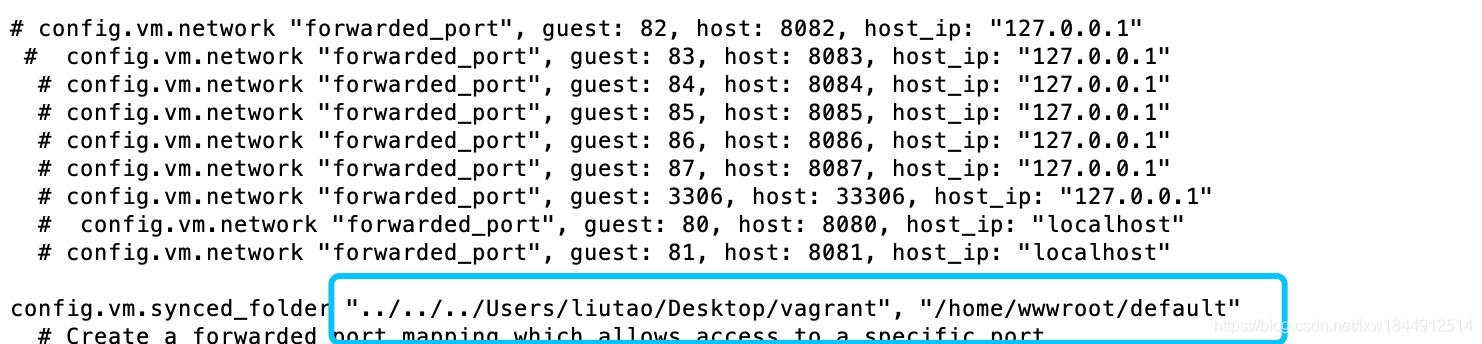
Vagrantfile配置
-
# -*- mode: ruby -*-
-
# vi: set ft=ruby :
-
-
# All Vagrant configuration is done below. The "2" in Vagrant.configure
-
# configures the configuration version (we support older styles for
-
# backwards compatibility). Please don't change it unless you know what
-
# you're doing.
-
Vagrant.configure("2") do |config|
-
# The most common configuration options are documented and commented below.
-
# For a complete reference, please see the online documentation at
-
# https://docs.vagrantup.com.
-
-
# Every Vagrant development environment requires a box. You can search for
-
# boxes at https://vagrantcloud.com/search.
-
config.vm.box = "Centos-7"
-
-
# Disable automatic box update checking. If you disable this, then
-
# boxes will only be checked for updates when the user runs
-
# `vagrant box outdated`. This is not recommended.
-
# config.vm.box_check_update = false
-
-
# Create a forwarded port mapping which allows access to a specific port
-
# within the machine from a port on the host machine. In the example below,
-
# accessing "localhost:8080" will access port 80 on the guest machine.
-
# NOTE: This will enable public access to the opened port
-
# config.vm.network "forwarded_port", guest: 80, host: 8080
-
-
# Create a forwarded port mapping which allows access to a specific port
-
# within the machine from a port on the host machine and only allow access
-
# via 127.0.0.1 to disable public access
-
# config.vm.network "forwarded_port", guest: 80, host: 8080, host_ip: "127.0.0.1"
-
-
# Create a private network, which allows host-only access to the machine
-
# using a specific IP.
-
# config.vm.network "private_network", ip: "192.168.33.10"
-
config.vm.network "public_network", ip: "192.168.10.250"
-
-
# Create a public network, which generally matched to bridged network.
-
# Bridged networks make the machine appear as another physical device on
-
# your network.
-
# config.vm.network "public_network"
-
-
# Share an additional folder to the guest VM. The first argument is
-
# the path on the host to the actual folder. The second argument is
-
# the path on the guest to mount the folder. And the optional third
-
# argument is a set of non-required options.
-
#config.vm.synced_folder "../www/laizheer", "/home/wwwroot/defalut"
-
-
# Provider-specific configuration so you can fine-tune various
-
# backing providers for Vagrant. These expose provider-specific options.
-
# Example for VirtualBox:
-
#
-
config.vm.provider "virtualbox" do |vb|
-
# # Display the VirtualBox GUI when booting the machine
-
vb.gui = false
-
#
-
# # Customize the amount of memory on the VM:
-
vb.memory = "4096"
-
vb.cpus = "2"
-
end
-
#
-
# View the documentation for the provider you are using for more
-
# information on available options.
-
-
# Enable provisioning with a shell script. Additional provisioners such as
-
# Puppet, Chef, Ansible, Salt, and Docker are also available. Please see the
-
# documentation for more information about their specific syntax and use.
-
# config.vm.provision "shell", inline: <<-SHELL
-
# apt-get update
-
# apt-get install -y apache2
-
# SHELL
-
end
补充:当lxw.com.conf监听端口改变为8080后,访问时对应改变端口 http://lxw.com:8080/
命令:
sudo vi lxw.com.conf 不用切换到root用户直接使用root的权限
sudo service nginx reload 重启nginx 服务
总结:
mac下给vagrant添加多个项目的步骤:
1.修改/usr/local/nginx/conf/nignx.conf,将域名和文件夹目录添加进去
Vagrantfile文件文中项目件夹配置如下
2.修改本地mac中host地址
sudo vi /etc/hosts
参考:https://www.jianshu.com/p/752211238c1b
文章来源: blog.csdn.net,作者:lxw1844912514,版权归原作者所有,如需转载,请联系作者。
原文链接:blog.csdn.net/lxw1844912514/article/details/100029126

【版权声明】本文为华为云社区用户转载文章,如果您发现本社区中有涉嫌抄袭的内容,欢迎发送邮件进行举报,并提供相关证据,一经查实,本社区将立刻删除涉嫌侵权内容,举报邮箱:
cloudbbs@huaweicloud.com
- 点赞
- 收藏
- 关注作者
评论(0)