【愚公系列】2022年01月 华为鸿蒙OS-02-页面语法的使用(JS开发版)

【摘要】 前言每种应用程序都有自己的语法,比如vue,react,angular。华为鸿蒙开发也不例外而且语法和前端框架类似,会前端的化,上手还是很快的。 一、HML语法 1.HML定义是不是和HTML很像,但HML并不是HTML。HML(HarmonyOS Markup Language)是一套类HTML的标记语言,通过组件,事件构建出页面的内容。页面具备数据绑定、事件绑定、列表渲染、条件渲染和逻...
前言
每种应用程序都有自己的语法,比如vue,react,angular。华为鸿蒙开发也不例外而且语法和前端框架类似,会前端的化,上手还是很快的。
一、HML语法
1.HML定义
是不是和HTML很像,但HML并不是HTML。
HML(HarmonyOS Markup Language)是一套类HTML的标记语言,通过组件,事件构建出页面的内容。页面具备数据绑定、事件绑定、列表渲染、条件渲染和逻辑控制等高级能力。
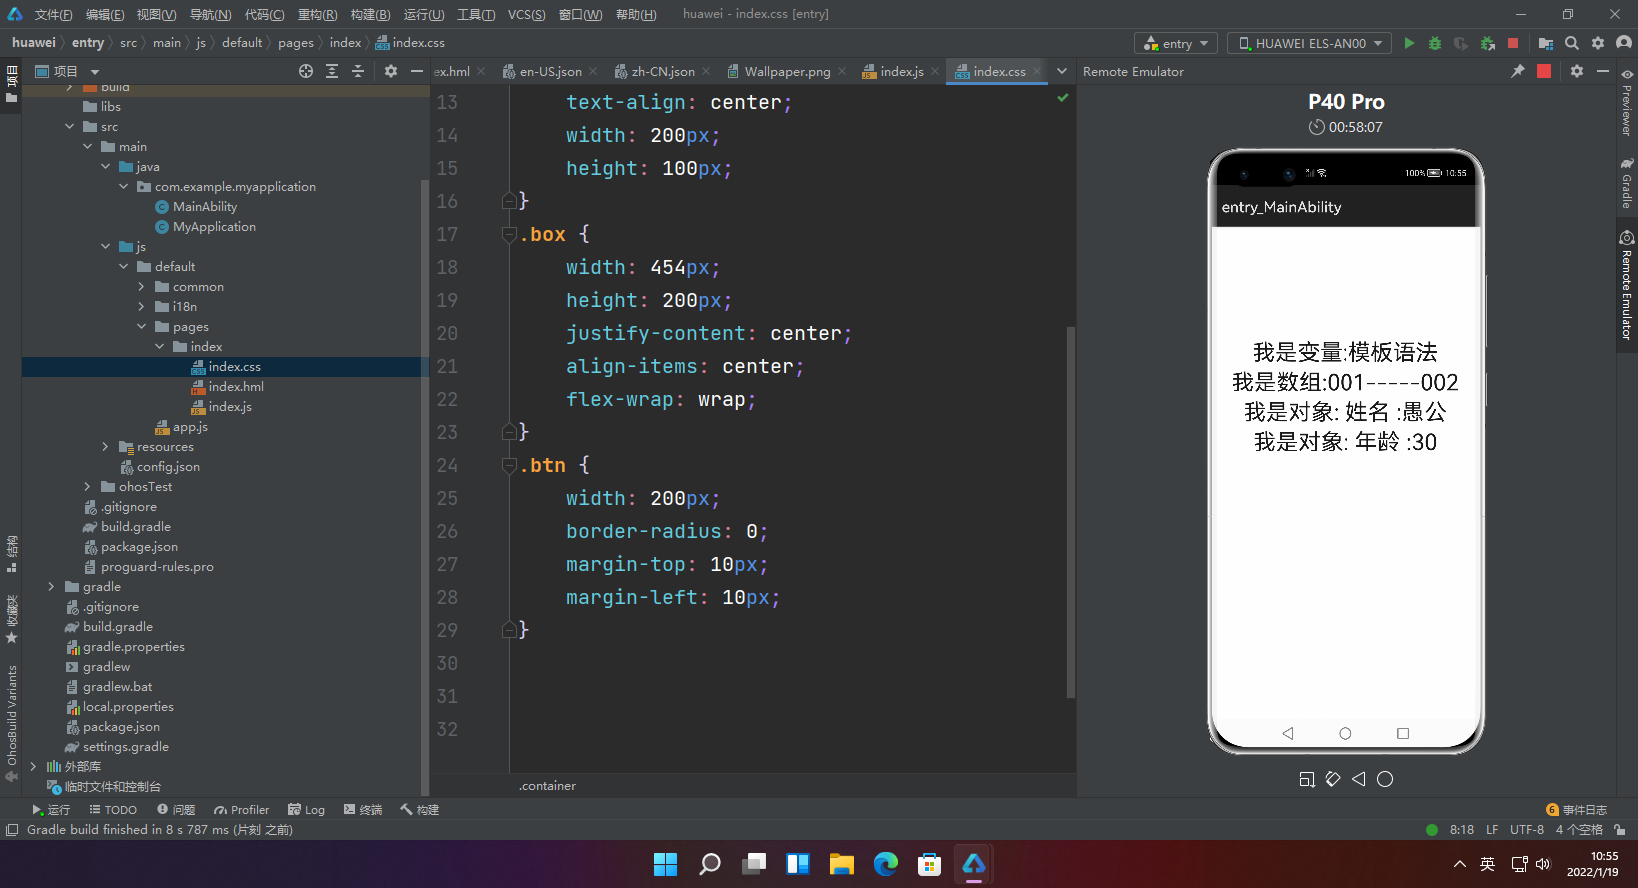
2.数据绑定
<div class='container'>
    <text> 我是变量:{{title}}</text>
    <text> 我是数组:{{arr[0]}}-----{{arr[1]}}</text>
    <text> 我是对象: 姓名 :{{obj.name}}</text>
    <text> 我是对象: 年龄 :{{obj.age}}</text>
</div>
export default {
    data: {
        title:"模板语法",
        arr: ['001','002'],
        obj:{name:'愚公',age:30}
    },
}
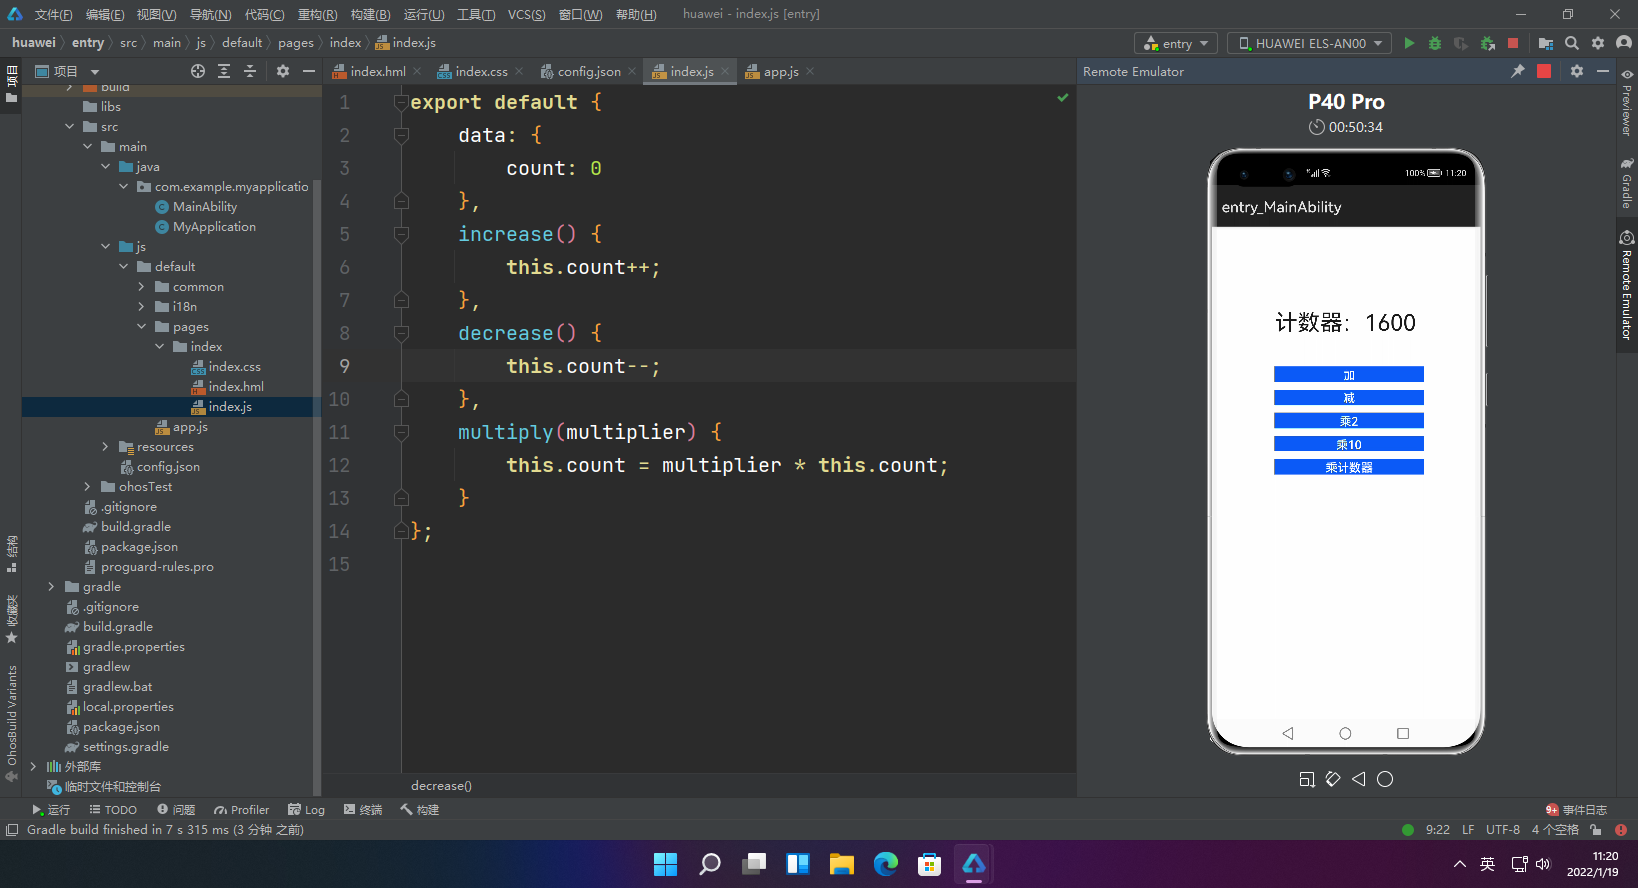
3.普通事件绑定
<div class="container">
    <text class="title">计数器:{{count}}</text>
    <div class="box">
        <button class='btn' onclick="increase">
            加
        </button>
        <button class='btn' @click="decrease">
            减
        </button>
        <button class='btn' @click="multiply(2)">
            乘2
        </button>
        <button class='btn' @click="multiply(10)">
            乘10
        </button>
        <button class='btn' @click="multiply(count)">
            乘计数器
        </button>
    </div>
</div>
export default {
    data: {
        count: 0
    },
    increase() {
        this.count++;
    },
    decrease() {
        this.count--;
    },
    multiply(multiplier) {
        this.count = multiplier * this.count;
    }
};
4.冒泡事件和捕获事件
4.1冒泡事件
<!-- xxx.hml -->
<div>
   <!-- 使用事件冒泡模式绑定事件回调函数。5+ -->
    <div on:touchstart.bubble="touchstartfunc"></div>
    <div on:touchstart="touchstartfunc"></div>
    <!-- 绑定事件回调函数,但阻止事件向上传递。5+ -->
    <div grab:touchstart.bubble="touchstartfunc"></div>
    <div grab:touchstart="touchstartfunc"></div>
    <!-- 使用事件冒泡模式绑定事件回调函数。6+ -->
    <div on:click.bubble="clickfunc"></div>
    <div on:click="clickfunc"></div>
    <!-- 绑定事件回调函数,但阻止事件向上传递。6+ -->
    <div grab:click.bubble="clickfunc"></div>
    <div grab:click="clickfunc"></div>
</div>
export default {
    clickfunc: function(e) {
        console.log(e);
    },
    touchstartfuc: function(e) {
        console.log(e);
    },
}
4.2 捕获事件
<div>
    <!-- 使用事件捕获模式绑定事件回调函数。5+ -->
    <div on:touchstart.capture="touchstartfunc"></div>
    <!-- 绑定事件回调函数,但阻止事件向下传递。5+ -->
    <div grab:touchstart.capture="touchstartfunc"></div>
</div>
export default {
    touchstartfuc: function(e) {
        console.log(e);
    },
}
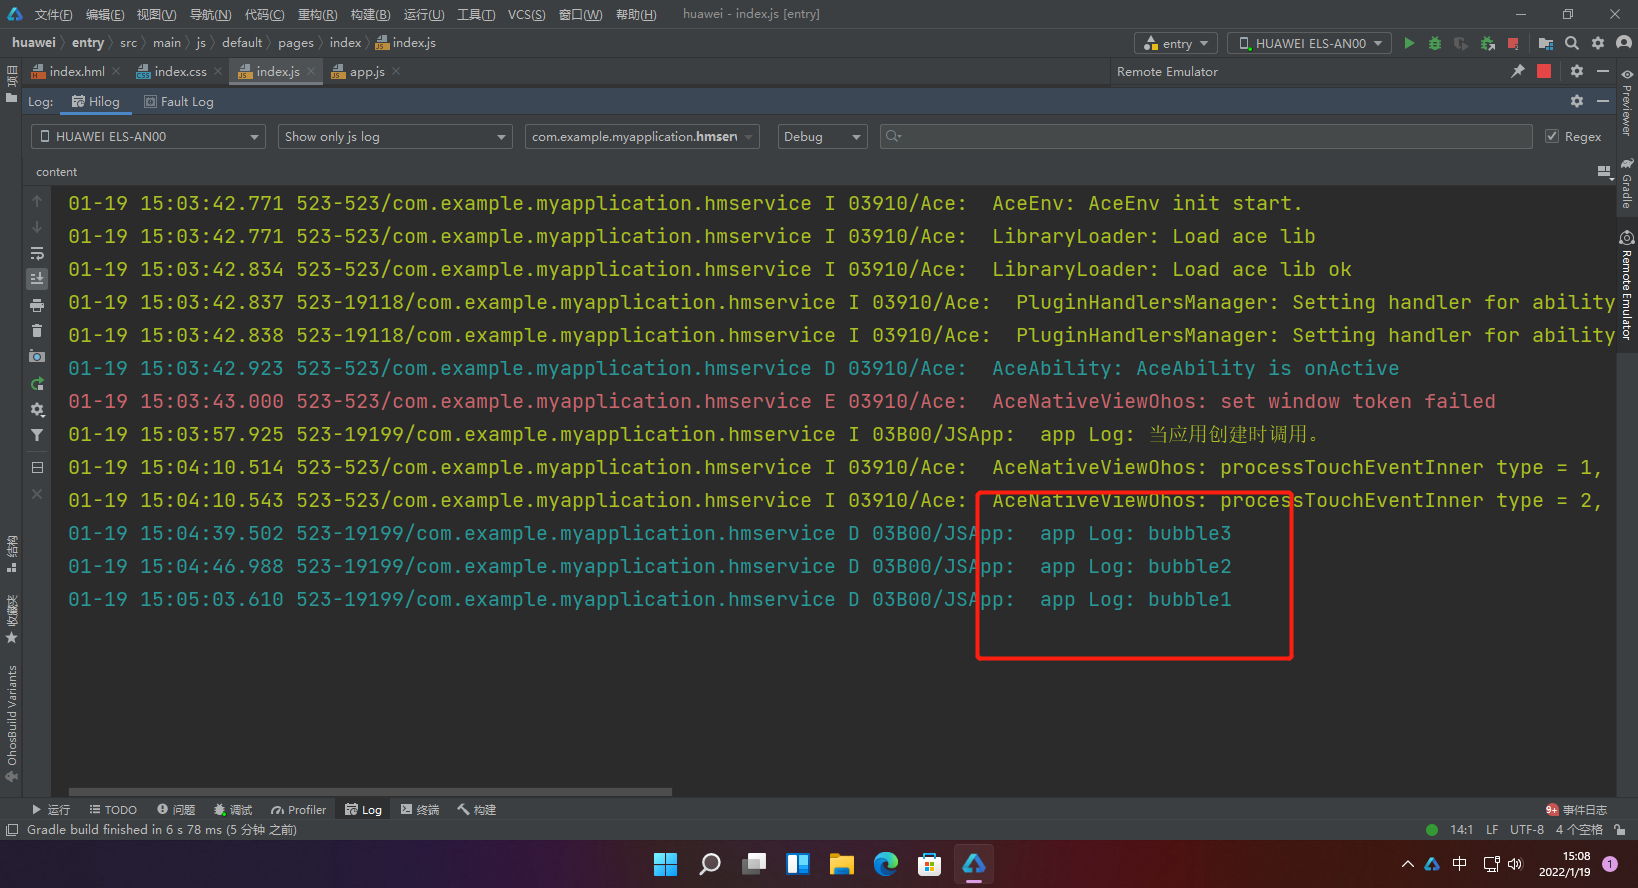
4.3 综合案例
<div  on:touchstart.capture="capture1"  on:touchstart.bubble="bubble1">
    <div on:touchstart.capture="capture2"  on:touchstart.bubble="bubble2">
        <text on:touchstart.capture="capture3"  on:touchstart.bubble="bubble3">测试</text>
    </div>
</div>
export default {
    capture1(){
        console.log("capture1")
    },
    capture2(){
        console.log("capture2")
    },
    capture3(){
        console.log("capture3")
    },
    bubble1(){
        console.log("bubble1")
    },
    bubble2(){
        console.log("bubble2")
    },
    bubble3(){
        console.log("bubble3")
    }
};
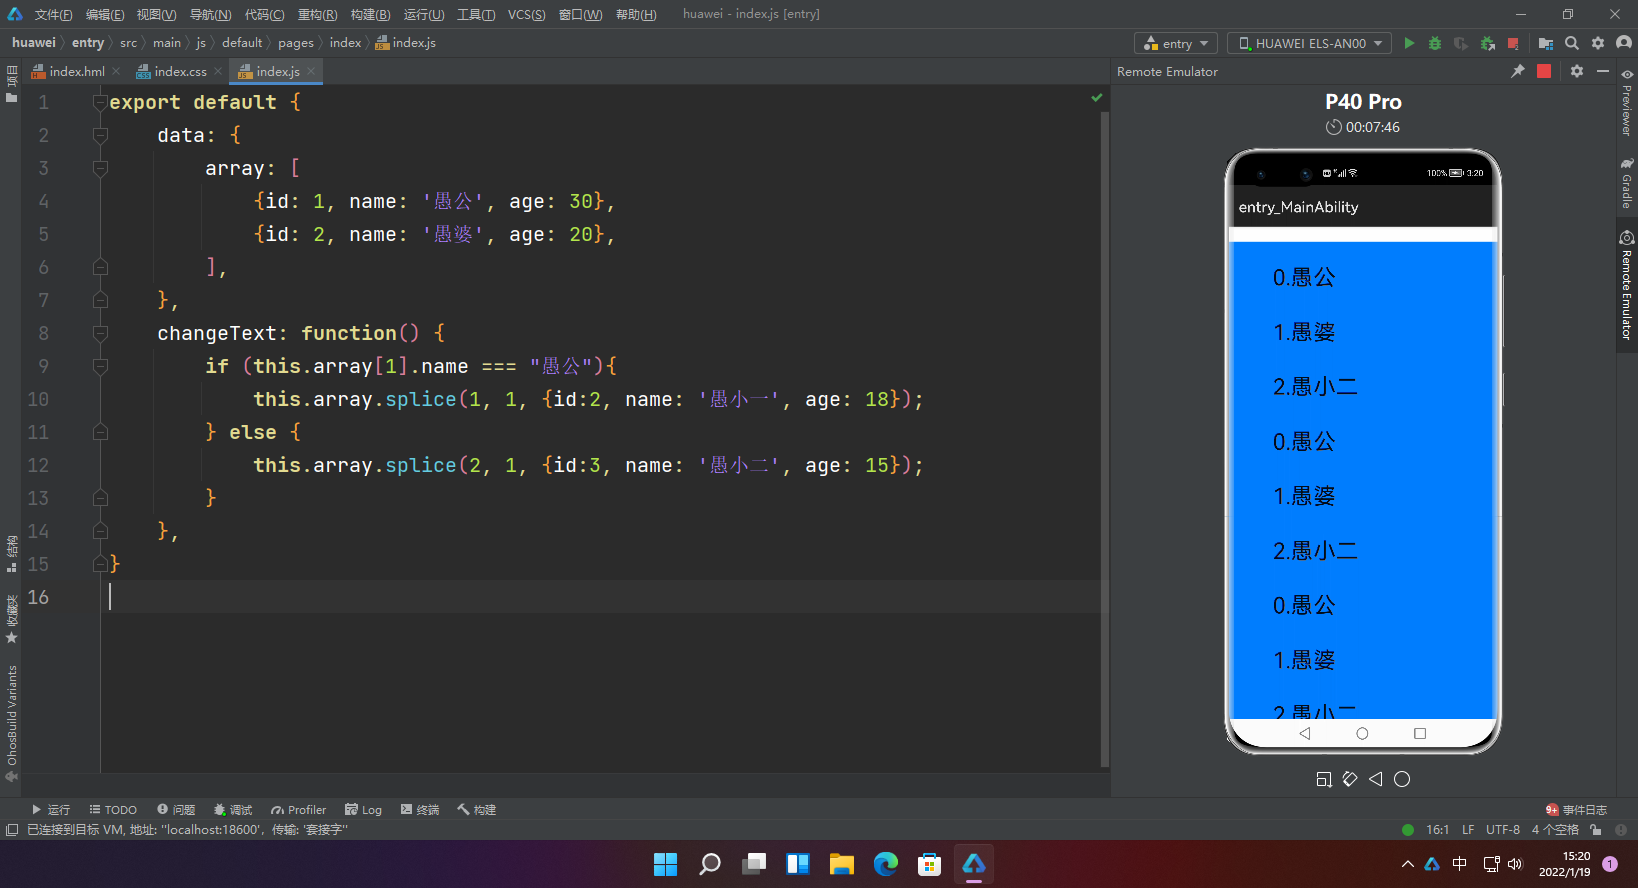
5.列表渲染
<div class="container">
    <!-- div列表渲染 -->
    <!-- 默认$item代表数组中的元素, $idx代表数组中的元素索引 -->
    <div for="{{array}}" tid="id" onclick="changeText">
        <text>{{$idx}}.{{$item.name}}</text>
    </div>
    <!-- 自定义元素变量名称 -->
    <div for="{{value in array}}" tid="id" onclick="changeText">
        <text>{{$idx}}.{{value.name}}</text>
    </div>
    <!-- 自定义元素变量、索引名称 -->
    <div for="{{(index, value) in array}}" tid="id" onclick="changeText">
        <text>{{index}}.{{value.name}}</text>
    </div>
</div>
export default {
    data: {
        array: [
            {id: 1, name: '愚公', age: 30},
            {id: 2, name: '愚婆', age: 20},
        ],
    },
    changeText: function() {
        if (this.array[1].name === "愚公"){
            this.array.splice(1, 1, {id:2, name: '愚小一', age: 18});
        } else {
            this.array.splice(2, 1, {id:3, name: '愚小二', age: 15});
        }
    },
}
5.条件渲染
<div class="container">
    <!--if/elif/else-->
    <button class="btn" type="capsule" value="toggleShow" onclick="toggleShow"></button>
    <button class="btn" type="capsule" value="toggleDisplay" onclick="toggleDisplay"></button>
    <text if="{{visible}}"> 我是if-1 </text>
    <text elif="{{display}}"> 我是if-2 </text>
    <text else> 我是if-3 </text>
    <!--show-->
    <button class="btn" type="capsule" value="toggle" onclick="toggle"></button>
    <text show="{{visibleShow}}" >我是show</text>
</div>
export default {
    data: {
        visible: false,
        display: true,
        visibleShow:false,
    },
    toggleShow: function() {
        this.visible = !this.visible;
    },
    toggleDisplay: function() {
        this.display = !this.display;
    },
    toggle: function() {
        this.visibleShow = !this.visibleShow;
    },
}
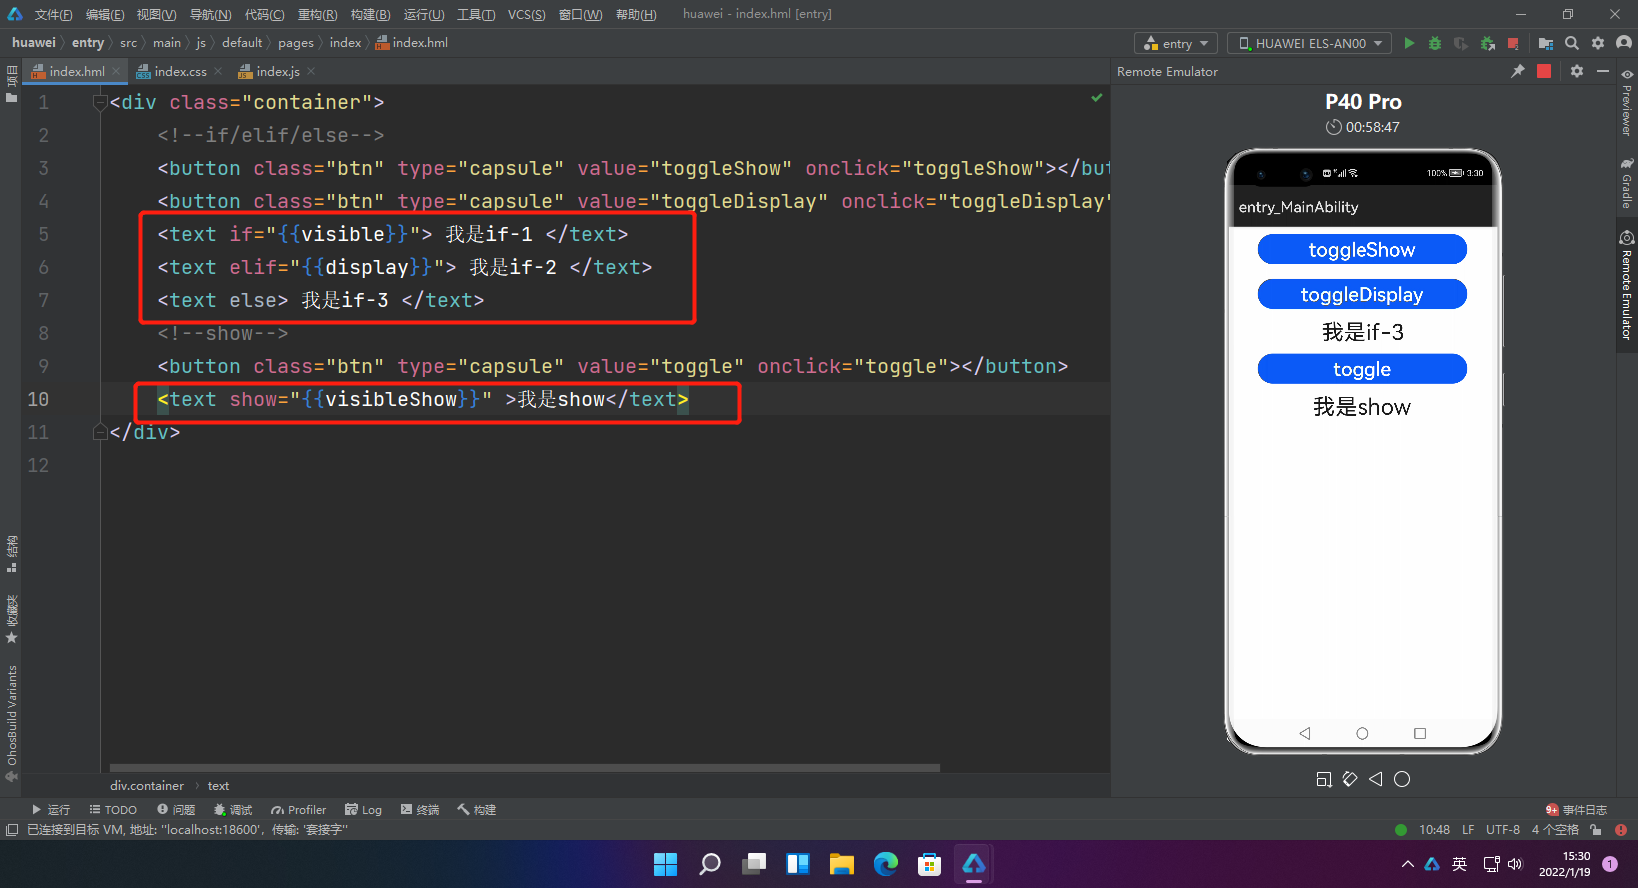
第一种写法里if为else时,组件不会在vdom中构建,也不会渲染,而第二种写法里show为false时虽然也不渲染,但会在vdom中构建。
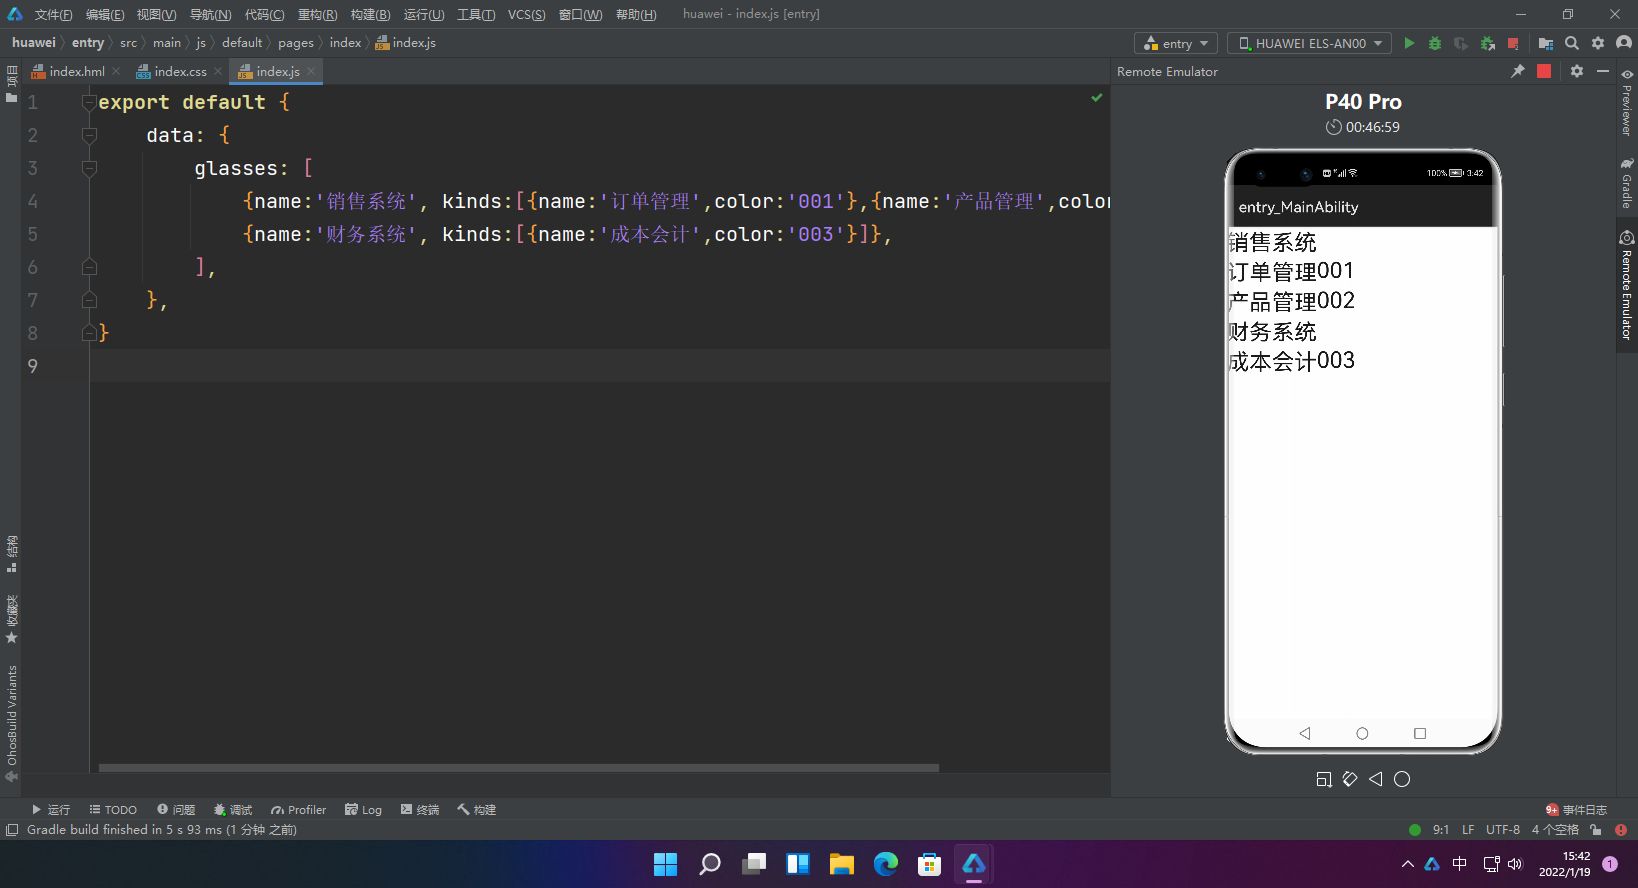
6.条件渲染
<list>
    <block for="glasses">
        <list-item type="glasses">
            <text>{{$item.name}}</text>
        </list-item>
        <block for="$item.kinds">
            <list-item type="kind">
                <text>{{$item.name}}</text>
                <text>{{$item.color}}</text>
            </list-item>
        </block>
    </block>
</list>
export default {
    data: {
        glasses: [
            {name:'销售系统', kinds:[{name:'订单管理',color:'001'},{name:'产品管理',color:'002'}]},
            {name:'财务系统', kinds:[{name:'成本会计',color:'003'}]},
        ],
    },
}
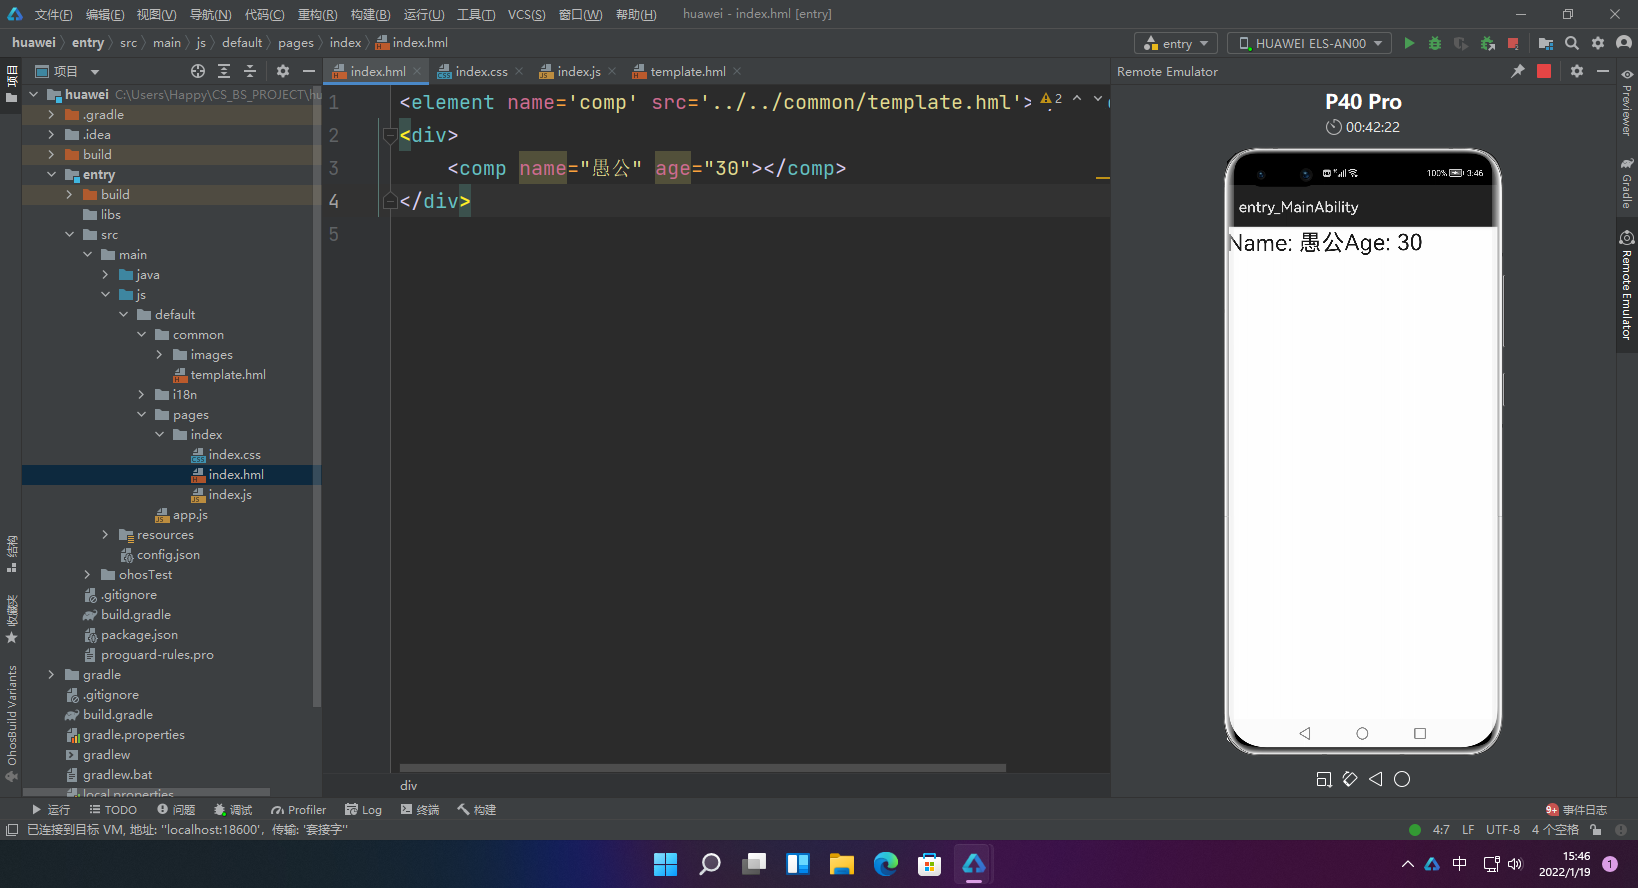
7.模板引用
<!-- template.hml -->
<div class="item">
  <text>Name: {{name}}</text>
  <text>Age: {{age}}</text>
</div>
<element name='comp' src='../../common/template.hml'></element>
<div>
    <comp name="愚公" age="30"></comp>
</div>
二、CSS导入和JS导入
1.CSS导入
@import '../../common/style.css';
.container {
  justify-content: center;
}
2.JS导入
2.1 模块声明
使用import方法引入功能模块:
import router from '@system.router';
2.2 代码引用
使用import方法导入js代码:
import utils from '../../common/utils.js';
2.3 对象导入
2.3.1全局对象
//获取app.js对象
this.$app.$def
本地对象
export default {
  data: {
    keyMap: {
      OS: 'HarmonyOS',
      Version: '2.0',
    },
  },
  getAppVersion() {
    this.$set('keyMap.Version', '3.0');
    console.info("keyMap.Version = " + this.keyMap.Version); // keyMap.Version = 3.0

    this.$delete('keyMap');
    console.info("keyMap.Version = " + this.keyMap); // log print: keyMap.Version = undefined
  }
}
2.3.2 DOM元素
 <image-animator class="image-player" ref="animator" images="{{images}}" duration="1s" onclick="handleClick"></image-animator>
 <image-animator class="image-player" id="animator" images="{{images}}" duration="1s" onclick="handleClick"></image-animator>
const animator = this.$refs.animator; // 获取ref属性为animator的DOM元素
const animator = this.$element('animator'); // 获取id属性为animator的DOM元素
2.3.3 获取ViewModel
主视图
<element name='parentComp' src='../../common/component/parent/parent.hml'></element>
<div>
  <parentComp></parentComp>
</div>
export default {
  data: {
    text: 'I am root!',
  },
}
parent视图
<element name='childComp' src='../child/child.hml'></element>
<div>
  <childComp id = "selfDefineChild"></childComp>
</div>
console.info(`${this.$parent().text}`);//获取主视图的text
console.info(`${this.$child('selfDefineChild').childClicked()}`);//获取指定id子视图的方法
子视图
<div class="item" onclick="textClicked">
  <text class="text-style" onclick="childClicked">child component clicked</text>
</div>
export default {
  data: {
    text: 'I am child component!',
  },
  childClicked () {
    console.info(`${this.$parent().text}`);//获取父视图
    console.info(`${this.$root().text}`);//获取顶级视图
  },
}

【声明】本内容来自华为云开发者社区博主,不代表华为云及华为云开发者社区的观点和立场。转载时必须标注文章的来源(华为云社区)、文章链接、文章作者等基本信息,否则作者和本社区有权追究责任。如果您发现本社区中有涉嫌抄袭的内容,欢迎发送邮件进行举报,并提供相关证据,一经查实,本社区将立刻删除涉嫌侵权内容,举报邮箱:
cloudbbs@huaweicloud.com
- 点赞
- 收藏
- 关注作者
评论(0)