Linux系统移植:U-Boot 顶层 Makefile 分析(下)
Linux系统移植:U-Boot 顶层 Makefile 分析(下)
继续沿着上的代码内容往下研读
一、调用 scripts/Kbuild.include
下面的代码就是在 Makefile 会调用文件 scripts/Kbuild.include 这个文件
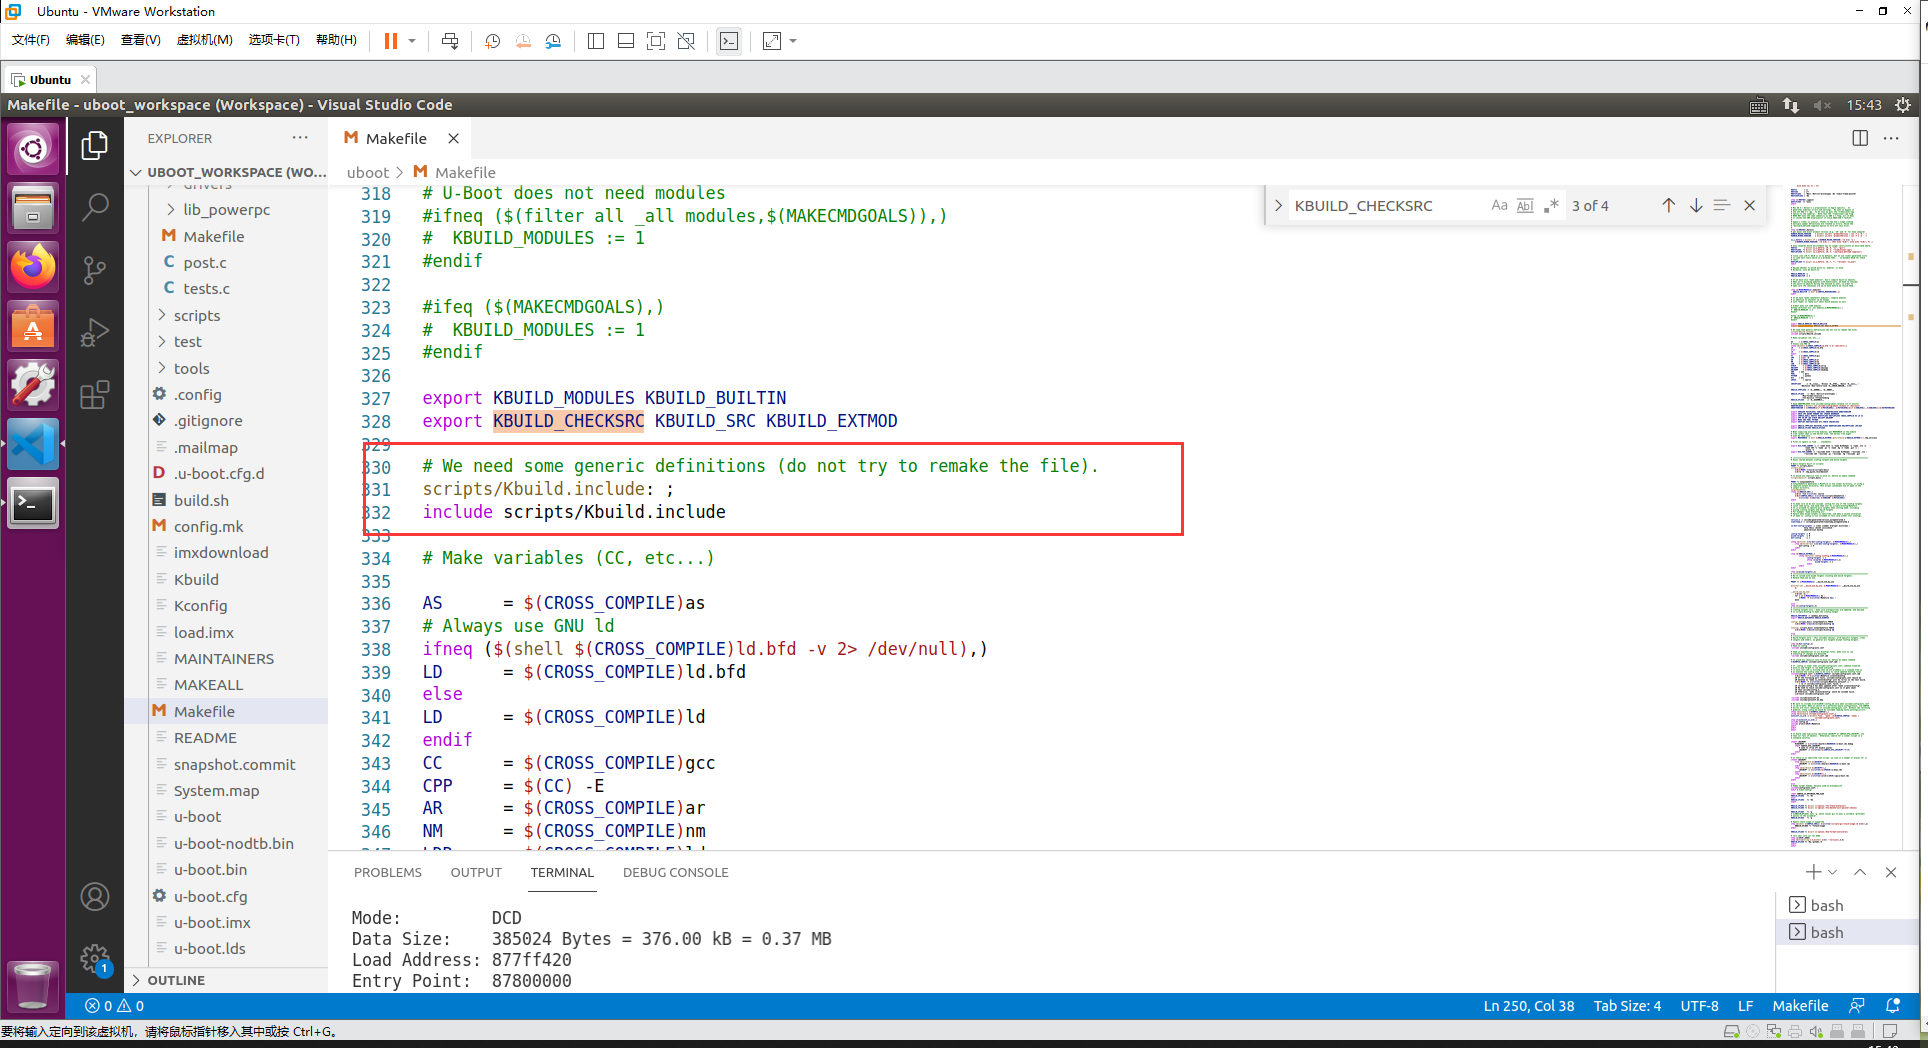
“include” 包含了文件 scripts/Kbuild.include,此文件里面定义了很多变量,我们打开看一下
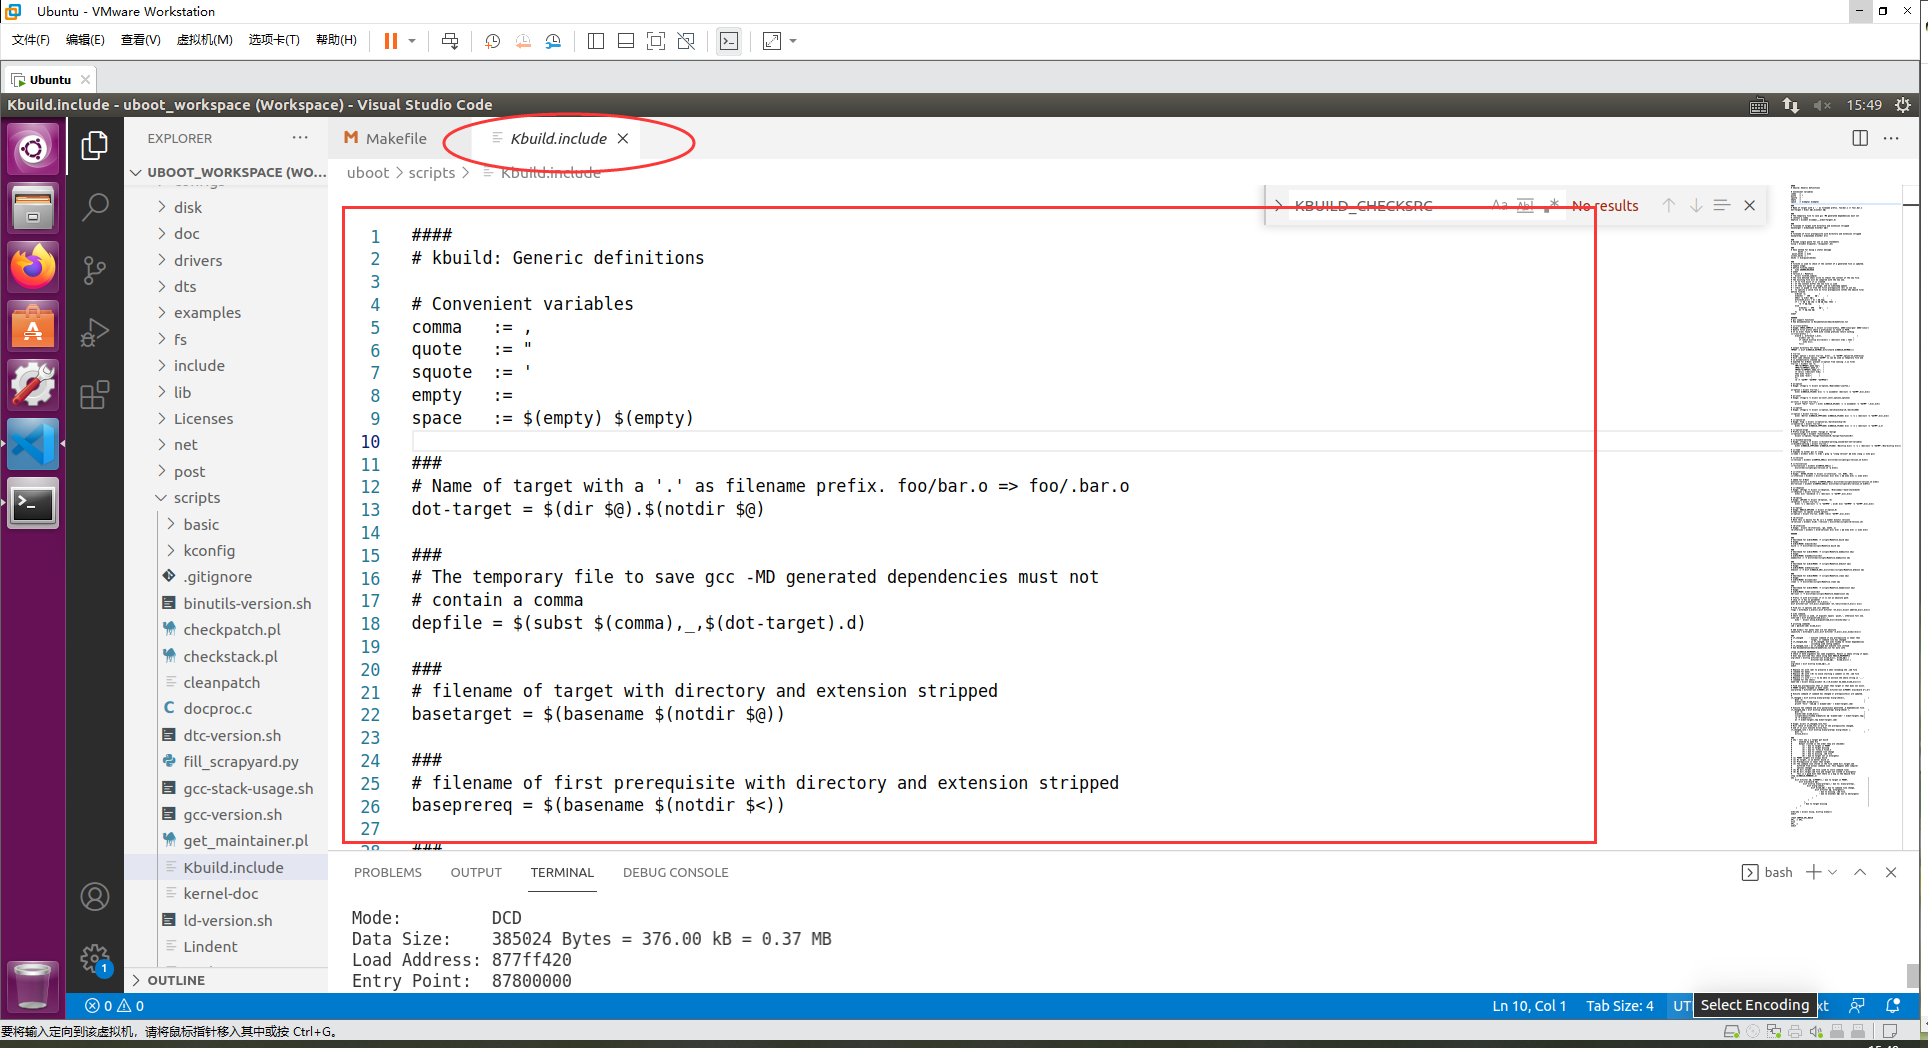
这些变量在编译工过程中会被调用
二、导出交叉编译工具变量设置
下面的代码就是设置交叉编译器的各种工具
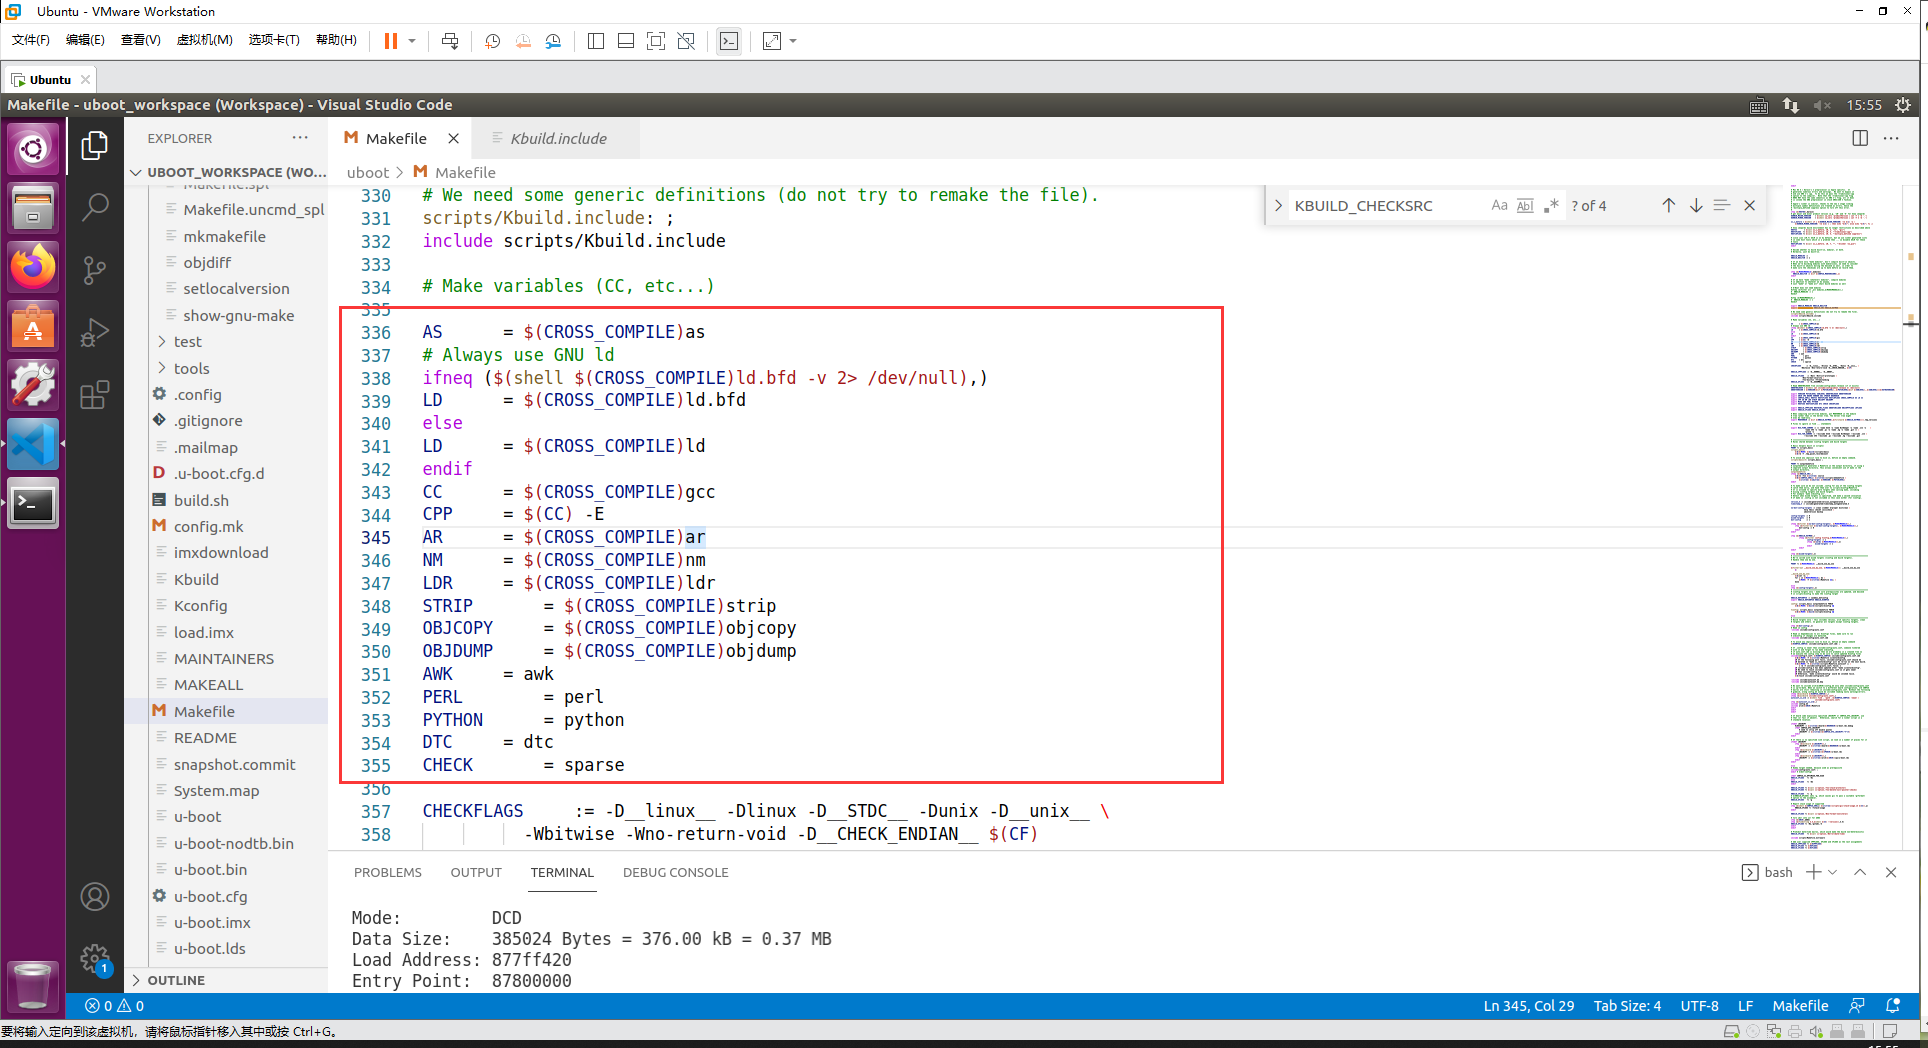
三、导出其他变量
之后的代码导出各种变量
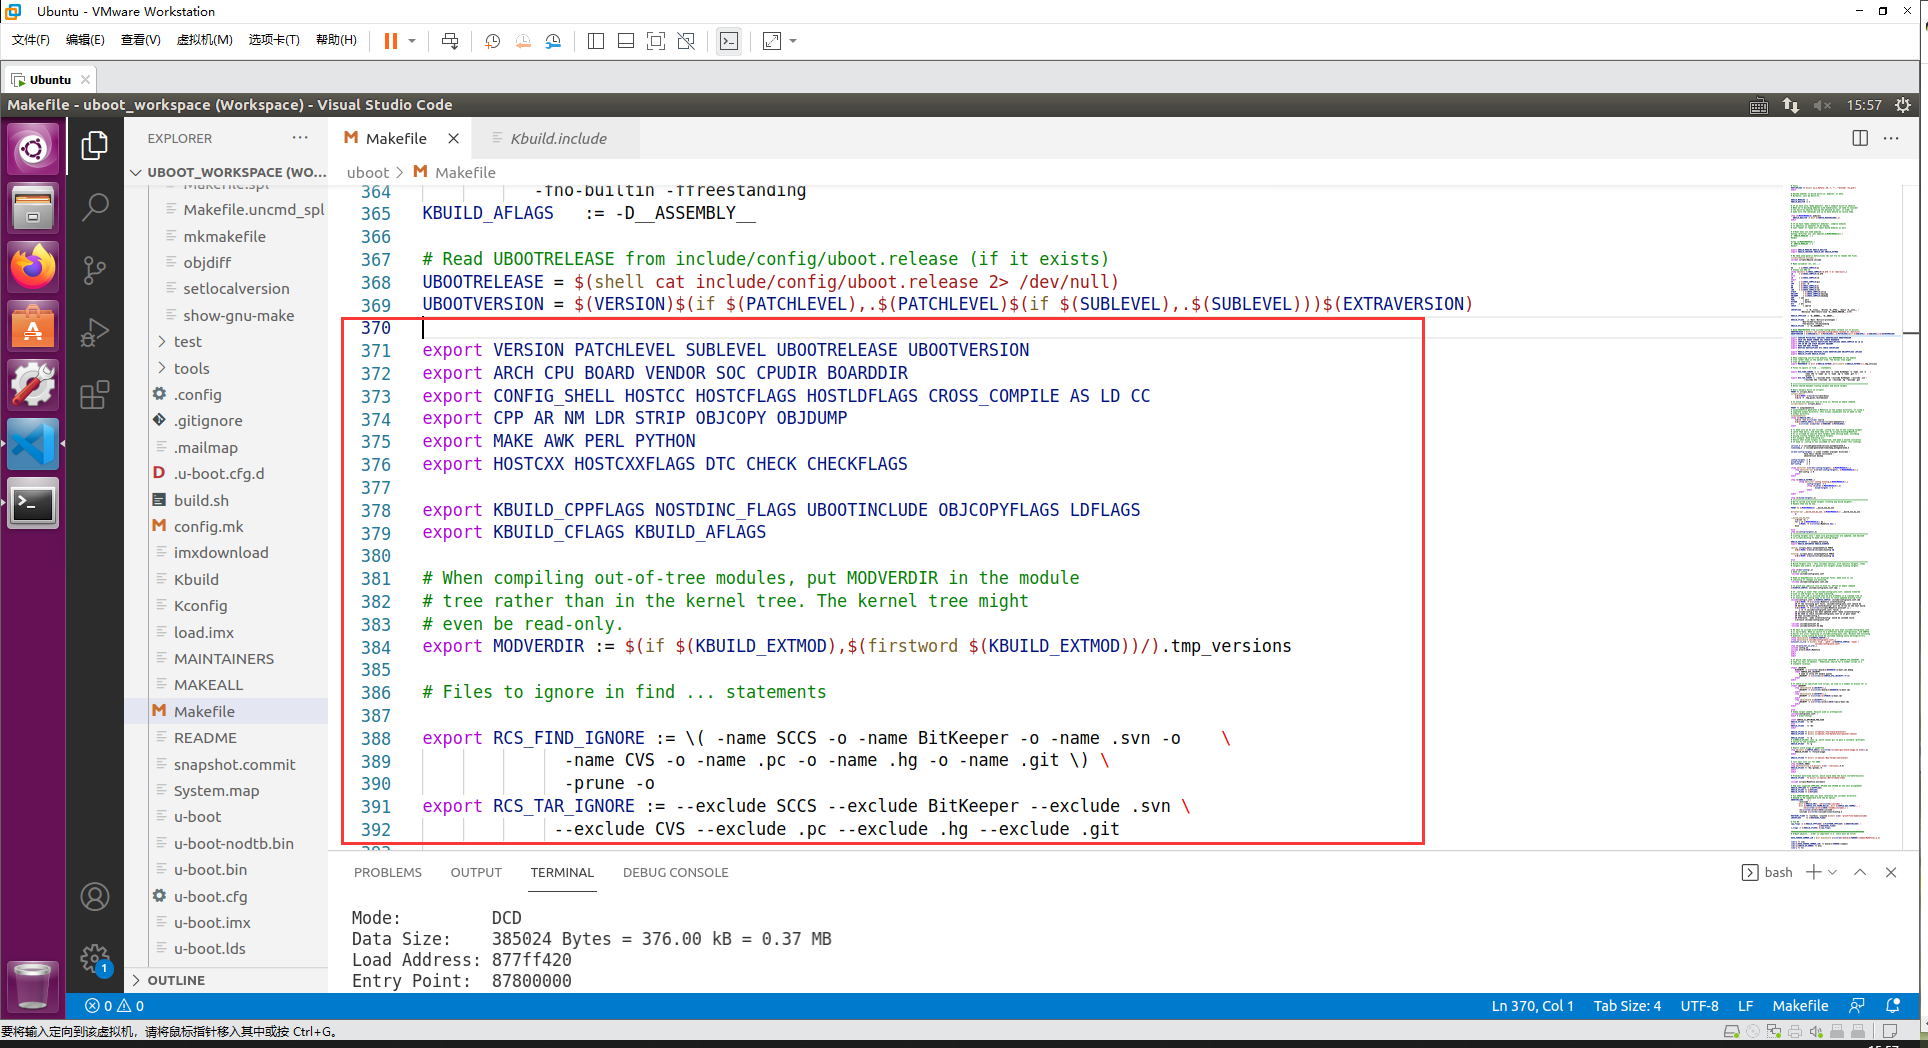
export VERSION PATCHLEVEL SUBLEVEL UBOOTRELEASE UBOOTVERSION
export ARCH CPU BOARD VENDOR SOC CPUDIR BOARDDIR
export CONFIG_SHELL HOSTCC HOSTCFLAGS HOSTLDFLAGS CROSS_COMPILE AS LD CC
export CPP AR NM LDR STRIP OBJCOPY OBJDUMP
export MAKE AWK PERL PYTHON
export HOSTCXX HOSTCXXFLAGS DTC CHECK CHECKFLAGS

export KBUILD_CPPFLAGS NOSTDINC_FLAGS UBOOTINCLUDE OBJCOPYFLAGS LDFLAGS
export KBUILD_CFLAGS KBUILD_AFLAGS
- 1
- 2
- 3
- 4
- 5
- 6
- 7
- 8
- 9
重点是第二行的几个变量:
export ARCH CPU BOARD VENDOR SOC CPUDIR BOARDDIR
- 1
我们在程序中加入自己的代码,把这些变量打印出来:
var_test:
	@echo 'ARCH=' $(ARCH)
	@echo 'CPU=' $(CPU)
	@echo 'BOARD=' $(BOARD)
	@echo 'VENDOR=' $(VENDOR)
	@echo 'SOC=' $(SOC)
	@echo 'CPUDIR=' $(CPUDIR)
	@echo 'BOARDDIR=' $(BOARDDIR)
- 1
- 2
- 3
- 4
- 5
- 6
- 7
- 8
使用 make var_test 执行后的结果如下:

- ARCH :架构信息
- CPU :具体CPU架构
- BOARD :开发板信息
- VENDOR :厂商
- SOC :芯片型号
- CPUDIR :CPU 架构文件目录
- BOARDDIR:开发板文件目录
这几个变量在 uboot 根目录下 config.mk 里面定义
四、 make xxx_config过程
uboot 可以使用 “make xxx_defconfig” 命令来配置 uboot,配置代码如下:
# To make sure we do not include .config for any of the *config targets
# catch them early, and hand them over to scripts/kconfig/Makefile
# It is allowed to specify more targets when calling make, including
# mixing *config targets and build targets.
# For example 'make oldconfig all'.
# Detect when mixed targets is specified, and make a second invocation
# of make so .config is not included in this case either (for *config).

version_h := include/generated/version_autogenerated.h
timestamp_h := include/generated/timestamp_autogenerated.h

no-dot-config-targets := clean clobber mrproper distclean \
			 help %docs check% coccicheck \
			 ubootversion backup

config-targets := 0
mixed-targets  := 0
dot-config     := 1
- 1
- 2
- 3
- 4
- 5
- 6
- 7
- 8
- 9
- 10
- 11
- 12
- 13
- 14
- 15
- 16
- 17
- 18
开头定义了变量 version_h,这变量保存版本号文件(此文件是自动生成的),内容如下:
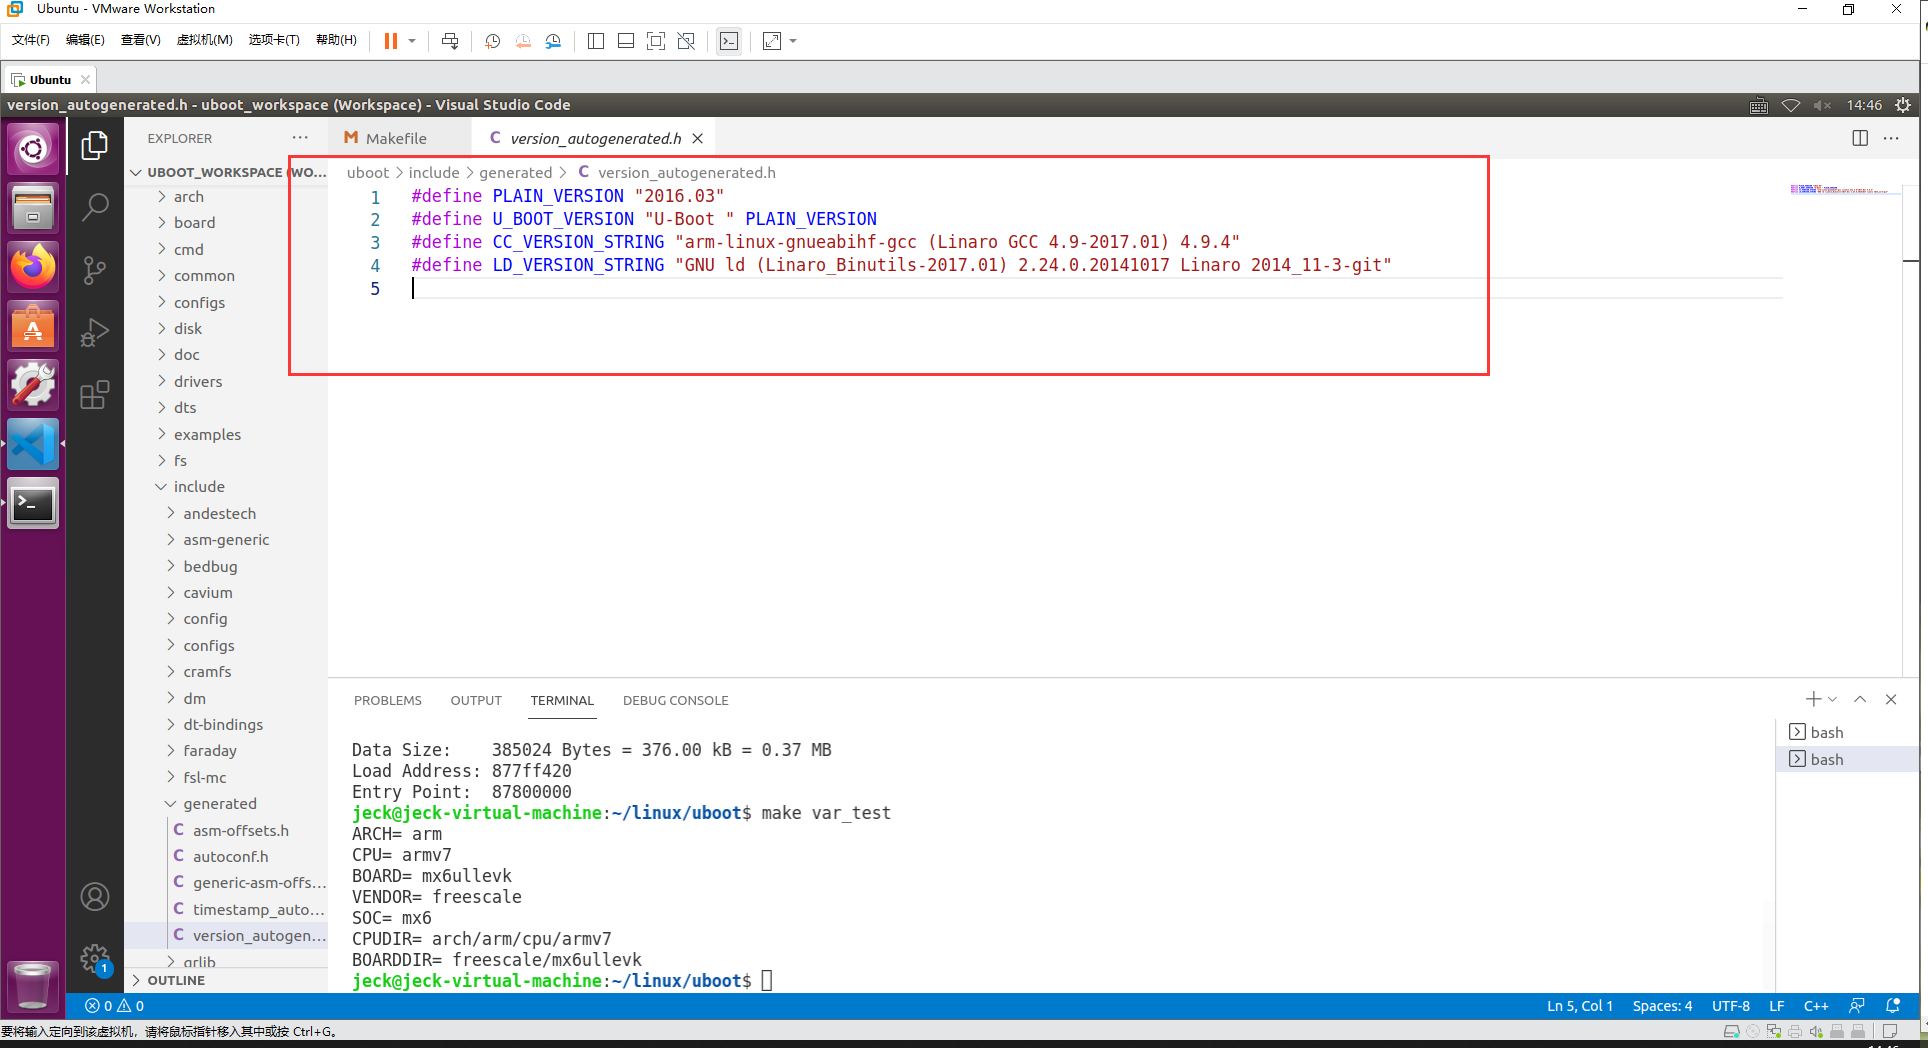
后面定义了变量 timestamp_h,保存时间戳文件,同时定义了其他的一些变量 no-dot-config-targets、config-targets、mixed-targets 并赋予了初值
下面的代码将 MAKECMDGOALS 中不符合 no-dot-config-targets 的部分过滤掉,剩下的如果不为空的话条件就成立
ifneq ($(filter $(no-dot-config-targets), $(MAKECMDGOALS)),)
	ifeq ($(filter-out $(no-dot-config-targets), $(MAKECMDGOALS)),)
		dot-config := 0
	endif
endif
- 1
- 2
- 3
- 4
- 5
判断KBUILD_EXTMOD 是否为空,如果KBUILD_EXTMOD为空的话条件成立,将 MAKECMDGOALS 中不符合“config”和“%config”的部分过滤掉,如果剩下的部分不为空条件就成立,然后统计 MAKECMDGOALS 中的单词个数,如果不为 1 的话条件成立
ifeq ($(KBUILD_EXTMOD),)
        ifneq ($(filter config %config,$(MAKECMDGOALS)),)
                config-targets := 1
                ifneq ($(words $(MAKECMDGOALS)),1)
                        mixed-targets := 1
                endif
        endif
endif
- 1
- 2
- 3
- 4
- 5
- 6
- 7
- 8
words 匹配函数格式如下:
$(words <text>)
- 1
判断完成后,几个变量值如下:
config-targets = 1
mixed-targets = 0
dot-config = 1
- 1
- 2
- 3
后面的代码根据值进行进一步执行,下面的代码分析直接写在注释内:
ifeq ($(mixed-targets),1)
# ===========================================================================
# We're called with mixed targets (*config and build targets).
# Handle them one by one.

PHONY += $(MAKECMDGOALS) __build_one_by_one

$(filter-out __build_one_by_one, $(MAKECMDGOALS)): __build_one_by_one
	@:

__build_one_by_one:
	$(Q)set -e; \
	for i in $(MAKECMDGOALS); do \
		$(MAKE) -f $(srctree)/Makefile $$i; \
	done

else
ifeq ($(config-targets),1)
# ===========================================================================
# *config targets only - make sure prerequisites are updated, and descend
# in scripts/kconfig to make the *config target

KBUILD_DEFCONFIG := sandbox_defconfig
export KBUILD_DEFCONFIG KBUILD_KCONFIG

#最终要执行的脚本
config: scripts_basic outputmakefile FORCE
	$(Q)$(MAKE) $(build)=scripts/kconfig $@
%config: scripts_basic outputmakefile FORCE
	$(Q)$(MAKE) $(build)=scripts/kconfig $@

else
# ===========================================================================
# Build targets only - this includes vmlinux, arch specific targets, clean
# targets and others. In general all targets except *config targets.

ifeq ($(dot-config),1)
# Read in config
-include include/config/auto.conf
- 1
- 2
- 3
- 4
- 5
- 6
- 7
- 8
- 9
- 10
- 11
- 12
- 13
- 14
- 15
- 16
- 17
- 18
- 19
- 20
- 21
- 22
- 23
- 24
- 25
- 26
- 27
- 28
- 29
- 30
- 31
- 32
- 33
- 34
- 35
- 36
- 37
- 38
- 39
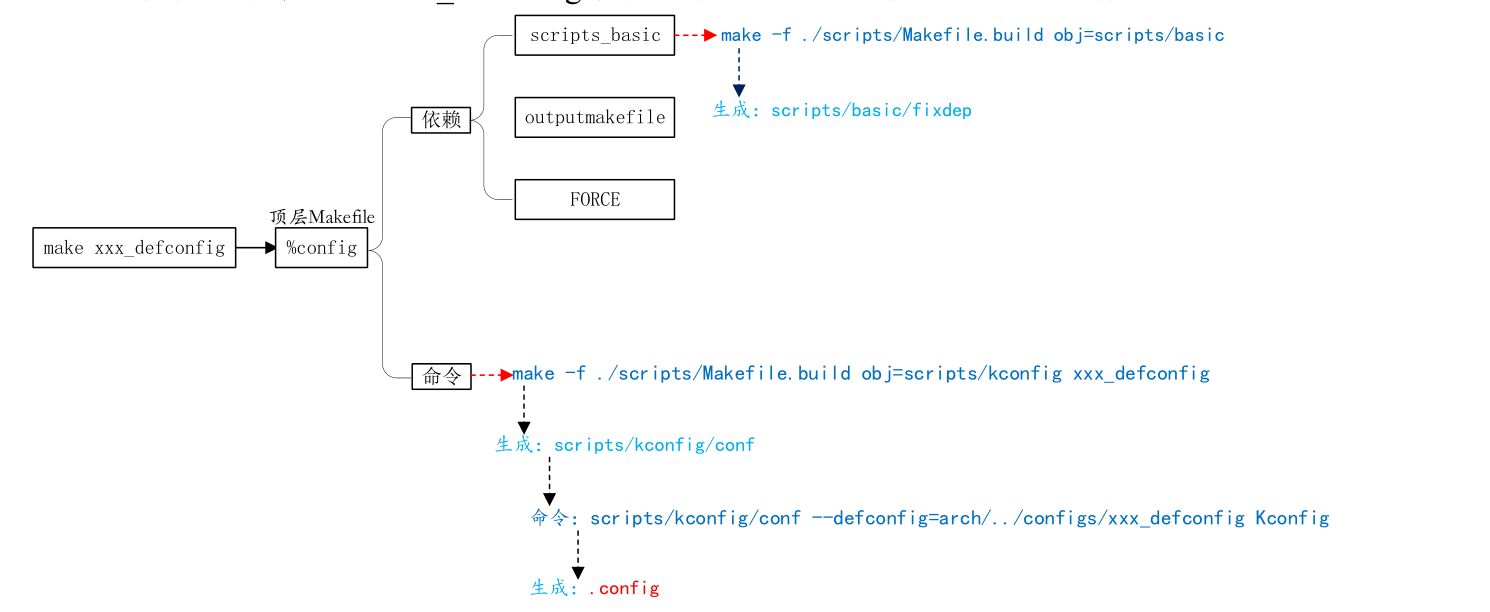
输入的指令最终执行下面的两句
①、scripts_basic 目标对应的命令
make -f ./scripts/Makefile.build obj=scripts/basic
- 1
②、%config 目标对应的命令
make -f ./scripts/Makefile.build obj=scripts/kconfig xxx_defconfig
- 1
其具体的执行流程如下:
五、make过程
先直接看 make 的执行流程示意图
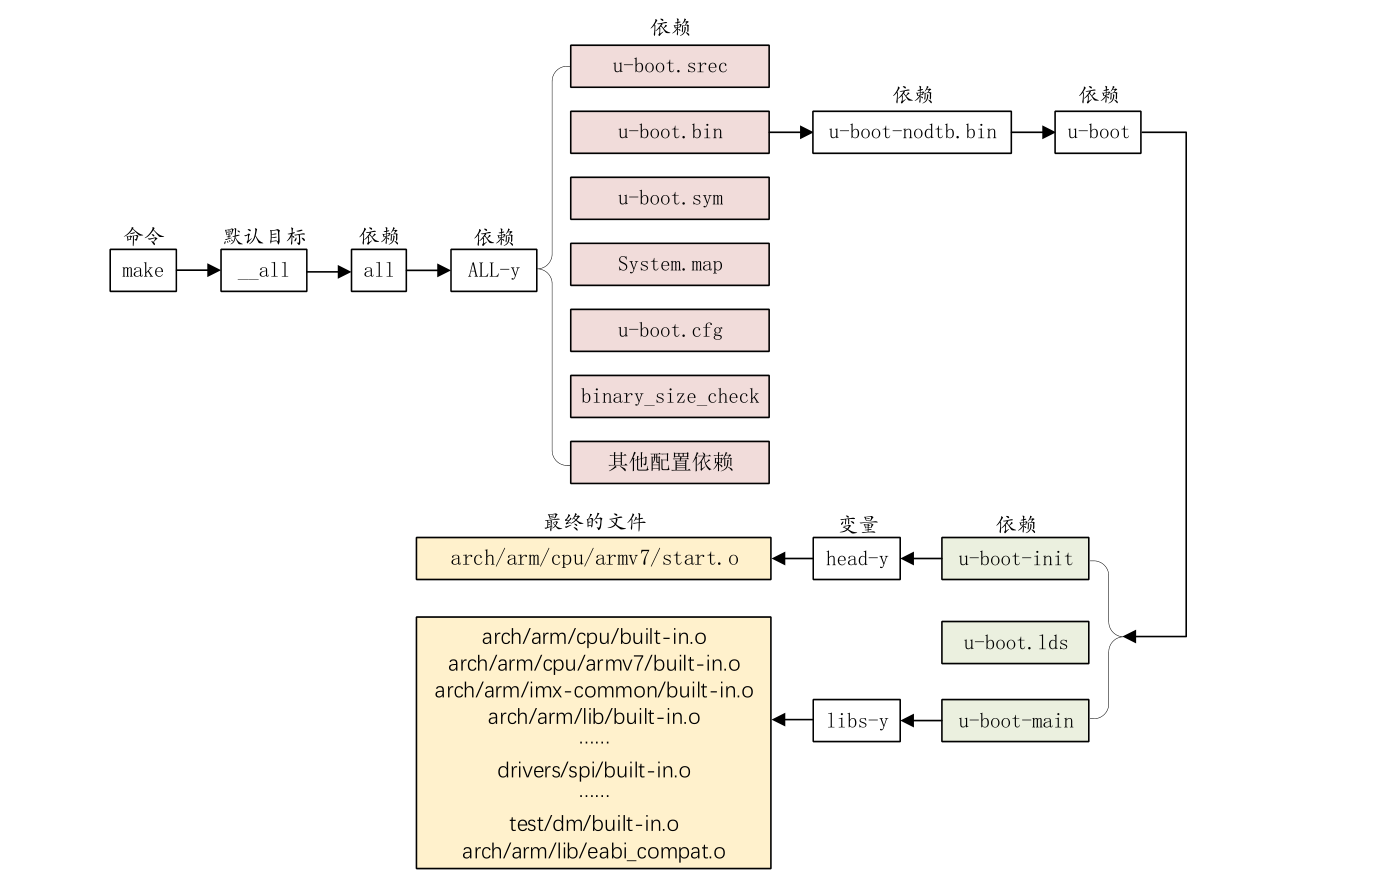
流程解释如下:
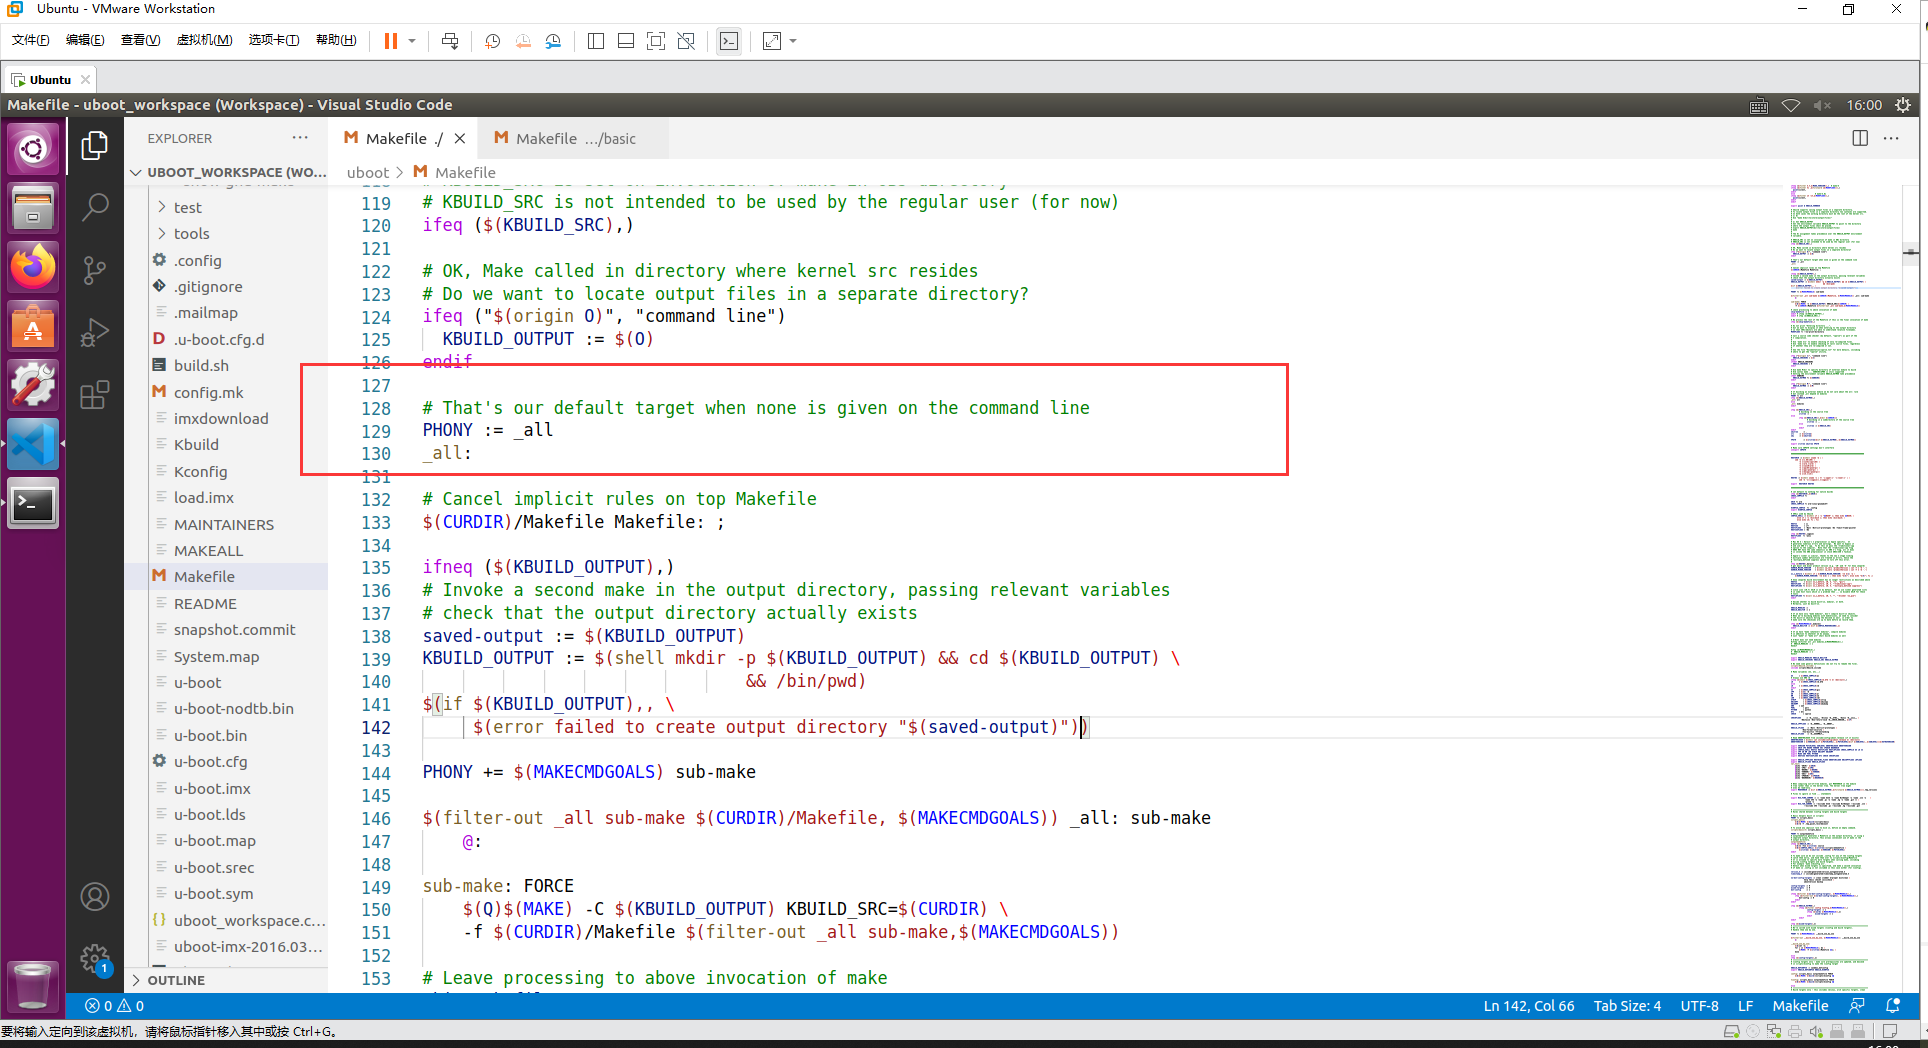
使用 make 命令后,先使用默认目标 _all,如下:
目标_all 又依赖于 all,然后加载 all 依赖

在主 Makefile 中 all 目标规则如下
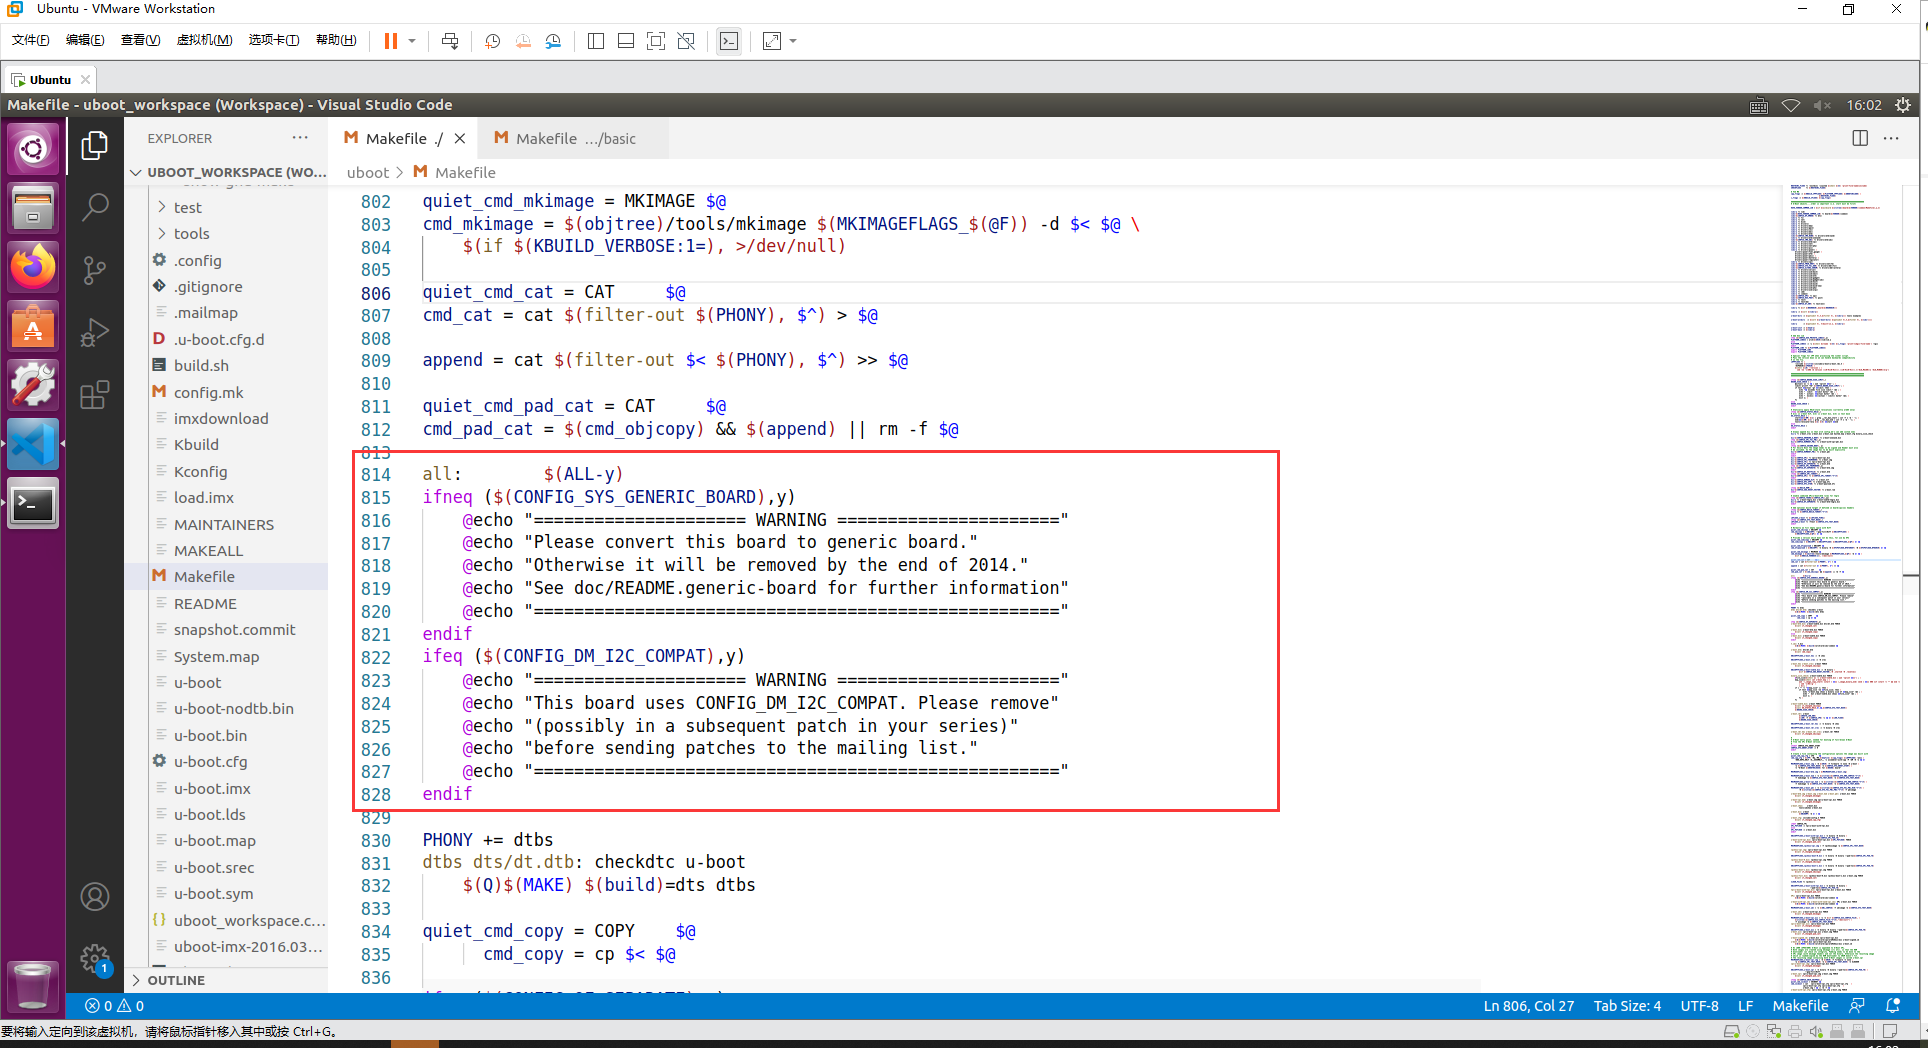
具体 All-y 规则:
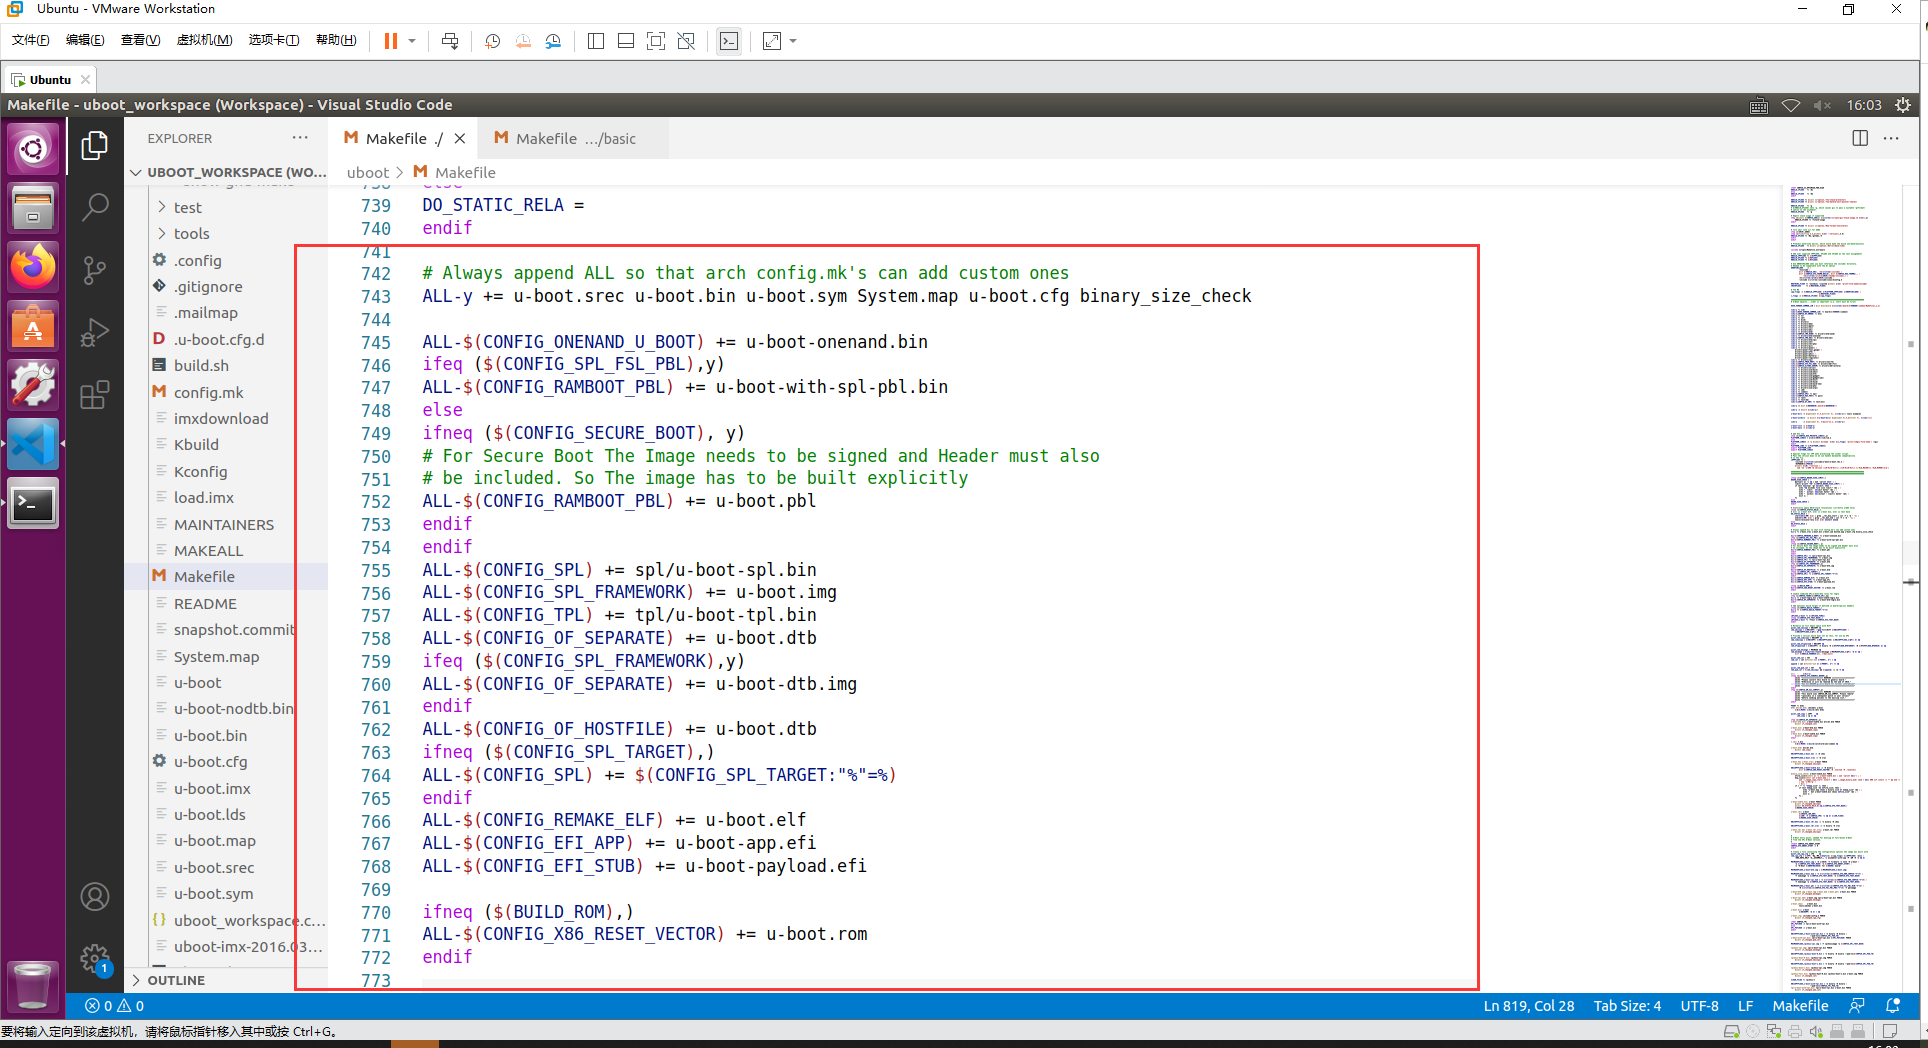
ALL-y 主要包含 u-boot.srec、u-boot.bin、u-boot.sym、System.map、u-boot.cfg 和 binary_size_check 这几个文件。根据 uboot 的配置情况也可能包含其他的文件
ALL-y 里面有个 u-boot.bin,这个就是我们最终需要的 uboot 二进制可执行文件,目标 u-boot.bin 依赖于 u-boot-nodtb.bin 文件,所以又先生成 u-boot-nodtb.bin 文件,在 Makefile 中代码如下:
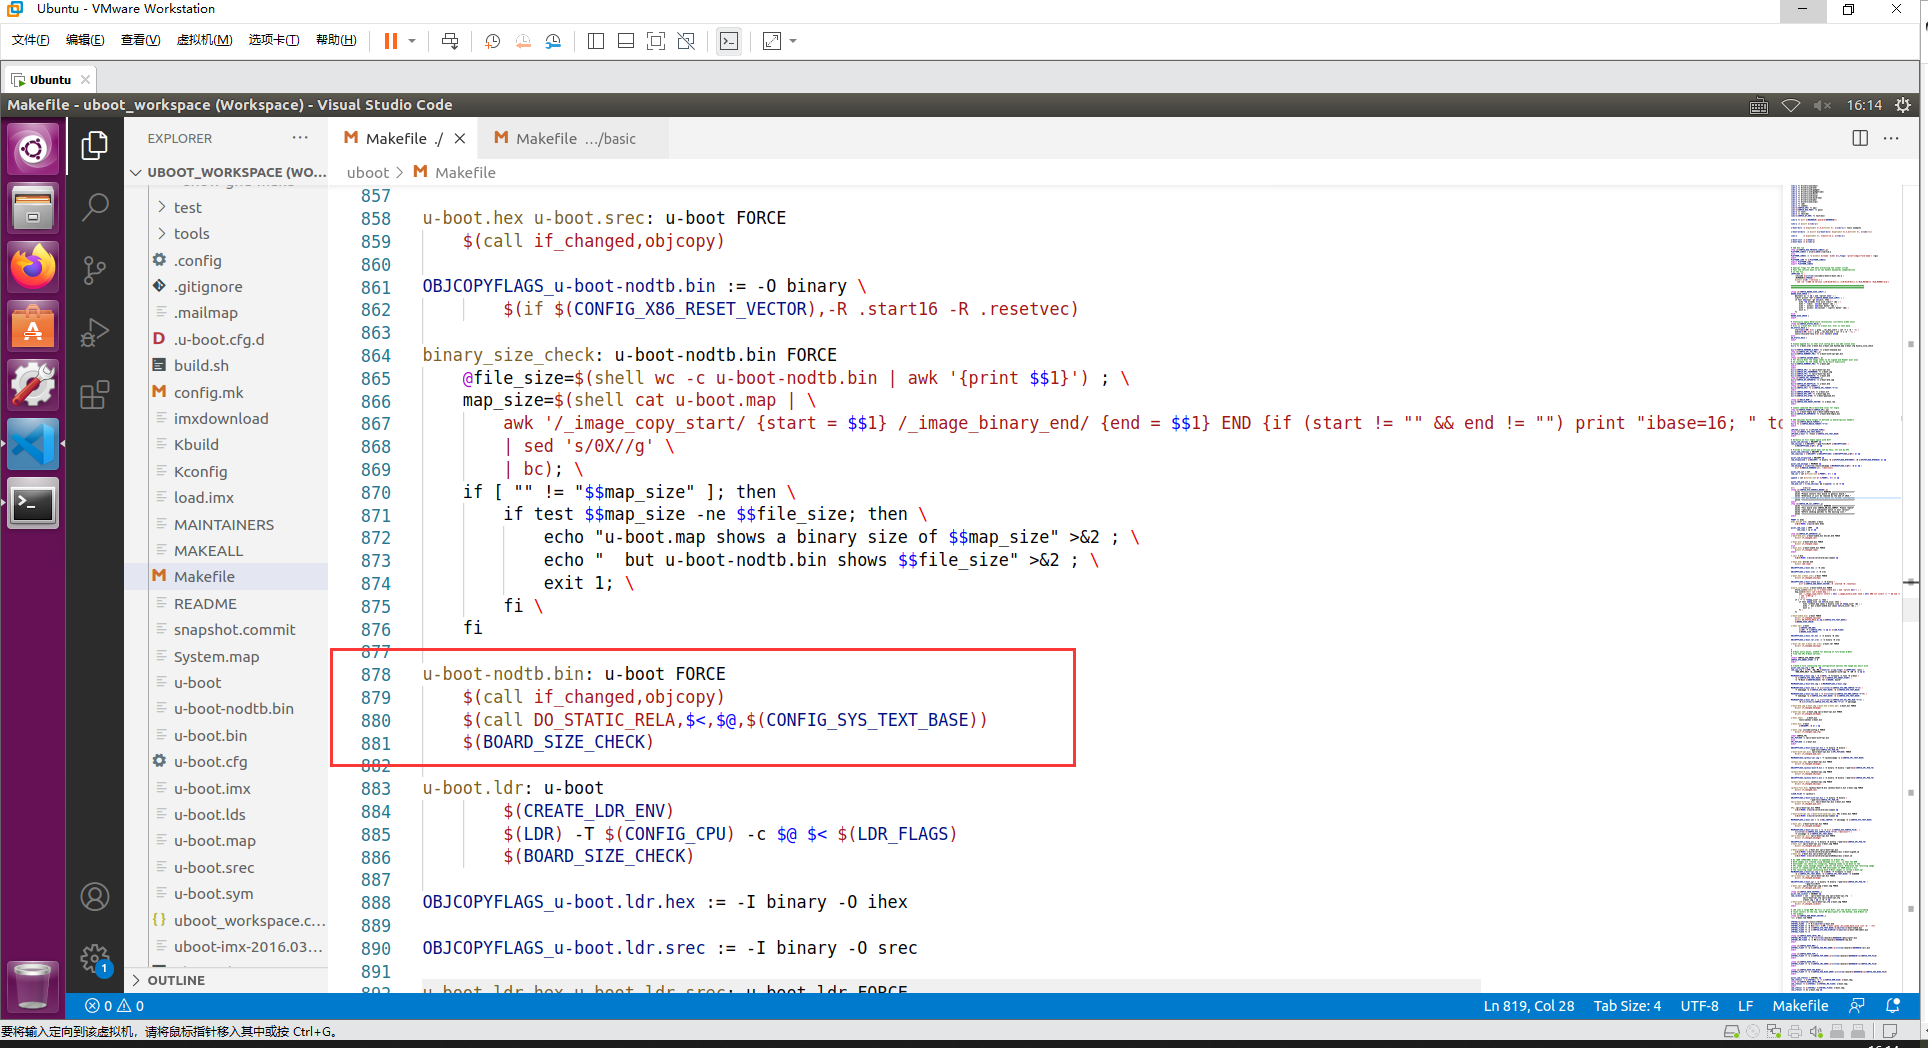
而目标 u-boot-nodtb.bin 又依赖于 u-boot,u-boot 相关规则如下:

规则就相当于将以 u-boot.lds 为链接脚本,将 arch/arm/cpu/armv7/start.o 和各个子目录下的 built-in.o 链接在一起生成 u-boot
表现在程序上最终是用 arm-linux-gnueabihf-ld.bfd 命令将 arch/arm/cpu/armv7/start.o 和其他众多的 built_in.o 链接在一起,形成 u-boot,以上就是 make 的大致流程,其 Makefile 主要就下面两个功能
- make xxx_defconfig:配置 uboot,生成.config 文件
- make:编译 uboot,生成二进制的 u-boot.bin 文件和其他的一些与 uboot 有关的文件,比如 u-boot.imx 等等
文章来源: blog.csdn.net,作者:JeckXu666,版权归原作者所有,如需转载,请联系作者。
原文链接:blog.csdn.net/qq_45396672/article/details/121731694
- 点赞
- 收藏
- 关注作者


评论(0)