【Android 组件化】使用 ARoute 实现组件化 ( 完整组件化项目框架 )


组件化系列博客 :
- 【Android 组件化】从模块化到组件化
- 【Android 组件化】使用 Gradle 实现组件化 ( Gradle 变量定义与使用 )
- 【Android 组件化】使用 Gradle 实现组件化 ( 组件模式与集成模式切换 )
- 【Android 组件化】使用 Gradle 实现组件化 ( 组件 / 集成模式下的 Library Module 开发 )
- 【Android 组件化】路由组件 ( 路由组件结构 )
- 【Android 组件化】路由组件 ( 注解处理器获取被注解的节点 )
- 【Android 组件化】路由组件 ( 注解处理器中使用 JavaPoet 生成代码 )
- 【Android 组件化】路由组件 ( 注解处理器参数选项设置 )
- 【Android 组件化】路由组件 ( 构造路由表中的路由信息 )
- 【Android 组件化】路由组件 ( 使用 JavaPoet 生成路由表类 )
- 【Android 组件化】路由组件 ( 组件间共享的服务 )
- 【Android 组件化】路由组件 ( 生成 Root 类记录模块中的路由表 )
- 【Android 组件化】路由组件 ( 运行时获取 注解处理器 生成的路由表 )
- 【Android 组件化】路由组件 ( 路由框架概述 )
- 【Android 组件化】路由组件 ( 页面跳转参数依赖注入 )
一、ARoute 引入
使用 ARouter 第三方库实现组件化 : https://github.com/alibaba/ARouter
ARoute 是阿里的开源库 ;
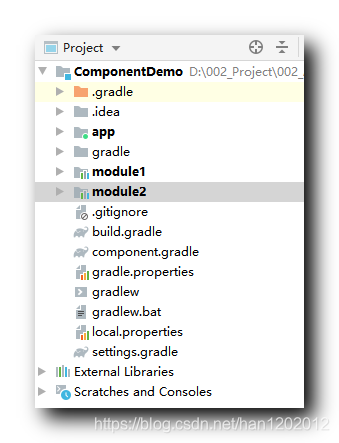
创建项目 , 项目中有 3 3 3 个 Module , 1 1 1 个主模块 app , 2 2 2 个依赖库 module1 和 module2 ;
在 app , module1 , module2 , 3 3 3 个模块的 build.gradle 中 , 都要进行如下配置 ;
在 build.gradle 下的 " android / defaultConfig " 层级添加配置 :
android {
    defaultConfig {
        ...
        javaCompileOptions {
            annotationProcessorOptions {
                arguments = [AROUTER_MODULE_NAME: project.getName()]
            }
        }
    }
}
- 1
- 2
- 3
- 4
- 5
- 6
- 7
- 8
- 9
- 10
在 build.gradle 下的 " dependencies " 层级添加 ARoute 依赖 :
    // 替换成最新版本, 需要注意的是api
    // 要与compiler匹配使用,均使用最新版可以保证兼容
    api 'com.alibaba:arouter-api:1.5.1'
    annotationProcessor 'com.alibaba:arouter-compiler:1.5.1'
- 1
- 2
- 3
- 4
3 3 3 模块间的依赖关系 : app 模块依赖剩余两个模块 , 模块之间不发生依赖关系 ;
implementation project(path: ':module1')
implementation project(path: ':module2')
- 1
- 2
二、3 个模块的界面跳转
1、app 模块注解、app 跳转到 module1 模块
app 模块 : 使用 @Route(path = "/app/MainActivity") 注解标注 Activity 类 , 界面按钮点击方法跳转到 module1 中的 Activity 界面中 ;
代码示例 :
package kim.hsl.component;

import androidx.appcompat.app.AppCompatActivity;

import android.os.Bundle;
import android.util.Log;
import android.view.View;

import com.alibaba.android.arouter.facade.annotation.Route;
import com.alibaba.android.arouter.launcher.ARouter;

// 在支持路由的页面上添加注解(必选)
// 这里的路径需要注意的是至少需要有两级,/xx/xx
@Route(path = "/app/MainActivity")
public class MainActivity extends AppCompatActivity {

    private static final String TAG = "MainActivity";

    @Override
    protected void onCreate(Bundle savedInstanceState) {
        super.onCreate(savedInstanceState);
        setContentView(R.layout.activity_main);
    }

    public void onClick(View view) {
        Log.i(TAG, "跳转到 Module1");
        ARouter.getInstance().build("/module1/Module1Activity").navigation();
        finish();
    }
}

- 1
- 2
- 3
- 4
- 5
- 6
- 7
- 8
- 9
- 10
- 11
- 12
- 13
- 14
- 15
- 16
- 17
- 18
- 19
- 20
- 21
- 22
- 23
- 24
- 25
- 26
- 27
- 28
- 29
- 30
2、module1 模块注解、module1 跳转到 module2 模块
module1 模块跳转到 module2 模块 , 这两个模块之间互相没有依赖关系 ;
module1 模块使用 @Route(path = "/module1/Module1Activity") 注解标注 ,
代码示例 :
package kim.hsl.module1;

import androidx.appcompat.app.AppCompatActivity;

import android.os.Bundle;
import android.util.Log;
import android.view.View;

import com.alibaba.android.arouter.facade.annotation.Route;
import com.alibaba.android.arouter.launcher.ARouter;

@Route(path = "/module1/Module1Activity")
public class Module1Activity extends AppCompatActivity {

    private static final String TAG = "Module1Activity";

    @Override
    protected void onCreate(Bundle savedInstanceState) {
        super.onCreate(savedInstanceState);
        setContentView(R.layout.activity_module1);
    }

    public void onClick(View view) {
        Log.i(TAG, "跳转到 Module2");
        ARouter.getInstance().build("/module2/Module2Activity").navigation();
        finish();
    }
}
- 1
- 2
- 3
- 4
- 5
- 6
- 7
- 8
- 9
- 10
- 11
- 12
- 13
- 14
- 15
- 16
- 17
- 18
- 19
- 20
- 21
- 22
- 23
- 24
- 25
- 26
- 27
- 28
3、module2 模块注解、module2 跳转到 app 模块
代码示例 :
package kim.hsl.module2;

import androidx.appcompat.app.AppCompatActivity;

import android.os.Bundle;
import android.util.Log;
import android.view.View;

import com.alibaba.android.arouter.facade.annotation.Route;
import com.alibaba.android.arouter.launcher.ARouter;

@Route(path = "/module2/Module2Activity")
public class Module2Activity extends AppCompatActivity {

    private static final String TAG = "Module2Activity";

    @Override
    protected void onCreate(Bundle savedInstanceState) {
        super.onCreate(savedInstanceState);
        setContentView(R.layout.activity_module2);
    }

    public void onClick(View view) {
        Log.i(TAG, "跳转到 app");
        ARouter.getInstance().build("/app/MainActivity").navigation();
        finish();
    }
}
- 1
- 2
- 3
- 4
- 5
- 6
- 7
- 8
- 9
- 10
- 11
- 12
- 13
- 14
- 15
- 16
- 17
- 18
- 19
- 20
- 21
- 22
- 23
- 24
- 25
- 26
- 27
- 28
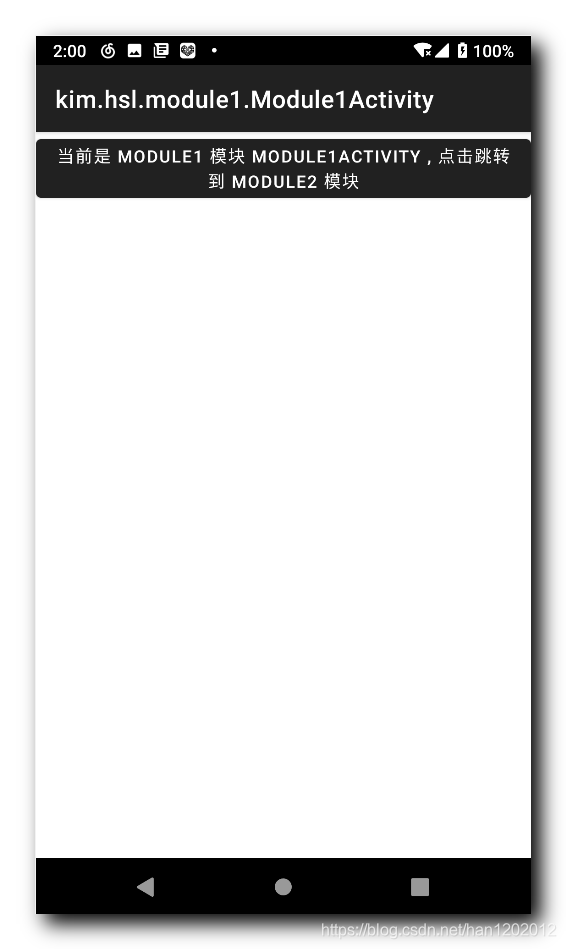
4、跳转效果
三、组件化配置
1、全局配置
全局配置 :
isModuleMode 是最终要的配置 , 通过该配置的 true / false 设置当前是否开启组件化 ,
- 集成模式 true ( 默认模式 , 模块化 )
- 组件模式 false ( 组件化 )
androidConfig 用于统一管理各个 Module 中的版本号 , 如编译版本号 , 最小版本号 , 目标版本号 ;
applicationId 用于保存各个模块的包名 , 尤其是 module 依赖库的包名 , 组件化的状态下 , 该 module 需要独立运行 , 必须配置一个 applicationId 包名 ;
dependencies 用于统一管理各个模块之间的依赖库 , 避免管理分散 ;
// ext 是 extension 扩展的含义
// ext 后的 {} 花括号 , 是闭包 ,
ext{

    // 是否是模块化模式
    // 集成模式 true ( 默认模式 , 模块化 )
    // 组件模式 false ( 组件化 )
    isModuleMode = true

    // 定义 android 变量 , 类型是字典 Map 集合
    // 其中定义了若干键值对集合
    androidConfig = [
            compileSdkVersion : 30,
            minSdkVersion : 18,
            targetSdkVersion : 30,
            versionCode : 1,
            versionName : "1.0"
    ]

    applicationId = [
            "app" : "kim.hsl.component",
            "module1" : "kim.hsl.module1",
            "module2" : "kim.hsl.module2",
    ]

    // androidx 版本号
    androidxVersion = "1.3.0"
    constraintlayoutVersion = "2.0.4"
    materialVersion = "1.3.0"

    // 统一管理依赖库
    dependencies = [
            // ${} 表示引用之前定义的变量
            "appcompat" : "androidx.appcompat:appcompat:${androidxVersion}",
            "constraintlayout" : "androidx.constraintlayout:constraintlayout:${constraintlayoutVersion}",
            "material" : "com.google.android.material:material:${materialVersion}"
    ]
}
- 1
- 2
- 3
- 4
- 5
- 6
- 7
- 8
- 9
- 10
- 11
- 12
- 13
- 14
- 15
- 16
- 17
- 18
- 19
- 20
- 21
- 22
- 23
- 24
- 25
- 26
- 27
- 28
- 29
- 30
- 31
- 32
- 33
- 34
- 35
- 36
- 37
- 38
2、工程下的 build.gradle 配置
在总的 build.gradle 配置中 , 引入上述全局配置 , 其作用就相当于将上述全局配置原封不动拷贝过来 ;
apply from: "component.gradle"
- 1
完整配置 :
// Top-level build file where you can add configuration options common to all sub-projects/modules.
// 将 component.gradle 配置文件中的内容导入到该位置
// 相当于引入头文件
apply from: "component.gradle"

buildscript {
    repositories {
        google()
        jcenter()
    }
    dependencies {
        classpath "com.android.tools.build:gradle:4.1.0"

        // NOTE: Do not place your application dependencies here; they belong
        // in the individual module build.gradle files
    }
}

allprojects {
    repositories {
        google()
        jcenter()
    }
}

task clean(type: Delete) {
    delete rootProject.buildDir
}
- 1
- 2
- 3
- 4
- 5
- 6
- 7
- 8
- 9
- 10
- 11
- 12
- 13
- 14
- 15
- 16
- 17
- 18
- 19
- 20
- 21
- 22
- 23
- 24
- 25
- 26
- 27
- 28
3、app 模块下的 build.gradle 配置
在 app 模块中重点关注 , 在组件模式下 , 一定不能引入依赖库 , 否则会报错 , 因为组件模式下这两个依赖库是两个可运行的独立应用 ;
dependencies {
    if (isModuleMode){
        // 集成模式下才能引用这两个 Library Module
        implementation project(path: ':module1')
        implementation project(path: ':module2')
    }
}
- 1
- 2
- 3
- 4
- 5
- 6
- 7
版本号 , applicationId , 依赖库 统一管理 :
从 Project 级别的配置中获取变量 :
def androidConfig = rootProject.ext.androidConfig
def appId = rootProject.ext.applicationId
def dep = rootProject.ext.dependencies
- 1
- 2
- 3
版本号 和 applicationId 统一管理 :
android {
    compileSdkVersion androidConfig.compileSdkVersion

    defaultConfig {
        applicationId appId["app"]
        minSdkVersion androidConfig.minSdkVersion
        targetSdkVersion androidConfig.targetSdkVersion
        versionCode androidConfig.versionCode
        versionName androidConfig.versionName
    }
- 1
- 2
- 3
- 4
- 5
- 6
- 7
- 8
- 9
- 10
依赖库统一管理 :
dependencies {

    //implementation 'androidx.appcompat:appcompat:1.3.0'
    //implementation 'androidx.constraintlayout:constraintlayout:2.0.4'
    //implementation 'com.google.android.material:material:1.3.0'

    implementation dep.appcompat
    implementation dep.constraintlayout
    implementation dep.material
}
- 1
- 2
- 3
- 4
- 5
- 6
- 7
- 8
- 9
- 10
完整配置 :
plugins {
    id 'com.android.application'
}

def androidConfig = rootProject.ext.androidConfig
def appId = rootProject.ext.applicationId
def dep = rootProject.ext.dependencies

android {
    compileSdkVersion androidConfig.compileSdkVersion
    buildToolsVersion "30.0.3"

    defaultConfig {
        applicationId appId["app"]
        minSdkVersion androidConfig.minSdkVersion
        targetSdkVersion androidConfig.targetSdkVersion
        versionCode androidConfig.versionCode
        versionName androidConfig.versionName

        testInstrumentationRunner "androidx.test.runner.AndroidJUnitRunner"

        // ARoute 需要的配置
        javaCompileOptions {
            annotationProcessorOptions {
                arguments = [AROUTER_MODULE_NAME: project.getName()]
            }
        }
    }

    buildTypes {
        release {
            minifyEnabled false
            proguardFiles getDefaultProguardFile('proguard-android-optimize.txt'), 'proguard-rules.pro'
        }
    }
    compileOptions {
        sourceCompatibility JavaVersion.VERSION_1_8
        targetCompatibility JavaVersion.VERSION_1_8
    }
}

dependencies {

    //implementation 'androidx.appcompat:appcompat:1.3.0'
    //implementation 'androidx.constraintlayout:constraintlayout:2.0.4'
    //implementation 'com.google.android.material:material:1.3.0'

    implementation dep.appcompat
    implementation dep.constraintlayout
    implementation dep.material

    testImplementation 'junit:junit:4.+'
    androidTestImplementation 'androidx.test.ext:junit:1.1.2'
    androidTestImplementation 'androidx.test.espresso:espresso-core:3.3.0'

    // 替换成最新版本, 需要注意的是api
    // 要与compiler匹配使用,均使用最新版可以保证兼容
    api 'com.alibaba:arouter-api:1.5.1'
    annotationProcessor 'com.alibaba:arouter-compiler:1.5.1'

    if (isModuleMode){
        // 集成模式下才能引用这两个 Library Module
        implementation project(path: ':module1')
        implementation project(path: ':module2')
    }

}
- 1
- 2
- 3
- 4
- 5
- 6
- 7
- 8
- 9
- 10
- 11
- 12
- 13
- 14
- 15
- 16
- 17
- 18
- 19
- 20
- 21
- 22
- 23
- 24
- 25
- 26
- 27
- 28
- 29
- 30
- 31
- 32
- 33
- 34
- 35
- 36
- 37
- 38
- 39
- 40
- 41
- 42
- 43
- 44
- 45
- 46
- 47
- 48
- 49
- 50
- 51
- 52
- 53
- 54
- 55
- 56
- 57
- 58
- 59
- 60
- 61
- 62
- 63
- 64
- 65
- 66
- 67
四、Module 模块的组件化配置
Module 模块的配置比较复杂 ;
首先 , Module 模块在组件模式下是可以独立运行的应用 , 必须有一个入口 Activity ; 但是 Module 下的清单文件是这样的 :
<?xml version="1.0" encoding="utf-8"?>
<manifest xmlns:android="http://schemas.android.com/apk/res/android"
    package="kim.hsl.module1">

    <application>
        <activity android:name=".Module1Activity"></activity>
    </application>

</manifest>
- 1
- 2
- 3
- 4
- 5
- 6
- 7
- 8
- 9
这就需要为其单独配置一个清单文件 , 并且还要兼容在组件模式下能适用原来的这个清单文件 ;
此外还需要为其配置 Application 类 , 需要为其单独指定 Java 文件 , 并且在模块化模式中 , 不使用该文件 ;
1、创建组件模式下使用的类和清单文件
在 module1 下创建 组件模式 时使用的 Application 类和清单文件 ;
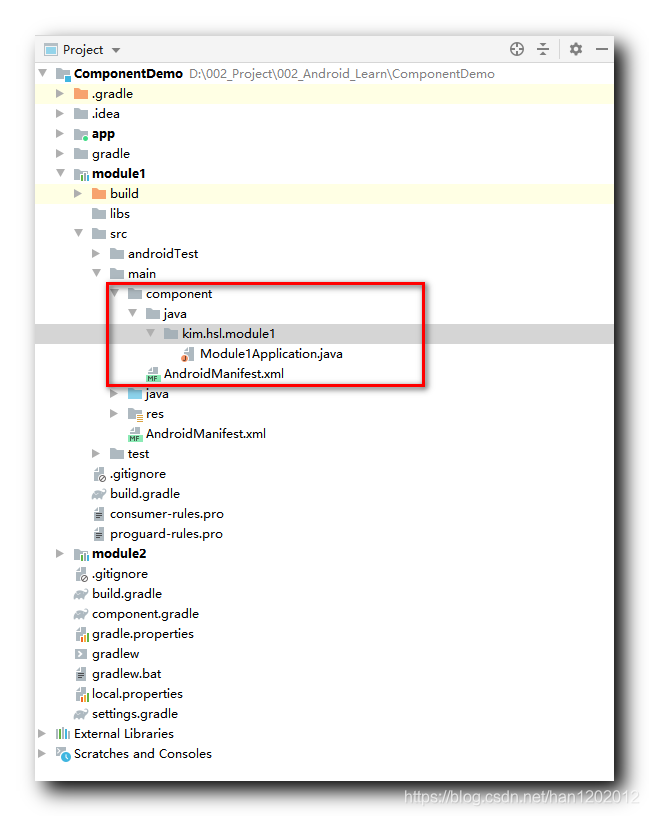
Application 类如下 :
package kim.hsl.module1;

import android.app.Application;

public class Module1Application extends Application {
    @Override
    public void onCreate() {
        super.onCreate();
    }
}
- 1
- 2
- 3
- 4
- 5
- 6
- 7
- 8
- 9
- 10
- 11
清单文件如下 :
<?xml version="1.0" encoding="utf-8"?>
<manifest xmlns:android="http://schemas.android.com/apk/res/android"
    package="kim.hsl.module1">

    <application
        android:name=".Module1Application"
        android:allowBackup="true"
        android:supportsRtl="true"
        android:theme="@style/Theme.MaterialComponents.DayNight.DarkActionBar">
        <activity android:name=".Module1Activity">
            <intent-filter>
                <action android:name="android.intent.action.MAIN" />

                <category android:name="android.intent.category.LAUNCHER" />
            </intent-filter>
        </activity>
    </application>

</manifest>
- 1
- 2
- 3
- 4
- 5
- 6
- 7
- 8
- 9
- 10
- 11
- 12
- 13
- 14
- 15
- 16
- 17
- 18
- 19
在 build.gradle 中 " android / defaultConfig / sourceSets " 下配置相关资源文件 , 如果在组件模式下 , 使用 manifest.srcFile 配置组件模式下的清单文件 , 使用 java.srcDirs 配置组件模式下使用的 Java 源文件 ;
这些配置在 集成模式 下都失效 , 因此使用 isModuleMode 进行判定当前是 组件模式 还是 集成模式 ;
android {
    defaultConfig {
        if (!isModuleMode){
            // 组件模式 : 必须配置 applicationId
            applicationId appId["module1"]
        }

        // 资源配置
        sourceSets{
            main{
                if (!isModuleMode){
                    // 组件化模式下使用 ComponentAndroidManifest.xml 作为清单文件
                    manifest.srcFile 'src/main/component/AndroidManifest.xml'

                    // 配置额外的 Java 源文件目录
                    java.srcDirs 'src/main/component/java', 'src/main/java'
                }else{
                    // 集成模式 下使用默认设置
                }
            }
        }
	}
}
- 1
- 2
- 3
- 4
- 5
- 6
- 7
- 8
- 9
- 10
- 11
- 12
- 13
- 14
- 15
- 16
- 17
- 18
- 19
- 20
- 21
- 22
- 23
2、动态切换 集成模式 / 组件模式
在 module 中需要考虑 集成模式 / 组件模式 动态切换问题 , 当 isModuleMode 设置为 true 时 , 当前是集成模式 , module 模块作为 app 模块的依赖库进行编译 , 因此需要加载 apply plugin: 'com.android.library' 插件 ;
当 isModuleMode 设置为 false 时 , 是 组件模式 , 每个 module 都是可以独立运行的应用 , 需要加载 apply plugin: 'com.android.application' 插件 ;
代码示例 :
// 根据 isModuleMode 动态切换 集成模式 / 组件模式
if (isModuleMode){
    // 集成模式
    apply plugin: 'com.android.library'
}else{
    // 组件模式
    apply plugin: 'com.android.application'
}
- 1
- 2
- 3
- 4
- 5
- 6
- 7
- 8
此外 , 如果是 组件模式 , module 是可以独立运行的应用 , 必须为其配置 applicationId ;
android {
    defaultConfig {
        if (!isModuleMode){
            // 组件模式 : 必须配置 applicationId
            applicationId appId["module2"]
        }
	}
}
- 1
- 2
- 3
- 4
- 5
- 6
- 7
- 8
3、module1 完整的 build.gradle 配置文件
// 根据 isModuleMode 动态切换 集成模式 / 组件模式
if (isModuleMode){
    // 集成模式
    apply plugin: 'com.android.library'
}else{
    // 组件模式
    apply plugin: 'com.android.application'
}

def androidConfig = rootProject.ext.androidConfig
def appId = rootProject.ext.applicationId
def dep = rootProject.ext.dependencies

android {
    compileSdkVersion androidConfig.compileSdkVersion
    buildToolsVersion "30.0.3"

    defaultConfig {
        if (!isModuleMode){
            // 组件模式 : 必须配置 applicationId
            applicationId appId["module1"]
        }

        minSdkVersion androidConfig.minSdkVersion
        targetSdkVersion androidConfig.targetSdkVersion
        versionCode androidConfig.versionCode
        versionName androidConfig.versionName

        testInstrumentationRunner "androidx.test.runner.AndroidJUnitRunner"
        consumerProguardFiles "consumer-rules.pro"

        // 资源配置
        sourceSets{
            main{
                if (!isModuleMode){
                    // 组件化模式下使用 ComponentAndroidManifest.xml 作为清单文件
                    manifest.srcFile 'src/main/component/AndroidManifest.xml'

                    // 配置额外的 Java 源文件目录
                    java.srcDirs 'src/main/component/java', 'src/main/java'
                }else{
                    // 集成模式 下使用默认设置
                }
            }
        }

        // ARoute 需要的配置
        javaCompileOptions {
            annotationProcessorOptions {
                arguments = [AROUTER_MODULE_NAME: project.getName()]
            }
        }
    }

    buildTypes {
        release {
            minifyEnabled false
            proguardFiles getDefaultProguardFile('proguard-android-optimize.txt'), 'proguard-rules.pro'
        }
    }
    compileOptions {
        sourceCompatibility JavaVersion.VERSION_1_8
        targetCompatibility JavaVersion.VERSION_1_8
    }
}

dependencies {

    //implementation 'androidx.appcompat:appcompat:1.3.0'
    //implementation 'androidx.constraintlayout:constraintlayout:2.0.4'
    //implementation 'com.google.android.material:material:1.3.0'

    implementation dep.appcompat
    implementation dep.constraintlayout
    implementation dep.material

    testImplementation 'junit:junit:4.+'
    androidTestImplementation 'androidx.test.ext:junit:1.1.2'
    androidTestImplementation 'androidx.test.espresso:espresso-core:3.3.0'

    // 替换成最新版本, 需要注意的是api
    // 要与compiler匹配使用,均使用最新版可以保证兼容
    api 'com.alibaba:arouter-api:1.5.1'
    annotationProcessor 'com.alibaba:arouter-compiler:1.5.1'
}
- 1
- 2
- 3
- 4
- 5
- 6
- 7
- 8
- 9
- 10
- 11
- 12
- 13
- 14
- 15
- 16
- 17
- 18
- 19
- 20
- 21
- 22
- 23
- 24
- 25
- 26
- 27
- 28
- 29
- 30
- 31
- 32
- 33
- 34
- 35
- 36
- 37
- 38
- 39
- 40
- 41
- 42
- 43
- 44
- 45
- 46
- 47
- 48
- 49
- 50
- 51
- 52
- 53
- 54
- 55
- 56
- 57
- 58
- 59
- 60
- 61
- 62
- 63
- 64
- 65
- 66
- 67
- 68
- 69
- 70
- 71
- 72
- 73
- 74
- 75
- 76
- 77
- 78
- 79
- 80
- 81
- 82
- 83
- 84
- 85
4、module2 完整的 build.gradle 配置文件
module1 与 module2 的配置项基本相同 ;
// 根据 isModuleMode 动态切换 集成模式 / 组件模式
if (isModuleMode){
    // 集成模式
    apply plugin: 'com.android.library'
}else{
    // 组件模式
    apply plugin: 'com.android.application'
}

def androidConfig = rootProject.ext.androidConfig
def appId = rootProject.ext.applicationId
def dep = rootProject.ext.dependencies

android {
    compileSdkVersion androidConfig.compileSdkVersion
    buildToolsVersion "30.0.3"

    defaultConfig {
        if (!isModuleMode){
            // 组件模式 : 必须配置 applicationId
            applicationId appId["module2"]
        }

        minSdkVersion androidConfig.minSdkVersion
        targetSdkVersion androidConfig.targetSdkVersion
        versionCode androidConfig.versionCode
        versionName androidConfig.versionName

        testInstrumentationRunner "androidx.test.runner.AndroidJUnitRunner"
        consumerProguardFiles "consumer-rules.pro"

        // 资源配置
        sourceSets{
            main{
                if (!isModuleMode){
                    // 组件化模式下使用 ComponentAndroidManifest.xml 作为清单文件
                    manifest.srcFile 'src/main/component/AndroidManifest.xml'

                    // 配置额外的 Java 源文件目录
                    java.srcDirs 'src/main/component/java', 'src/main/java'
                }else{
                    // 集成模式 下使用默认设置
                }
            }
        }

        // ARoute 需要的配置
        javaCompileOptions {
            annotationProcessorOptions {
                arguments = [AROUTER_MODULE_NAME: project.getName()]
            }
        }
    }

    buildTypes {
        release {
            minifyEnabled false
            proguardFiles getDefaultProguardFile('proguard-android-optimize.txt'), 'proguard-rules.pro'
        }
    }
    compileOptions {
        sourceCompatibility JavaVersion.VERSION_1_8
        targetCompatibility JavaVersion.VERSION_1_8
    }
}

dependencies {

    //implementation 'androidx.appcompat:appcompat:1.3.0'
    //implementation 'androidx.constraintlayout:constraintlayout:2.0.4'
    //implementation 'com.google.android.material:material:1.3.0'

    implementation dep.appcompat
    implementation dep.constraintlayout
    implementation dep.material

    testImplementation 'junit:junit:4.+'
    androidTestImplementation 'androidx.test.ext:junit:1.1.2'
    androidTestImplementation 'androidx.test.espresso:espresso-core:3.3.0'

    // 替换成最新版本, 需要注意的是api
    // 要与compiler匹配使用,均使用最新版可以保证兼容
    api 'com.alibaba:arouter-api:1.5.1'
    annotationProcessor 'com.alibaba:arouter-compiler:1.5.1'
}
- 1
- 2
- 3
- 4
- 5
- 6
- 7
- 8
- 9
- 10
- 11
- 12
- 13
- 14
- 15
- 16
- 17
- 18
- 19
- 20
- 21
- 22
- 23
- 24
- 25
- 26
- 27
- 28
- 29
- 30
- 31
- 32
- 33
- 34
- 35
- 36
- 37
- 38
- 39
- 40
- 41
- 42
- 43
- 44
- 45
- 46
- 47
- 48
- 49
- 50
- 51
- 52
- 53
- 54
- 55
- 56
- 57
- 58
- 59
- 60
- 61
- 62
- 63
- 64
- 65
- 66
- 67
- 68
- 69
- 70
- 71
- 72
- 73
- 74
- 75
- 76
- 77
- 78
- 79
- 80
- 81
- 82
- 83
- 84
- 85
5、module1 独立运行效果
<?xml version="1.0" encoding="utf-8"?>
<manifest xmlns:android="http://schemas.android.com/apk/res/android"
    package="kim.hsl.module1">

    <application
        android:name=".Module1Application"
        android:allowBackup="true"
        android:supportsRtl="true"
        android:theme="@style/Theme.MaterialComponents.DayNight.DarkActionBar">
        <activity android:name=".Module1Activity">
            <intent-filter>
                <action android:name="android.intent.action.MAIN" />

                <category android:name="android.intent.category.LAUNCHER" />
            </intent-filter>
        </activity>
    </application>

</manifest>
- 1
- 2
- 3
- 4
- 5
- 6
- 7
- 8
- 9
- 10
- 11
- 12
- 13
- 14
- 15
- 16
- 17
- 18
- 19
清单文件中设置的主题是黑色的 ;
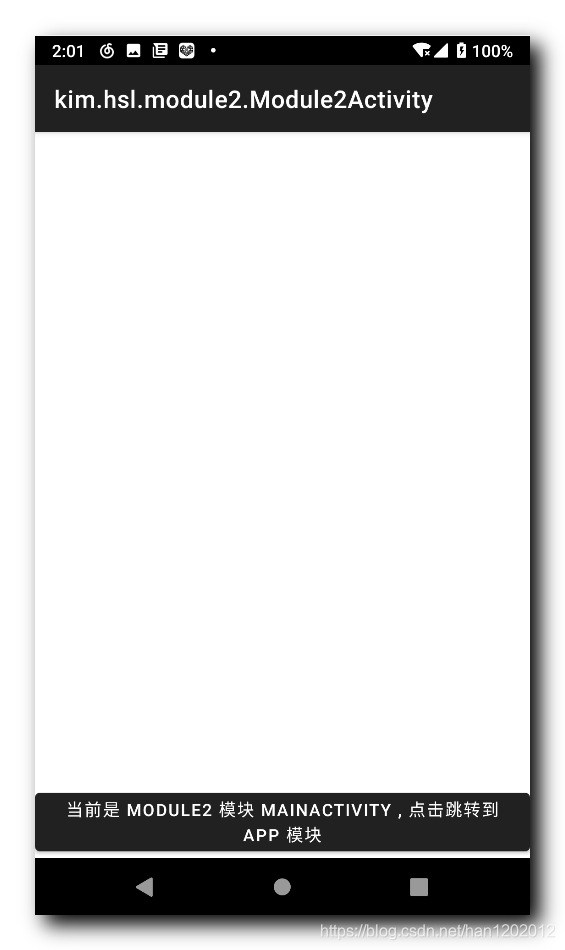
6、module2 独立运行效果
<?xml version="1.0" encoding="utf-8"?>
<manifest xmlns:android="http://schemas.android.com/apk/res/android"
    package="kim.hsl.module2">

    <application
        android:name=".Module2Application"
        android:allowBackup="true"
        android:supportsRtl="true"
        android:theme="@style/Theme.MaterialComponents.DayNight.DarkActionBar">
        <activity android:name=".Module2Activity">
            <intent-filter>
                <action android:name="android.intent.action.MAIN" />

                <category android:name="android.intent.category.LAUNCHER" />
            </intent-filter>
        </activity>
    </application>

</manifest>
- 1
- 2
- 3
- 4
- 5
- 6
- 7
- 8
- 9
- 10
- 11
- 12
- 13
- 14
- 15
- 16
- 17
- 18
- 19
清单文件中设置的主题是黑色的 ;
五、博客资源
博客源码 :
- GitHub : https://github.com/han1202012/ComponentDemo
- CSDN 下载 : https://download.csdn.net/download/han1202012/19197739

文章来源: hanshuliang.blog.csdn.net,作者:韩曙亮,版权归原作者所有,如需转载,请联系作者。
原文链接:hanshuliang.blog.csdn.net/article/details/117294139

- 点赞
- 收藏
- 关注作者
评论(0)