【C 语言】结构体 ( 结构体深拷贝 )
【摘要】
文章目录
一、结构体浅拷贝与深拷贝二、结构体深拷贝三、结构体深拷贝代码示例
一、结构体浅拷贝与深拷贝
结构体 中 嵌套了 指针 , 指针指向的内存 , 如果需要 m...
一、结构体浅拷贝与深拷贝
结构体 中 嵌套了 指针 , 指针指向的内存 , 如果需要 malloc 在堆内存中 分配内存 , 如果在 该类型 结构体变量 之间互相赋值 ,
- 如果直接赋值 , 就是浅拷贝 ;
- 如果赋值时 , 重新为 指针变量 在堆内存中重新申请内存 , 拷贝数据 , 就是 深拷贝 ;
浅拷贝 只会 拷贝 指针变量的值 , 不会拷贝 指针变量 指向的 内存空间的 数据 ;
二、结构体深拷贝
结构体深拷贝 : 如果要实现结构体的深拷贝 , 需要在 浅拷贝 的基础上 , 重新为 指针 在堆内存中分配数据 ;
/**
 * @brief copy_student 执行深拷贝操作
 * @param to
 * @param from
 */
void copy_student(Student *to, Student *from)
{
    // 结构体内存拷贝
    // 该拷贝是浅拷贝
    memcpy(to, from, sizeof (Student));

    // 结构体直接赋值 , 与上面的代码作用相同
    // 该拷贝也是浅拷贝
    //*to = *from;


    // 重新为 address 分配内存
    to->address = (char *)malloc(20);

    // 将 from 中的地址字符串数据 拷贝到 to 中
    strcpy(to->address, from->address);
}
- 1
- 2
- 3
- 4
- 5
- 6
- 7
- 8
- 9
- 10
- 11
- 12
- 13
- 14
- 15
- 16
- 17
- 18
- 19
- 20
- 21
- 22
三、结构体深拷贝代码示例
代码示例 :
#include <stdio.h>
#include <stdlib.h>
#include <string.h>

/**
 * @brief The Student struct
 * 定义 结构体 数据类型 , 同时为该结构体类型声明 别名
 * 可以直接使用 别名 结构体变量名 声明结构体类型变量
 * 不需要在前面添加 struct 关键字
 */
typedef struct Student
{
    // 声明变量时 , 会自动分配这 5 字节内存
    // 赋值时 , 可以直接使用 = 赋值字符串
    char name[5];
    int age;

    // 声明变量时 , 只会为 4 字节指针分配内存
    // 具体的 字符串内存 需要额外使用 malloc 申请内存
    // 赋值时 , 必须使用 strcpy 函数 , 向堆内存赋值
    char *address;
}Student;

/**
 * @brief copy_student 执行深拷贝操作
 * @param to
 * @param from
 */
void copy_student(Student *to, Student *from)
{
    // 结构体内存拷贝
    // 该拷贝是浅拷贝
    memcpy(to, from, sizeof (Student));

    // 结构体直接赋值 , 与上面的代码作用相同
    // 该拷贝也是浅拷贝
    //*to = *from;


    // 重新为 address 分配内存
    to->address = (char *)malloc(20);

    // 将 from 中的地址字符串数据 拷贝到 to 中
    strcpy(to->address, from->address);
}


/**
 * @brief 主函数入口
 * @return
 */
int main(int argc, char* argv[], char**env)
{
    Student s1;
    Student s2;

    // 为 s1.age 赋值
    s1.age = 18;

    // 为 s1.name 赋值
    // 该成员是 数组 , 在 s1 结构体变量声明时 , 就分配好了内存
    strcpy(s1.name, "Tom");

    // 给 s1.address 在堆内存分配内存
    s1.address = (char *)malloc(20);
    strcpy(s1.address, "Beijing");


    // 将 s1 赋值给 s2
    copy_student(&s2, &s1);

    printf("s1 : name = %s, age = %d, address = %s, %d\n", s1.name, s1.age, s1.address, &s1.address);
    printf("s2 : name = %s, age = %d, address = %s, %d\n", s2.name, s2.age, s2.address, &s2.address);

    // 命令行不要退出
    system("pause");
    return 0;
}
- 1
- 2
- 3
- 4
- 5
- 6
- 7
- 8
- 9
- 10
- 11
- 12
- 13
- 14
- 15
- 16
- 17
- 18
- 19
- 20
- 21
- 22
- 23
- 24
- 25
- 26
- 27
- 28
- 29
- 30
- 31
- 32
- 33
- 34
- 35
- 36
- 37
- 38
- 39
- 40
- 41
- 42
- 43
- 44
- 45
- 46
- 47
- 48
- 49
- 50
- 51
- 52
- 53
- 54
- 55
- 56
- 57
- 58
- 59
- 60
- 61
- 62
- 63
- 64
- 65
- 66
- 67
- 68
- 69
- 70
- 71
- 72
- 73
- 74
- 75
- 76
- 77
- 78
- 79
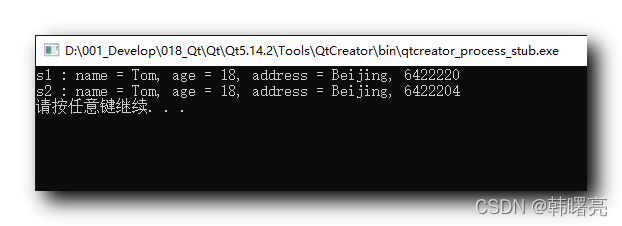
执行结果 :
s1 : name = Tom, age = 18, address = Beijing, 6422220
s2 : name = Tom, age = 18, address = Beijing, 6422204
请按任意键继续. . .
- 1
- 2
- 3

文章来源: hanshuliang.blog.csdn.net,作者:韩曙亮,版权归原作者所有,如需转载,请联系作者。
原文链接:hanshuliang.blog.csdn.net/article/details/121685208
【版权声明】本文为华为云社区用户转载文章,如果您发现本社区中有涉嫌抄袭的内容,欢迎发送邮件进行举报,并提供相关证据,一经查实,本社区将立刻删除涉嫌侵权内容,举报邮箱:
cloudbbs@huaweicloud.com
- 点赞
- 收藏
- 关注作者


评论(0)