【Android 应用开发】Android 数据存储 之 SQLite数据库详解

.
作者 :万境绝尘
转载请注明出处 : http://blog.csdn.net/shulianghan/article/details/19028665
.
SQLiteDataBase示例程序下载地址 :
-- GirHub - https://github.com/han1202012/SQLite_NewsList.git.
SQLiteOpenHelper示例程序下载地址 :
-- GitHub : https://github.com/han1202012/NewsSearch.git .
SQLite数据库简介 :
-- 轻量级 : SQLite数据库是一个轻量级的数据库, 适用于少量数据的CURD;
-- 文件本质 : SQLite数据库支持大部分SQL语法, 允许使用SQL语句操作数据库, 其本质是一个文件, 不需要安装启动;
-- 数据读写 : SQLite数据库打开只是打开了一个文件的读写流, 如果有大数据量读写, 需要高并发存储, 那么就不应该使用SQLite;
一. 使用SQLiteDataBase操作数据库
SQLiteDataBase简介 : SQLIteDataBase代表一个数据库, 其本质是一个数据库文件, 创建该类对象, 可以使用该对象的一系列方法操作数据库;
1. SQLiteDataBase方法介绍
(1) 打开数据库方法
使用静态方法打开文件对应的数据库, 数据库文件通常是 文件名.db 形式的;
1> 根据标志位创建数据库
打开数据库: 根据标志位flag要求打开数据库, 这个方法很强大;
public static SQLiteDatabase openDatabase (String path, SQLiteDatabase.CursorFactory factory, int flags)
-- 参数① path : path 要打开 或者 需要创建的 数据库文件的路径;
-- 参数② factory : 当打开的数据库执行查询语句的时候 会创建一个Cursor对象, 这时会调用Cursor工厂类 factory, 可以填写null默认值;
-- 参数③ flag :
OPEN_READWRITE 打开一个读写数据库, 如果磁盘满了, 之前写入的也作废;
READ_OPENONLY 打开只读数据库, 这时读取数据库的可靠方法;
CREATE_IF_NECESSARY 打开数据库, 如果数据库不存在, 就创建这个数据库;
NO_LOCALIZED_CALLATORS 打开数据库 不根据本地语言顺序进行排序, 使用这种模式创建数据库, 排序器不会被创建, 使用这个数据库 和 创建这个数据库的时候必须都使用这个标识, 如果这个标识被使用了, 那么setLocal()方法将不会起到任何作用;
2> 根据文件打开或创建数据库
打开数据库 : 根据数据库文件 对象打开数据库, 如果数据库不存在就创建数据库;
public static SQLiteDatabase openOrCreateDatabase (File file, SQLiteDatabase.CursorFactory factory)
3> 根据路径打开或创建数据库
打开数据库 : 根据数据库文件 路径打开数据库, 如果数据库不存在就创建数据库;
public static SQLiteDatabase openOrCreateDatabase (String path, SQLiteDatabase.CursorFactory factory)
(2) 操作数据库方法
1> 执行SQL语句动态参数
执行SQL语句, 如果需要动态传入SQL语句参数, 将动态参数放入一个Object[]数组中;
public void execSQL (String sql, Object[] bindArgs)
该方法适用于 :修改表结构,创建和删除表 触发器 视图 索引等,重建数据库表的索引,数据库升级,事物中保存点,没有返回值的语句;
参数介绍 :
-- 参数① sql: 要执行的SQL语句, 只能执行一条, 多条语句用分号隔开不管用, 参数使用 "?" 占位符代替;
-- 参数② bingArgs: 替换上面SQL语句中的 "?" 占位符, 按照数组中的顺序依次替换;
2> 执行固定的SQL语句
该方法执行固定的SQL语句, 没有参数, 用法与上面的 execSQL(sql, bindArgs)一致;
public void execSQL (String sql)
3> 插入数据
插入数据 : 向数据库中的 一个表 插入 一行 数据;
public long insert (String table, String nullColumnHack, ContentValues values)
参数介绍
-- 参数① table : 数据库中的表名, 要插入数据的表;
-- 参数② nullColumnHack : 该参数是可选的, 数据库表中不允许插入一行空的数据, 插入数据至少有一列不为null才能插入, 如果后面的values是null, 并且不知道列的名称, 那么插入操作会失败, 为了避免这种情况, 就出现了本参数, 为了防止 values为null的情况;
-- 参数③ values : 相当于一个Map集合,键 是列名,值 是对应列名要插入的数据;
插入原则 : 不管 第三个 ContentValues参数 是否为null, 执行insert()方法都会添加一条记录, 如果values参数为null, 会添加一个除主键之外其它字段都为null的记录;
nullColumnHack参数作用分析SQL语句 : 在SQL语句中在表名后面必须跟着一个列名, 例如 " insert into appale_info(name) values("乔帮主") ", 这是values参数不为null的情况下,如果values参数为null, 那么导致表名 "apple_info" 后面的列名也为null, 这样SQL语句就不合法了, 因此这里必须加上一个默认的列名, 以防values参数为null;
实例 :
-
//创建表数据, 键 为 列名, 值 为 对应的表数据
-
ContentValues values = new ContentValues();
-
values.put("name", "乔帮主");
-
values.put("age", 54);
-
//向表中插入数据, 如果values为null, 就会添加一个
-
long rowsNum = db.insert("apple_info", "name", values);
上面代码转成SQL语句 :
insert into apple_info (name, age) values ('乔帮主', 54)假如values为null转化成SQL语句 :
insert into apple_info (name) values ()4> 更新数据
更新指定表中的特定数据 :
public int update (String table, ContentValues values, String whereClause, String[] whereArgs)
参数介绍 :
-- 参数① table : 数据库表名称;
-- 参数② values : 该值类似Map集合, 键 是 列名, 值 是 要更新的数据, 这个值可以为null, 如果为null 这些数据会被清空;
-- 参数③ whereClause: where选择语句, 选择那些行进行数据的更新, 如果该参数为 null, 就会修改所有行;
-- 参数④ whereArgs : where选择语句的参数, 逐个替换 whereClause 中的占位符;
返回值 : 返回修改的行数;
实例 :
-
//创建表数据, 键 为 列名, 值 为 对应的表数据
-
ContentValues values = new ContentValues();
-
values.put("name", "乔帮主");
-
values.put("age", 54);
-
int result = db.update("apple_info", values, "name=?", new String[]{"乔帮主"});
update apple_info set name='乔帮主', age=56 where name='乔帮主'
5> 删除数据
删除指定表中特定数据 :
public int delete (String table, String whereClause, String[] whereArgs)
-- 参数① table : 要操作的数据库表名;
-- 参数② whereClause : where选择语句, 选择哪些行要被删除, 如果为null, 就删除所有行;
-- 参数③ whereArgs : where语句的参数, 逐个替换where语句中的 "?" 占位符;
实例 :
int result = db.delete("apple_info", "name=?", new String[]{"乔帮主"});
转化为SQL
delete apple_info where name='乔帮主'
6> 最全面查询
.
-
public Cursor query (boolean distinct, String table, String[] columns,
-
String selection, String[] selectionArgs,
-
String groupBy, String having,
-
String orderBy, String limit,
-
CancellationSignal cancellationSignal)
参数介绍 :
-- 参数① distinct : 是否去重复, true 去重复;
-- 参数② table : 要查询的表名;
-- 参数③ columns : 要查询的列名, 如果为null, 就会查询所有的列;
-- 参数④ whereClause : 条件查询子句, 在这里可以使用占位符 "?";
-- 参数⑤ whereArgs : whereClause查询子句中的传入的参数值, 逐个替换 "?" 占位符;
-- 参数⑥ groupBy: 控制分组, 如果为null 将不会分组;
-- 参数⑦ having : 对分组进行过滤;
-- 参数⑧ orderBy : 对记录进行排序;
-- 参数⑨ limite : 用于分页, 如果为null, 就认为不进行分页查询;
-- 参数⑩ cancellationSignal : 进程中取消操作的信号, 如果操作被取消, 当查询命令执行时会抛出 OperationCanceledException 异常;
实例 :
-
Cursor cursor = db.query(true, "apple_info", new String[]{"_id, name, age"},
-
"name like ?", new String[]{"乔%"},
-
null, null,
-
"_id desc", "5, 10");
-
cursor.close();
7> 执行SQL查询语句
通过执行SQL语句, 查询结果;
public Cursor rawQuery (String sql, String[] selectionArgs)
-- 参数① sql : 要执行的SQL语句, 可以使用 "?" 作为占位符;
-- 参数② selectionArgs : sql语句中的参数, 按照次序依次替换占位符 "?";
(3) SQLite中的事务
开启事务 :
public void beginTransaction ()
public void endTransaction ()
public boolean inTransaction ()
示例代码 :
-
db.beginTransaction();
-
try {
-
-
... ...
-
-
//调用该方法设置事务成功, 如果没有调用该方法, 在调用endTransaction()方法的时候会回滚事务
-
db.setTransactionSuccessful();
-
} finally {
-
db.endTransaction();
-
}
2. Cursor的相关方法
(1) 移动记录指针方法
1> 移动到指定行数
方法作用 : 将记录指针向上 或者 向下移动offset行, offset为正数就是向下,为负数 就是向上;
public abstract boolean move (int offset)
2> 移动到第一行
记录指针移动到第一行, 如果移动成功返回true;
public abstract boolean moveToFirst ()
3> 移动到最后一行
记录指针移动到最后一行, 如果移动成功返回true;
public abstract boolean moveToLast ()
4> 移动到上一行
移动到上一行, 成功返回true;
public abstract boolean moveToPrevious ()
5> 移动到下一行
移动到下一行, 成功返回true;
public abstract boolean moveToNext ()
6> 移动到指定行
移动到指定行, 成功返回true;
public abstract boolean moveToPosition (int position)
(2) 获取记录数据方法
获取某个类型的数据 :
-
public abstract float getFloat (int columnIndex);//获取浮点型数据
-
public abstract int getInt (int columnIndex);//获取整型数据
-
public abstract long getLong (int columnIndex);//获取长整型数据
-
public abstract short getShort (int columnIndex);//获取短整型数据
-
public abstract String getString (int columnIndex);//获取字符串数据
3. sqlite3工具介绍
工具简介 : sqlite3 是一个简单的数据库管理工具, 该用于位于 SDK tools 目录下;
获取数据库文件 : 使用虚拟机运行程序在 data/data/包名 安装目录下, 数据库文件在里面可以找到;
打开数据库 : 进入cmd命令行, 使用sqlite3 数据库文件 命令打开数据库;
常用的sqlite3 工具命令:
-- 打开数据库: sqlite3 文件路径名 ;
-- 查看当前数据库 : .database ;
-- 查看当前数据库中的表 : .tables ;
-- 查看sqlite3的帮助 : .help ;
4. SQLite的数据存储格式
支持的数据类型 : SQLite数据库 内部 只支持null,integer,real(浮点型),text(文本),blob(二进制数据) 五种数据类型;
数据类型转换 : SQLite可以接受varchar(n), char(n), decimal(p,s) 等数据类型, 不过内部的机制使将这个数据类型转换成上面的五种数据类型进行存储;
无类型限制: SQLite允许将各种类型的数据保存到各种类型的字段中, 没有严格的某个字段 必须存放某个类型的数据这样的限制, 因此创建数据库 和 插入数据的时候不用关心这个列的数据类型;
-- eg: 在SQLite中可以将字符串数据放到整型字段中, 但是主键id, 不能随便放其它数据, 只能存放64卫整数;
二. 新闻列表程序实例
1. 要点解析
(1) 数据库相关操作
使用 openOrCreateDatabase()方法创建数据库 : 传入数据库的路径 和 CursorFactory对象;
-- Context.getFilesDir()方法: 该方法返回 内存中应用安装目录中的 文件存储目录的绝对路径, 在这里是 "data/data/shuliang.han.database/files", 整个数据库的完整路径是 :"data/data/shuliang.han.database/files/news.db";
-
//打开或者创建数据库, 这里是创建数据库
-
db = SQLiteDatabase.openOrCreateDatabase(this.getFilesDir().toString() + "/news.db", null);
创建表 使用 execSQL()方法
-
db.execSQL("create table news_table (" +
-
"_id integer primary key autoincrement, " +
-
"news_tittle varchar(50), " +
-
"news_content varchar(5000))");
db.execSQL("insert into news_table values(null, ?, ?)", new String[]{tittle, content});
查询数据 rawQuery()方法
Cursor cursor = db.rawQuery("select * from news_table", null);
关闭数据库 是否为null 是打开的
-
@Override
-
protected void onDestroy() {
-
super.onDestroy();
-
//在Activity销毁的时候, 如果没有
-
if(db != null && db.isOpen())
-
db.close();
-
}
(2) ListView相关操作
创建SimpleCursorAdapter适配器 :
参数解析 :
-- 参数① context : 上下文对象;
-- 参数② resource : ListView条目的布局;
-- 参数③ cursor : 从数据库表中查询出来的记录;
-- 参数④ string[]: 数据库中表的字段名称;
-- 参数⑤ int[]: 将数据库中每行的字段 按照对应顺序 放入到该数组对应组件中;
-
SimpleCursorAdapter cursorAdapter = new SimpleCursorAdapter(
-
getApplicationContext(),
-
R.layout.item,
-
cursor,
-
new String[]{"news_tittle", "news_content"},
-
new int[]{R.id.tittle, R.id.content});
将创建的适配器设置给ListView
listView.setAdapter(cursorAdapter);
2. 详细代码
SQLiteDataBase示例程序下载地址 :
-- GirHub - https://github.com/han1202012/SQLite_NewsList.git.
(1) MainActivity代码
-
package shuliang.han.database;
-
-
import android.app.Activity;
-
import android.database.Cursor;
-
import android.database.sqlite.SQLiteDatabase;
-
import android.database.sqlite.SQLiteException;
-
import android.os.Bundle;
-
import android.view.View;
-
import android.widget.EditText;
-
import android.widget.ListView;
-
import android.widget.SimpleCursorAdapter;
-
-
public class MainActivity extends Activity {
-
-
private SQLiteDatabase db; //数据库对象
-
private ListView listView; //列表
-
private EditText et_tittle; //输入的新闻标题
-
private EditText et_content; //输入的新闻内容
-
-
@Override
-
protected void onCreate(Bundle savedInstanceState) {
-
super.onCreate(savedInstanceState);
-
setContentView(R.layout.activity_main);
-
-
//打开或者创建数据库, 这里是创建数据库
-
db = SQLiteDatabase.openOrCreateDatabase(this.getFilesDir().toString() + "/news.db", null);
-
System.out.println(this.getFilesDir().toString() + "/news.db");
-
-
//初始化组件
-
listView = (ListView) findViewById(R.id.lv_news);
-
et_tittle = (EditText) findViewById(R.id.et_news_tittle);
-
et_content = (EditText) findViewById(R.id.et_news_content);
-
-
-
}
-
-
/*
-
* 插入数据到数据库中的触发点击事件
-
* 如果数据库存在就能正常访问数据库, 如果不存在访问数据库的时候就会出现 SQLiteException 异常
-
* 正常访问 : 获取输入的新闻标题 和 新闻内容, 将标题 和 内容插入到数据库, 重新获取Cursor, 使用Cursor刷新ListView内容
-
* 异常访问 : 如果访问出现了SQLiteException异常, 说明数据库不存在, 这时就需要先创建数据库
-
*/
-
public void insertNews(View view) {
-
String tittle = et_tittle.getText().toString();
-
String content = et_content.getText().toString();
-
-
try{
-
insertData(db, tittle, content);
-
Cursor cursor = db.rawQuery("select * from news_table", null);
-
inflateListView(cursor);
-
}catch(SQLiteException exception){
-
db.execSQL("create table news_table (" +
-
"_id integer primary key autoincrement, " +
-
"news_tittle varchar(50), " +
-
"news_content varchar(5000))");
-
insertData(db, tittle, content);
-
Cursor cursor = db.rawQuery("select * from news_table", null);
-
inflateListView(cursor);
-
}
-
-
}
-
-
/*
-
* 向数据库中插入数据
-
* 参数介绍 :
-
* -- 参数① : SQL语句, 在这个语句中使用 ? 作为占位符, 占位符中的内容在后面的字符串中按照顺序进行替换
-
* -- 参数② : 替换参数①中占位符中的内容
-
*/
-
private void insertData(SQLiteDatabase db, String tittle, String content) {
-
db.execSQL("insert into news_table values(null, ?, ?)", new String[]{tittle, content});
-
}
-
-
/*
-
* 刷新数据库列表显示
-
* 1. 关联SimpleCursorAdapter与数据库表, 获取数据库表中的最新数据
-
* 2. 将最新的SimpleCursorAdapter设置给ListView
-
*/
-
private void inflateListView(Cursor cursor) {
-
SimpleCursorAdapter cursorAdapter = new SimpleCursorAdapter(
-
getApplicationContext(),
-
R.layout.item,
-
cursor,
-
new String[]{"news_tittle", "news_content"},
-
new int[]{R.id.tittle, R.id.content});
-
-
listView.setAdapter(cursorAdapter);
-
}
-
-
@Override
-
protected void onDestroy() {
-
super.onDestroy();
-
//在Activity销毁的时候, 如果没有
-
if(db != null && db.isOpen())
-
db.close();
-
}
-
-
}
(2) XML布局文件
主布局文件 :
-
<LinearLayout xmlns:android="http://schemas.android.com/apk/res/android"
-
xmlns:tools="http://schemas.android.com/tools"
-
android:layout_width="match_parent"
-
android:layout_height="match_parent"
-
android:paddingBottom="@dimen/activity_vertical_margin"
-
android:paddingLeft="@dimen/activity_horizontal_margin"
-
android:paddingRight="@dimen/activity_horizontal_margin"
-
android:paddingTop="@dimen/activity_vertical_margin"
-
tools:context=".MainActivity"
-
android:orientation="vertical">
-
-
<TextView
-
android:layout_width="wrap_content"
-
android:layout_height="wrap_content"
-
android:text="新闻标题" />
-
-
<EditText
-
android:id="@+id/et_news_tittle"
-
android:layout_width="fill_parent"
-
android:layout_height="wrap_content"
-
android:singleLine="true"
-
android:hint="点击此处输入新闻标题"/>
-
-
<TextView
-
android:layout_width="wrap_content"
-
android:layout_height="wrap_content"
-
android:text="新闻内容" />
-
-
<EditText
-
android:id="@+id/et_news_content"
-
android:layout_width="fill_parent"
-
android:layout_height="wrap_content"
-
android:lines="2"
-
android:hint="点击此处输入新闻内容"/>
-
-
<Button
-
android:id="@+id/bt_add_news"
-
android:layout_width="wrap_content"
-
android:layout_height="wrap_content"
-
android:onClick="insertNews"
-
android:text="添加新闻" />
-
-
<ListView
-
android:id="@+id/lv_news"
-
android:layout_width="fill_parent"
-
android:layout_height="fill_parent"/>
-
-
</LinearLayout>
ListView条目布局文件
-
<?xml version="1.0" encoding="utf-8"?>
-
<LinearLayout xmlns:android="http://schemas.android.com/apk/res/android"
-
android:layout_width="match_parent"
-
android:layout_height="match_parent"
-
android:orientation="vertical" >
-
-
<TextView
-
android:id="@+id/tittle"
-
android:layout_width="wrap_content"
-
android:layout_height="wrap_content"
-
android:textSize="15dp"
-
android:textColor="#FFFF00"/>
-
-
<TextView
-
android:id="@+id/content"
-
android:layout_width="fill_parent"
-
android:layout_height="wrap_content"
-
android:textSize="10dp"
-
android:textColor="#00FF00"/>
-
-
</LinearLayout>
效果图 :
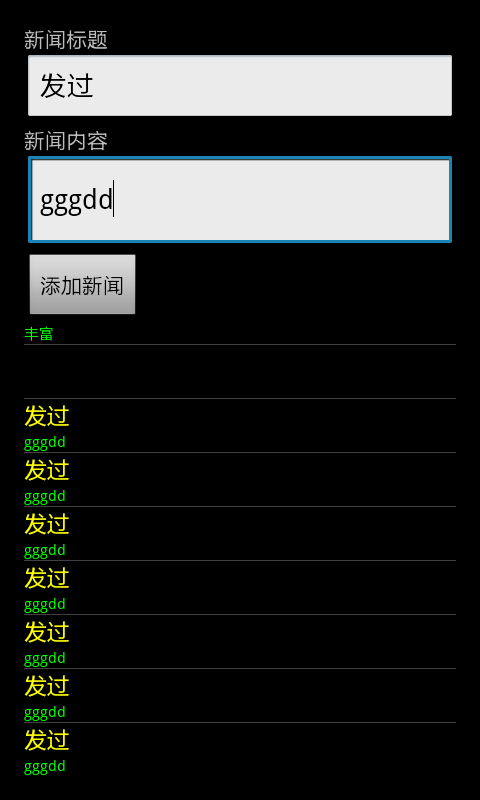
三. SQLiteOpenHelper类操作数据库
单独使用SQLiteDataBase操作数据库的弊端: 对数据库的表进行操作的时候, 我们不知道数据库中表是否存在, 首先要进行表操作, 在出现异常之后, 在异常捕获的try catch 代码块中创建表, 这样操作很繁琐;
SQLiteOpenHelper作用 : 该类用来管理数据库的创建 和版本更新, 通常使用其子类, 实现onCreate() 和 onUpgrade()方法;
1. 类中的方法介绍
(1) 读写打开数据库
以读写的方式打开数据库 :先以读写方式打开数据库, 如果磁盘满了, 就会打开失败,然后会尝试以只读的方式打开数据库;
public SQLiteDatabase getReadableDatabase ()
(2) 写方式打开数据库
以写的方式打开数据库 :先以读写方式打开数据库, 如果磁盘满了, 就会出错,不推荐使用这种方法, 使用 getReadableDatabase()方法即可;
public SQLiteDatabase getWritableDatabase ()
(3) 创建数据库
创建数据库 : 第一次创建数据库的时候回调该方法, 一般在该方法中 创建数据库表;
public abstract void onCreate (SQLiteDatabase db)
-- 调用时机: 当使用getReadableDatabase()方法 获取数据库 实例 的时候, 如果数据库不存在, 就会调用这个方法;
-- 方法内容 : 重写该方法一般 将 创建数据库表的 execSQL()方法 和 初始化表数据的一些 insert()方法写在里面;
(4) 更新数据库
更新数据库 : 升级软件的时候更新数据库表结构, 在数据库版本发生变化的时候调用;
public abstract void onUpgrade (SQLiteDatabase db, int oldVersion, int newVersion)
-- 调用时机 : 数据库版本发生变化的时候回调, newVersion是当前数据库版本号, oldVersion是旧的版本号;
-- 识别版本 : 创建SQLiteOpenHelper子类对象的时候,必须传入一个version参数, 该参数就是当前数据库版本, 只要这个版本高于之前的版本, 就会触发这个onUpgrade()方法;
(5) 关闭数据库
关闭打开的数据库 :
public synchronized void close ()
2. 示例程序要点解析
(1) 在onCreate()方法中创建表
创建数据库表 : 定义一个数据库SQL语句, 之后在onCreate()方法中 execSQL()执行该语句;
-
final String SQL_CREATE_TABLE = "create table news_table (" +
-
"_id integer primary key autoincrement, " +
-
"news_tittle varchar(50), " +
-
"news_content varchar(5000))";
-
@Override
-
public void onCreate(SQLiteDatabase db) {
-
db.execSQL(SQL_CREATE_TABLE);
-
}
(2) 插入数据
插入内容 : 打开数据库,如果存在直接插入内容, 如果不存在就创建表在插入内容;
-
helper.getReadableDatabase().execSQL("insert into news_table values(null, ?, ?)",
-
new String[]{tittle, content});
(3) 查询数据库
查询数据 : 使用SQLiteOpenHelper子类对象打开数据库, 并且执行查询语句;
Cursor cursor = helper.getReadableDatabase().rawQuery("select * from news_table", null);
(4) 解析Cursor记录
将Cursor中的数据转为 ArrayList<Map<String, String>> 类型数据 :
-- 遍历条件 : Cursor的moveToNext()方法, 如果成功移到下一个记录, 就执行循环内容;
-- 获取表中数据 : Cursor的getString(1) 就是获取 这一样记录中的 第二列的数据, 第一列是 "_id" 主键;
-
private ArrayList<Map<String, String>> cursor2list(Cursor cursor) {
-
ArrayList<Map<String, String>> list = new ArrayList<Map<String,String>>();
-
-
//遍历Cursor
-
while(cursor.moveToNext()){
-
Map<String, String> map = new HashMap<String, String>();
-
map.put("tittle", cursor.getString(1));
-
map.put("content", cursor.getString(2));
-
list.add(map);
-
}
-
return list;
-
}
(5) 开启一个Activity并传递数据
流程 :
-- ① 创建Bundle对象 : 该对象可以存放数据, 并可以放到Intent对象中, 传递给另外的组件;
-- ② Bundle存数据 : 使用putSerializable()方法, 可以存放对象, 将 ArrayList<Map<String, String>> 存入里面;
-- ③ 创建Intent对象 : 传入要跳转的Activity的Class对象;
-- ④ Bundle加入Intent对象 : 将存放好数据的Bundle对象加入到Intent对象中;
-- ⑤ 开启Activity : 使用startActivity(intent)方法跳转Activity;
-
Bundle bundle = new Bundle();
-
bundle.putSerializable("news", cursor2list(cursor));
-
Intent intent = new Intent(this, SearchResultActivity.class);
-
intent.putExtras(bundle);
-
startActivity(intent);
(6) 在Activity中获取Intent传递的数据
执行流程 :
-- 获取Intent对象: 调用 getIntent()方法, 可以获取Activity跳转到额Intent对象;
-- 获取Bundle对象 : Intent对象调用 getExtras()方法, 可以获取存放数据的Bundle对象;
-- 将数据从Bundle对象取出 : 调用getSerializable()方法, 并将返回值转换成 List<Map<String, String>> 类型;
-
//获取跳转到该Activity的intent对象
-
Intent intent = getIntent();
-
//获取Intent对象所携带的数据
-
Bundle bundle = intent.getExtras();
-
//从Bundle中取出List<Map<String,String>>数据
-
@SuppressWarnings("unchecked")
-
List<Map<String, String>> list = (List<Map<String, String>>)bundle.getSerializable("news");
(7) 适配器转化
将 List<Map<String, String>> 类型数据转为 SimpleAdapter类型适配器 :
参数介绍 :
-- 参数① context : 上下文对象;
-- 参数②List<Map<String, String>> : 数据源;
-- 参数③ id : ListView元素条目布局文件;
-- 参数④ string[] : 数据源中Map对象的键;
-- 参数⑤ int[]: 数据源中Map每个键对应的值 存放的组件 id;
-
SimpleAdapter adapter = new SimpleAdapter(
-
getApplicationContext(), //上下文对象
-
list, //数据源
-
R.layout.item, //List显示布局
-
new String[]{"tittle", "content"}, //List中map的键值
-
new int[]{R.id.tittle, R.id.content}); //填充到的布局文件
3. 实例程序源码
(1) SQLiteOpenHelper源码
-
package shuliang.han.newssearch;
-
-
import android.content.Context;
-
import android.database.sqlite.SQLiteDatabase;
-
import android.database.sqlite.SQLiteOpenHelper;
-
-
public class NewsSearchDatabaseHelper extends SQLiteOpenHelper {
-
-
final String SQL_CREATE_TABLE = "create table news_table (" +
-
"_id integer primary key autoincrement, " +
-
"news_tittle varchar(50), " +
-
"news_content varchar(5000))";
-
-
/*
-
* 构造方法 :
-
* 参数介绍 :
-
* 参数① : 上下文对象
-
* 参数② : 数据库名称
-
* 参数③ : 数据库版本号
-
*/
-
public NewsSearchDatabaseHelper(Context context, String name, int version) {
-
super(context, name, null, version);
-
}
-
-
@Override
-
public void onCreate(SQLiteDatabase db) {
-
db.execSQL(SQL_CREATE_TABLE);
-
}
-
-
@Override
-
public void onUpgrade(SQLiteDatabase db, int oldVersion, int newVersion) {
-
System.out.println("call update");
-
}
-
-
}
(2) MainActivity源码
-
package shuliang.han.newssearch;
-
-
import java.util.ArrayList;
-
import java.util.HashMap;
-
import java.util.Map;
-
-
import android.app.Activity;
-
import android.content.Intent;
-
import android.database.Cursor;
-
import android.os.Bundle;
-
import android.view.View;
-
import android.widget.EditText;
-
import android.widget.ListView;
-
import android.widget.SimpleCursorAdapter;
-
-
public class MainActivity extends Activity {
-
-
private NewsSearchDatabaseHelper helper; //数据库帮助类
-
private EditText et_tittle; //输入新闻标题
-
private EditText et_content; //输入新闻内容
-
private ListView listView; //显示新闻列表
-
-
@Override
-
protected void onCreate(Bundle savedInstanceState) {
-
super.onCreate(savedInstanceState);
-
setContentView(R.layout.activity_main);
-
-
helper = new NewsSearchDatabaseHelper(getApplicationContext(), "news", 1);
-
-
//初始化控件
-
et_tittle = (EditText) findViewById(R.id.et_news_tittle);
-
et_content = (EditText) findViewById(R.id.et_news_content);
-
listView = (ListView) findViewById(R.id.lv_news);
-
-
}
-
-
/*
-
* 按钮点击事件
-
* 通过判断被点击的组件, 执行不同的操作
-
*/
-
public void onClick(View view) {
-
int id = view.getId();
-
switch (id) {
-
case R.id.bt_add_news:
-
insertNews();
-
break;
-
case R.id.bt_query_news:
-
queryNews();
-
break;
-
default:
-
break;
-
}
-
}
-
-
/*
-
* 插入新闻数据
-
* 1. 从EditText组件中获取新闻的标题 和 新闻内容
-
* 2. 获取数据库并从将 新闻标题 和 内容 插入到数据库中
-
* 3. 重新查询数据库 获得Cursor对象
-
* 4. 根据cursor对象创建SimpleCursorAdapter对象
-
* 5. 将SimpleCursorAdapter设置给ListView, 显示新闻列表
-
*/
-
private void insertNews() {
-
String tittle = et_tittle.getText().toString();
-
String content = et_content.getText().toString();
-
-
helper.getReadableDatabase().execSQL("insert into news_table values(null, ?, ?)",
-
new String[]{tittle, content});
-
-
Cursor cursor = helper.getReadableDatabase().rawQuery("select * from news_table", null);
-
inflateListView(cursor);
-
}
-
-
/*
-
* 刷新数据库列表显示
-
* 1. 关联SimpleCursorAdapter与数据库表, 获取数据库表中的最新数据
-
* 2. 将最新的SimpleCursorAdapter设置给ListView
-
*/
-
private void inflateListView(Cursor cursor) {
-
SimpleCursorAdapter cursorAdapter = new SimpleCursorAdapter(
-
getApplicationContext(),
-
R.layout.item,
-
cursor,
-
new String[]{"news_tittle", "news_content"},
-
new int[]{R.id.tittle, R.id.content});
-
-
listView.setAdapter(cursorAdapter);
-
}
-
-
/*
-
* 查询新闻
-
* 1. 获取要查询的新闻标题 和 新闻内容
-
* 2. 查询数据库 获取 Cursor, 并将Cursor转化为List<Map<String, String>>类型的集合
-
* 3. 将集合放入bundle, Intent开启另一个Activity, 将bundle放入intent对象, 跳转Activity
-
*
-
*/
-
private void queryNews() {
-
String tittle = et_tittle.getText().toString();
-
String content = et_content.getText().toString();
-
-
Cursor cursor = helper.getReadableDatabase().rawQuery(
-
"select * from news_table where news_tittle like ? or news_content like ?",
-
new String[]{"%" + tittle + "%", "%" + content + "%"});
-
-
Bundle bundle = new Bundle();
-
bundle.putSerializable("news", cursor2list(cursor));
-
Intent intent = new Intent(this, SearchResultActivity.class);
-
intent.putExtras(bundle);
-
startActivity(intent);
-
-
-
}
-
-
/*
-
* 返回一个ArrayList集合, 这个集合中每个元素是一个Map集合, 每个Map集合有两个元素
-
* 解析Cursor对象 :
-
* 1. cursor光标向下移动一格;
-
* 2. 创建一个HashMap对象
-
* 3. 使用 cursor.getString(列标号)获取该行中某列值, 将这个值放入map中
-
* 4. 将Map对象放入
-
*/
-
private ArrayList<Map<String, String>> cursor2list(Cursor cursor) {
-
ArrayList<Map<String, String>> list = new ArrayList<Map<String,String>>();
-
-
//遍历Cursor
-
while(cursor.moveToNext()){
-
Map<String, String> map = new HashMap<String, String>();
-
map.put("tittle", cursor.getString(1));
-
map.put("content", cursor.getString(2));
-
list.add(map);
-
}
-
return list;
-
}
-
-
@Override
-
protected void onDestroy() {
-
super.onDestroy();
-
//释放数据库资源
-
if(helper !=null)
-
helper.close();
-
}
-
}
(3) SearchResultActivity源码
-
package shuliang.han.newssearch;
-
-
import java.util.List;
-
import java.util.Map;
-
-
import android.app.Activity;
-
import android.content.Intent;
-
import android.os.Bundle;
-
import android.widget.ListView;
-
import android.widget.SimpleAdapter;
-
-
public class SearchResultActivity extends Activity {
-
-
private ListView listView;
-
-
@Override
-
protected void onCreate(Bundle savedInstanceState) {
-
super.onCreate(savedInstanceState);
-
-
//设置布局文件
-
setContentView(R.layout.news_search_result);
-
//初始化组件
-
listView = (ListView) findViewById(R.id.lv_search_result);
-
//获取跳转到该Activity的intent对象
-
Intent intent = getIntent();
-
//获取Intent对象所携带的数据
-
Bundle bundle = intent.getExtras();
-
//从Bundle中取出List<Map<String,String>>数据
-
@SuppressWarnings("unchecked")
-
List<Map<String, String>> list = (List<Map<String, String>>)bundle.getSerializable("news");
-
-
SimpleAdapter adapter = new SimpleAdapter(
-
getApplicationContext(), //上下文对象
-
list, //数据源
-
R.layout.item, //List显示布局
-
new String[]{"tittle", "content"}, //List中map的键值
-
new int[]{R.id.tittle, R.id.content}); //填充到的布局文件
-
-
listView.setAdapter(adapter);
-
}
-
-
}
(4) XML文件
主界面布局 :
-
<LinearLayout xmlns:android="http://schemas.android.com/apk/res/android"
-
xmlns:tools="http://schemas.android.com/tools"
-
android:layout_width="match_parent"
-
android:layout_height="match_parent"
-
android:paddingBottom="@dimen/activity_vertical_margin"
-
android:paddingLeft="@dimen/activity_horizontal_margin"
-
android:paddingRight="@dimen/activity_horizontal_margin"
-
android:paddingTop="@dimen/activity_vertical_margin"
-
tools:context=".MainActivity"
-
android:orientation="vertical">
-
-
<TextView
-
android:layout_width="wrap_content"
-
android:layout_height="wrap_content"
-
android:text="新闻标题" />
-
-
<EditText
-
android:id="@+id/et_news_tittle"
-
android:layout_width="fill_parent"
-
android:layout_height="wrap_content"
-
android:singleLine="true"
-
android:hint="点击此处输入新闻标题"/>
-
-
<TextView
-
android:layout_width="wrap_content"
-
android:layout_height="wrap_content"
-
android:text="新闻内容" />
-
-
<EditText
-
android:id="@+id/et_news_content"
-
android:layout_width="fill_parent"
-
android:layout_height="wrap_content"
-
android:lines="2"
-
android:hint="点击此处输入新闻内容"/>
-
-
<LinearLayout
-
android:layout_width="wrap_content"
-
android:layout_height="wrap_content"
-
android:orientation="horizontal"
-
android:layout_gravity="center_horizontal">
-
<Button
-
android:id="@+id/bt_add_news"
-
android:layout_width="wrap_content"
-
android:layout_height="wrap_content"
-
android:onClick="onClick"
-
android:text="添加新闻" />
-
-
<Button
-
android:id="@+id/bt_query_news"
-
android:layout_width="wrap_content"
-
android:layout_height="wrap_content"
-
android:onClick="onClick"
-
android:text="查找新闻" />
-
</LinearLayout>
-
-
<ListView
-
android:id="@+id/lv_news"
-
android:layout_width="fill_parent"
-
android:layout_height="fill_parent"/>
-
-
</LinearLayout>
ListView条目布局
-
<?xml version="1.0" encoding="utf-8"?>
-
<LinearLayout xmlns:android="http://schemas.android.com/apk/res/android"
-
android:layout_width="match_parent"
-
android:layout_height="match_parent"
-
android:orientation="vertical" >
-
-
<TextView
-
android:id="@+id/tittle"
-
android:layout_width="wrap_content"
-
android:layout_height="wrap_content"
-
android:textSize="15dp"
-
android:textColor="#FFFF00"/>
-
-
<TextView
-
android:id="@+id/content"
-
android:layout_width="fill_parent"
-
android:layout_height="wrap_content"
-
android:textSize="10dp"
-
android:textColor="#00FF00"/>
-
-
</LinearLayout>
跳转Activity布局
-
<?xml version="1.0" encoding="utf-8"?>
-
<LinearLayout xmlns:android="http://schemas.android.com/apk/res/android"
-
android:layout_width="match_parent"
-
android:layout_height="match_parent"
-
android:orientation="vertical" >
-
-
<ListView
-
android:id="@+id/lv_search_result"
-
android:layout_height="wrap_content"
-
android:layout_width="wrap_content"/>
-
-
</LinearLayout>
SQLiteOpenHelper示例程序下载地址 :
-- GitHub : https://github.com/han1202012/NewsSearch.git .
效果图 :
.
作者 :万境绝尘
转载请注明出处 : http://blog.csdn.net/shulianghan/article/details/19028665
.
文章来源: hanshuliang.blog.csdn.net,作者:韩曙亮,版权归原作者所有,如需转载,请联系作者。
原文链接:hanshuliang.blog.csdn.net/article/details/19028665

- 点赞
- 收藏
- 关注作者
评论(0)