旋转的Apriltag码
简 介: Apriltag 可以用于视觉定位基础标识,在AR,机器人,机器视觉领域应用广泛。
关键词: Apriltag定位算法
§01 Apriltag定位
Apriltag 可以用于视觉定位基础标识,在AR,机器人,机器视觉领域应用广泛。

▲ 图1.1 几组Apriltag码
常用到的Apriltag的图片可以很方便在如下链网页上接获得:
- 相机标定
- 目标大小估计
- 测量相机到目标的距离
- 3D 定位(3D positioning)
- 机器人
- SLAM
- 自主导航(autonomous navigation)
在 AprilTag with Python 有一个视频对Apriltag原理和应用进行了讲解。
在 第十七届全国大学生智能车竞赛 中 智能视觉组 也规定了在智能车模运行的场地内包含有8个左右的Apriltag用于车模的视觉定位。下面对于Apriltag用于视觉定位进行初步的测试。
1.1 制作Apriltag定位方块
根据 十七届智能视觉Apriltag定位方块的参数 可以知道视觉方块的为边长20厘米的 正六面体 。为了便于在小范围内测试,下面利用手头的小立方体制作小型的Apriltag的定位立方体,这样可以缩短实验距离。

▲ 图1.1.1 用于视觉定位的方框参数
1.1.1 小型立方体
下图显示了实验中所使用的立方体的编程为30mm:
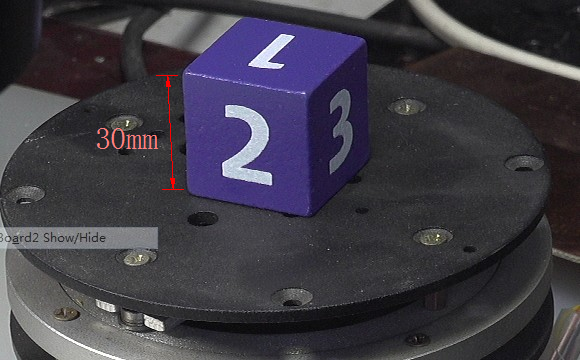
▲ 图1.1.2 实验中所使用的立方体的编程为30mm
根据方块的参数实际Apriltag的边长是立方体的 18 / 20 = 0.9 18/20 = 0.9 18/20=0.9,所以对于30mm的立方体,Apriltag的编程为 0.9 × 30 = 27 m m 0.9 \times 30 = 27mm 0.9×30=27mm。
1.1.2 打印Apriltag
在 APRILTAG 标准图片:TAG25H9 网页上选择 april.tag.Tag25H9,id=0 进行大约。
为了是的打印出的编程等于27mm,使用Work文档编辑页面A4(21×29.7),调节Apriltag图片编程使其等于27mm。

▲ 图1.1.3 在Word中编辑Apriltag,使其编程等于27面
打印四联Apriltag,方便贴在立方体。
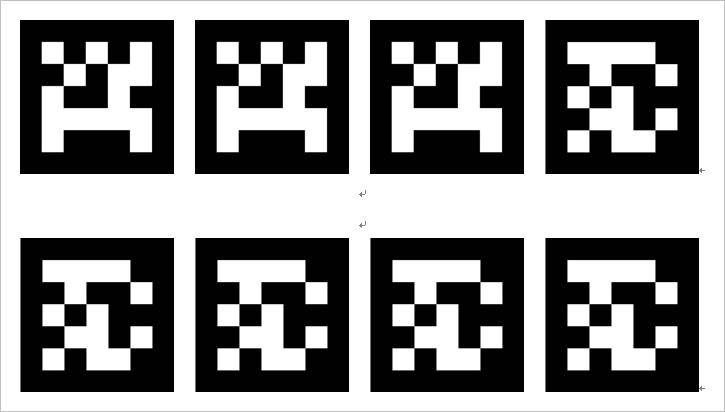
▲ 图1.1.4 打印id=,id=1四个Apriltag
下面是打印输出的Apriltag。
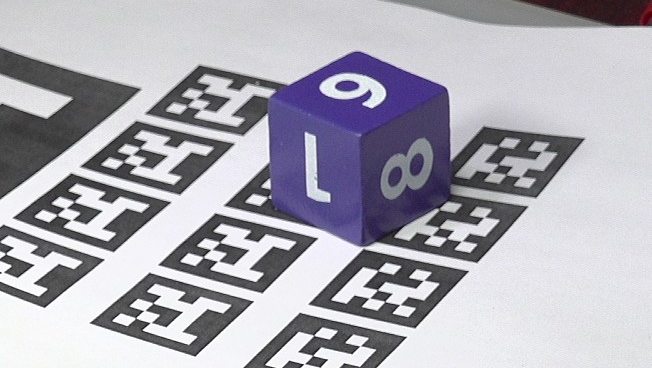
▲ 图1.1.5 打印出Apriltag与立方体
张贴在立方体四周的定位立方体:
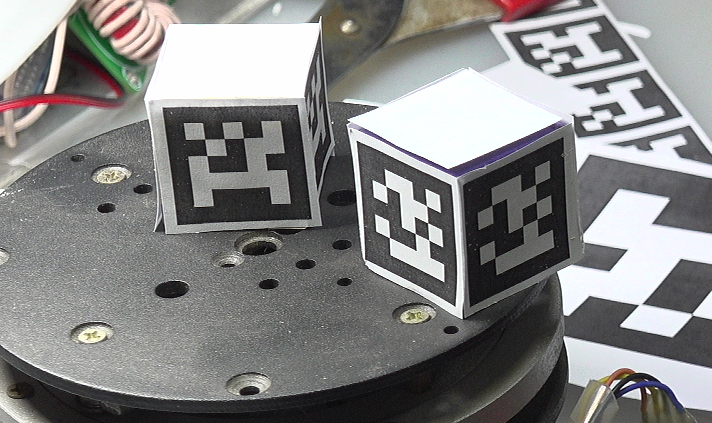
▲ 图1.1.6 张贴在立方体四周的定位立方体

▲ 图1.1.7 拍摄旋转之后的Apriltag定位

▲ 图1.1.8 拍摄旋转之后的Apriltag定位
1.2 检测Apriltag
1.2.1 apriltag软件包检测
根据 基于Python下的Apriltag检测 测试的方法,使用 apriltag软件包 可以很方便在图片中检测到存在的Apriltag码的位置和方向。
!pip install apriltag
- 1
下面是使用apriltag软件包对于【图1.1.6】进行检测。
(1)读入图片转换成灰度图
aprildir = '/home/aistudio/work/apriltag/rotateapriltag/apr1'
filedim = os.listdir(aprildir)

filename0 = os.path.join('/home/aistudio', 'work/apriltag/211225222453.JPG')

img = cv2.imread(filename0)
gray = cv2.cvtColor(img, cv2.COLOR_BGR2GRAY)

plt.clf()
plt.figure(figsize=(10,10))
plt.imshow(img)
- 1
- 2
- 3
- 4
- 5
- 6
- 7
- 8
- 9
- 10
- 11

▲ 图1.2.1 用于Apriltag检测的图片
程序中,使用cv2.cvtColor()函数将读入的图片转换为灰度图片是必须的。否则,在运行的过程apriltag软件包会出错报警:
---------------------------------------------------------------------------
AssertionError                            Traceback (most recent call last)
/tmp/ipykernel_156/2397871023.py in <module>
      4         for a in args: f.write(str(a)+'\n'), print(a)
      5 atd = apriltag.Detector(apriltag.DetectorOptions(families='tag36h11 tag25h9'))
----> 6 tags = atd.detect(img)
      7 printt("tags: {}".format(tags))

/opt/conda/envs/python35-paddle120-env/lib/python3.7/site-packages/apriltag.py in detect(self, img, return_image)
    350 image of type numpy.uint8.'''
    351
--> 352         assert len(img.shape) == 2
    353         assert img.dtype == numpy.uint8
    354

AssertionError:
- 1
- 2
- 3
- 4
- 5
- 6
- 7
- 8
- 9
- 10
- 11
- 12
- 13
- 14
- 15
- 16
(2)检测Apriltag并显示
atd = apriltag.Detector(apriltag.DetectorOptions(families='tag36h11 tag25h9'))
tags = atd.detect(gray)

print("tags: {}".format(tags))

for tag in tags:
    for i in range(4):
        cv2.circle(img, tuple(tag.corners[i].astype(int)), 4, (255, 0, 0), 2)

    cv2.circle(img, tuple(tag.center.astype(int)), 4, (2, 180, 200), 4)

plt.clf()
plt.figure(figsize=(10,10))
plt.imshow(img)
- 1
- 2
- 3
- 4
- 5
- 6
- 7
- 8
- 9
- 10
- 11
- 12
- 13
- 14

▲ 图1.2.2 检测到的三个Apriltag位置
下面是检测结果tags的数据内容。其中包含有三个检测结果Detection。
tags: [Detection(tag_family=b'tag25h9', tag_id=0, hamming=0, goodness=0.0, decision_margin=53.60857009887695, homography=array([[7.96267681e-01, 9.05073189e-02, 2.69319614e+00],
       [4.57491333e-03, 6.53558757e-01, 1.84559338e+00],
       [1.63910457e-04, 3.68041970e-05, 1.12387967e-02]]), center=array([239.63385084, 164.21627906]), corners=array([[163.65353394, 107.57844543],
       [299.04852295, 105.28063965],
       [312.94790649, 218.86660767],
       [178.8598938 , 224.50024414]])), Detection(tag_family=b'tag25h9', tag_id=0, hamming=1, goodness=0.0, decision_margin=76.01866149902344, homography=array([[-8.50042014e-01,  1.02734508e+00,  9.81667236e+00],
       [-4.28710058e-01, -1.48809350e-01,  8.30598761e-01],
       [-8.74267096e-04,  3.31680326e-04,  1.70341891e-02]]), center=array([576.29232056,  48.76068693]), corners=array([[548.4151001 ,  80.11242676],
       [501.58984375,  34.79211807],
       [606.00390625,  15.34595299],
       [641.11688232,  60.8821907 ]])), Detection(tag_family=b'tag25h9', tag_id=1, hamming=0, goodness=0.0, decision_margin=78.83943176269531, homography=array([[-4.97533871e-01, -1.44957916e-01,  5.13931328e+00],
       [-2.42118440e-01, -8.07190036e-01,  2.81386162e+00],
       [ 2.21094653e-04, -2.43450290e-04,  1.25708882e-02]]), center=array([408.82658297, 223.83952279]), corners=array([[459.11959839, 306.76528931],
       [367.20968628, 259.21142578],
       [358.35437012, 140.61828613],
       [453.6373291 , 185.7530365 ]]))]
- 1
- 2
- 3
- 4
- 5
- 6
- 7
- 8
- 9
- 10
- 11
- 12
- 13
- 14
- 15
- 16
每个Detection包含有一下数据:
-
Detection中的数据:
-
tag-family:给出检测到Apriltag所属组别;
tag-id:检测Apriltag的id号码;
hamming:
goodness:
decision:
margin:
homography: 单应矩阵 定义了从二维码坐标系中的四个角点的齐次坐标到图像二维码四个角点坐标的映射H。
center array:检测到Apriltag中心像素位置;
corners array:Apriltag四个角点的像素位置;

▲ 图1.2.3 单应变原理图
◎ 图片来源 :https://pic1.zhimg.com/80/v2-9b7277eeff8bcfe95eb5b9bc600d713c_720w.jpg

▲ 图1.2.4 利用Homography绘制出Apriltag的方向图
1.3 检测旋转Apriltag
利用Apriltag的 Homography 矩阵可以估计摄像头的姿态,参见论文: Camera Calibration and 3D Reconstruction
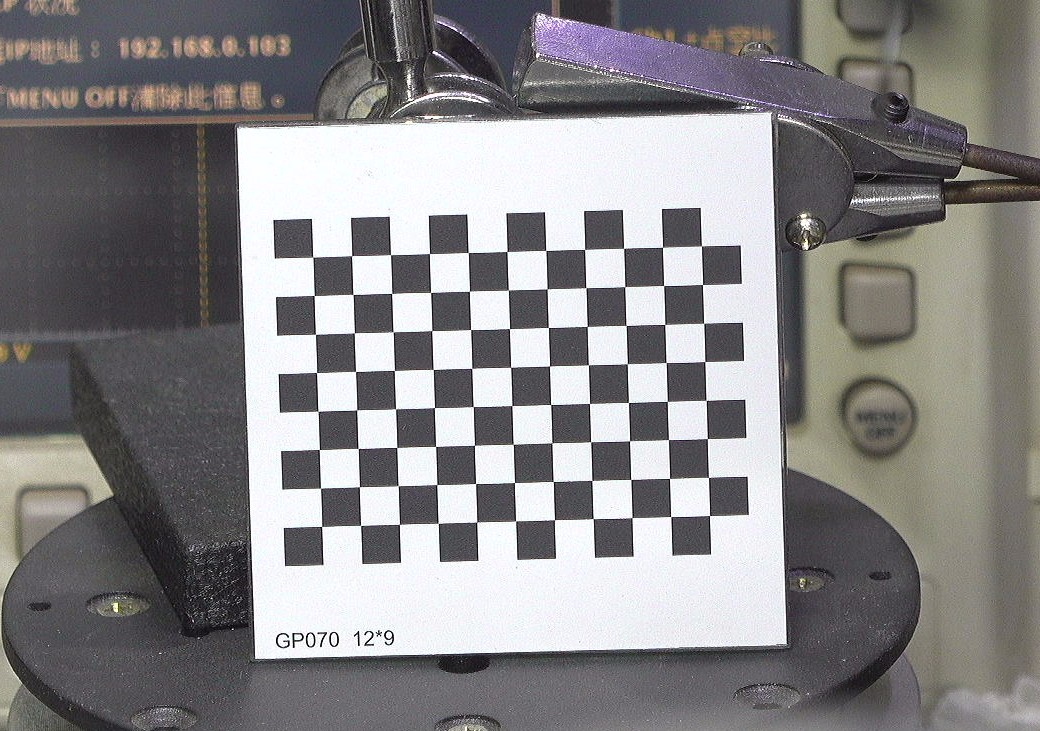
1.3.1 棋盘格图片


#!/usr/local/bin/python
# -*- coding: gbk -*-
#============================================================
# TEST2.PY                     -- by Dr. ZhuoQing 2021-12-26
#
# Note:
#============================================================

from headm import *                 # =
import apriltag
import cv2

filedir = '/home/aistudio/work/apriltag/rotateapriltag'
def getradir(n):
    fdir = os.path.join(filedir, 'apr%d'%n)
    if not os.path.isdir(fdir):
        printf("%sdoes not exists!"%fdir)
        return os.path.join(filedir, 'apr1')

    return fdir

#------------------------------------------------------------
apr1dir = getradir(1)

filedim = [os.path.join(apr1dir, f) for f in sorted(os.listdir(apr1dir)) if f.find(".JPG") >= 0]

printt(filedim)

#------------------------------------------------------------
gifpath = '/home/aistudio/GIF'
filedim = os.listdir(gifpath)
for f in filedim:
    fn = os.path.join(gifpath, f)
    if os.path.isfile(fn):
        os.remove(fn)


#------------------------------------------------------------
atd = apriltag.Detector(apriltag.DetectorOptions(families='tag36h11 tag25h9'))

PLANE_DIST = 20

def apriltagimg(id):
    if id >= len(filedim):
        printt("Error id:%d/%d"%(id, len(filedim)))
        return

    printt(filedim[id]:)

    img = cv2.imread(filedim[id])
    gray = cv2.cvtColor(img, cv2.COLOR_BGR2GRAY)
    tags = atd.detect(gray)


    for id,tag in enumerate(tags):
        tag0h = tag.homography
        cornerh = []

        for i in range(4):
            corner = tag.corners[i]
            cv2.circle(img, tuple(corner.astype(int)), 4, (255, 0, 0), 2)

            cn = array([corner[0], corner[1], 1])[:,newaxis]
            ach = linalg.inv(tag0h).dot(cn)

            ach[2] = ach[2] + PLANE_DIST
#            printt(ach:, type(ach):, shape(ach):)

            ach = tag0h.dot(ach)
            ach[1] = ach[1]
            cornerh.append(ach)

#            return img

        for i in range(4):
            cn = cornerh[i].flatten().astype(int)
            ii = i + 1 if i < 3 else 0
            cn1 = cornerh[ii].flatten().astype(int)

            corner = tag.corners[i].astype(int)

            cv2.line(img, tuple(cn[:2]), tuple(cn1[:2]), (255, 0, 0), 2)
            cv2.line(img, tuple(cn[:2]), tuple(corner[:2]), (255, 0, 0), 2)


        cv2.circle(img, tuple(tag.center.astype(int)), 4, (2, 180, 200), 4)


    return img


 #------------------------------------------------------------
img = apriltagimg(15)

'''
for i in range(200):
    printt(i:)
    img = apriltagimg(i)

    savefile = os.path.join(gifpath, '%02d.jpg'%i)
    cv2.imwrite(savefile, img)

'''
 #------------------------------------------------------------
plt.clf()
plt.figure(figsize=(15,15))
plt.imshow(img)


#------------------------------------------------------------
#        END OF FILE : TEST2.PY
#============================================================
- 1
- 2
- 3
- 4
- 5
- 6
- 7
- 8
- 9
- 10
- 11
- 12
- 13
- 14
- 15
- 16
- 17
- 18
- 19
- 20
- 21
- 22
- 23
- 24
- 25
- 26
- 27
- 28
- 29
- 30
- 31
- 32
- 33
- 34
- 35
- 36
- 37
- 38
- 39
- 40
- 41
- 42
- 43
- 44
- 45
- 46
- 47
- 48
- 49
- 50
- 51
- 52
- 53
- 54
- 55
- 56
- 57
- 58
- 59
- 60
- 61
- 62
- 63
- 64
- 65
- 66
- 67
- 68
- 69
- 70
- 71
- 72
- 73
- 74
- 75
- 76
- 77
- 78
- 79
- 80
- 81
- 82
- 83
- 84
- 85
- 86
- 87
- 88
- 89
- 90
- 91
- 92
- 93
- 94
- 95
- 96
- 97
- 98
- 99
- 100
- 101
- 102
- 103
- 104
- 105
- 106
- 107
- 108
- 109
- 110
- 111
- 112
- 113
- 114
- 115
■ 相关文献链接:
- Apriltag
- APRILTAG 标准图片:TAG25H9
- Apriltag可用图片:TAG16H5
- Apriltag : 用于视觉系统标定图标tag36H11
- Apriltag的主要用途
- AprilTag with Python
- 第十七届全国大学智能汽车竞赛竞速比赛规则
- 第十七届智能车竞赛智能视觉组比赛细则
- 十七届智能视觉Apriltag定位方块的参数
- 正六面体
- april.tag.Tag25H9,id=0
- 基于Python下的Apriltag检测
- apriltag软件包
- 单应矩阵
- Camera Calibration and 3D Reconstruction
● 相关图表链接:
- 图1.1 几组Apriltag码
- 图1.1.1 用于视觉定位的方框参数
- 图1.1.2 实验中所使用的立方体的编程为30mm
- 图1.1.3 在Word中编辑Apriltag,使其编程等于27面
- 图1.1.4 打印id=,id=1四个Apriltag
- 图1.1.5 打印出Apriltag与立方体
- 图1.1.6 张贴在立方体四周的定位立方体
- 图1.1.7 拍摄旋转之后的Apriltag定位
- 图1.1.8 拍摄旋转之后的Apriltag定位
- 图1.2.1 用于Apriltag检测的图片
- 图1.2.2 检测到的三个Apriltag位置
- 图1.2.3 单应变原理图
- 图1.2.4 利用Homography绘制出Apriltag的方向图
文章来源: zhuoqing.blog.csdn.net,作者:卓晴,版权归原作者所有,如需转载,请联系作者。
原文链接:zhuoqing.blog.csdn.net/article/details/122143423
- 点赞
- 收藏
- 关注作者


评论(0)