Android从入门到进阶之高级控件

高级控件
1.自动完成文本控件
在搜索引擎(百度、搜狗)输入几个文字,会出来一些提示。可以减少用户的输入,提高程序的效率。刚才看到的自动提示,ajax技术。
1.1AotoCompleteTextView
取消下拉:Esc或BackSpace键
步骤:
1.定义一个字符串数组(有后台了,从后台读取),用于保存自动提示的数据。
2.将此字符串数组放入到数组适配器(ArrayAdapter)。
3.利用AutoCompleteTextView的setAdapter()方法,将字符串数组加入到AutoCompleteTextView对象中,设置自动完成文本控件的适配器。
2.MutilAutoCompleteTextView
 <TextView
        android:layout_width="fill_parent"
        android:layout_height="wrap_content"
        android:text="自动完成文本框实例"
        android:textSize="20dp"/>
    <!--加入实例-->
    <AutoCompleteTextView
        android:layout_width="fill_parent"
        android:layout_height="wrap_content"
        android:id="@+id/myAuto"
        android:hint="请输入您需要的城市"/>
    <!--加入多行    -->
    <MultiAutoCompleteTextView
        android:layout_width="fill_parent"
        android:layout_height="wrap_content"
        android:id="@+id/myMulti"
        android:hint="请输入您需要的城市名称"/>
- 1
- 2
- 3
- 4
- 5
- 6
- 7
- 8
- 9
- 10
- 11
- 12
- 13
- 14
- 15
- 16
- 17
后台代码:
package com.aaa.zyg001;
// 这个是包的定义
//import导入相关的类;
import androidx.appcompat.app.AppCompatActivity;

import android.graphics.Color;
import android.os.Bundle;
import android.text.Editable;
import android.text.TextWatcher;
import android.view.KeyEvent;
import android.view.View;
import android.widget.ArrayAdapter;
import android.widget.AutoCompleteTextView;
import android.widget.Button;
import android.widget.CheckBox;
import android.widget.CompoundButton;
import android.widget.DatePicker;
import android.widget.EditText;
import android.widget.ImageButton;
import android.widget.ImageView;
import android.widget.MultiAutoCompleteTextView;
import android.widget.RadioGroup;
import android.widget.Switch;
import android.widget.TextView;
import android.widget.ToggleButton;

import org.w3c.dom.Text;

import java.util.Calendar;
//直接这个类,实现一个抽象类的抽象方法
public class MainActivity extends AppCompatActivity {
    //1.定义字符串数组;
    String[]arr={"郑州","安阳","洛阳","驻马店","安庆","安溪","安阳西","安阳东"};
    AutoCompleteTextView myAuto;

    MultiAutoCompleteTextView myMulti;

    @Override
    protected void onCreate(Bundle savedInstanceState) {
        super.onCreate(savedInstanceState);
        setContentView(R.layout.activity_main);
        //获取内容
        //1.当前对象,单行项目行;填充内容
        ArrayAdapter<String>adapter=new ArrayAdapter<>(this, android.R.layout.simple_dropdown_item_1line,arr);
//        System.out.println(adapter+"-------");
        myAuto=(AutoCompleteTextView)findViewById(R.id.myAuto);
        myMulti=(MultiAutoCompleteTextView)findViewById(R.id.myMulti);

        System.out.println(myAuto+"======");
        myAuto.setAdapter(adapter);
        //设置显示自动提示需要的字符串
        myAuto.setThreshold(1);
        //-------------------------------------------------------------
        myMulti.setAdapter(adapter);
        //用来区分不同的子串;
        myMulti.setTokenizer(new MultiAutoCompleteTextView.CommaTokenizer());
        myMulti.setThreshold(1);

    }
}
- 1
- 2
- 3
- 4
- 5
- 6
- 7
- 8
- 9
- 10
- 11
- 12
- 13
- 14
- 15
- 16
- 17
- 18
- 19
- 20
- 21
- 22
- 23
- 24
- 25
- 26
- 27
- 28
- 29
- 30
- 31
- 32
- 33
- 34
- 35
- 36
- 37
- 38
- 39
- 40
- 41
- 42
- 43
- 44
- 45
- 46
- 47
- 48
- 49
- 50
- 51
- 52
- 53
- 54
- 55
- 56
- 57
- 58
- 59
- 60
效果图:

2.下拉列表控件
Spinner,当用户单击该控件的时候,弹出选择列表供用户选择,且只能选择一项。同网页中的Select,同C#中的Combox。
使用步骤:
1.先定义一个字符串数组,用于保存下拉列表的数据;在实际使用中,可以从数据库获取数据;
2.将此字符串数组存入数组适配器(ArrayAdapter)。
3.利用Spinner的setAdapter()方法,将适配器加入到Spinner对象中,设置自动完成文本框的适配器。
属性:
spinnerMode 设置下拉列表的模式;dialog或者dropdown
dropDownWidth getDropDownWidth()
setDropDownWidth(int pix) 设置下拉框的宽度
gravity getGravity()/setGravity() 设置选定项目的对齐方式
事件
setOnItemSelectedListener(AdapterView.OnItemSelectedListener) 当列表被选中时触发的事件
<!--设计界面    -->
    <TextView
        android:layout_width="fill_parent"
        android:layout_height="wrap_content"
        android:id="@+id/tv"
        android:text="请选择城市"
        android:textSize="20dp"/>
    <Spinner
        android:layout_width="fill_parent"
        android:layout_height="wrap_content"
        android:id="@+id/citySp"
        android:spinnerMode="dropdown"/>
    <TextView
        android:layout_width="fill_parent"
        android:layout_height="wrap_content"
        android:id="@+id/tv_city"
        android:textSize="20dp"/>
- 1
- 2
- 3
- 4
- 5
- 6
- 7
- 8
- 9
- 10
- 11
- 12
- 13
- 14
- 15
- 16
- 17
后台代码
  //1.变量和数据的声明
    TextView tv_city;
    Spinner citySp;
    //字符串数组
    String[]arr={"深圳","东莞","珠海","哈尔滨"};

  //获取内容
        tv_city=(TextView) findViewById(R.id.tv_city);
        citySp=(Spinner) findViewById(R.id.citySp);

        //适配器:和自动完成文本一致
        ArrayAdapter<String>adapter=new ArrayAdapter<>(this, android.R.layout.simple_spinner_item,arr);

        citySp.setAdapter(adapter);
        //下拉列表的事件
        citySp.setOnItemSelectedListener(new AdapterView.OnItemSelectedListener(){

            @Override
            public void onItemSelected(AdapterView<?> parent, View view, int position,long id) {
                //当我们在下拉列表上单击
                tv_city.setText(arr[position]);
            }

            @Override
            public void onNothingSelected(AdapterView<?> adapterView) {

            }
        });
- 1
- 2
- 3
- 4
- 5
- 6
- 7
- 8
- 9
- 10
- 11
- 12
- 13
- 14
- 15
- 16
- 17
- 18
- 19
- 20
- 21
- 22
- 23
- 24
- 25
- 26
- 27
- 28
效果图:

3.进度条和滑块
进度条:
用于某些资源的加载、文件下载和大量数据处理等,使用进度条为用户提供明确的操作结束时间,让用户能够了解目前程序的进度及其状态。
3.1 ProgressBar
属性:
max getMax() setMax() 设置或获取进度条的上限
progress getProgress() setProgress() 设置或获取进度条的进度
 <TextView
        android:layout_width="wrap_content"
        android:layout_height="wrap_content"
        android:text="文件下载进度"
        android:textSize="20dp"/>
    <ProgressBar
        android:layout_width="match_parent"
        android:layout_height="wrap_content"
        android:id="@+id/fileDown"
        style="?android:attr/progressBarStyleHorizontal"/>
    <ProgressBar
        android:layout_width="match_parent"
        android:layout_height="wrap_content"/>
    <Button
        android:layout_width="match_parent"
        android:layout_height="wrap_content"
        android:text="模拟文件下载"
        android:id="@+id/btn_progress"/>
- 1
- 2
- 3
- 4
- 5
- 6
- 7
- 8
- 9
- 10
- 11
- 12
- 13
- 14
- 15
- 16
- 17
- 18
后台代码
public class MainActivity extends AppCompatActivity {
    //1.变量
    ProgressBar fileDown;
    Button btnProgress;

    int progress=0;     //进度为0
    int max=102400;


    @Override
    protected void onCreate(Bundle savedInstanceState) {
        super.onCreate(savedInstanceState);
        setContentView(R.layout.activity_main);
    //============================
        fileDown=(ProgressBar) findViewById(R.id.fileDown);
        btnProgress=(Button)findViewById(R.id.btn_progress);
        //设置进度条的最大值
        fileDown.setMax(max);
        //设置按钮的事件
        btnProgress.setOnClickListener(new View.OnClickListener() {
            @Override
            public void onClick(View view) {
                //一步一步来
                int seed=max-progress;
                Random random=new Random();
                int current=random.nextInt(seed);

                progress=progress+current;
                fileDown.setProgress(progress);
            }
        });


    }
}
- 1
- 2
- 3
- 4
- 5
- 6
- 7
- 8
- 9
- 10
- 11
- 12
- 13
- 14
- 15
- 16
- 17
- 18
- 19
- 20
- 21
- 22
- 23
- 24
- 25
- 26
- 27
- 28
- 29
- 30
- 31
- 32
- 33
- 34
- 35
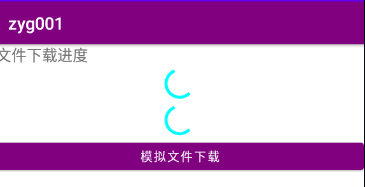
运行效果:
nt seed=max-progress;
Random random=new Random();
int current=random.nextInt(seed);
            progress=progress+current;
            fileDown.setProgress(progress);
        }
    });


}
- 1
- 2
- 3
- 4
- 5
- 6
- 7
}
运行效果:
**4.滑块案例**
SeekBar控件,用来接收用户输入的控件,类似于拖动条,可以直观的显示用户需要的数据。可以显示数值,也可以设置标度。
设置音量,使用滑块。
```xml
<TextView
android:layout_width="wrap_content"
android:layout_height="wrap_content"
android:text="调节音量"
android:textSize="20dp"/>
<SeekBar
android:layout_width="match_parent"
android:layout_height="wrap_content"
android:id="@+id/sk_vol"/>
<TextView
android:layout_width="match_parent"
android:layout_height="wrap_content"
android:id="@+id/tv_cur"/>
- 1
- 2
- 3
- 4
- 5
- 6
- 7
- 8
- 9
- 10
- 11
- 12
- 13
- 14
- 15
- 16
- 17
- 18
- 19
- 20
- 21
- 22
- 23
- 24
- 25
后台代码
public class MainActivity extends AppCompatActivity {
    //1.设计变量 对象
    SeekBar sk_vol;
    AudioManager myAudio;   //声音管理对象;
    TextView tv_cur;        //当前声音的提示
    @Override
    protected void onCreate(Bundle savedInstanceState) {
        super.onCreate(savedInstanceState);
        setContentView(R.layout.activity_main);
        //-------------------------------------------------
        sk_vol=(SeekBar) findViewById(R.id.sk_vol);
        tv_cur=(TextView)findViewById(R.id.tv_cur);
        //获取系统声音服务;
        myAudio=(AudioManager) getSystemService(Context.AUDIO_SERVICE);
        //音乐流声音最大值
        int maxVol=myAudio.getStreamMaxVolume(AudioManager.STREAM_MUSIC);
        //当前系统声音;
        int sysVol=myAudio.getStreamVolume(AudioManager.STREAM_MUSIC);

        //绑定到滑块
        sk_vol.setMax(maxVol);
        sk_vol.setProgress(sysVol);
        sk_vol.setOnSeekBarChangeListener(new SeekBar.OnSeekBarChangeListener() {
            @Override
            public void onProgressChanged(SeekBar seekBar, int i, boolean b) {
                //当滑动的时候,不能划到负数
                int tempInt=seekBar.getProgress();
                if(tempInt<1)
                    tempInt=1;

                myAudio.setStreamVolume(AudioManager.STREAM_MUSIC,tempInt,0);
                tv_cur.setText("当前音量:"+tempInt);
            }

            @Override
            public void onStartTrackingTouch(SeekBar seekBar) {

            }

            @Override
            public void onStopTrackingTouch(SeekBar seekBar) {

            }
        });
    }
}
- 1
- 2
- 3
- 4
- 5
- 6
- 7
- 8
- 9
- 10
- 11
- 12
- 13
- 14
- 15
- 16
- 17
- 18
- 19
- 20
- 21
- 22
- 23
- 24
- 25
- 26
- 27
- 28
- 29
- 30
- 31
- 32
- 33
- 34
- 35
- 36
- 37
- 38
- 39
- 40
- 41
- 42
- 43
- 44
- 45
- 46
显示效果
5.列表视图
listView是一个常用的控件,会根据屏幕大小,把具体的内容以列表的形式显示出来,例如电话本、通信记录等。
属性
choiceMode 选择模式:list没有选择模式:none;singleChoice 一项选中;multipleChoice:多项选中。
divider: 项目之间用某个图形或颜色来分割。
dividerHeight 分割符的高度。
方法
setOnItemClickLister(AdapterView.OnItemClickListener) 列表项被单击时触发的事件
setOnItemSelectedListener(AdapterView.OnItemSelectedListener) 当列表项改变时被触发的事件
getCheckedItemIds() 返回检查项目标识的集合
4个xml界面文件
1.activity_main.xml
<?xml version="1.0" encoding="utf-8"?>
<LinearLayout xmlns:android="http://schemas.android.com/apk/res/android"
    xmlns:tools="http://schemas.android.com/tools"
    xmlns:app="http://schemas.android.com/apk/res-auto"
    android:layout_width="match_parent"
    android:layout_height="match_parent"
    android:orientation="vertical">
   <TextView
       android:layout_width="fill_parent"
       android:layout_height="wrap_content"
       android:text="列表视图案例"
       android:textSize="20dp"/>
    <Button
        android:layout_width="fill_parent"
        android:layout_height="wrap_content"
        android:id="@+id/btn_arr"
        android:text="使用ArrayAdapter为ListView绑定数据"/>
    <Button
        android:layout_width="fill_parent"
        android:layout_height="wrap_content"
        android:id="@+id/btn_simple"
        android:text="使用SimpleAdapter为ListView绑定数据"/>
</LinearLayout>
- 1
- 2
- 3
- 4
- 5
- 6
- 7
- 8
- 9
- 10
- 11
- 12
- 13
- 14
- 15
- 16
- 17
- 18
- 19
- 20
- 21
- 22
- 23
2.arrayadapter.xml
<?xml version="1.0" encoding="utf-8"?>
<LinearLayout xmlns:android="http://schemas.android.com/apk/res/android"
    android:orientation="vertical"
    android:layout_width="fill_parent"
    android:layout_height="fill_parent">
    <TextView
        android:layout_width="fill_parent"
        android:layout_height="wrap_content"
        android:text="这是一个ArrayAdapter的案例"
        android:textSize="20dp"/>
    <TextView
        android:layout_width="match_parent"
        android:layout_height="wrap_content"
        android:id="@+id/tv_content"/>
    <!--    arrayList,分割颜色;#5555555,行高5px-->
    <ListView
        android:layout_width="fill_parent"
        android:layout_height="wrap_content"
        android:id="@+id/arrayList"
        android:divider="#555555"
        android:dividerHeight="5px"/>
</LinearLayout>
- 1
- 2
- 3
- 4
- 5
- 6
- 7
- 8
- 9
- 10
- 11
- 12
- 13
- 14
- 15
- 16
- 17
- 18
- 19
- 20
- 21
- 22
3.simpleadapter.xml
<?xml version="1.0" encoding="utf-8"?>
<LinearLayout xmlns:android="http://schemas.android.com/apk/res/android"
    android:orientation="vertical"
    android:layout_width="fill_parent"
    android:layout_height="fill_parent">
<!--    设计界面-->
    <TextView
        android:layout_width="match_parent"
        android:layout_height="wrap_content"
        android:text="热歌排行榜"
        android:textSize="20dp"/>
    <LinearLayout
        android:layout_width="fill_parent"
        android:layout_height="wrap_content"
        android:orientation="horizontal">
        <TextView
            android:layout_width="0dp"
            android:layout_height="wrap_content"
            android:text="歌曲"
            android:layout_weight="1"/>
        <TextView
            android:layout_width="0dp"
            android:layout_height="wrap_content"
            android:text="歌手"
            android:layout_weight="1"/>
        <TextView
            android:layout_width="0dp"
            android:layout_height="wrap_content"
            android:text="时长"
            android:layout_weight="1"/>
    </LinearLayout>
    <ListView
        android:layout_width="fill_parent"
        android:layout_height="fill_parent"
        android:divider="#555555"
        android:dividerHeight="1dp"
        android:id="@+id/simpleAdapter"/>
</LinearLayout>
- 1
- 2
- 3
- 4
- 5
- 6
- 7
- 8
- 9
- 10
- 11
- 12
- 13
- 14
- 15
- 16
- 17
- 18
- 19
- 20
- 21
- 22
- 23
- 24
- 25
- 26
- 27
- 28
- 29
- 30
- 31
- 32
- 33
- 34
- 35
- 36
- 37
- 38
4.list.xml
<?xml version="1.0" encoding="utf-8"?>
<LinearLayout xmlns:android="http://schemas.android.com/apk/res/android"
    android:orientation="horizontal"
    android:layout_width="fill_parent"
    android:layout_height="fill_parent">
    <!-- 设计界面   -->
    <TextView
        android:layout_width="0dp"
        android:layout_height="wrap_content"
        android:layout_weight="1"
        android:id="@+id/song_name"/>
    <TextView
        android:layout_width="0dp"
        android:layout_height="wrap_content"
        android:layout_weight="1"
        android:id="@+id/singer"/>
    <TextView
        android:layout_width="0dp"
        android:layout_height="wrap_content"
        android:layout_weight="1"
        android:id="@+id/album"/>
<!--    横向线性布局,4个TextView-->
    <TextView
        android:layout_width="0dp"
        android:layout_height="wrap_content"
        android:layout_weight="1"
        android:id="@+id/duration"/>
</LinearLayout>
- 1
- 2
- 3
- 4
- 5
- 6
- 7
- 8
- 9
- 10
- 11
- 12
- 13
- 14
- 15
- 16
- 17
- 18
- 19
- 20
- 21
- 22
- 23
- 24
- 25
- 26
- 27
- 28
3个java代码
1.MainActivity.java
package com.aaa.zyg001;
// 这个是包的定义
//import导入相关的类;
import androidx.appcompat.app.AppCompatActivity;

import android.content.Context;
import android.content.Intent;
import android.graphics.Color;
import android.media.AudioManager;
import android.os.Bundle;
import android.text.Editable;
import android.text.TextWatcher;
import android.view.KeyEvent;
import android.view.View;
import android.widget.AdapterView;
import android.widget.ArrayAdapter;
import android.widget.AutoCompleteTextView;
import android.widget.Button;
import android.widget.CheckBox;
import android.widget.CompoundButton;
import android.widget.DatePicker;
import android.widget.EditText;
import android.widget.ImageButton;
import android.widget.ImageView;
import android.widget.MultiAutoCompleteTextView;
import android.widget.ProgressBar;
import android.widget.RadioGroup;
import android.widget.SeekBar;
import android.widget.Spinner;
import android.widget.Switch;
import android.widget.TextView;
import android.widget.ToggleButton;

import org.w3c.dom.Text;

import java.util.Calendar;
import java.util.Random;

//直接这个类,实现一个抽象类的抽象方法
public class MainActivity extends AppCompatActivity {
    Button btn_ArrayAdapter;
    Button btn_SimpleAdapter;


    @Override
    protected void onCreate(Bundle savedInstanceState) {
        super.onCreate(savedInstanceState);
        setContentView(R.layout.activity_main);
        //======数组适配器初始化;参数:this当前对象;1行;数组内容
        //获取变量对应的控件
        btn_ArrayAdapter=(Button)findViewById(R.id.btn_arr);
        btn_SimpleAdapter=(Button)findViewById(R.id.btn_simple);

        //下面是监听事件
        btn_ArrayAdapter.setOnClickListener(new View.OnClickListener(){
            /**
             * 需要用到后面的技术点;
             * @param view
             */
            @Override
            public void onClick(View view) {
                Intent intent=new Intent();
                //需要增加该类
                intent.setClass(MainActivity.this,ArrayAdapterActivity.class);
                //启动;
                startActivity(intent);
            }
        });

        btn_SimpleAdapter.setOnClickListener(new Button.OnClickListener(){
            @Override
            public void onClick(View view) {
                Intent intent=new Intent();
                //需要增加该类
                intent.setClass(MainActivity.this,SimpleAdapterActivity.class);
                //启动;
                startActivity(intent);
            }
        });
    }
}
- 1
- 2
- 3
- 4
- 5
- 6
- 7
- 8
- 9
- 10
- 11
- 12
- 13
- 14
- 15
- 16
- 17
- 18
- 19
- 20
- 21
- 22
- 23
- 24
- 25
- 26
- 27
- 28
- 29
- 30
- 31
- 32
- 33
- 34
- 35
- 36
- 37
- 38
- 39
- 40
- 41
- 42
- 43
- 44
- 45
- 46
- 47
- 48
- 49
- 50
- 51
- 52
- 53
- 54
- 55
- 56
- 57
- 58
- 59
- 60
- 61
- 62
- 63
- 64
- 65
- 66
- 67
- 68
- 69
- 70
- 71
- 72
- 73
- 74
- 75
- 76
- 77
- 78
- 79
- 80
- 81
- 82
2.ArrayAdapterActivity.java
package com.aaa.zyg001;

import android.app.Activity;
import android.os.Bundle;
import android.os.PersistableBundle;
import android.view.View;
import android.widget.AdapterView;
import android.widget.ArrayAdapter;
import android.widget.ListView;
import android.widget.TextView;

import androidx.annotation.Nullable;
import androidx.appcompat.app.AppCompatActivity;

public class ArrayAdapterActivity extends AppCompatActivity {
    /* 定义我们需要的类的对象*/
    ListView listView;
    ArrayAdapter<String>adapter;
    TextView tv_Content;

    //复制也行,不复制也可以;


    @Override
    protected void onCreate(Bundle savedInstanceState) {
        super.onCreate(savedInstanceState);
        //猜测是加载某个xml文件,设置界面视图
        setContentView(R.layout.arrayadapter);
        //----------------------------------------
        listView=(ListView) findViewById(R.id.arrayList);
        //星期数组
        final String[] weekList={"周一","周二","周三","周四","周五","周六","周日"};
        adapter=new ArrayAdapter<String>(this, android.R.layout.simple_list_item_1,weekList);

        listView.setAdapter(adapter);

        //设置监听事件;
        listView.setOnItemClickListener(new AdapterView.OnItemClickListener() {
            @Override
            public void onItemClick(AdapterView<?> adapterView, View view, int position, long l) {
                tv_Content=(TextView) findViewById(R.id.tv_content);
                tv_Content.setText("您的选择是:"+weekList[position]);
            }
        });
    }
}
- 1
- 2
- 3
- 4
- 5
- 6
- 7
- 8
- 9
- 10
- 11
- 12
- 13
- 14
- 15
- 16
- 17
- 18
- 19
- 20
- 21
- 22
- 23
- 24
- 25
- 26
- 27
- 28
- 29
- 30
- 31
- 32
- 33
- 34
- 35
- 36
- 37
- 38
- 39
- 40
- 41
- 42
- 43
- 44
- 45
- 46
3.SimpleAdapterActivity.java
package com.aaa.zyg001;

import android.app.Activity;
import android.os.Bundle;
import android.widget.ListView;
import android.widget.SimpleAdapter;

import androidx.annotation.Nullable;

import java.util.ArrayList;
import java.util.HashMap;
import java.util.List;
import java.util.Map;

public class SimpleAdapterActivity extends Activity {
    //1.声明变量
    String[]songs=new String[]{"国歌","歌唱祖国","夏天的风","无人之岛"};
    String[]singer=new String[]{"聂耳","无","Uu","任然"};
    String[]albums=new String[]{"国歌","歌唱祖国","夏天的风","无人之岛"};
    String[]duratioins=new String[]{"3:56","3:17","4:45","4:37"};

    ListView listView;

    @Override
    protected void onCreate(@Nullable Bundle savedInstanceState) {
        super.onCreate(savedInstanceState);
        setContentView(R.layout.simpleadapter);//获取布局xml
        //
        listView=(ListView) findViewById(R.id.simpleAdapter);
        //泛型+Map集合
        List<Map<String,Object>> listItem=new ArrayList<Map<String,Object>>();

        for(int i=0;i<songs.length;i++){
            Map<String,Object>item=new HashMap<String,Object>();
            item.put("song",songs[i]);
            item.put("singer",singer[i]);
            item.put("album",albums[i]);
            item.put("duration",duratioins[i]);

            listItem.add(item);
        }
        SimpleAdapter  myAdapter=new SimpleAdapter(getApplicationContext(),
                listItem,
                R.layout.list,
                new String[]{"song","singer","album","duration"},
                new int[]{R.id.song_name,R.id.singer,R.id.album,R.id.duration});
        //绑定
        listView.setAdapter(myAdapter);
    }
}
- 1
- 2
- 3
- 4
- 5
- 6
- 7
- 8
- 9
- 10
- 11
- 12
- 13
- 14
- 15
- 16
- 17
- 18
- 19
- 20
- 21
- 22
- 23
- 24
- 25
- 26
- 27
- 28
- 29
- 30
- 31
- 32
- 33
- 34
- 35
- 36
- 37
- 38
- 39
- 40
- 41
- 42
- 43
- 44
- 45
- 46
- 47
- 48
- 49
- 50
1个整合配置文件
<?xml version="1.0" encoding="utf-8"?>
<manifest xmlns:android="http://schemas.android.com/apk/res/android"
    package="com.aaa.zyg001">

    <application
        android:allowBackup="true"
        android:icon="@mipmap/ic_launcher"
        android:label="@string/app_name"
        android:roundIcon="@mipmap/ic_launcher_round"
        android:supportsRtl="true"
        android:theme="@style/Theme.Zyg001">
        <activity
            android:name=".MainActivity"
            android:exported="true">
            <intent-filter>
                <action android:name="android.intent.action.MAIN" />
                <category android:name="android.intent.category.LAUNCHER" />
            </intent-filter>
        </activity>
        <!--再启动其他的两个activity        -->
        <activity android:name=".ArrayAdapterActivity"></activity>
        <activity android:name=".SimpleAdapterActivity"></activity>
         <!--定义结束   activity        -->
    </application>

</manifest>
- 1
- 2
- 3
- 4
- 5
- 6
- 7
- 8
- 9
- 10
- 11
- 12
- 13
- 14
- 15
- 16
- 17
- 18
- 19
- 20
- 21
- 22
- 23
- 24
- 25
- 26
效果图:


文章来源: aaaedu.blog.csdn.net,作者:tea_year,版权归原作者所有,如需转载,请联系作者。
原文链接:aaaedu.blog.csdn.net/article/details/120457962

- 点赞
- 收藏
- 关注作者
评论(0)