如何在 Flutter 中设置背景图像【Flutter专题5】
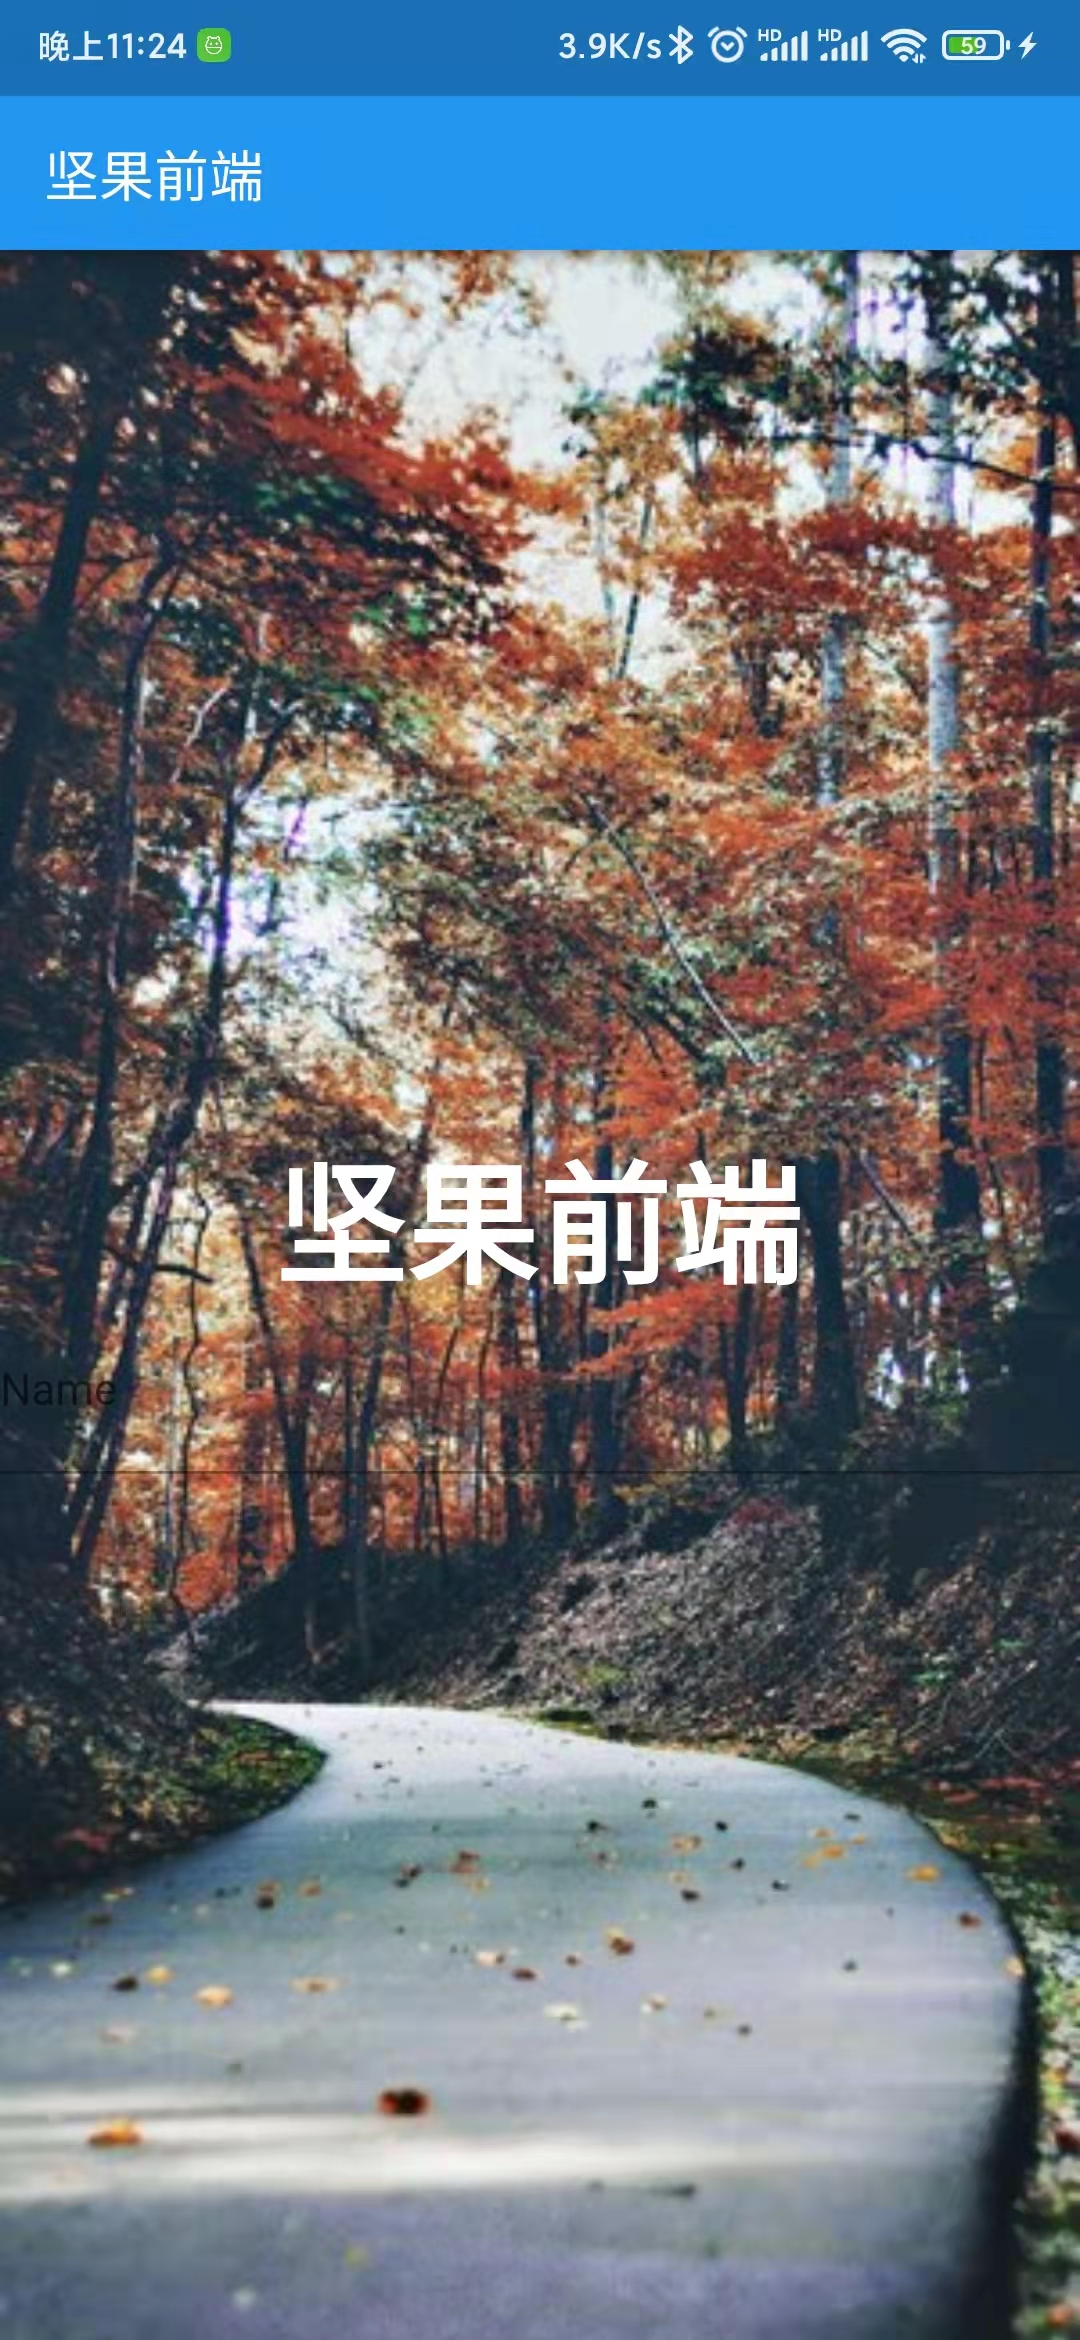
在 Flutter 应用程序中设置背景图像的常用方法是使用DecorationImage. 以下示例包括如何设置Fit 模式、透明度以及在显示键盘时防止图像变化。
设置背景图像使用 DecorationImage
您可能已经熟悉Container小部件。Container 的构造函数有一个名为decoration的参数,用于在 child 后面绘制装饰。对于该参数,您需要传递一个Decoration值。Flutter 中有一些Decoration类。其中一些,例如BoxDecorationand ShapeDecoration,允许您传递类型为image的参数DecorationImage。
该DecorationImage构造函数需要你传递一个参数,其名称也为image,为此您需要传递一个 ImageProvider 作为值。本教程以 NetworkImage 为例。但是您也可以使用其他 ImageProvider,例如 MemoryImage、FileImage,或从资产加载图像。
static const String imageUrl =
'https://mocah.org/thumbs/268085-wallpaper-1080-2400.jpg';
static const Widget appName = const Text(
'坚果前端',
style: const TextStyle(
color: Colors.white, fontSize: 48, fontWeight: FontWeight.bold),
);
@override
Widget build(BuildContext context) {
return Scaffold(
appBar: AppBar(
title: const Text('坚果前端'),
),
body: Container(
width: double.infinity,
height: double.infinity,
decoration: BoxDecoration(
image: DecorationImage(
image: NetworkImage(imageUrl),
),
),
child: Column(
mainAxisAlignment: MainAxisAlignment.center,
children: [
appName,
],
),
),
);
}输出:

设置Fit 模式
如果图像不适合屏幕,您可能需要调整图像应如何嵌入到可用空间中。它可以通过传递一个BoxFit枚举值作为fit参数来完成。可能的值为:
-
fill:设置源填充目标框。它可能会扭曲源的纵横比。 -
contain:在目标框内将源设置为尽可能大。 -
cover:将源设置为尽可能小,同时仍覆盖整个目标框。 -
fitWidth: 设置源的宽度以匹配目标框的宽度。它可能会导致源垂直溢出目标框。 -
fitHeight: 设置源的高度以匹配目标框的宽度。它可能会导致源水平溢出目标框。 -
none: 对齐目标框内的源并丢弃框外的任何部分.. -
scaleDown:在目标框内对齐源并在必要时缩小源以适合目标框。
  Container(
    width: double.infinity,
    height: double.infinity,
    decoration: BoxDecoration(
      image: DecorationImage(
        fit: BoxFit.fitWidth,
        image: NetworkImage(imageUrl),
      ),
    ),
    child: Column(
      mainAxisAlignment: MainAxisAlignment.center,
      children: [
        appName,
      ],
    ),
  ),
设置图像透明度/不透明度
要设置背景图像的透明度或不透明度,您可以传递colorFilter参数。在下面的示例中,我们创建了ColorFilter不透明度为 0.2 的 。混合模式设置为dstATop,将目标图像(透明滤镜)合成到源图像(背景图像)重叠的位置。
  Container(
    width: double.infinity,
    height: double.infinity,
    decoration: BoxDecoration(
      image: DecorationImage(
        fit: BoxFit.fitWidth,
        colorFilter: ColorFilter.mode(Colors.black.withOpacity(0.2), BlendMode.dstATop),
        image: NetworkImage(imageUrl),
      ),
    ),
    child: Column(
      mainAxisAlignment: MainAxisAlignment.center,
      children: [
        appName,
      ],
    ),
  ),
输出:

显示键盘时防止调整大小
在移动设备上,当用户与文本字段交互时,通常会显示屏幕键盘。显示键盘时,应用程序内容的屏幕区域变小。它还会影响背景图像的渲染方式,因为图像必须适合较小的空间。
例如,有一个TextField小部件
  static const Widget textField = const TextField(
    decoration: InputDecoration(
      labelText: 'Name',
      hintText: 'Enter your name',
      hintStyle: const TextStyle(color: Colors.white),
    )
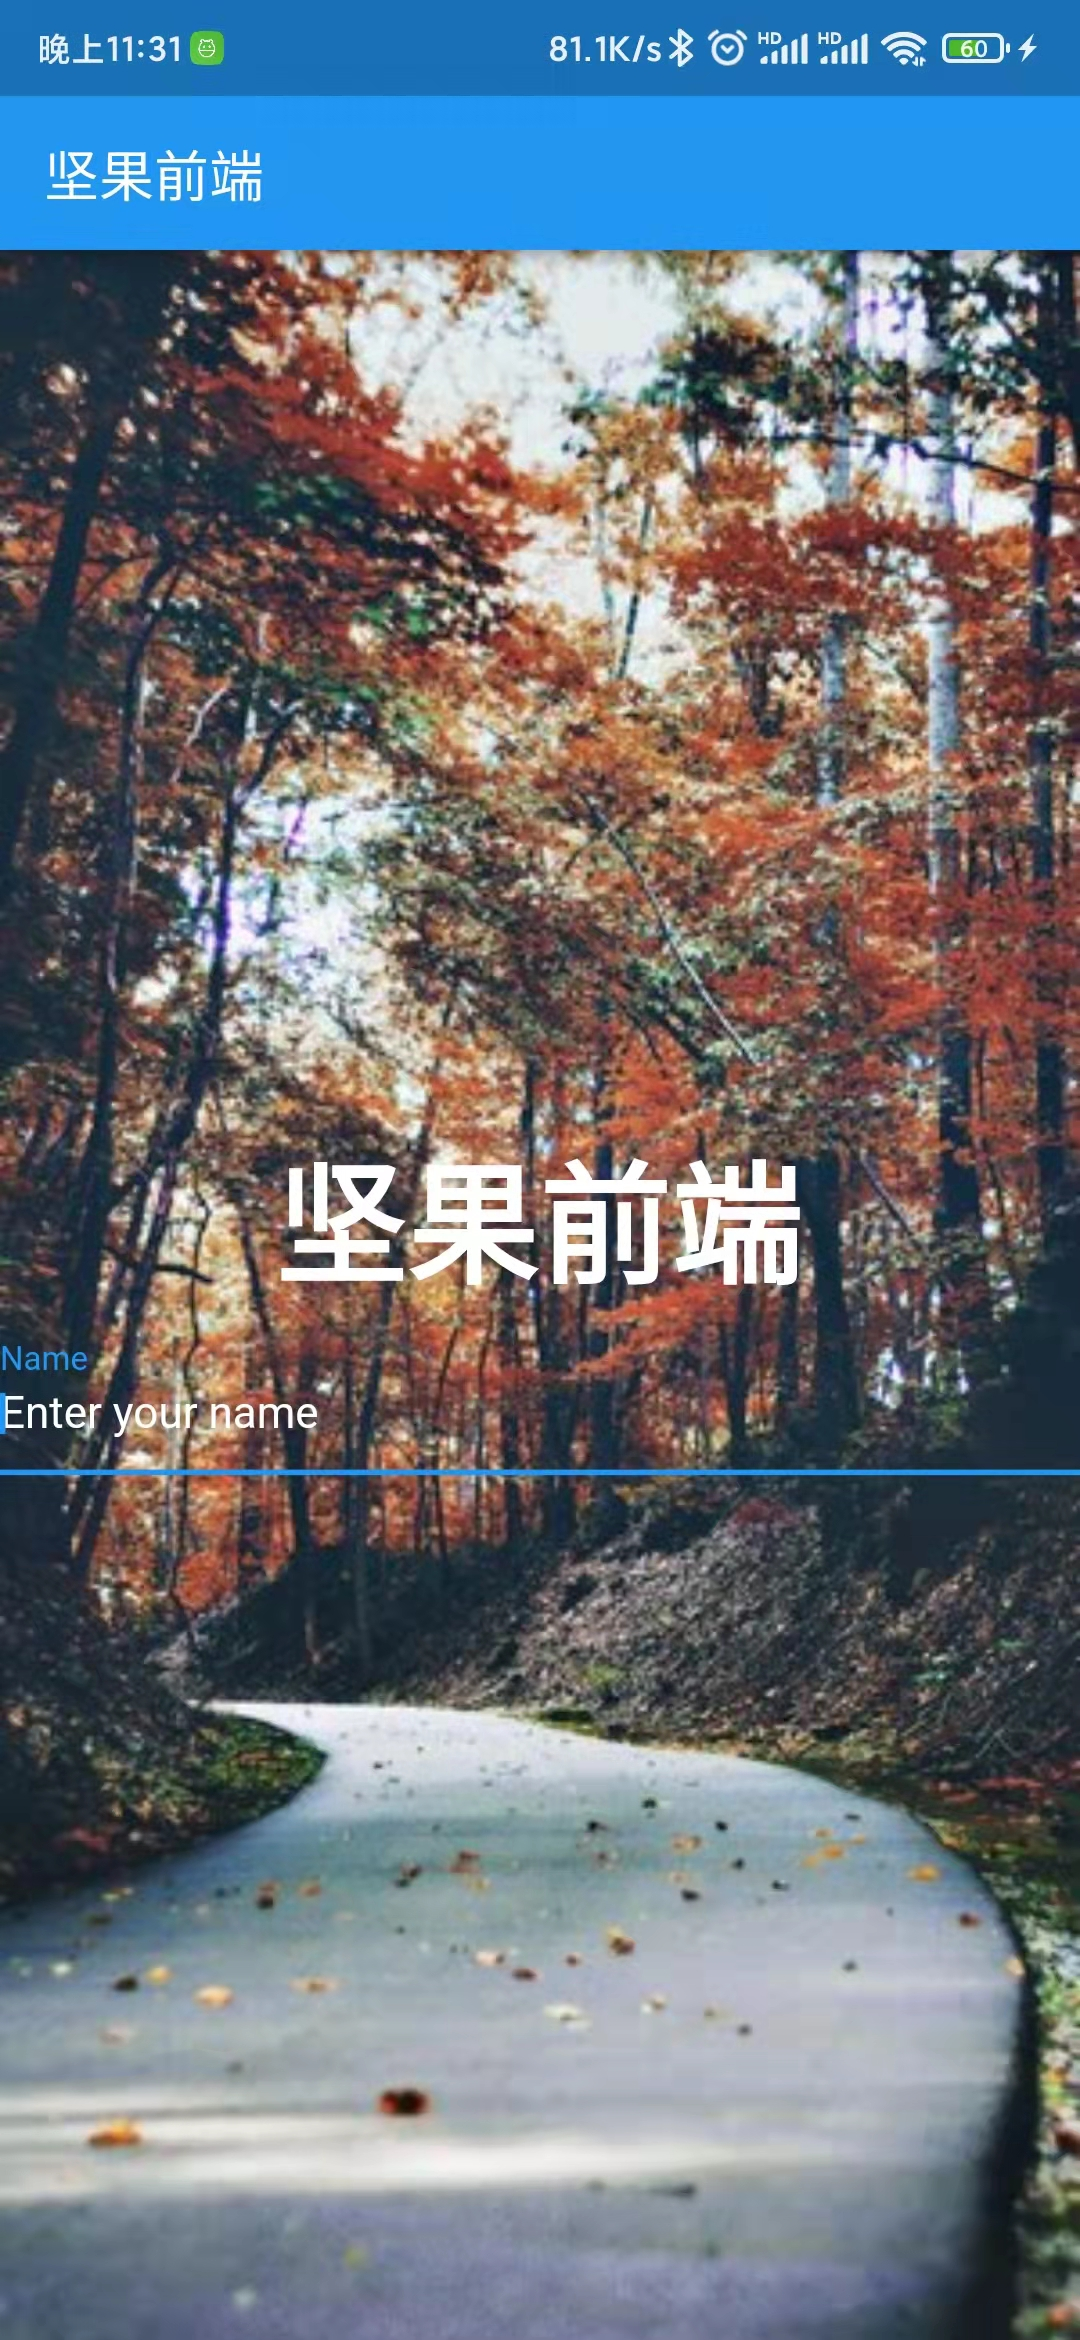
);如果TextField小部件是当前焦点节点,则会显示屏幕键盘。正如您在下面的输出中看到的,背景图像受到影响。在这种情况下,由于fit模式为fitWidth,图像被向上推以使用较小的可用高度空间进行调整。
  Container(
    width: double.infinity,
    height: double.infinity,
    decoration: BoxDecoration(
      image: DecorationImage(
        fit: BoxFit.fitWidth,
        image: NetworkImage(imageUrl),
      ),
    ),
    child: Column(
      mainAxisAlignment: MainAxisAlignment.center,
      children: [
        appName,
        textField,
      ],
    ),
  ),
输出:

如果你想让背景图像不受键盘存在的影响,你可以将resizeToAvoidBottomInset参数传递给的构造函数Scaffold并将值设置为false。该参数的值默认为true,这会导致调整小部件的大小,使其不与屏幕键盘重叠。``
  Scaffold(
    resizeToAvoidBottomInset: false,
    appBar: AppBar(
      title: const Text('坚果前端'),
    ),
    body: Container(
      width: double.infinity,
      height: double.infinity,
      decoration: BoxDecoration(
        image: DecorationImage(
          fit: BoxFit.fitWidth,\
          image: NetworkImage(imageUrl),\
        ),
      ),
      child: Column(
        mainAxisAlignment: MainAxisAlignment.center,
        children: [
          appName,
          textField,
        ],
      ),
    ),
  )
输出:

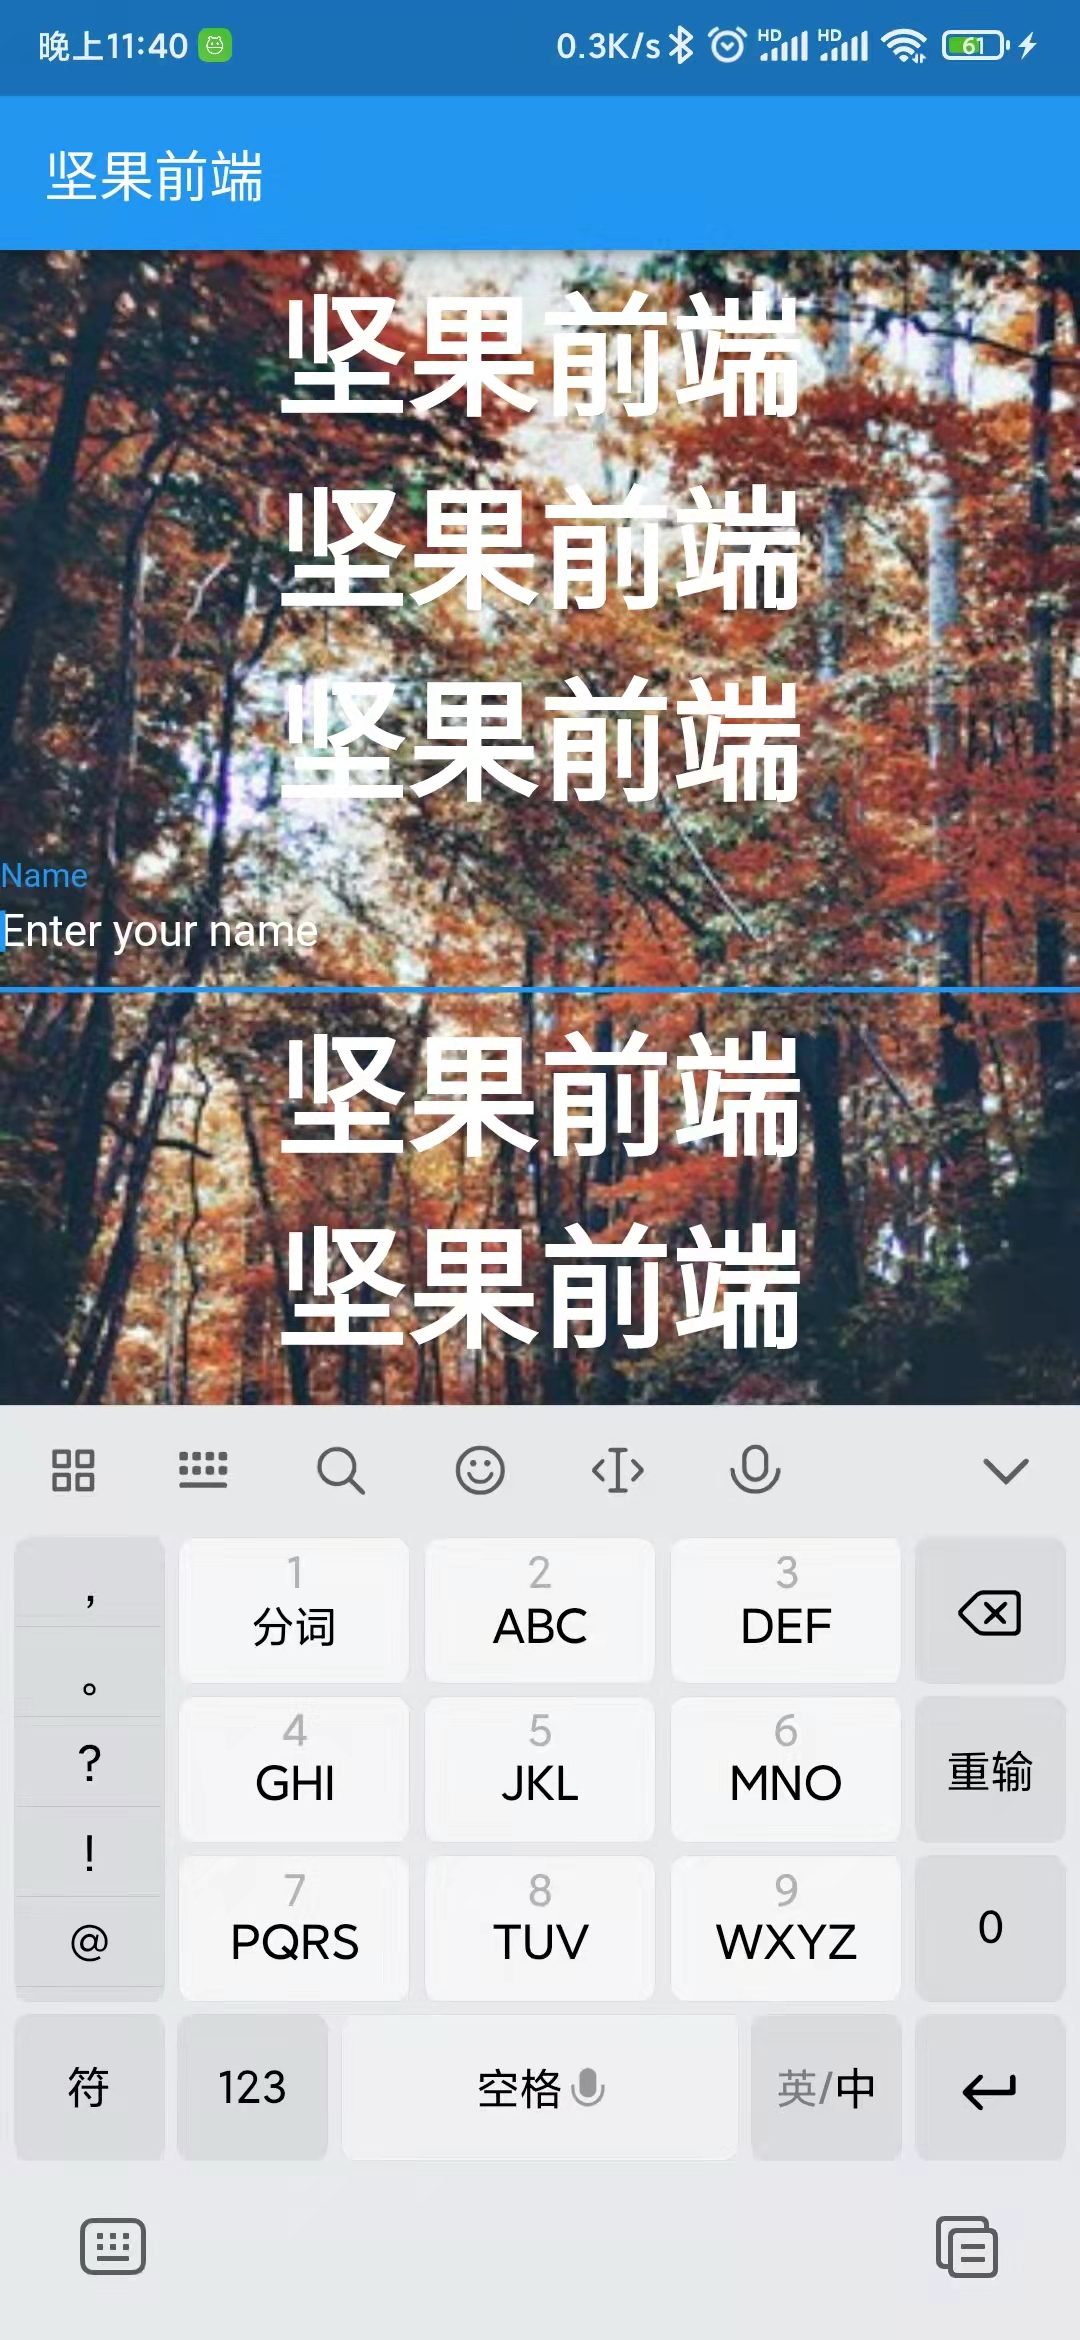
但是,如果内容不适合可用空间,您将遇到另一个问题。正如您在上面的输出中看到的那样,当显示键盘时,部分内容是不可见的。一种可能的解决方法是将 Scaffold 包裹在带有背景图像的 Container 中。然后,您需要将内容(可以滚动)放在 Scaffold 下,必要时将其包裹在 SingleChildScrollView 中。
 return Container(
    width: double.infinity,
    height: double.infinity,
    decoration: BoxDecoration(
      image: DecorationImage(
        fit: BoxFit.fitWidth,
        image: NetworkImage(imageUrl),
      ),
    ),
    child: Scaffold(
      backgroundColor: Colors.transparent,
      // resizeToAvoidBottomInset: false,
      appBar: AppBar(
        title: const Text('坚果前端'),
      ),
      body: SingleChildScrollView(
        child: Column(
          mainAxisAlignment: MainAxisAlignment.center,
          children: [
            appName,
            appName,
            appName,
            textField,
            appName,
            appName,
            appName,
          ],
        ),
      ),
    ),
  );
输出:

完整代码
import 'package:flutter/material.dart';
void main() => runApp(MyApp());
class MyApp extends StatelessWidget {
@override
Widget build(BuildContext context) {
return MaterialApp(
title: '坚果前端',
home: BackgroundImageExample(),
debugShowCheckedModeBanner: false,
);
}
}
class BackgroundImageExample extends StatelessWidget {
static const String imageUrl =
'https://mocah.org/thumbs/268085-wallpaper-1080-2400.jpg';
static const Widget appName = const Text(
'坚果前端',
style: const TextStyle(
color: Colors.white, fontSize: 48, fontWeight: FontWeight.bold),
);
static const Widget textField = const TextField(
decoration: InputDecoration(
labelText: 'Name',
hintText: 'Enter your name',
hintStyle: const TextStyle(color: Colors.white),
));
@override
Widget build(BuildContext context) {
// 1. Example without prevent image resizing (can be used if the application never show the on-screen keyboard).
// return Scaffold(
// // resizeToAvoidBottomInset: false,
// appBar: AppBar(
// title: const Text('坚果前端'),
// ),
// body: Container(
// width: double.infinity,
// height: double.infinity,
// decoration: BoxDecoration(
// image: DecorationImage(
// fit: BoxFit.fitWidth,
// // colorFilter: ColorFilter.mode(Colors.black.withOpacity(0.2), BlendMode.dstATop),
// image: NetworkImage(imageUrl),
// // image: Image.asset('assets/images/pikachu.png').image,
// ),
// ),
// child: Column(
// mainAxisAlignment: MainAxisAlignment.center,
// children: [
// appName,
// textField,
// ],
// ),
// ),
// );
// 2. Example that prevents image resizing when the keyboard is shown.
return Container(
width: double.infinity,
height: double.infinity,
decoration: BoxDecoration(
image: DecorationImage(
fit: BoxFit.fitWidth,
// colorFilter: ColorFilter.mode(Colors.black.withOpacity(0.2), BlendMode.dstATop),
image: NetworkImage(imageUrl),
// image: Image.asset('assets/images/pikachu.png').image,
),
),
child: Scaffold(
backgroundColor: Colors.transparent,
// resizeToAvoidBottomInset: false,
appBar: AppBar(
title: const Text('坚果前端'),
),
body: SingleChildScrollView(
child: Column(
mainAxisAlignment: MainAxisAlignment.center,
children: [
appName,
appName,
appName,
textField,
appName,
appName,
appName,
],
),
),
),
);
}
}
概括
要设置背景图像,您可以使用Container小部件并传递Decoration包含图像的对象。对于图像源,您需要创建一个DecorationImage并将其传递给Decoration. 还可以定义图像应如何刻入可用空间并设置图像的不透明度。如果应用程序包含可能触发屏幕键盘的文本字段,您还需要处理如上所示的情况。
- 点赞
- 收藏
- 关注作者


评论(0)