Apollo生产环境整合springboot


1.准备工作
- OS
- Apollo服务端:1.8+
- MySQL 5.6.5+
2.安装
本项目只安装了pro环境。
1.创建数据库
导入sql ,地址如下。
https://github.com/ctripcorp/apollo/blob/master/scripts/sql/apolloportaldb.sql
https://github.com/ctripcorp/apollo/blob/master/scripts/sql/apolloconfigdb.sql
- 1
- 2
2.调整服务端
1.调整ApolloPortalDB.serverconfig表

- 使用的环境
- 组织描述
- 服务端地址(Config Service地址 默认端口为8080)
2.调整ApolloConfigDB.ServerConfig

3.下载安装包
获取apollo-configservice、apollo-adminservice、apollo-portal安装包 地址:https://github.com/ctripcorp/apollo/releases
4.更改数据库配置
1.配置apollo-configservice
用程序员专用编辑器(如vim,notepad++,sublime等)打开config目录下的application-github.properties文件,修改完的效果如下:
# DataSource
spring.datasource.url = jdbc:mysql://localhost:3306/ApolloConfigDB?useSSL=false&characterEncoding=utf8
spring.datasource.username = someuser
spring.datasource.password = somepwd
- 1
- 2
- 3
- 4
2.配置apollo-adminservice的数据库连接信息
用程序员专用编辑器(如vim,notepad++,sublime等)打开config目录下的application-github.properties文件,修改完的效果如下:
# DataSource
spring.datasource.url = jdbc:mysql://localhost:3306/ApolloConfigDB?useSSL=false&characterEncoding=utf8
spring.datasource.username = someuser
spring.datasource.password = somepwd
- 1
- 2
- 3
- 4
3.配置apollo-portal的数据库连接信息
用程序员专用编辑器(如vim,notepad++,sublime等)打开config目录下的application-github.properties文件,修改完的效果如下:
local.meta=http://localhost:8080
#dev.meta=http://fill-in-dev-meta-server:8080
#fat.meta=http://fill-in-fat-meta-server:8080
#uat.meta=http://fill-in-uat-meta-server:8080
#lpt.meta=${lpt_meta}
pro.meta=http://localhost:8080
- 1
- 2
- 3
- 4
- 5
- 6
# DataSource
spring.datasource.url = jdbc:mysql://localhost:3306/ApolloPortalDB?useSSL=false&characterEncoding=utf8
spring.datasource.username = someuser
spring.datasource.password = somepwd
- 1
- 2
- 3
- 4
4.配置apollo-portal的meta service信息
使用程序员专用编辑器(如vim,notepad++,sublime等)打开apollo-portal-x.x.x-github.zip中config目录下的apollo-env.properties文件。修改完的效果如下:
local.meta=http://localhost:8080
pro.meta=http://localhost:8080
- 1
- 2
5.运行
导入服务器运行scripts/startup.sh
6.整合spring boot
1.修改pom文件
        <dependency>
            <groupId>com.ctrip.framework.apollo</groupId>
            <artifactId>apollo-client</artifactId>
            <version>1.3.0</version>
        </dependency>
- 1
- 2
- 3
- 4
- 5
2.修改application配置
app:
  id: 项目名称
apollo:
  meta: http://127.0.0.1:8080(admin server 端口默认8080)
  bootstrap:
    enabled: true
    eagerLoad:
      enabled: true
- 1
- 2
- 3
- 4
- 5
- 6
- 7
- 8
3.SpringBootApplication加入注解
@EnableApolloConfig
- 1
6.页面配置
1.新建项目

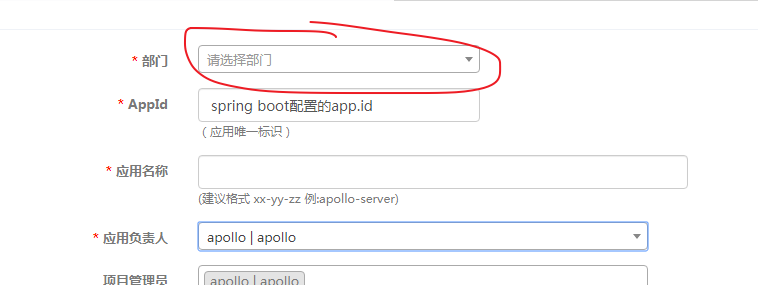
红圈处为上面配置的组织名。
2.处理项目的配置项

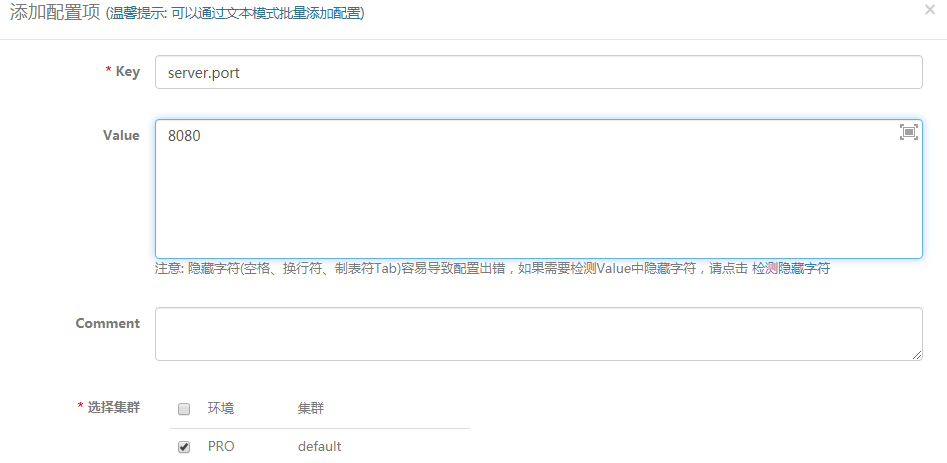 也可以直接输入全部配置项。

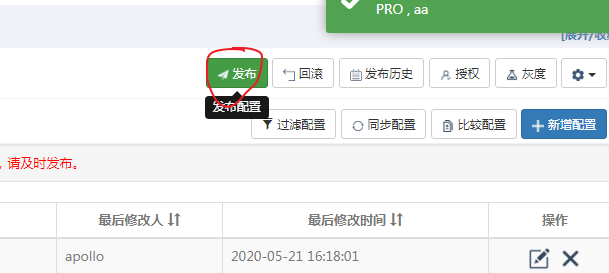
更改配置之后需要点击发布,否则不会更改。
7.验证
对于项目来说,因为配置放入了applicationcontent中,所以需要重启才能生效,但是通过以下代码不重启就能体现出生效。
@RestController
public class HelloController {

    @Value("${server.port}")
    String port;

    @GetMapping("hi")
    public String hi(String name) {
        return "hi " + name + " ,i am from port:" + port;
    }
}
- 1
- 2
- 3
- 4
- 5
- 6
- 7
- 8
- 9
- 10
- 11
参考:https://github.com/ctripcorp/apollo/wiki/%E5%88%86%E5%B8%83%E5%BC%8F%E9%83%A8%E7%BD%B2%E6%8C%87%E5%8D%97#2-apolloportalmetaservers—%E5%90%84%E7%8E%AF%E5%A2%83meta-service%E5%88%97%E8%A1%A8
文章来源: baocl.blog.csdn.net,作者:小黄鸡1992,版权归原作者所有,如需转载,请联系作者。
原文链接:baocl.blog.csdn.net/article/details/121123938

- 点赞
- 收藏
- 关注作者
评论(0)