基于AI算法开发套件进行水表读数识别
算法工程外壳介绍
云原生的产品化算法开发架构
算法外壳+算法套件基于云上资源和IDE开发工具,串联ModelArts开发、训练和部署等功能,高效管理AI算法开发的全生命周期。

基于算法外壳的水表读数识别
围绕真实AI需求场景,介绍算法外壳和算法套件在AI开发中的使用流程。
水表识别项目流程介绍
基于CV算法识别水表读数的流程大致如下:
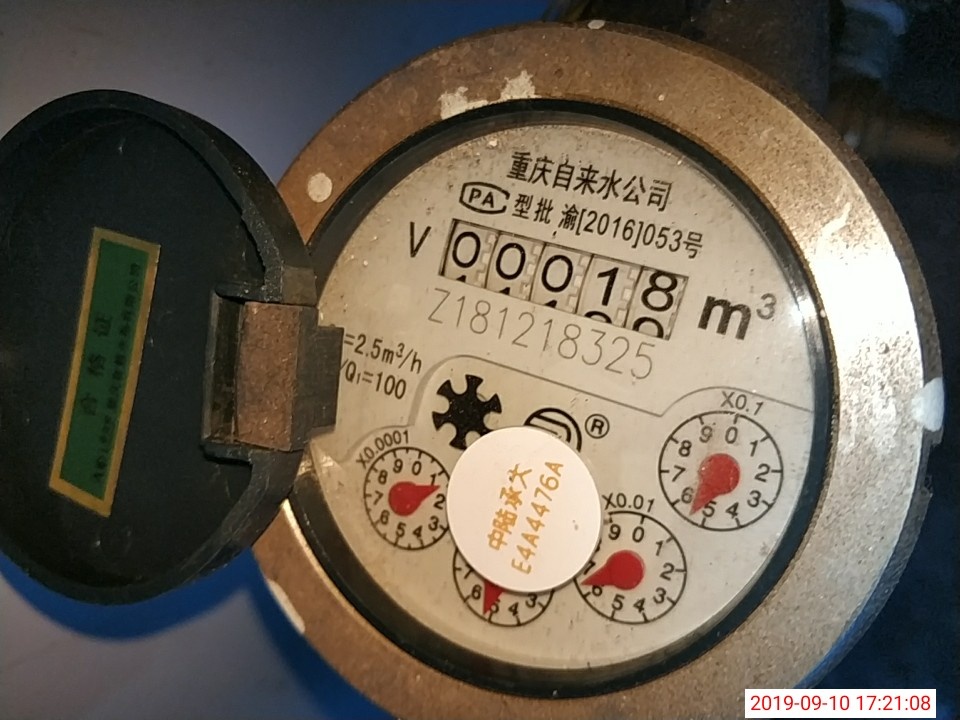
获取真实水表数据
下图水表的示数为00018
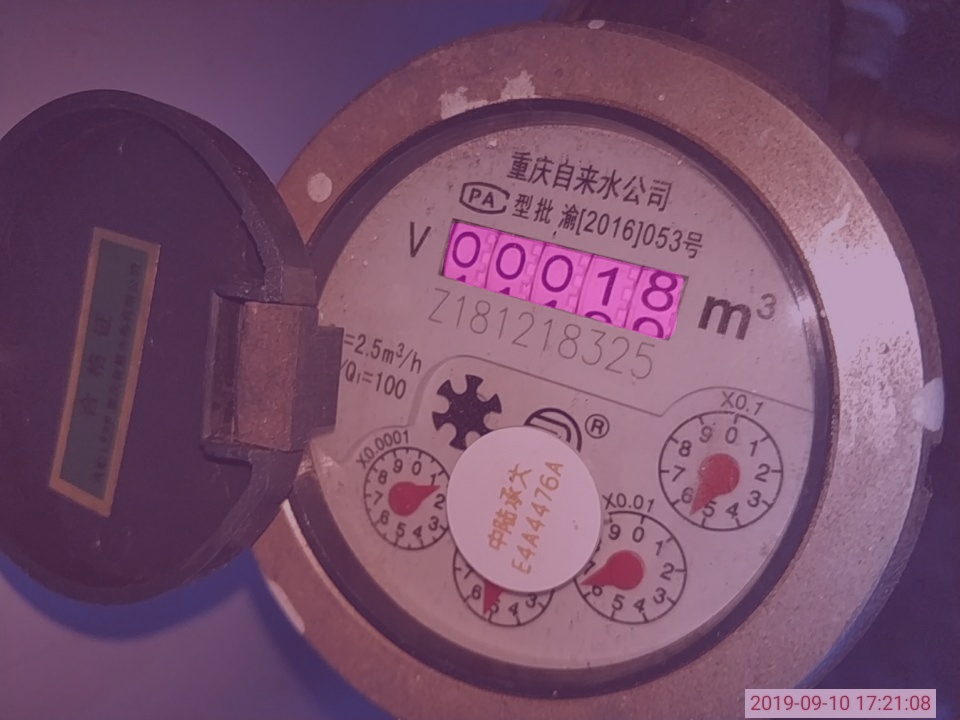
基于图片分割算法分割出水表读数区域
分割算法会输出水表读数区域四个角的坐标点(像素点),并覆盖不同颜色的蒙版区分图片不同的区域,最后可以裁剪出读数区域用于后续的OCR识别任务。
基于图片OCR算法识别出读数
OCR任务识别出水表读数为00018,与水表示数一致。

如何基于算法外壳和算法套件完成上述流程
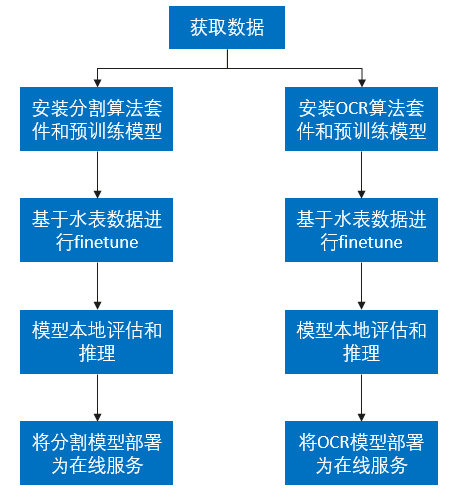
算法外壳中目前提供自研(ivg系列)和开源(mm系列)共两套算法资产,均可应用于分类、检测、分割和OCR等任务中。接下来,我们将组合使用自研分割算法(ivgSegmentation)和开源OCR算法(mmOCR)完成水表读数识别项目,并将其部署为华为云在线服务。操作流程如下图所示。
获取数据
# 下载并解压分割用数据集
wget https://cnnorth4-modelarts-sdk.obs.cn-north-4.myhuaweicloud.com:443/custom.zip

unzip custom.zip -d ./data/raw/

# 下载并解压OCR用数据集
wget https://cnnorth4-modelarts-sdk.obs.cn-north-4.myhuaweicloud.com:443/crop.zip
unzip crop.zip -d ./data/raw/


#### 安装分割资产和OCR资产

接下来将使用deeplabv3完成分割任务,使用XXX完成OCR任务

- **安装分割套件和预训练模型**
python manage.py install algorithm ivgSegmentation
python manage.py install model ivgSegmentation:deeplab/deeplabv3_resnet50_cityscapes_1024x512
- **安装OCR套件和预训练模型**
python manage.py install algorithm mmocr
python manage.py install model mmocr:textrecog/robust_scanner/robustscanner_r31_academic
#### 参数配置和模型训练


### 1. 分割水表读数区域

#### 目标:使用`deeplabv3`完成水表区域分割任务:

1. 安装ivgSegmentation套件后,可以在`./algorithms/ivgSegmentation/config`中查看目前支持的分割模型,以sample为例(sample默认的算法就是deeplabv3),文件夹中包括`config.py`(算法外壳配置)和`deeplabv3_resnet50_standard-sample_1024x512.py`(模型结构)。

2. 表盘分割只需要区分背景和读数区域,因此属于二分类,需要根据项目所需数据集对配置文件进行修改,如下所示:

   ```python
   # config.py
   alg_cfg = dict(
       ...
       data_root='data/raw/crop',   # 修改为真实路径
       ...
   )

   # deeplabv3_resnet50_standard-sample_1024x512.py
   data_cfg = dict(
       ...
       num_classes=2,  # 修改为2类
       ...
       palate=[[128, 64, 128], [244, 35, 232]]  # 可视化调色板也改成两种颜色即可
   )
-
训练分割模型
# shell
python manage.py run --cfg algorithms/ivgSegmentation/config/sample/config.py
训练好的模型会保存在指定位置中,默认为
output/${algorithm}/checkpoints中。 -
验证模型效果
模型训练完成后,可以在验证集上计算模型的指标,首先修改配置文件的模型位置:
# config.py
alg_cfg = dict(
    ...
    load_from='output/deeplabv3p_resnet50_cityscapes_1024x512/checkpoints/checkpoint_best.pth.tar',  # 修改训练模型的路径
    ...
)
# shell python manage.py run --cfg algorithms/ivgSegmentation/config/sample/config.py --pipeline evaluate -
模型推理
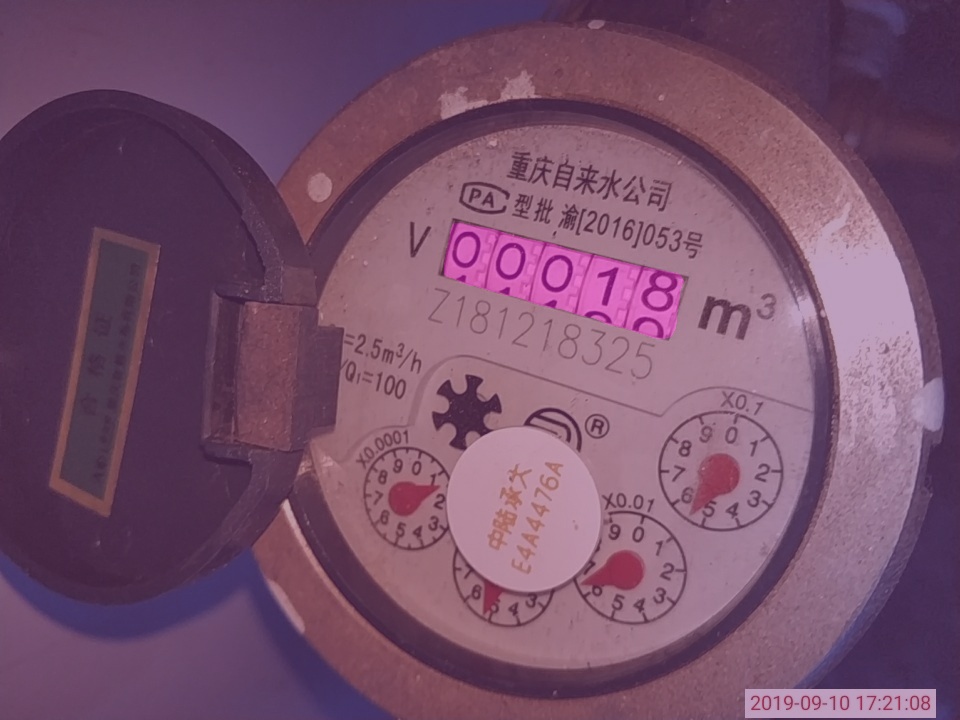
模型推理能够指定某一张图片,并且推理出图片的分割区域,并进行可视化,首先需要指定需要推理的图片路径
alg_cfg = dict(
    ...
    img_file='./data/raw/crop/image/train_27.jpg'  # 指定需要推理的图片路径
)
# shell python manage.py run --cfg algorithms/ivgSegmentation/config/sample/config.py --pipeline infer
-
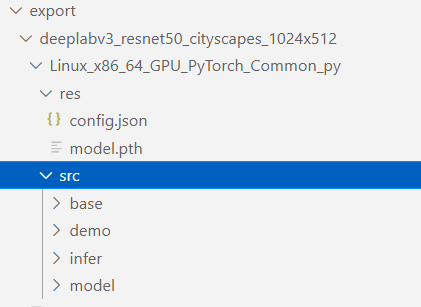
导出SDK
算法外壳支持将模型导出成一个sdk,方便进行模型部署等下游任务:
# shell
python manage.py export --cfg algorithms/ivgSegmentation/config/sample/config.py
2. 识别读数
目标:完成水表读数识别
-
安装
mmocr套件后,./algorithms/mmocr/config/textdet文件夹中包括config.py(算法外壳配置),需要根据所需算法和数据集路径修改配置文件。以下以robust_scanner算法为例。 -
为了方便处理,我么可以在
./algorithms/mmocr/experiment目录下复制一个textrecog文件夹,以下所指的配置文件都是新复制的配置文件:# shell cp ./algorithms/mmocr/config/textdet ./algorithms/mmocr/config/textrecogn# config.py ... alg_name = 'robustscanner_r31_academic' # 修改模型名称 ... model_path = './output/robustscanner_r31_academic/best_0_word_acc_epoch_1.pth' # 修改预训练模型位置 ... alg_cfg = dict( cfg=f'algorithms/{alg_home}/algorithm/configs/textrecog/robust_scanner/' \ 'robustscanner_r31_academic.py', # 修改robustscanner算法配置文件路径 ) # ./algorithms/mmocr/algorithm/configs/textrecog/robust_scanner/robustscanner_r31_academic.py ... train_prefix = 'data/raw/crop/' # 修改数据集路径 train_img_prefix1 = train_prefix + 'train' train_ann_file1 = train_prefix + 'train.txt' ... test_prefix = 'data/raw/crop/' test_img_prefix1 = test_prefix + 'val/' test_ann_file1 = test_prefix + 'val.txt' data = dict( ... train=dict( ... datasets=[ train1 ], ...), val=dict( ... datasets=[test1], .), test=dict( ... datasets=[test1], )) -
训练分割模型
# shell
python manage.py run --cfg algorithms/mmocr/config/textrecogn/config.py
训练好的模型会保存在指定位置中,默认为
output/${algorithm}/checkpoints中。 -
验证模型效果
模型训练完成后,可以在验证集上计算模型的指标,首先修改配置文件的模型位置:
# config.py
alg_cfg = dict(
    ...
    load_from='./output/robustscanner_r31_academic/latest.pth',  # 修改训练模型的路径
    ...
)
# shell python manage.py run --cfg algorithms/mmocr/config/textrecogn/config.py --pipeline evaluate -
模型推理
模型推理能够指定某一张图片,并且推理出图片的分割区域,并进行可视化,首先需要指定需要推理的图片路径
alg_cfg = dict(
    ...
    img_file="your infer image"  # 指定需要推理的图片路径
)
# shell python manage.py run --cfg algorithms/mmocr/config/textrecogn/config.py --pipeline infer

-
导出SDK
算法外壳支持将模型导出成一个sdk,方便进行模型部署等下游任务:
# shell
python manage.py export --cfg algorithms/mmocr/config/textrecogn/config.py
部署为在线服务
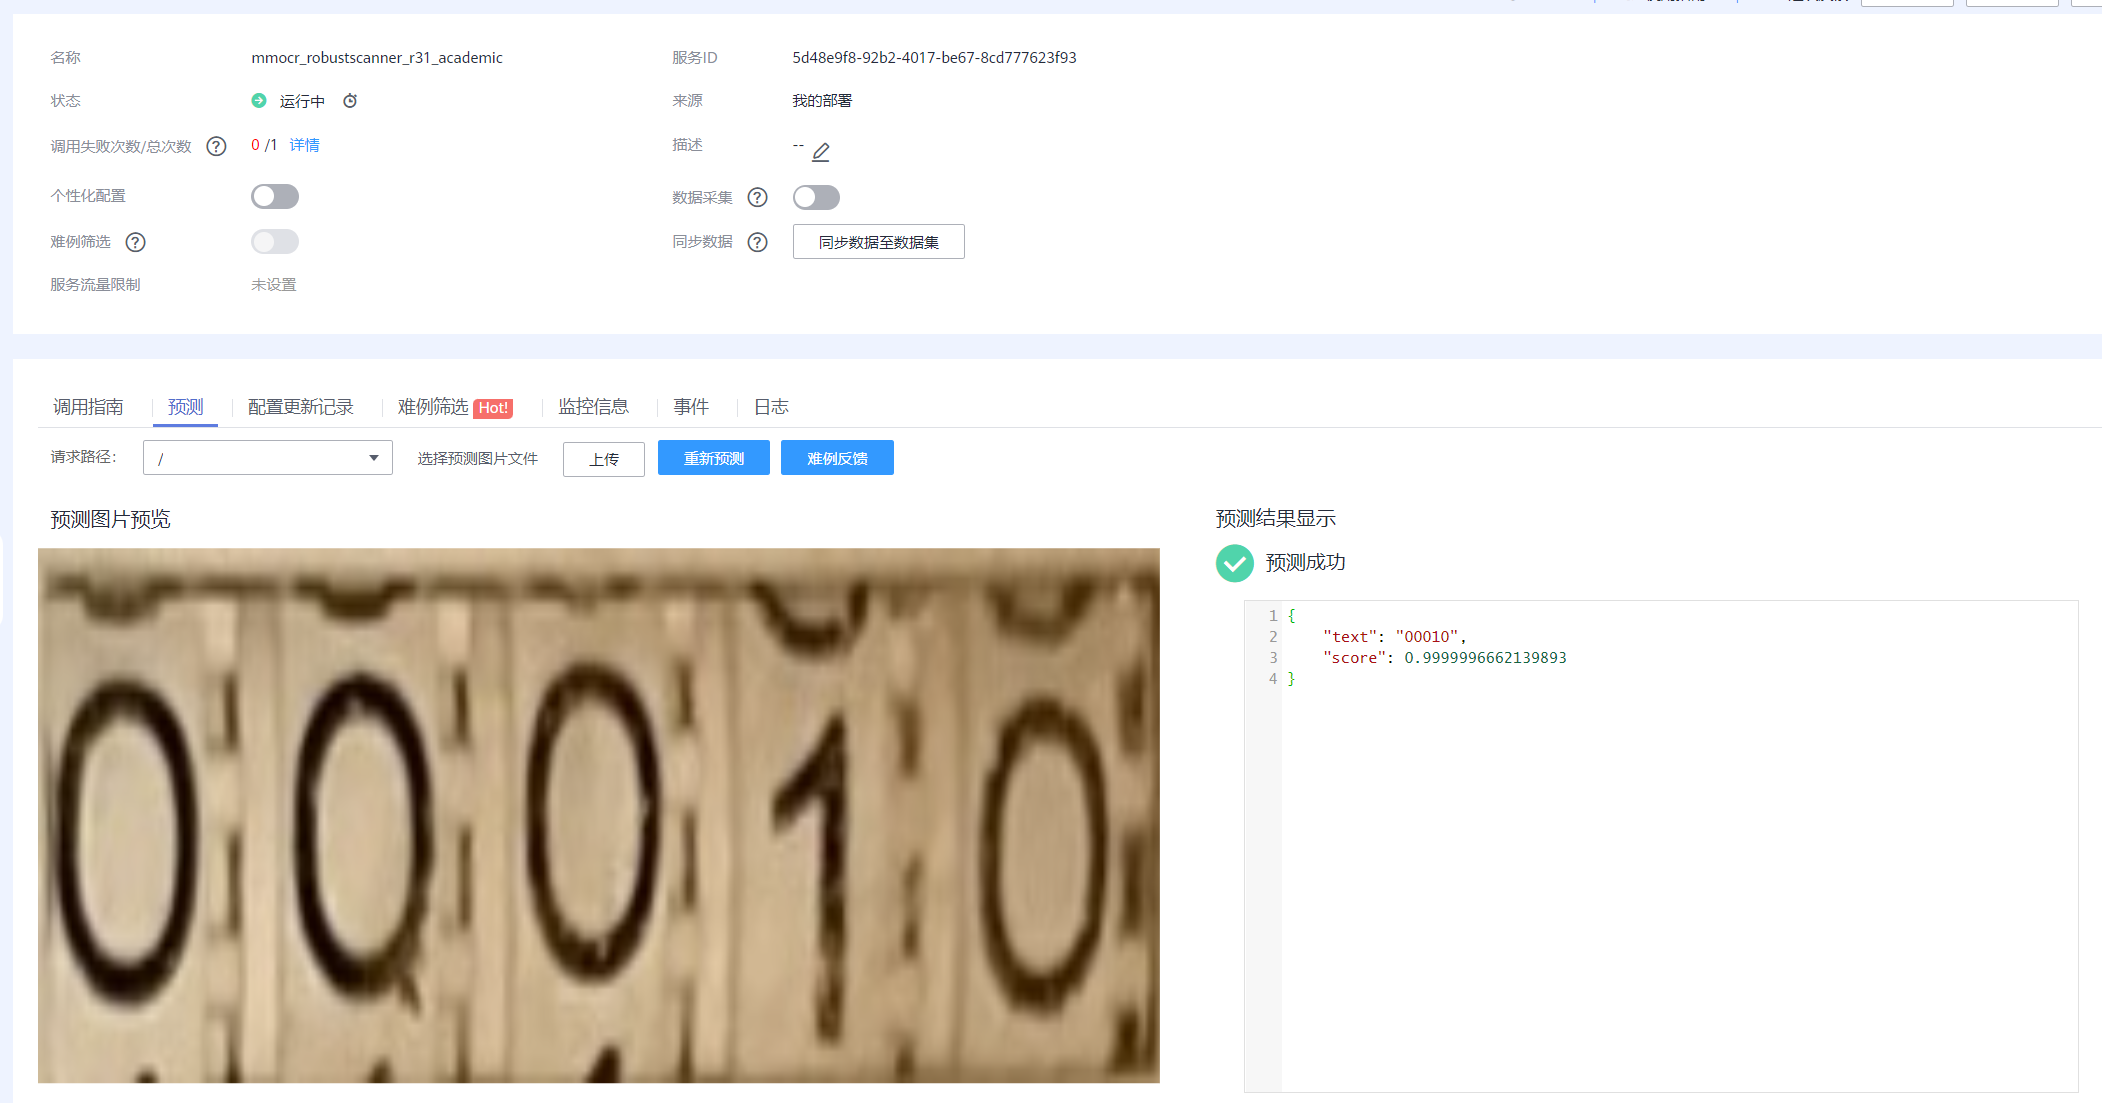
本次展示仅部署OCR服务, 包括本地部署和线上部署, 部署上线后调用部署服务进行本地图片的推理,获取水表的预测读数。
# 本地部署
python manage.py deploy --cfg  --cfg algorithms/mmocr/config/textrecogn/config.py

The model source location is /home/ma-user/work/water_meter/export/robustscanner_r31_academic/Linux_x86_64_GPU_PyTorch_Common_py
Validate config.json successfully.
Create local model successfully, model_id is:0f71de32-b9c0-41b7-98b0-d1395253f783
Validate config.json successfully.
Service name is mmocr_robustscanner_r31_academic
[Exsiting Conda environment(/home/ma-user/anaconda3/envs/modelarts_env_47ce3a59b9b6f8767c7aa98229bf4233) found to run current task.]
local_service_port is 127.0.0.1:42329
Deploying the local service ...
Successfully deployed the local service. You can check the log in /home/ma-user/work/water_meter/export/robustscanner_r31_academic/Linux_x86_64_GPU_PyTorch_Common_py/log.txt
INFO:ma_cau:{
 "text": "00326",
 "score": 0.9999996662139893
}
# 在线部署
python manage.py deploy --cfg algorithms/mmocr/config/textrecogn/config.py --launch_remote
- 点赞
- 收藏
- 关注作者


评论(0)