安卓学习笔记38:利用OpenGL ES绘制旋转立方体
零、学习目标
- 了解绘制图形的基本步骤
- 掌握如何绘制旋转立方体
一、绘制图形基本步骤
在三维坐标系里绘制平面图形(三角形、正方形[拼合法、顶点法、索引法]、多边形),如何实现动画(变色、旋转、平移)。
- 建模(Model):保存顶点坐标;提供自绘方法
- 渲染(Renderer):设置一些选项,进行变换,绘制图形
- 展示(Activity):将视图作为用户界面
二、绘制旋转立方体
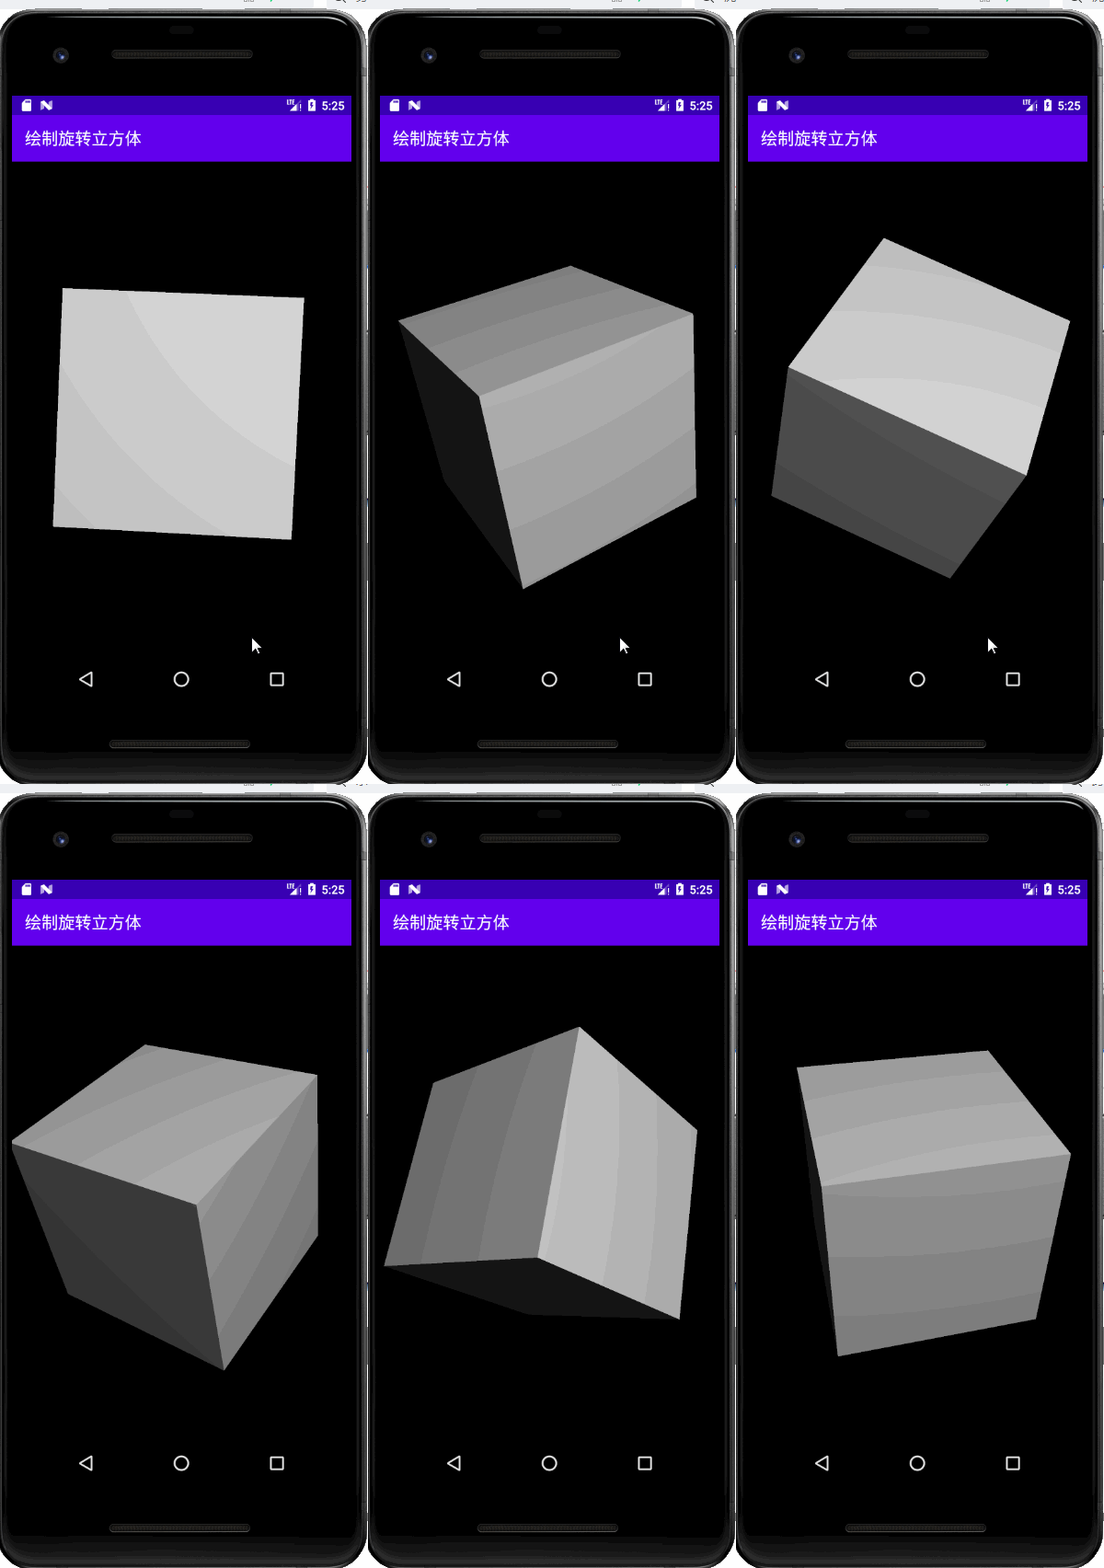
(一)运行效果


(二)实现步骤
1、创建安卓应用【DrawRotatingCube】


2、建模:立方体类 - Cube

如上图所示,将正方体的中心设定为坐标原点。
八个顶点为 P 1 、 P 2 、 P 3 、 P 4 、 P 5 、 P 6 、 P 7 、 P 8 P_1、P_2、P_3、P_4、P_5、P_6、P_7、P_8 P1、P2、P3、P4、P5、P6、P7、P8。
为方便起见,假设正方体边长为 o n e one one,半边长为 h a l f half half。
-
P 1 ( − h a l f , − h a l f , h a l f ) P_1(-half, -half, half) P1(−half,−half,half)
P 2 ( h a l f , − h a l f , h a l f ) P_2(half, -half, half) P2(half,−half,half)
P 3 ( h a l f , h a l f , h a l f ) P_3(half, half, half) P3(half,half,half)
P 4 ( − h a l f , h a l f , h a l f ) P_4(-half, half, half) P4(−half,half,half)
P 5 ( − h a l f , − h a l f , − h a l f ) P_5(-half, -half, -half) P5(−half,−half,−half)
P 6 ( h a l f , − h a l f , − h a l f ) P_6(half, -half, -half) P6(half,−half,−half)
P 7 ( h a l f , h a l f , − h a l f ) P_7(half, half, -half) P7(half,half,−half)
P 8 ( − h a l f , h a l f , − h a l f ) P_8(-half, half, -half) P8(−half,half,−half) -
前面: P 1 P 2 P 3 P 4 P_1P_2P_3P_4 P1P2P3P4
后面: P 5 P 6 P 7 P 8 P_5P_6P_7P_8 P5P6P7P8 -
左面: P 1 P 5 P 8 P 4 P_1P_5P_8P_4 P1P5P8P4
右面: P 2 P 6 P 7 P 3 P_2P_6P_7P_3 P2P6P7P3 -
上面: P 4 P 3 P 7 P 8 P_4P_3P_7P_8 P4P3P7P8
下面: P 1 P 2 P 5 P 6 P_1P_2P_5P_6 P1P2P5P6

package net.hw.draw_rotating_cube;

import java.nio.ByteBuffer;
import java.nio.ByteOrder;
import java.nio.IntBuffer;

import javax.microedition.khronos.opengles.GL10;

/**
 * 功能:创建立方体模型
 * 作者:华卫
 * 日期:2020年12月31日
 */
public class Cube {
    /**
     * 定义单位长度
     */
    private int one = 0x10000;
    /**
     * 半个单位长度
     */
    private int half = one / 2;
    /**
     * 立方体整型缓冲区
     */
    private IntBuffer cubebBuffer;
    /**
     * 字节型缓冲区
     */
    private ByteBuffer byteBuffer;

    /**
     * 立方体六个面顶点坐标数组
     */
    int cubeVertices[] = {
            /* 前面四个顶点坐标 */
            -half, -half, half, // 顶点P1
            half, -half, half, // 顶点P2
            half, half, half, // 顶点P3
            -half, half, half, // 顶点P4

            /* 后面四个顶点坐标 */
            -half, -half, -half, // 顶点P5
            half, -half, -half, // 顶点P6
            half, half, -half, // 顶点P7
            -half, half, -half, // 顶点P8

            /* 左面四个顶点坐标 */
            -half, -half, half, // 顶点P1
            -half, -half, -half, // 顶点P5
            -half, half, -half, // 顶点P8
            -half, half, half, // 顶点P4

            /* 右面四个顶点坐标 */
            half, -half, half, // 顶点P2
            half, -half, -half, // 顶点P6
            half, half, -half, // 顶点P7
            half, half, half, // 顶点P3

            /* 上面四个顶点坐标 */
            -half, half, half, // 顶点P4
            half, half, half, // 顶点P3
            half, half, -half, // 顶点P7
            -half, half, -half, // 顶点P8

            /* 下面四个顶点坐标 */
            -half, -half, half, // 顶点P1
            half, -half, half, // 顶点P2
            half, -half, -half, // 顶点P6
            -half, -half, -half, // 顶点P5
    }; // 6 * 4 * 3 = 72 (立方体的面数 * 每个面的顶点数 * 每个顶点的坐标数)

    /**
     * 构造方法:将立方体顶点坐标保存到整型缓冲区里
     */
    public Cube() {
        // 分配空间,一个整数是4个字节,所以要乘4
        byteBuffer = ByteBuffer.allocateDirect(cubeVertices.length * 4);
        // 采用本地字节顺序来处理字节数据
        byteBuffer.order(ByteOrder.nativeOrder());
        // 将字节型缓冲区转换成整型缓冲区
        cubebBuffer = byteBuffer.asIntBuffer();
        // 将立方体顶点坐标存放到立方体整型缓冲区里
        cubebBuffer.put(cubeVertices);
        // 将立方体整型缓冲区内部指针归位到第一个数据
        cubebBuffer.position(0);
    }

    /**
     * 自绘方法:按照固定大小与位置绘制正方体
     *
     * @param gl
     */
    public void drawSelf(GL10 gl) {
        // 将立方体整型缓冲区数据加载到内存
        gl.glVertexPointer(3, GL10.GL_FIXED, 0, cubebBuffer);

        /* 绘制立方体的前面 */
        gl.glColor4f(1.0f, 1.0f, 0.0f, 1.0f); // 黄色
        gl.glNormal3f(0.0f, 0.0f, 1.0f); // z轴正向
        gl.glDrawArrays(GL10.GL_TRIANGLE_FAN, 0, 4); // △P1P2P3 + △P1P3P4

        /* 绘制立方体的后面 */
        gl.glNormal3f(0.0f, 0.0f, -1.0f); // z轴负向
        gl.glDrawArrays(GL10.GL_TRIANGLE_FAN, 4, 4); // △P5P6P7 + △P5P7P8

        /* 绘制立方体的左面 */
        gl.glColor4f(0.0f, 0.0f, 1.0f, 1.0f); // 蓝色
        gl.glNormal3f(-1.0f, 0.0f, 0.0f); // x轴负向
        gl.glDrawArrays(GL10.GL_TRIANGLE_FAN, 8, 4); // △P1P5P8 + △P1P8P4

        /* 绘制立方体的右面 */
        gl.glNormal3f(1.0f, 0.0f, 0.0f); // x轴正向
        gl.glDrawArrays(GL10.GL_TRIANGLE_FAN, 12, 4); // △P2P6P7 + △P2P7P3

        /* 绘制立方体的上面 */
        gl.glColor4f(1.0f, 0.0f, 1.0f, 1.0f); // 紫色
        gl.glNormal3f(0.0f, 1.0f, 0.0f); // y轴正向
        gl.glDrawArrays(GL10.GL_TRIANGLE_FAN, 16, 4); // △P4P3P7 + △P4P7P8

        /* 绘制立方体的下面 */
        gl.glNormal3f(0.0f, -1.0f, 0.0f); // y轴负向
        gl.glDrawArrays(GL10.GL_TRIANGLE_FAN, 20, 4); // △P1P2P6 + △P1P6P5
    }
}
- 1
- 2
- 3
- 4
- 5
- 6
- 7
- 8
- 9
- 10
- 11
- 12
- 13
- 14
- 15
- 16
- 17
- 18
- 19
- 20
- 21
- 22
- 23
- 24
- 25
- 26
- 27
- 28
- 29
- 30
- 31
- 32
- 33
- 34
- 35
- 36
- 37
- 38
- 39
- 40
- 41
- 42
- 43
- 44
- 45
- 46
- 47
- 48
- 49
- 50
- 51
- 52
- 53
- 54
- 55
- 56
- 57
- 58
- 59
- 60
- 61
- 62
- 63
- 64
- 65
- 66
- 67
- 68
- 69
- 70
- 71
- 72
- 73
- 74
- 75
- 76
- 77
- 78
- 79
- 80
- 81
- 82
- 83
- 84
- 85
- 86
- 87
- 88
- 89
- 90
- 91
- 92
- 93
- 94
- 95
- 96
- 97
- 98
- 99
- 100
- 101
- 102
- 103
- 104
- 105
- 106
- 107
- 108
- 109
- 110
- 111
- 112
- 113
- 114
- 115
- 116
- 117
- 118
- 119
- 120
- 121
- 122
- 123
- 124
- 125
3、渲染:立方体表面视图 - CubeSurfaceView

package net.hw.draw_rotating_cube;

import android.opengl.GLSurfaceView;
import android.opengl.GLU;

import javax.microedition.khronos.egl.EGLConfig;
import javax.microedition.khronos.opengles.GL10;

/**
 * 功能:立方体渲染器,绘制和旋转
 * 作者:华卫
 * 日期:2020年12月31日
 */
public class CubeSurfaceView implements GLSurfaceView.Renderer {
    /**
     * 声明立方体变量
     */
    private Cube cube;
    /**
     * 起始时间
     */
    private long startTime;

    /**
     * 表面创建回调方法
     */
    @Override
    public void onSurfaceCreated(GL10 gl, EGLConfig config) {
        /* 设置OpenGL的一些选项 */
        // 启用深度测试(进入深度对比,并更新深度缓冲区内容)
        gl.glEnable(GL10.GL_DEPTH_TEST);
        // 设置深度功能起作用
        gl.glDepthFunc(GL10.GL_LEQUAL);

        // 实例化正方体
        cube = new Cube();
        // 获得起始时间
        startTime = System.currentTimeMillis();
    }

    /**
     * 表面变化回调方法
     */
    @Override
    public void onSurfaceChanged(GL10 gl, int width, int height) {
        // 计算手机屏幕宽高比
        float ratio = (float) width / height;
        // 设置视区为整个手机屏幕
        gl.glViewport(0, 0, width, height);
        // 设置为投影模式
        gl.glMatrixMode(GL10.GL_PROJECTION);
        // 加载单位矩阵,表明从基本模型开始变换
        gl.glLoadIdentity();
        // 设置透视范围
        GLU.gluPerspective(gl, 45.0f, ratio, 1.0f, 100.0f);
        // 设置为模型视图模式
        gl.glMatrixMode(GL10.GL_MODELVIEW);
    }

    /**
     * 绘制帧回调方法
     */
    @Override
    public void onDrawFrame(GL10 gl) {
        // 清除手机屏幕
        gl.glClear(GL10.GL_COLOR_BUFFER_BIT | GL10.GL_DEPTH_BUFFER_BIT);
        // 启用顶点绘制法
        gl.glEnableClientState(GL10.GL_VERTEX_ARRAY);

        // 计算流逝的时间
        long elapsed = System.currentTimeMillis() - startTime;

        // 加载单位矩阵,将当前点移到屏幕中心
        gl.glLoadIdentity();
        // 向屏幕内平移3个单位
        gl.glTranslatef(0.0f, 0.0f, -3.0f);

        // 绕x轴每秒逆时针旋转15度
        gl.glRotatef(elapsed / 1000f * 15, 1.0f, 0.0f, 0.0f);
        // 绕y轴每秒逆时针旋转20度
        gl.glRotatef(elapsed / 1000f * 20, 0.0f, 1.0f, 0.0f);
        // 绕z轴每秒逆时针旋转25度
        gl.glRotatef(elapsed / 1000f * 25, 0.0f, 0.0f, 1.0f);
        // 绘制立方体
        cube.drawSelf(gl);

        // 禁用顶点绘制法
        gl.glDisableClientState(GL10.GL_VERTEX_ARRAY);
    }
}
- 1
- 2
- 3
- 4
- 5
- 6
- 7
- 8
- 9
- 10
- 11
- 12
- 13
- 14
- 15
- 16
- 17
- 18
- 19
- 20
- 21
- 22
- 23
- 24
- 25
- 26
- 27
- 28
- 29
- 30
- 31
- 32
- 33
- 34
- 35
- 36
- 37
- 38
- 39
- 40
- 41
- 42
- 43
- 44
- 45
- 46
- 47
- 48
- 49
- 50
- 51
- 52
- 53
- 54
- 55
- 56
- 57
- 58
- 59
- 60
- 61
- 62
- 63
- 64
- 65
- 66
- 67
- 68
- 69
- 70
- 71
- 72
- 73
- 74
- 75
- 76
- 77
- 78
- 79
- 80
- 81
- 82
- 83
- 84
- 85
- 86
- 87
- 88
- 89
- 90
4、展示:主界面类 - MainActivity

package net.hw.draw_rotating_cube;

import android.opengl.GLSurfaceView;
import android.os.Bundle;

import androidx.appcompat.app.AppCompatActivity;

public class MainActivity extends AppCompatActivity {
    /**
     * 图形库表面视图
     */
    private GLSurfaceView mGlSurfaceView;
    /**
     * 立方体表面视图(渲染器)
     */
    private CubeSurfaceView mCubeSurfaceView;

    @Override
    protected void onCreate(Bundle savedInstanceState) {
        super.onCreate(savedInstanceState);
        // 实例化图形库表面视图
        mGlSurfaceView = new GLSurfaceView(this);
        // 实例化立方体表面视图
        mCubeSurfaceView = new CubeSurfaceView();
        // 图形库表面视图设置渲染器
        mGlSurfaceView.setRenderer(mCubeSurfaceView);
        // 将图形库表面视图设置为用户界面
        setContentView(mGlSurfaceView);
    }
}
- 1
- 2
- 3
- 4
- 5
- 6
- 7
- 8
- 9
- 10
- 11
- 12
- 13
- 14
- 15
- 16
- 17
- 18
- 19
- 20
- 21
- 22
- 23
- 24
- 25
- 26
- 27
- 28
- 29
- 30
5、启动应用,查看效果

6、演示如何设置光照效果
- 修改立方体表面视图代码

/* 设置照明效果:有三种光线(环境光、散射光、镜面高光) */
float[] lightAmbient = new float[] { 0.2f, 0.2f, 0.2f, 1 }; // 环境光参数
float[] lightDiffuse = new float[] { 1, 1, 1, 1 }; // 散射光参数
float[] lightPosition = new float[] { 1, 1, 1, 1 }; // 镜面高光参数

/* 将上面设置的值代入一个照明方程,就可以确定屏幕上每个像素的颜色和亮度 */
gl.glEnable(GL10.GL_LIGHTING); // 启用照明
gl.glEnable(GL10.GL_LIGHT0); // 设置照明方式
gl.glLightfv(GL10.GL_LIGHT0, GL10.GL_AMBIENT, lightAmbient, 0); // 设置环境光
gl.glLightfv(GL10.GL_LIGHT0, GL10.GL_DIFFUSE, lightDiffuse, 0); // 设置散射光
gl.glLightfv(GL10.GL_LIGHT0, GL10.GL_POSITION, lightPosition, 0); // 设置镜面高光
- 1
- 2
- 3
- 4
- 5
- 6
- 7
- 8
- 9
- 10
- 11
- 启动应用,查看效果

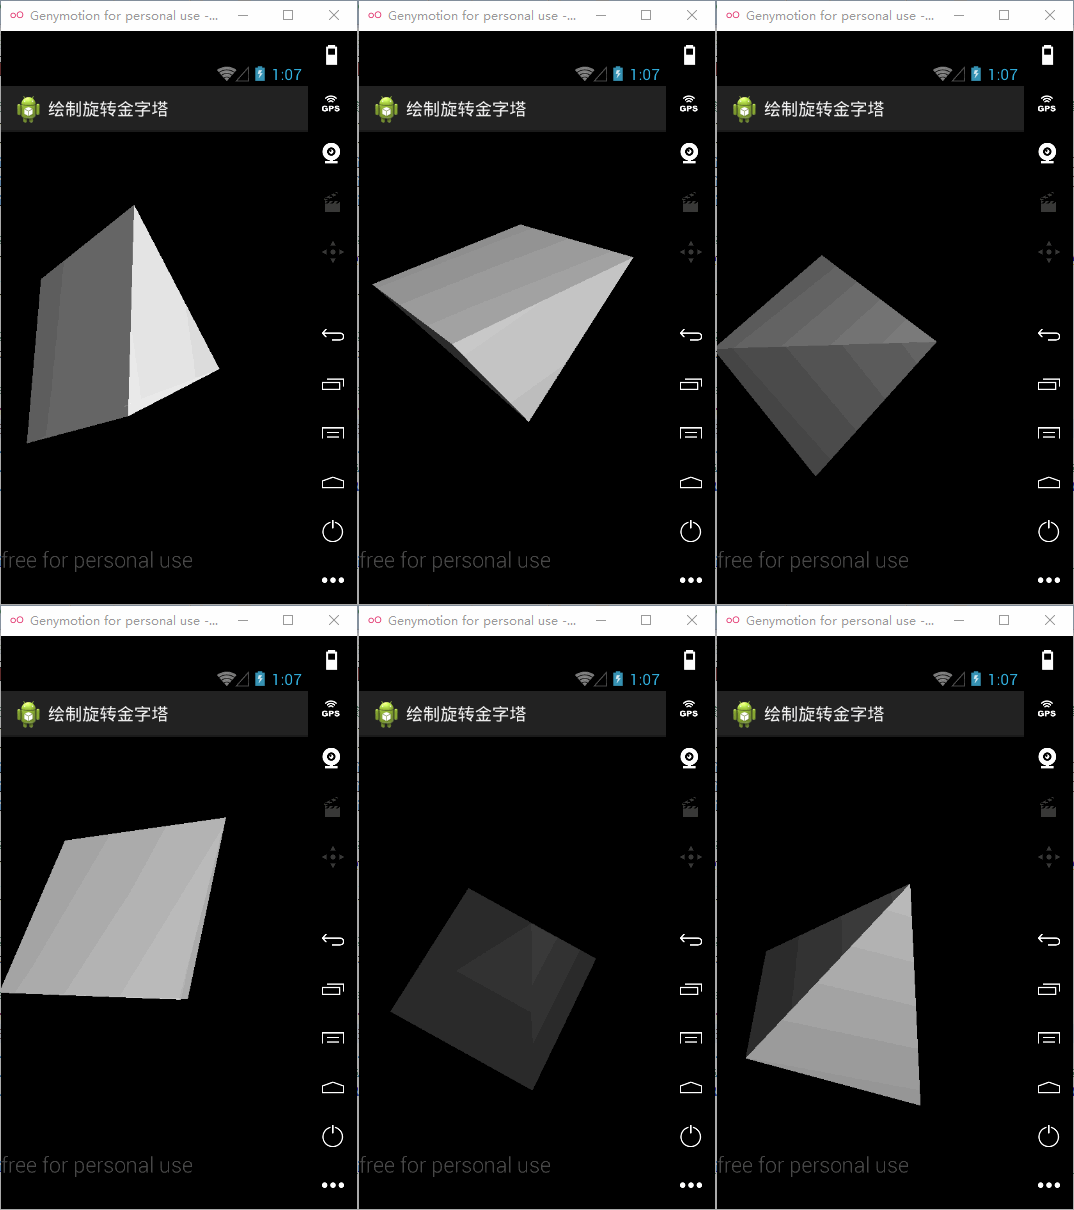
(三)课堂练习:绘制旋转金字塔

文章来源: howard2005.blog.csdn.net,作者:howard2005,版权归原作者所有,如需转载,请联系作者。
原文链接:howard2005.blog.csdn.net/article/details/112006941
- 点赞
- 收藏
- 关注作者


评论(0)