手撕源码,实现一个Koa。

官方简介
Koa 是一个新的 web 框架,由 Express 幕后的原班人马打造, 致力于成为 web 应用和 API 开发领域中的一个更小、更富有表现力、更健壮的基石。 通过利用 async 函数,Koa 帮你丢弃回调函数,并有力地增强错误处理。 Koa 并没有捆绑任何中间件, 而是提供了一套优雅的方法,帮助您快速而愉快地编写服务端应用程序。
前置知识
node http
使用http搭建服务
step1:引入http
var http = require('http');
step2: createServer方法创建http服务
let server=http.createServer(function (request, response) {
    response.writeHead(200, {'Content-Type': 'text/plain'});
    response.end('Hello World');
})
step3:监听端口
server.listen(8000);
koa简单用法
const Koa = require('koa');
const app = new Koa();

app.use(async ctx => {
  ctx.body = 'Hello World';
});

app.listen(3000);
核心目录
- application.js: 入口,导出koa。
- context.js:上下文
- request.js:处理请求
- response.js:处理响应
导出koa类
上面我们简单介绍了koa的用法,可以看出koa有两个核心的函数,一个use,一个listen。我们先来实现这两个函数。
我们已经预先学习了http的用法,那么事情就很好办了!
koa类
application.js
先定义一个koa的基本结构。
class Application {
    use() {

    }

    listen() {

    }
}
module.exports = Application
app.listen
主要是将http.listen封装一下。
class Application {
    callback = (req, res) => {
        res.end('Hello World\n');
    }
    listen() {
        const server = http.createServer(this.callback);
        console.log(...arguments)
        server.listen(...arguments)
    }
}
测试一下:test.js
const Koa=require('./application.js')

const app=new Koa()

app.listen(3000)
可以正常访问

app.use
在前置知识中我们看到,app.use接收一个回调函数,同时传入一个ctx上下文,这里ctx将request和response封装起来。为了清晰易懂,我们先不进行上下文的封装。
app.use(async ctx => {
  ctx.body = 'Hello World';
});
那么use简单的处理如下:
class Application {
    use(fn) {
        this.fn=fn

    }
}
此时use接收了一个函数,这个函数的执行的时机是在访问网站的时候,那么此时就需要在创建http服务的时候,传入这个函数。最好的方式就是放在listen的callbak中调用。
callback = (req, res) => {
    this.fn(req, res)
}
最终代码
let http = require('http')
class Application {
    use(fn) {
        this.fn=fn

    }
    callback = (req, res) => {
        this.fn(req, res)
    }

    listen() {
        const server = http.createServer(this.callback);
        server.listen(...arguments)
    }
}

module.exports = Application
测试:test.js
const Koa=require('./application.js')

const app=new Koa()

app.use((req, res) => {
    res.end('Hello World\n');
})
app.listen(3000)
可以正常访问
封装ctx
明确一个事实:每个请求都是独立的,对于原生的http请求来说,每次请求的response和request是不同的。对于koa中的ctx,则表示每次请求的ctx都是一个新的ctx。
ctx的结构
为了看到ctx的结构,我们先使用源koa打印一下ctx。最终得到的结果如下所示,有了这个结构我们就可以实现一个自己的ctx。
下面这个格式是console.dir(ctx)的结果(删掉了一些具体的内容),从下面的内容,我们可以得出ctx的结构。。
{
  request: {
    app: Application {

    },
    req: IncomingMessage {

    },
    res: ServerResponse {

    },
    ctx: [Circular],
    response: {
      app: [Application],
      req: [IncomingMessage],
      res: [ServerResponse],
      ctx: [Circular],
      request: [Circular]
    },
    originalUrl: '/'
  },
  response: {
    app: Application {

    },
    req: IncomingMessage {
    },
    res: ServerResponse {

    },
    ctx: [Circular],
    request: {
      app: [Application],
      req: [IncomingMessage],
      res: [ServerResponse],
      ctx: [Circular],
      response: [Circular],
      originalUrl: '/'
    }
  },
  app: Application {
  },
  req: IncomingMessage {
  },
  res: ServerResponse {
  },
  originalUrl: '/',
  state: {}
}
context.js
context.js 主要定义了context的具体结构以及提供的方法。
Koa Context 将 node 的 request 和 response 对象封装到单个对象中,为编写 Web 应用程序和 API 提供了许多有用的方法。 这些操作在 HTTP 服务器开发中频繁使用,它们被添加到此级别而不是更高级别的框架,这将强制中间件重新实现此通用功能。
request.js和response.js文件
在核心目录,我们提到了这两个文件,这两个文件此时就派上了用场。这两个文件具体实现了啥呢?这两个文件定义了ctx.resopnse和ctx.request的结构,也就是上面使用dir输出的结果。在koa中文文档中可以具体的看到结构,可以自行查阅。
Koa Request 对象是在 node 的 原生请求对象之上的抽象,提供了诸多对 HTTP 服务器开发有用的功能。
Koa Response 对象是在 node 的原生响应对象之上的抽象,提供了诸多对 HTTP 服务器开发有用的功能。
实现ctx
定义context.js
const context={

}
module.exports=context
定义request.js
const request={

}

module.exports=request
定义response.js
const resposne={

}

module.exports=response
use中封装ctx
我们在上面导出koa章节中可以看到,在app.use的时候,我们传的参数是(request,response),源koa传的的ctx,所以我们就知道了,koa是在app.use的时候创建了一个ctx。
在本章开头的时候,我们又提到每次请求的ctx都是全新的ctx。
综合以上两点,我们可以基本编写出下面的代码。(为了代码的清晰易读,我们封装了一个createcontext函数来创建上下文。)
const Context = require('./context')
const Request = require('./request')
const Response = require('./response')
class Application {
constructor(){
this.context = Object.create(Context);
this.request = Object.create(Request);
this.response = Object.create(Response);
}
use(fn) {
this.fn = fn
}
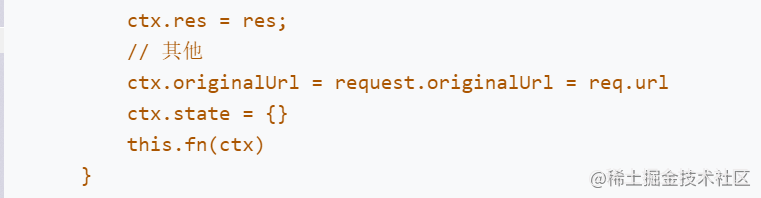
createContext = (req, res) => {
const ctx = Object.create(this.context);
const request = Object.create(this.request);
const response = Object.create(this.response);
ctx.app = request.app = response.app = this
ctx.request = request;
ctx.request.req = ctx.req = req;
ctx.response = response;
ctx.response.res = ctx.res = res;
ctx.originalUrl = request.originalUrl = req.url
ctx.state = {}
return ctx
}
callback = (req, res) => {
let ctx = this.createContext(req, res)
this.fn(ctx)
}
listen() {
const server = http.createServer(this.callback);
console.log(...arguments)
server.listen(...arguments)
}
}
首先我们在constructor中定义了一个context对象,这里会在constructor定义是因为Koa的app上默认导出context属性。
app.context是从其创建ctx的原型。您可以通过编辑app.context为ctx添加其他属性。这对于将ctx添加到整个应用程序中使用的属性或方法非常有用,这可能会更加有效(不需要中间件)和/或 更简单(更少的require()),而更多地依赖于ctx,这可以被认为是一种反模式。
例如,要从ctx添加对数据库的引用:app.context.db = db(); app.use(async ctx => { console.log(ctx.db); });
然后再callback中,我们针对response和request进行了二次封装。
再来看看这段代码:
>app.context.db = db();
>app.use(async ctx => {
>  console.log(ctx.db);
>});
再使用use之前,通过app.context对context进行了修改。当使用use函数的时候,是不是直接进入了callback函数,此时的this.context已经是修改过的了。
测试
const Koa=require('./application.js')

const app=new Koa()

app.use((ctx) => {
    // 测试1
    ctx.response.res.end(" hello my koa")
    // 测试2
    ctx.res.end(" hello my koa")
})
app.listen(3000,()=>{
    console.log('3000')
})
正常访问!
封装request.js
明确一个事实:request类的属性是通过getter和setter设置的。为什么会这样设置?这样设置的好处是可以方便的设置和获取到值。是不是有点懵逼!请听我细细道来。
先来看一下Koa中request类所绑定的属性,官方链接。
我这里简单的列举几个:
### request.header=
设置请求头对象。

### request.headers
请求头对象。别名为 `request.header`.

### request.headers=
设置请求头对象。别名为 `request.header=`

### request.url
获取请求 URL.

### request.url=
设置请求 URL, 对 url 重写有用。

### request.originalUrl
获取请求原始URL。
- 这里对于每个属性都有设置和获取的功能,使用getter和setter可以很好的实现。
- 这里的每个属性是如何获取的呢?还记得我们在request绑定了一个啥?node http原生的request(req)对不对,当我们使用Object.create并ctx.request.req=req之后,对于当前的request对象是不是都有了一个req属性。那么是不是可以通过getter进行获取。
get url () { return this.req.url }, - 这里的每个属性是如何设置的,如果我们对request本身设置有效吗?
例如下面的结构:
我们直接request.url=“https://juejin.cn/”, 这样会导致一个bug,是啥呢?还记得 我们的数据是从哪里取得的,req中获取的,如果你set的时候不是对req.url进行设置,你能获取到这个值吗?所以request的结构是这样子的。const request={ url:'', header:{ } }const request={ set url (val) { this.req.url = val } get url () { return this.req.url }, }
request.socket的getter
socket在这里指套接字。套接字的概念这里不赘述!
  get socket () {
    return this.req.socket
  },
request.protocol的getter
返回请求协议,“https” 或 “http”。当 app.proxy 是 true 时支持 X-Forwarded-Proto。
先判断套接字中是否存在encrypted(加密),如果加密,就是https,
X-Forwarded-Proto用来确定客户端与代理服务器或者负载均衡服务器之间的连接所采用的传输协议(HTTP 或 HTTPS)
X-Forwarded-Proto: https

X-Forwarded-Proto: http
  get protocol () {
    if (this.socket.encrypted) return 'https'
    if (!this.app.proxy) return 'http'
    const proto = this.get('X-Forwarded-Proto')
    return proto ? proto.split(/\s*,\s*/, 1)[0] : 'http'
  },
这里有一个get函数,主要时根据字段,从请求头中获取数据。
 get (field) {
    const req = this.req
    switch (field = field.toLowerCase()) {
      case 'referer':
      case 'referrer':
        return req.headers.referrer || req.headers.referer || ''
      default:
        return req.headers[field] || ''
    }
  },
request.host的getter
存在时获取主机(hostname:port)。当 app.proxy 是 true 时支持 X-Forwarded-Host,否则使用 Host。
get host () {
    const proxy = this.app.proxy
    let host = proxy && this.get('X-Forwarded-Host')
    if (!host) {
      if (this.req.httpVersionMajor >= 2) host = this.get(':authority')
      if (!host) host = this.get('Host')
    }
    if (!host) return ''
    return host.split(/\s*,\s*/, 1)[0]
  },
request.origin的getter
获取URL的来源,包括 protocol 和 host。
例如我请求:http://localhost:3000/index?a=3,
origin返回的是http://localhost:3000
get origin () {
    return `${this.protocol}://${this.host}`
  },
request.href的getter
获取完整的请求URL,包括 protocol,host 和 url。
href支持解析 GET http://example.com/foo
例如我访问http://localhost:3000/index?a=3
href返回http://localhost:3000/index?a=3
 get href () {

    if (/^https?:\/\//i.test(this.originalUrl)) return this.originalUrl
    return this.origin + this.originalUrl
  },
注意:这里的this.originalUrl在封装ctx的时候已经绑定过了
request.header 的getter和setter
请求头对象。这与 node http.IncomingMessage 上的 headers 字段相同
  get header () {
    return this.req.headers
  },

  set header (val) {
    this.req.headers = val
  },
request的属性是很多的,我们就不展开了,反正知道了原理,大家慢慢自己加吧。
封装response.js
对比request的封装,response的封装稍微有些不同,因为,对于request来说大部分的封装是getter,而response的封装大部分都是setter
在request部分我们阐述了三个使用getter和setter的原因。在resposne中最主要的原因我觉得是改变set的对象。
其实想一想很简单,例如在网络请求中我们会经常遇到各种状态:404 200等等,这些在node的http模块中,是用resposne.status进行改变的。假设我们在koa的response直接设置,你觉得会有用吗?简单概括一句话:koa的request和respsone是对nodehttp模块的二次封装,并且底层还是对nodehttp模块的操作。
response.status的getterh和setter
获取响应状态。默认情况下,response.status 设置为 404 而不是像 node 的 res.statusCode 那样默认为 200。
默认’404’,这里的默认是在何时默认的时候呢,其实是在接收到请求后就设置为404,也就是说在callback的时候开始设置为404。(注意:http中res.statusCode用来标记状态码,在Koa中这个被封装成status)
  callback = (req, res) => {
        let ctx = this.createContext(req, res)
        const res = ctx.res
        res.statusCode = 404
        this.fn(ctx)
    }
response.status的实现
  get status () {
    return this.res.statusCode
  },

  set status (code) {
    if (this.headerSent) return

    assert(Number.isInteger(code), 'status code must be a number')
    assert(code >= 100 && code <= 999, `invalid status code: ${code}`)
    this._explicitStatus = true
    this.res.statusCode = code
    if (this.req.httpVersionMajor < 2) this.res.statusMessage = statuses[code]
    if (this.body && statuses.empty[code]) this.body = null
  },
response.body的getter和setter
首先我们要知道body是用来干嘛的。body是用来设置响应主体的,也就是返回响应的内容的。这些内容支持以下格式:
string写入Buffer写入Stream管道Object||ArrayJSON-字符串化null无内容响应
-
nodehttp中是 res.end(“我是返回内容”) 返回响应内容的。在koa中我们是通过ctx.body="" 来设置响应内容的。这里有人会问了,ctx.body和resopnse.body 有啥关系。其实他们是一个东西,ctx里面封装了response.body。
-
koa中通过设置ctx.body,就能返回内容,其实本质还是使用了res.end(),通过res.end(ctx.body)来返回内容。res.end的调用时机在这里是放在callback中(具体的原因我们后面会说到)
const response = {
    _body: undefined,
    get body() {
        return this._body
    },
    set body(originContent) {
        this.res.statusCode = 200;
        this._body = originContent;
    }
};
封装context.js
先谈谈Koa用到的delegates。这是一个实现了代理模式的包。对于Koa来说,context就是response和request的代理,通过ctx可以直接拿到request和response的属性和方法。
下面的是Koa主要用到的两个方法。其实最终的效果和封装request和response的效果一致。
__defineGetter__ 方法可以将一个函数绑定在当前对象的指定属性上,当那个属性的值被读取时,你所绑定的函数就会被调用。
__defineSetter__ 方法可以将一个函数绑定在当前对象的指定属性上,当那个属性被赋值时,你所绑定的函数就会被调用。
(这两个方法已废弃: 该特性已经从 Web 标准中删除,虽然一些浏览器目前仍然支持它,但也许会在未来的某个时间停止支持,请尽量不要使用该特性。)
Delegator.prototype.setter = function (name) {
    var proto = this.proto;
    var target = this.target;
    this.setters.push(name);
    proto.__defineSetter__(name, function (val) {
        return this[target][name] = val;
    });
    return this;
};
Delegator.prototype.getter = function (name) {
    var proto = this.proto;
    var target = this.target;
    this.getters.push(name);
    proto.__defineGetter__(name, function () {
        return this[target][name];
    });
    return this;
};
这里我们将delegates的核心逻辑抽离,封装context
function defineGetter(target, key) {
    context.__defineGetter__(key, function () {
        return this[target][key]
    })
}
function defineSetter(target, key) {
    context.__defineSetter__(key, function (value) {
        this[target][key] = value
    })
}
const context = {};

defineGetter('request', 'path')

defineGetter('response', 'body')
)

module.exports = context;
这里我们就列了两个,其他的不再赘述。
ctx.body再追述
在上面我们谈到了response.body以及ctx通过代理模式,拿到了response.body.
在Koa的源码中,针对不同格式的内容进行了不同的处理.大家简单看一下就可以。
response = {
    set body (val) {
        const original = this._body
        this._body = val

        // no content
        if (val == null) {
          if (!statuses.empty[this.status]) {
            if (this.type === 'application/json') {
              this._body = 'null'
              return
            }
            this.status = 204
          }

          return
        }

        // 内容存在(设置了内容),这是状态码为200
        if (!this._explicitStatus) this.status = 200


        // string 字符串
        if (typeof val === 'string') {
          if (setType) this.type = /^\s*</.test(val) ? 'html' : 'text'
          this.length = Buffer.byteLength(val)
          return
        }

        // buffer
        if (Buffer.isBuffer(val)) {
          if (setType) this.type = 'bin'
          this.length = val.length
          return
        }

        // stream
        if (val instanceof Stream) {
          onFinish(this.res, destroy.bind(null, val))
          if (original !== val) {
            val.once('error', err => this.ctx.onerror(err))
            // overwriting
            if (original != null) this.remove('Content-Length')
          }

          if (setType) this.type = 'bin'
          return
        }

        // json
        this.remove('Content-Length')
        this.type = 'json'
      }
  },
ctx.body最终是在res.end()返回的,这个时机是在callback中调用的。
我们通过app.use来传入我们要执行的方法,这个方法里面有ctx.body的赋值。
app.use((ctx) => {
    console.log(ctx.request.href)
    ctx.body="123"
})
在callback中我们先创建了上下文,然后我们调用了传入的方法。
 callback = (req, res) => {
        let ctx = this.createContext(req, res)
        this.fn(ctx)
    }
那么我们是不是应该在fn执行结束之后,调用res.end(),因为这个时候body才被赋值
 callback = (req, res) => {
        let ctx = this.createContext(req, res)
        this.fn(ctx)
        let body = ctx.body;
        if (body) {
            res.end(body);
        } else {
            res.end('Not Found')
        }
    }
小结
至此已经实现了koa的基本内容。
具体来说:
-
- response通过getter和setter,封装了nodehttp的res
-
- request通过getter和setter,封装了nodehttp的req
-
- ctx通过代理,拿到了response和request的属性方法

- 点赞
- 收藏
- 关注作者
评论(0)