走进Java接口测试之服务端测试报告Klov ExtentReports
引言
在上文走进Java接口测试之测试报告ExtentReport中我们已经知道 ExtentReport 可以为接口测试提供了出色的可视化报告。而 Klov 是Extent Framework 的新的报表服务器。Klov 提供了对最新版本的详细分析,能够利用历史数据分析接口测试的执行情况。本文并没有详细介绍 TestNG 和其他配置,详细配置请参照上文。
ps:在 ExtentReports 4.0版本中 extentx 已被废弃。

功能简介
官方已经在 Heroku上使用模拟数据创建了一个demo。
注意:demo上的某些功能已禁用,以防止数据被修改。
地址:http://klov.herokuapp.com/
目前可以使用以下功能:
- Login
- Project
- Dashboard
- Build list
- Build
- Error States
- Test
- Tag Overview (pro版)
- Tag (pro版)
- Device (pro版)
- Environment
- User Settings
- User new
- User manage
- Search
可以在时间线图表中查看历史视图中的失败, 可以看到执行这些测试及其构建执行信息的时间等。

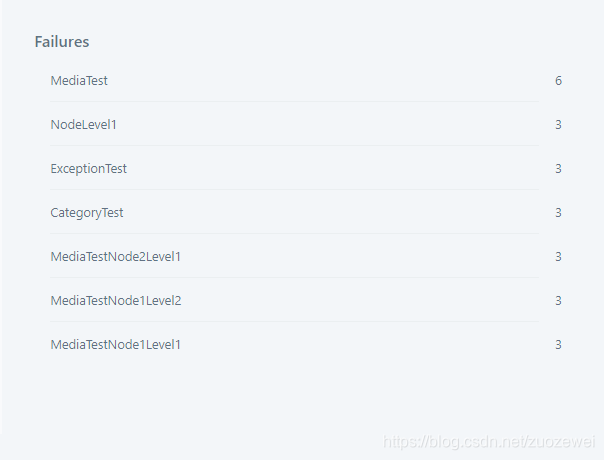
然后,可以检查哪些测试失败最多。

最后,可以使用条形图跟踪状态。

安装配置
安装 Mongo DB
安装是一个简单的过程。对于MongoDB的Windows安装,可以参考以下:
https://docs.mongodb.com/manual/tutorial/install-mongodb-on-windows/
安装 Redis
安装Redis,此处省略(如果不打算使用Redis,请跳过,请参阅 “使用没有 Redis 的” 一节)
运行 Klov
下载地址:http://extentreports.com/community/
下载 Klov-xxx.jar
有2个文件对您很重要:
- klov-xx.jar
- application.properties
启动 Klov
java -jar klov-x.x.x.jar
MongoDB 设置
可以从`application.properties``以下位置配置 MongoDB 环境设置:
# data.mongodb
spring.data.mongodb.host=localhost
spring.data.mongodb.port=27017
spring.data.mongodb.database=klov
Redis 设置
可以从application.properties以下位置配置 Redis 服务器设置:
# redis, session
spring.session.store-type=redis
server.session.timeout=-1
spring.redis.host=localhost
spring.redis.port=6379
使用没有 Redis 的设置
要在没有 Redis 的情况下使用 Klov,只需在 application.properties 以下位置取消注释:
spring.autoconfigure.exclude=org.springframework.boot.autoconfigure.session.SessionAutoConfiguration
Email 设置
您可以从中配置电子邮件设置application.properties。需要这些设置才能重置忘记的密码。
spring.mail.host=
spring.mail.port=
spring.mail.username=
spring.mail.password=
spring.mail.properties.mail.smtp.ssl.enable=true
#spring.mail.properties.mail.smtp.starttls.enable=true
#spring.mail.properties.mail.smtp.starttls.required=true
spring.mail.properties.mail.smtp.auth=true
#spring.mail.properties.mail.smtp.connectiontimeout=5000
#spring.mail.properties.mail.smtp.timeout=5000
#spring.mail.properties.mail.smtp.writetimeout=5000
spring.mail.test-connection=true
打开Klov
转到 http://localhost:portNo,看到欢迎页面。

默认使用以下超级用户凭据:
- user: klovadmin
- pass: password
测试使用
引包
引入pom.xml
<dependency>
            <groupId>com.aventstack</groupId>
            <artifactId>extentreports</artifactId>
            <version>4.0.6</version>
        </dependency>
添加 Listener
首先,没有必要更改测试代码。需要做的就是在项目中添加一个 Listener,接上文代码修改 `MyExtentTestNgFormatter```类
主要步骤:
- 创建一个 KlovReporter 对象。
- 定义 MongoDB 连接
- 为我们的测试项目提供项目名称
- 将构建号定义为报告名称。
- 设置 klov 服务器 URL
- 最后,创建一个ExtentReports对象并将其绑定到 KlovReport 对象。
通过这样做,Klov 将创建一个具有给定名称的项目。如果存在,Klov 将使用先前创建的项目并将结果存储到其中。
 public MyExtentTestNgFormatter() {
        setInstance(this);
        testRunnerOutput = new ArrayList<>();
        // reportPath 报告路径
        String reportPathStr = System.getProperty("reportPath");
        File reportPath;

        try {
            reportPath = new File(reportPathStr);
        } catch (NullPointerException e) {
            reportPath = new File(TestNG.DEFAULT_OUTPUTDIR);
        }

        if (!reportPath.exists()) {
            if (!reportPath.mkdirs()) {
                throw new RuntimeException("Failed to create output run directory");
            }
        }
        //  报告名report.html
        File reportFile = new File(reportPath, "report.html");
		//  邮件报告名emailable-report.html
        File emailReportFile = new File(reportPath, "emailable-report.html");

        //  创建一个KlovReporter对象
        ExtentKlovReporter klov = new ExtentKlovReporter();
        //  定义MongoDB连接
        klov.initMongoDbConnection("localhost", 27017);
        //  设置klov服务器URL
        klov.initKlovServerConnection("http://localhost");
        //  为我们的测试项目提供项目名称
        klov.setProjectName("zuozewei-test");
        klov.setReportName("1.0");

        htmlReporter = new ExtentHtmlReporter(reportFile);
        EmailReporter emailReporter = new EmailReporter(emailReportFile);
        reporter = new ExtentReports();

	//  如果cdn.rawgit.com访问不了,可以设置为:ResourceCDN.EXTENTREPORTS或者ResourceCDN.GITHUB
    //   htmlReporter.config().setResourceCDN(ResourceCDN.EXTENTREPORTS);

        // 绑定 Reporters
        reporter.attachReporter(htmlReporter, emailReporter,klov);
    }
注意:在ExtentReports 4.0中 setResourceCDN的方法已失效
运行测试
现在运行测试,看看结果。

项目代码示例:
- 点赞
- 收藏
- 关注作者


评论(0)