Spring MVC-10循序渐进之文件下载

概述
像静态资源,我们在浏览器中打开正确的URL即可下载,只要该资源不是放在WEB-INF目录下,Servlet/JSP容器就会将该资源发送到浏览器。 然而有的时候静态资源是保存在应用程序目录外或者存在数据库中,或者有的时候需要控制它的访问权限,防止其他网站交叉引用它。 如果出现上述任意一种情况,都必须通过编程来发送资源。
文件下载概览
为了将像文件这样的资源发送到浏览器,需要在控制器中完成以下工作
1. 队请求处理方法使用void返回类型,并在方法中添加HttpServletRespinse参数
2. 将响应的内容设置为文件的内容类型。 Content-Type标题在某个实体的body中定义数据的类型,并包含没提类型和子类型标示符。如果不清楚内容类型,并且希望浏览器始终显示Save As(另存为)对话框,则将它设置为APPLICATION/OCTETPSTREAM ,不区分大小写
3. 添加一个名为Content-Dispositionde HTTP响应标题,并赋值attachment;filename=fileName.这里的fileName是默认文件名,应该出现在File Download对话框中,它通常与文件名同名,但是也并非一定如此
下面的代码是将一个文件发送到浏览器
FileInputStream fis = new FileInputStream();
BufferedInputStream bis = new BufferedInputStream(fis);
byte[] bytes = new byte[bis.available()];
response.setContentType(contentType);
OutputStream os = response.getOutputStream();
bis.read(bytes);
os.write(bytes);
- 1
- 2
- 3
- 4
- 5
- 6
- 7
为了通过编程将一个文件发送到浏览器,首先要读取该文件作为FileInputStream,并将内容加载到一个字节数组。 随后,获取HttpServletResponse的OutputStream,并调用其write方法传入字节数组。
隐藏资源
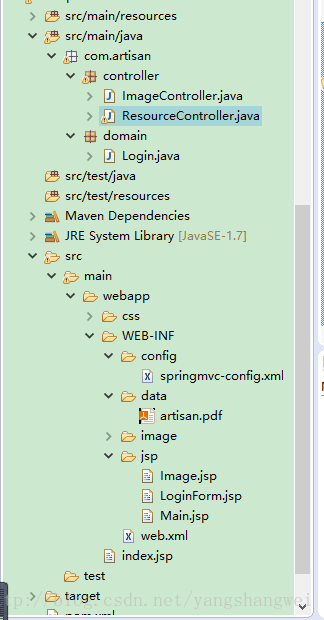
该示例演示如何向浏览器发送文件,由ResourceController类处理用户登录请求,并将WEB-INF/data目录下的artisan.pdf发送给浏览器。因为文件放到了WEB-INF目录下,所以不能够直接访问,只有得到授权的用户才能看到,如果未登录,返回登录页面。
ResourceController, 这里模拟下用户登录,只有当用户的HttpSession中包含一个loggedIn属性时,表明登录成功。
package com.artisan.controller;

import java.io.BufferedInputStream;
import java.io.File;
import java.io.FileInputStream;
import java.io.OutputStream;

import javax.servlet.http.HttpServletRequest;
import javax.servlet.http.HttpServletResponse;
import javax.servlet.http.HttpSession;

import org.springframework.stereotype.Controller;
import org.springframework.ui.Model;
import org.springframework.web.bind.annotation.ModelAttribute;
import org.springframework.web.bind.annotation.RequestMapping;

import com.artisan.domain.Login;

@Controller
public class ResourceController {

    @RequestMapping(value = "/login")
    public String login(@ModelAttribute Login login, HttpSession httpSession, Model model) {
        model.addAttribute("login", new Login());
        if ("artisan".equals(login.getUserName()) && "artisan123".equals(login.getPassword())) {
            httpSession.setAttribute("loggedIn", Boolean.TRUE);
            return "Main";
        } else {
            return "LoginForm";
        }
    }

    @RequestMapping(value = "/resource_download")
    public String downLoadResource(HttpSession session, HttpServletRequest request, HttpServletResponse response) {

        if (session == null && session.getAttribute("loggedIn") == null) {
            return "LoginForm";
        }

        String dataDirectory = request.getServletContext().getRealPath("/WEB-INF/data");
        File file = new File(dataDirectory, "artisan.pdf");
        if (file.exists()) {
            response.setContentType("application/pdf");
            response.addHeader("Content-Disposition", "attachment; filename=artisan.pdf");
            byte[] buffer = new byte[1024];
            FileInputStream fis = null;
            BufferedInputStream bis = null;

            // JDK7 以前的写法
            // try {
            // fis = new FileInputStream(file);
            // bis = new BufferedInputStream(fis);
            // OutputStream os = response.getOutputStream();
            // int i = bis.read(buffer);
            // while (i != -1) {
            // os.write(buffer, 0, i);
            // i = bis.read(buffer);
            // }
            // } catch (IOException ex) {
            // // do something,
            // // probably forward to an Error page
            // } finally {
            // if (bis != null) {
            // try {
            // bis.close();
            // } catch (IOException e) {
            // }
            // }
            // if (fis != null) {
            // try {
            // fis.close();
            // } catch (IOException e) {
            // }
            // }
            // }
            //

            // Java 7, use try-with-resources,自动释放资源
            try (OutputStream os = response.getOutputStream();) {
                fis = new FileInputStream(file);
                bis = new BufferedInputStream(fis);
                int i = bis.read(buffer);
                while (i != -1) {
                    os.write(buffer, 0, i);
                    i = bis.read(buffer);
                }
            } catch (Exception e) {
                // do something,
                // probably forward to an Error page
            }
        }
        return null;
    }
}
- 1
- 2
- 3
- 4
- 5
- 6
- 7
- 8
- 9
- 10
- 11
- 12
- 13
- 14
- 15
- 16
- 17
- 18
- 19
- 20
- 21
- 22
- 23
- 24
- 25
- 26
- 27
- 28
- 29
- 30
- 31
- 32
- 33
- 34
- 35
- 36
- 37
- 38
- 39
- 40
- 41
- 42
- 43
- 44
- 45
- 46
- 47
- 48
- 49
- 50
- 51
- 52
- 53
- 54
- 55
- 56
- 57
- 58
- 59
- 60
- 61
- 62
- 63
- 64
- 65
- 66
- 67
- 68
- 69
- 70
- 71
- 72
- 73
- 74
- 75
- 76
- 77
- 78
- 79
- 80
- 81
- 82
- 83
- 84
- 85
- 86
- 87
- 88
- 89
- 90
- 91
- 92
- 93
- 94
- 95
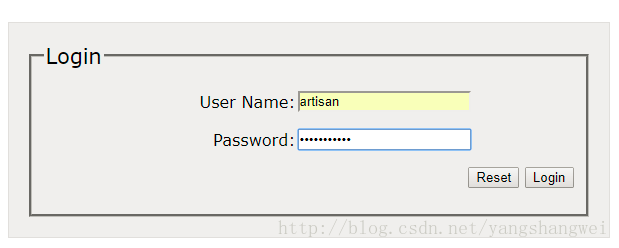
login方法,将用户带到登录表单页面
<%@ taglib prefix="form" uri="http://www.springframework.org/tags/form" %>
<%@ taglib prefix="c" uri="http://java.sun.com/jsp/jstl/core" %>
<!DOCTYPE HTML>
<html>
<head>
<title>Login</title>
<style type="text/css">@import url("<c:url value="/css/main.css"/>");</style>
</head>
<body>
<div id="global">
<form:form commandName="login" action="login" method="post">
    <fieldset>
        <legend>Login</legend>
        <p>
            <label for="userName">User Name: </label>
            <form:input id="userName" path="userName" cssErrorClass="error"/>
        </p>
        <p>
            <label for="password">Password: </label>
            <form:password id="password" path="password" cssErrorClass="error"/>
        </p>
        <p id="buttons">
            <input id="reset" type="reset" tabindex="4">
            <input id="submit" type="submit" tabindex="5"
                value="Login">
        </p>
    </fieldset>
</form:form>
</div>
</body>
</html>
- 1
- 2
- 3
- 4
- 5
- 6
- 7
- 8
- 9
- 10
- 11
- 12
- 13
- 14
- 15
- 16
- 17
- 18
- 19
- 20
- 21
- 22
- 23
- 24
- 25
- 26
- 27
- 28
- 29
- 30
- 31
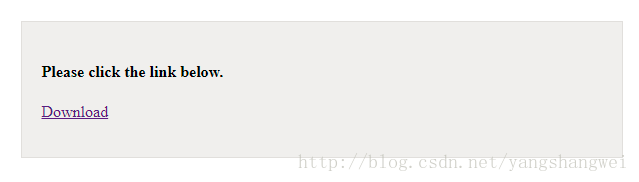
用户名和密码在login方法中使用硬编码的方式模拟用户登录,成功后跳转到Main.jsp页面,该页面包含一个超链接,点击下载文件。
<%@ taglib uri="http://java.sun.com/jsp/jstl/core" prefix="c" %>
<!DOCTYPE HTML>
<html>
<head>
<title>Download Page</title>
<style type="text/css">@import url("<c:url value="/css/main.css"/>");</style>
</head>
<body>
<div id="global">
    <h4>Please click the link below.</h4>
    <p>
        <a href="resource_download">Download</a>
    </p>
</div>
</body>
</html>
- 1
- 2
- 3
- 4
- 5
- 6
- 7
- 8
- 9
- 10
- 11
- 12
- 13
- 14
- 15
- 16
测试
点击链接

查看下载的文件

防止交叉引用
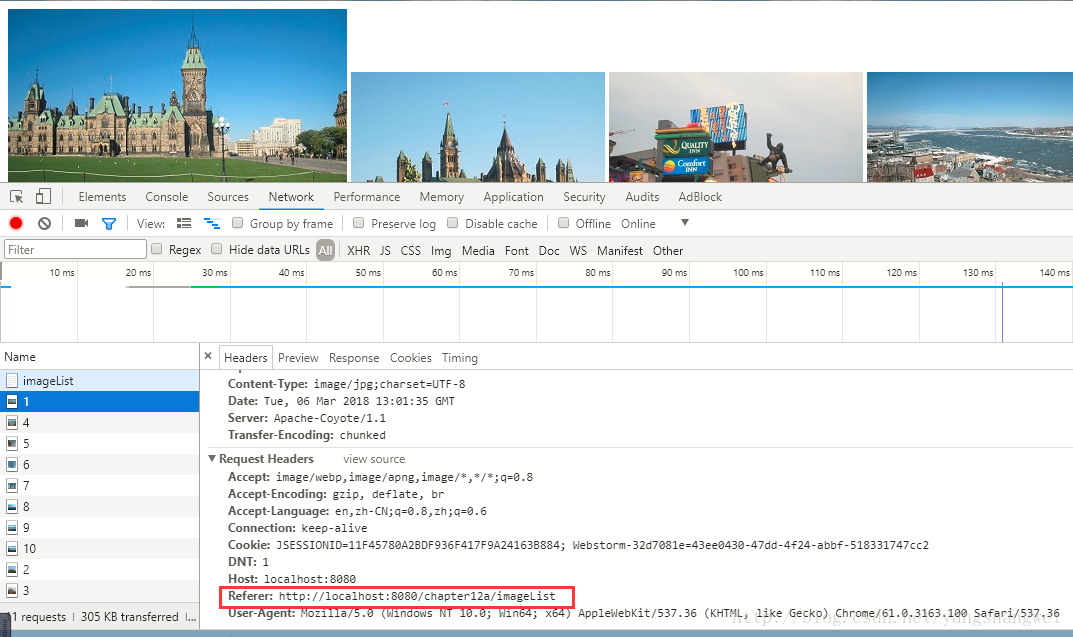
为了防止他人引用我们网站的资源,可以通过编程的方式,只有当请求的报头referer标题中包含你的域名时才发出资源,当然了这种方式也不能完全阻止。
该示例中,ImageController类中,只有referer标题不为空时,才将图片发送给浏览器
package com.artisan.controller;

import java.io.BufferedInputStream;
import java.io.File;
import java.io.FileInputStream;
import java.io.IOException;
import java.io.OutputStream;

import javax.servlet.http.HttpServletRequest;
import javax.servlet.http.HttpServletResponse;

import org.springframework.stereotype.Controller;
import org.springframework.web.bind.annotation.PathVariable;
import org.springframework.web.bind.annotation.RequestHeader;
import org.springframework.web.bind.annotation.RequestMapping;
import org.springframework.web.bind.annotation.RequestMethod;

@Controller
public class ImageController {

    @RequestMapping("/imageList")
    public String getImageList(){
        return "Image";
    }

    @RequestMapping(value = "/image_get/{id}", method = RequestMethod.GET)
    public void getImage(@PathVariable String id, HttpServletRequest request, HttpServletResponse response,
            @RequestHeader String referer) {
        // 判断请求头中的Referer
        if (referer != null) {
            String imageDirectory = request.getServletContext().getRealPath("/WEB-INF/image");
            File file = new File(imageDirectory, id + ".jpg");
            if (file.exists()) {
                response.setContentType("image/jpg");
                byte[] buffer = new byte[1024];
                FileInputStream fis = null;
                BufferedInputStream bis = null;
                // if you're using Java 7, use try-with-resources
                try {
                    fis = new FileInputStream(file);
                    bis = new BufferedInputStream(fis);
                    OutputStream os = response.getOutputStream();
                    int i = bis.read(buffer);
                    while (i != -1) {
                        os.write(buffer, 0, i);
                        i = bis.read(buffer);
                    }
                } catch (IOException ex) {
                    // do something here
                } finally {
                    if (bis != null) {
                        try {
                            bis.close();
                        } catch (IOException e) {

                        }
                    }
                    if (fis != null) {
                        try {
                            fis.close();
                        } catch (IOException e) {

                        }
                    }
                }
            }
        }
    }
}
- 1
- 2
- 3
- 4
- 5
- 6
- 7
- 8
- 9
- 10
- 11
- 12
- 13
- 14
- 15
- 16
- 17
- 18
- 19
- 20
- 21
- 22
- 23
- 24
- 25
- 26
- 27
- 28
- 29
- 30
- 31
- 32
- 33
- 34
- 35
- 36
- 37
- 38
- 39
- 40
- 41
- 42
- 43
- 44
- 45
- 46
- 47
- 48
- 49
- 50
- 51
- 52
- 53
- 54
- 55
- 56
- 57
- 58
- 59
- 60
- 61
- 62
- 63
- 64
- 65
- 66
- 67
- 68
- 69
- 70
前台页面
<!DOCTYPE HTML>
<html>
<head>
<title>Images</title>
</head>
<body>
<img src="image_get/1"/>
<img src="image_get/2"/>
<img src="image_get/3"/>
<img src="image_get/4"/>
<img src="image_get/5"/>
<img src="image_get/6"/>
<img src="image_get/7"/>
<img src="image_get/8"/>
<img src="image_get/9"/>
<img src="image_get/10"/>
</body>
</html>
- 1
- 2
- 3
- 4
- 5
- 6
- 7
- 8
- 9
- 10
- 11
- 12
- 13
- 14
- 15
- 16
- 17
- 18
测试:
源码
代码已提交到github
https://github.com/yangshangwei/SpringMvcTutorialArtisan
文章来源: artisan.blog.csdn.net,作者:小小工匠,版权归原作者所有,如需转载,请联系作者。
原文链接:artisan.blog.csdn.net/article/details/79462746

- 点赞
- 收藏
- 关注作者
评论(0)