Spring Security 中如何让上级拥有下级的所有权限?

答案是能!
松哥之前写过类似的文章,但是主要是讲了用法,今天我们来看看原理!
本文基于当前 Spring Security 5.3.4 来分析,为什么要强调最新版呢?因为在在 5.0.11 版中,角色继承配置和现在不一样。旧版的方案我们现在不讨论了,直接来看当前最新版是怎么处理的。
1.角色继承案例
我们先来一个简单的权限案例。
创建一个 Spring Boot 项目,添加 Spring Security 依赖,并创建两个测试用户,如下:
@Override
protected void configure(AuthenticationManagerBuilder auth) throws Exception { auth.inMemoryAuthentication() .withUser("javaboy") .password("{noop}123").roles("admin") .and() .withUser("江南一点雨") .password("{noop}123") .roles("user");
}
- 1
- 2
- 3
- 4
- 5
- 6
- 7
- 8
- 9
- 10
然后准备三个测试接口,如下:
@RestController
public class HelloController { @GetMapping("/hello") public String hello() { return "hello"; } @GetMapping("/admin/hello") public String admin() { return "admin"; } @GetMapping("/user/hello") public String user() { return "user"; }
}
- 1
- 2
- 3
- 4
- 5
- 6
- 7
- 8
- 9
- 10
- 11
- 12
- 13
- 14
- 15
- 16
- 17
这三个测试接口,我们的规划是这样的:
- /hello 是任何人都可以访问的接口
- /admin/hello 是具有 admin 身份的人才能访问的接口
- /user/hello 是具有 user 身份的人才能访问的接口
- 所有 user 能够访问的资源,admin 都能够访问
注意第四条规范意味着所有具备 admin 身份的人自动具备 user 身份。
接下来我们来配置权限的拦截规则,在 Spring Security 的 configure(HttpSecurity http) 方法中,代码如下:
http.authorizeRequests() .antMatchers("/admin/**").hasRole("admin") .antMatchers("/user/**").hasRole("user") .anyRequest().authenticated() .and() ... ...
- 1
- 2
- 3
- 4
- 5
- 6
- 7
这里的匹配规则我们采用了 Ant 风格的路径匹配符,Ant 风格的路径匹配符在 Spring 家族中使用非常广泛,它的匹配规则也非常简单:
| 通配符 | 含义 |
|---|---|
** |
匹配多层路径 |
* |
匹配一层路径 |
? |
匹配任意单个字符 |
上面配置的含义是:
- 如果请求路径满足
/admin/**格式,则用户需要具备 admin 角色。 - 如果请求路径满足
/user/**格式,则用户需要具备 user 角色。 - 剩余的其他格式的请求路径,只需要认证(登录)后就可以访问。
注意代码中配置的三条规则的顺序非常重要,和 Shiro 类似,Spring Security 在匹配的时候也是按照从上往下的顺序来匹配,一旦匹配到了就不继续匹配了,所以拦截规则的顺序不能写错。
如果使用角色继承,这个功能很好实现,我们只需要在 SecurityConfig 中添加如下代码来配置角色继承关系即可:
@Bean
RoleHierarchy roleHierarchy() { RoleHierarchyImpl hierarchy = new RoleHierarchyImpl(); hierarchy.setHierarchy("ROLE_admin > ROLE_user"); return hierarchy;
}
- 1
- 2
- 3
- 4
- 5
- 6
注意,在配置时,需要给角色手动加上 ROLE_ 前缀。上面的配置表示 ROLE_admin 自动具备 ROLE_user 的权限。
接下来,我们启动项目进行测试。
项目启动成功后,我们首先以 江南一点雨的身份进行登录:
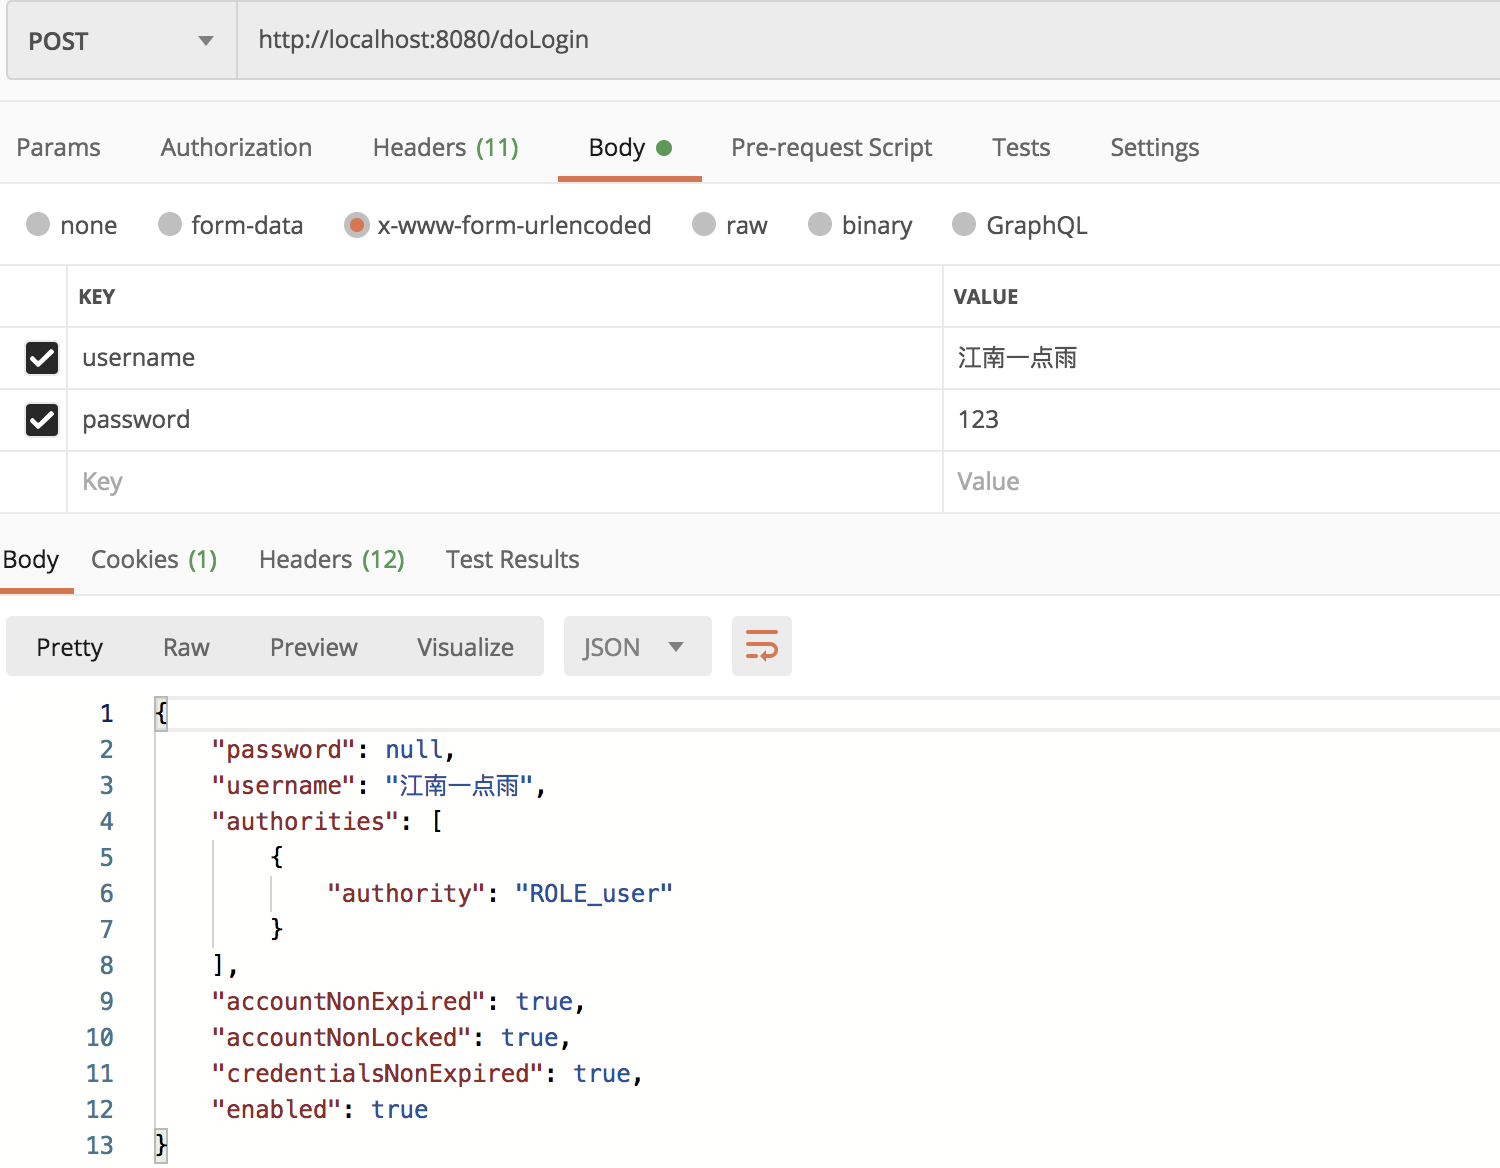
登录成功后,分别访问 /hello,/admin/hello 以及 /user/hello 三个接口,其中:
/hello因为登录后就可以访问,这个接口访问成功。/admin/hello需要 admin 身份,所以访问失败。/user/hello需要 user 身份,所以访问成功。
再以 javaboy 身份登录,登录成功后,我们发现 javaboy 也能访问 /user/hello 这个接口了,说明我们的角色继承配置没问题!
2.原理分析
这里配置的核心在于我们提供了一个 RoleHierarchy 实例,所以我们的分析就从该类入手。
RoleHierarchy 是一个接口,该接口中只有一个方法:
public interface RoleHierarchy {
	Collection<? extends GrantedAuthority> getReachableGrantedAuthorities( Collection<? extends GrantedAuthority> authorities);

}
- 1
- 2
- 3
- 4
- 5
这个方法参数 authorities 是一个权限集合,从方法名上看方法的返回值是一个可访问的权限集合。
举个简单的例子,假设角色层次结构是 ROLE_A > ROLE_B > ROLE_C,现在直接给用户分配的权限是 ROLE_A,但实际上用户拥有的权限有 ROLE_A、ROLE_B 以及 ROLE_C。
getReachableGrantedAuthorities 方法的目的就是是根据角色层次定义,将用户真正可以触达的角色解析出来。
RoleHierarchy 接口有两个实现类,如下图:
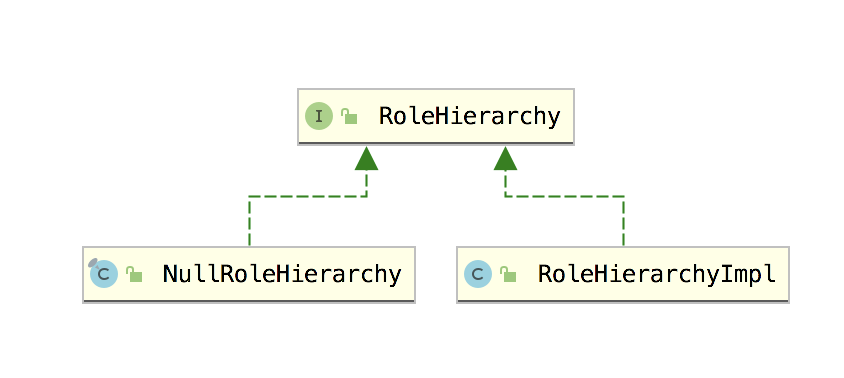
- NullRoleHierarchy 这是一个空的实现,将传入的参数原封不动返回。
- RoleHierarchyImpl 这是我们上文所使用的实现,这个会完成一些解析操作。
我们来重点看下 RoleHierarchyImpl 类。
这个类中实际上就四个方法 setHierarchy、getReachableGrantedAuthorities、buildRolesReachableInOneStepMap 以及 buildRolesReachableInOneOrMoreStepsMap,我们来逐个进行分析。
首先是我们一开始调用的 setHierarchy 方法,这个方法用来设置角色层级关系:
public void setHierarchy(String roleHierarchyStringRepresentation) {
	this.roleHierarchyStringRepresentation = roleHierarchyStringRepresentation;
	if (logger.isDebugEnabled()) {
		logger.debug("setHierarchy() - The following role hierarchy was set: " + roleHierarchyStringRepresentation);
	}
	buildRolesReachableInOneStepMap();
	buildRolesReachableInOneOrMoreStepsMap();
}
- 1
- 2
- 3
- 4
- 5
- 6
- 7
- 8
- 9
用户传入的字符串变量设置给 roleHierarchyStringRepresentation 属性,然后通过 buildRolesReachableInOneStepMap 和 buildRolesReachableInOneOrMoreStepsMap 方法完成对角色层级的解析。
buildRolesReachableInOneStepMap 方法用来将角色关系解析成一层一层的形式。我们来看下它的源码:
private void buildRolesReachableInOneStepMap() {
	this.rolesReachableInOneStepMap = new HashMap<>();
	for (String line : this.roleHierarchyStringRepresentation.split("\n")) {
		String[] roles = line.trim().split("\\s+>\\s+");
		for (int i = 1; i < roles.length; i++) { String higherRole = roles[i - 1]; GrantedAuthority lowerRole = new SimpleGrantedAuthority(roles[i]); Set<GrantedAuthority> rolesReachableInOneStepSet; if (!this.rolesReachableInOneStepMap.containsKey(higherRole)) { rolesReachableInOneStepSet = new HashSet<>(); this.rolesReachableInOneStepMap.put(higherRole, rolesReachableInOneStepSet); } else { rolesReachableInOneStepSet = this.rolesReachableInOneStepMap.get(higherRole); } rolesReachableInOneStepSet.add(lowerRole);
		}
	}
}
- 1
- 2
- 3
- 4
- 5
- 6
- 7
- 8
- 9
- 10
- 11
- 12
- 13
- 14
- 15
- 16
- 17
- 18
首先大家看到,按照换行符来解析用户配置的多个角色层级,这是什么意思呢?
我们前面案例中只是配置了 ROLE_admin > ROLE_user,如果你需要配置多个继承关系,怎么配置呢?多个继承关系用 \n 隔开即可,如下 ROLE_A > ROLE_B \n ROLE_C > ROLE_D。还有一种情况,如果角色层级关系是连续的,也可以这样配置 ROLE_A > ROLE_B > ROLE_C > ROLE_D。
所以这里先用 \n 将多层继承关系拆分开形成一个数组,然后对数组进行遍历。
在具体遍历中,通过 > 将角色关系拆分成一个数组,然后对数组进行解析,高一级的角色作为 key,低一级的角色作为 value。
代码比较简单,最终的解析出来存入 rolesReachableInOneStepMap 中的层级关系是这样的:
假设角色继承关系是 ROLE_A > ROLE_B \n ROLE_C > ROLE_D \n ROLE_C > ROLE_E,Map 中的数据是这样:
- A–>B
- C–>[D,E]
假设角色继承关系是 ROLE_A > ROLE_B > ROLE_C > ROLE_D,Map 中的数据是这样:
- A–>B
- B–>C
- C–>D
这是 buildRolesReachableInOneStepMap 方法解析出来的 rolesReachableInOneStepMap 集合。
接下来的 buildRolesReachableInOneOrMoreStepsMap 方法则是对 rolesReachableInOneStepMap 集合进行再次解析,将角色的继承关系拉平。
例如 rolesReachableInOneStepMap 中保存的角色继承关系如下:
- A–>B
- B–>C
- C–>D
经过 buildRolesReachableInOneOrMoreStepsMap 方法解析之后,新的 Map 中保存的数据如下:
- A–>[B、C、D]
- B–>[C、D]
- C–>D
这样解析完成后,每一个角色可以触达到的角色就一目了然了。
我们来看下 buildRolesReachableInOneOrMoreStepsMap 方法的实现逻辑:
private void buildRolesReachableInOneOrMoreStepsMap() {
	this.rolesReachableInOneOrMoreStepsMap = new HashMap<>();
	for (String roleName : this.rolesReachableInOneStepMap.keySet()) {
		Set<GrantedAuthority> rolesToVisitSet = new HashSet<>(this.rolesReachableInOneStepMap.get(roleName));
		Set<GrantedAuthority> visitedRolesSet = new HashSet<>();
		while (!rolesToVisitSet.isEmpty()) { GrantedAuthority lowerRole = rolesToVisitSet.iterator().next(); rolesToVisitSet.remove(lowerRole); if (!visitedRolesSet.add(lowerRole) || !this.rolesReachableInOneStepMap.containsKey(lowerRole.getAuthority())) { continue; } else if (roleName.equals(lowerRole.getAuthority())) { throw new CycleInRoleHierarchyException(); } rolesToVisitSet.addAll(this.rolesReachableInOneStepMap.get(lowerRole.getAuthority()));
		}
		this.rolesReachableInOneOrMoreStepsMap.put(roleName, visitedRolesSet);
	}
}
- 1
- 2
- 3
- 4
- 5
- 6
- 7
- 8
- 9
- 10
- 11
- 12
- 13
- 14
- 15
- 16
- 17
- 18
- 19
这个方法还比较巧妙。首先根据 roleName 从 rolesReachableInOneStepMap 中获取对应的 rolesToVisitSet,这个 rolesToVisitSet 是一个 Set 集合,对其进行遍历,将遍历结果添加到 visitedRolesSet 集合中,如果 rolesReachableInOneStepMap 集合的 key 不包含当前读取出来的 lowerRole,说明这个 lowerRole 就是整个角色体系中的最底层,直接 continue。否则就把 lowerRole 在 rolesReachableInOneStepMap 中对应的 value 拿出来继续遍历。
最后将遍历结果存入 rolesReachableInOneOrMoreStepsMap 集合中即可。
这个方法有点绕,小伙伴们可以自己打个断点品一下。
看了上面的分析,小伙伴们可能发现了,其实角色继承,最终还是拉平了去对比。
我们定义的角色有层级,但是代码中又将这种层级拉平了,方便后续的比对。
最后还有一个 getReachableGrantedAuthorities 方法,根据传入的角色分析出其可能潜在包含的一些角色:
public Collection<GrantedAuthority> getReachableGrantedAuthorities(
		Collection<? extends GrantedAuthority> authorities) {
	if (authorities == null || authorities.isEmpty()) {
		return AuthorityUtils.NO_AUTHORITIES;
	}
	Set<GrantedAuthority> reachableRoles = new HashSet<>();
	Set<String> processedNames = new HashSet<>();
	for (GrantedAuthority authority : authorities) {
		if (authority.getAuthority() == null) { reachableRoles.add(authority); continue;
		}
		if (!processedNames.add(authority.getAuthority())) { continue;
		}
		reachableRoles.add(authority);
		Set<GrantedAuthority> lowerRoles = this.rolesReachableInOneOrMoreStepsMap.get(authority.getAuthority());
		if (lowerRoles == null) { continue;
		}
		for (GrantedAuthority role : lowerRoles) { if (processedNames.add(role.getAuthority())) { reachableRoles.add(role); }
		}
	}
	List<GrantedAuthority> reachableRoleList = new ArrayList<>(reachableRoles.size());
	reachableRoleList.addAll(reachableRoles);
	return reachableRoleList;
}
- 1
- 2
- 3
- 4
- 5
- 6
- 7
- 8
- 9
- 10
- 11
- 12
- 13
- 14
- 15
- 16
- 17
- 18
- 19
- 20
- 21
- 22
- 23
- 24
- 25
- 26
- 27
- 28
- 29
- 30
这个方法的逻辑比较直白,就是从 rolesReachableInOneOrMoreStepsMap 集合中查询出当前角色真正可访问的角色信息。
3.RoleHierarchyVoter
getReachableGrantedAuthorities 方法将在 RoleHierarchyVoter 投票器中被调用。
public class RoleHierarchyVoter extends RoleVoter {
	private RoleHierarchy roleHierarchy = null;
	public RoleHierarchyVoter(RoleHierarchy roleHierarchy) {
		Assert.notNull(roleHierarchy, "RoleHierarchy must not be null");
		this.roleHierarchy = roleHierarchy;
	}
	@Override
	Collection<? extends GrantedAuthority> extractAuthorities( Authentication authentication) {
		return roleHierarchy.getReachableGrantedAuthorities(authentication .getAuthorities());
	}
}
- 1
- 2
- 3
- 4
- 5
- 6
- 7
- 8
- 9
- 10
- 11
- 12
- 13
关于 Spring Security 投票器,将是另外一个故事,松哥将在下篇文章中和小伙伴们分享投票器和决策器~
4.小结
好啦,今天就和小伙伴们简简单单聊一下角色继承的问题,感兴趣的小伙伴可以自己试一下~如果觉得有收获,记得点个在看鼓励下松哥哦~
文章来源: wangsong.blog.csdn.net,作者:_江南一点雨,版权归原作者所有,如需转载,请联系作者。
原文链接:wangsong.blog.csdn.net/article/details/108493240

- 点赞
- 收藏
- 关注作者
评论(0)