如何在2021年编写网络应用程序?

介绍
在本文中,我将逐步向您介绍我使用的工具。您可以继续学习,但是了解“我为什么要这样做”比“我在做什么”更为重要。一个很好的建议是,尝试在本教程中与我一起执行相同的步骤。然后,尝试更改一些越来越大的东西。最后,在结尾您应该能够自己再次进行所有操作。
免责声明
首先,这确实很重要,所有这些都是我对开发的偏见。我们都有独特的看待事物的方式。
Web开发是一个巨大而复杂的主题。这篇文章并不是要描述最简单或最快的方法。
但是,这是我从小就喜欢的方法(出于我将要讲到的原因),也是我最能详细解释的方法。
从这里开始,我假设您对Java和Vue有基本的了解。我也不会详细介绍如何安装Node.js以及如何使用NPM。
语言能力
让我们从语言开始说起。
我已经使用Javascript大约十年了。它有很多贬低者,但过去和现在一直是我最喜欢的语言。
它易于使用,拥有最大的社区之一,并且可以支持庞大的应用程序。
当然,我也在用英语写作。尽管这不是我的母语,但它被公认是国际语言。
安装
Node.js已安装在我的计算机上,因此我将使用NPM安装所有JS依赖项。
开始新项目时,我总是做的第一件事是
$ npm run init
- 1
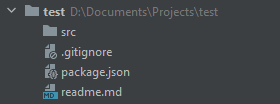
这将创建package.json文件。然后,我们手动创建readme.md和.gitignore文件以及src目录,这将在后面使用。
我的项目文件系统的预览
Vue
我喜欢Vue,这就是我最常使用的。安装简单
$ npm install vue
- 1
Bundler
我比较喜欢Vue提供的模块化模板语法。但是,这不是浏览器可以理解的本机JS。因此,需要对其进行转换才能使用。
我为此使用Webpack。安装不是那么简单,因为我们需要更多的模块。首先,让我们从Webpack本身及其CLI界面开始
$ npm install webpack webpack-cli
- 1
然后,我们需要使用其编译器添加处理Vue文件的插件
$ npm install vue-loader vue-template-compiler
- 1
最后,我们就可以编写CSS,现在我们需要另一对插件来处理CSS代码
$ npm install css-loader style-loader
- 1
现在,需要配置Webpack。这是最无趣的部分,但是我们需要了解此步骤以解决将来可能出现的问题。
Webpack可以使用名为的文件进行配置webpack.config.js,因此让我们创建它。
这是最低要求。如果需要扩展它,我们稍后再回来。
// Get the vue-loader plugin
const VueLoaderPlugin = require("vue-loader/lib/plugin");

// This is what the file exports
module.exports = { // My entry point entry: "./src/index.js", module: { rules: [ // All Vue files use the vue-loader { test: /\.vue$/, loader: "vue-loader", }, // All CSS files use css than style loaders { test: /\.css$/, use: [ "style-loader", "css-loader" ] }, ], }, plugins: [ // Register the vue-loader plugin new VueLoaderPlugin(), ],
};
- 1
- 2
- 3
- 4
- 5
- 6
- 7
- 8
- 9
- 10
- 11
- 12
- 13
- 14
- 15
- 16
- 17
- 18
- 19
- 20
- 21
- 22
- 23
- 24
- 25
- 26
- 27
- 28
- 29
这样就都结束了,我们只需要在终端中运行
$ webpack
- 1
看到我的项目被完全压缩和缩小。这将暂时失败,但请放心。
Optionals
这些工具不在本文讨论范围之内。也许我会在下一个中详细介绍。
我总是使用Eslint来检查代码中的潜在错误。
为了与我的个人配置一起使用,我运行
$ npm install eslint eslint-plugin-vue @gmartigny/eslint-config
- 1
我尝试测试我的代码以赶上回归,并确保我涵盖了大多数用例。我使用AVA进行测试,使用NYC进行代码覆盖。
$ npm install ava nyc
- 1
Development
这已经有很多步骤了,我还没有写一行代码。所有这些看起来很多,但是请相信我,它将使您将来的运行速度更快。
比较细心的人会记得,在我的Webpack配置中,入口文件是./src/index.js。所以,让我们从那里开始。
我们在其中创建一个index.js文件,src并添加几行代码以调用Vue(带有ESM)。
// Import Vue, I prefer the ESM syntaxe
import Vue from "vue/dist/vue.esm.js";

// Create a new Vue instance targeted at the element with the id "app"
new Vue({ el: "#app",
});
- 1
- 2
- 3
- 4
- 5
- 6
- 7
有了这个基本的JS文件,我就可以安全地运行
$ webpack --mode=development --watch
- 1
用watch(在我们每次更改代码时都会重新构建)以开发模式(较慢,但对错误的描述性更高)触发Webpack。
这将main.js在dist目录中创建一个新文件。这是我的最终用户将使用的文件。
现在,我们创建一个index.html文件(通常在public目录中,但这并不是必然要求)。
<!DOCTYPE html>
<html lang="en">
<head> <meta charset="UTF-8"> <title>Test</title>
</head>
<body>
<!-- My target element -->
<main id="app"></main>
<!-- The JS file from webpack -->
<script src="../dist/main.js"></script>
</body>
</html>
- 1
- 2
- 3
- 4
- 5
- 6
- 7
- 8
- 9
- 10
- 11
- 12
- 13
在浏览器中打开该文件将不会显示任何预期的结果,但这一切正常。到目前为止,这是我项目的状态。

添加视图和组件
你Vue的文件应该是视图之间拆分(个人屏幕,如:菜单,关于…)和组件(撰写你的意见,如:按钮,页脚…)
这两种工作方式相同,但不具有相同的关注。因此,让我们在其中添加两个目录(views和components)src进行排序。
Views
让我们从创建一个新视图开始。这将是主页,所以我将其称为文件Home.vue。
我在文件名中使用了大写字母,以表明它是Java等其他OOP语言中的类。
<template> <h1>Home</h1>
</template>

<script>
export default { name: "Home",
};
</script>
- 1
- 2
- 3
- 4
- 5
- 6
- 7
- 8
- 9
为了进入该视图,我必须告诉我的Vue实例进行渲染。在index.js文件中,我将添加必要的行。
import Vue from "vue/dist/vue.esm.js";
// Import the view
import Home from "./views/Home.vue";

new Vue({ el: "#app", // Declare it as a components I'll use (I know, views are treated as components by Vue) components: { Home, }, // Render the view template: "<Home/>",
});
- 1
- 2
- 3
- 4
- 5
- 6
- 7
- 8
- 9
- 10
- 11
- 12
- 13
为了拥有更多views,您需要在views之间进行导航,因此需要vue-router。我们暂时不谈论它。
Components
想象一下,我想为我想看的每部电影制作一张简单的卡片(标题+文字),我不想重复每张卡片的代码。一个很好的规则是DRY(Don’t Repeat Yourself)。
如果您写两次以上,则应将其分解为一处。
同样,我Film.vue在components目录中创建一个新文件。
<template> <div class="film"> <h2>Title</h2> <p>Text</p> </div>
</template>

<script>
export default { name: "Film",
};
</script>

<!-- scoped because I don't want to interfere with any other component -->
<style scoped>
.film { border: 1px solid blue;
}
</style>
- 1
- 2
- 3
- 4
- 5
- 6
- 7
- 8
- 9
- 10
- 11
- 12
- 13
- 14
- 15
- 16
- 17
- 18
- 19
并在中使用它Home.vue。
<template> <div> <!-- Use the component --> <Film /> <Film /> <Film /> </div>
</template>

<script>
// Import the component
import Film from "../components/Film.vue";

export default { name: "Home", components: { // Declare the component Film, },
};
</script>
- 1
- 2
- 3
- 4
- 5
- 6
- 7
- 8
- 9
- 10
- 11
- 12
- 13
- 14
- 15
- 16
- 17
- 18
- 19
- 20
- 21
正如您已经看到的那样,我有3张卡片具有相同的标题和文本。
这不是我想要的。
如果我向card组件添加属性并在主视图中写入数据,这将允许我为每张卡定义值。
<template> <div class="film"> <!-- Use properties here --> <h2>{{ title }}</h2> <p>{{ text }}</p> </div>
</template>

<script>
export default { name: "Film", // Properties list declaration props: ["title", "text"],
};
</script>

<style scoped>
.film { border: 1px solid blue;
}
</style>
- 1
- 2
- 3
- 4
- 5
- 6
- 7
- 8
- 9
- 10
- 11
- 12
- 13
- 14
- 15
- 16
- 17
- 18
- 19
- 20
- 21
<template> <div> <!-- Loop through my data --> <Film v-for="(film, index) in films" :key="index" :title="film.title" :text="film.text"/> </div>
</template>

<script>
import Film from "../components/Film.vue";

export default { name: "Home", components: { Film, }, // data should be a function data () { // that return a set of values return { films: [ { title: "Alien", text: "It follows the crew of the commercial space tug Nostromo, who encounter the eponymous Alien, an aggressive and deadly extraterrestrial set loose on the ship.", }, { title: "Interstellar", text: "In a dystopian future where humanity is struggling to survive, it follows a group of astronauts who travel through a wormhole near Saturn in search of a new home for mankind.", }, { title: "Reservoir Dogs", text: "Diamond thieves whose planned heist of a jewelry store goes terribly wrong.", }, ], }; },
};
</script>
- 1
- 2
- 3
- 4
- 5
- 6
- 7
- 8
- 9
- 10
- 11
- 12
- 13
- 14
- 15
- 16
- 17
- 18
- 19
- 20
- 21
- 22
- 23
- 24
- 25
- 26
- 27
- 28
- 29
- 30
- 31
- 32
- 33
- 34
- 35
- 36
- 37
- 38
设置好之后,应用于我的数据的任何更改都会反映在屏幕上。
动态页面
例如,我可以从API获取数据,或者允许用户编辑页面(或同时选择两个😉)。
从API获取
首先,我将从在线模拟API中获取数据。为了做到这一点,我首先清空数据数组。
然后,根据Vue生命周期,mounted当视图出现在屏幕上时,我可以使用函数执行代码。
<template> <!-- ... -->
</template>

<script>
import Film from "../components/Film.vue";

export default { name: "Home", components: { Film, }, data () { return { // Emtpy film list films: [], }; }, async mounted () { // Fetch from mock API const response = await fetch("https://mock-film-api-t0jk5mabvwnt.runkit.sh/"); if (response.ok) { // Load result into films list this.films = await response.json(); } },
};
</script>
- 1
- 2
- 3
- 4
- 5
- 6
- 7
- 8
- 9
- 10
- 11
- 12
- 13
- 14
- 15
- 16
- 17
- 18
- 19
- 20
- 21
- 22
- 23
- 24
- 25
- 26
- 27
- 28
用户编辑
同样,我可以允许用户将新film添加到列表中。提交时会推送新条目的小型HTML表单将看到修改反映在视图上。
<template> <v-app> <Film v-for="(film, index) in films" :key="index" :title="film.title" :text="film.text"/> <!-- Form that will call addFilm when submitted --> <form @submit="addFilm"> <div> <label for="title">Title</label> <!-- v-model link the input value to a variable --> <input type="text" v-model="inputTitle" id="title"> </div> <div> <label for="text">Text</label> <input type="text" v-model="inputText" id="text"> </div> <button type="submit">Add</button> </form> </v-app>
</template>

<script>
import Film from "../components/Film.vue";

export default { name: "Home", components: { Film, }, data () { return { films: [], // Holds the value of each input inputTitle: "", inputText: "", }; }, async mounted () { // ... }, methods: { // New method addFilm (event) { // Stop the form from reloading the page (default behavior) event.preventDefault(); // Add a new film to the list this.films.push({ title: this.inputTitle, text: this.inputText, }); // Clear out input fields this.inputTitle = ""; this.inputText = ""; }, },
};
</script>
- 1
- 2
- 3
- 4
- 5
- 6
- 7
- 8
- 9
- 10
- 11
- 12
- 13
- 14
- 15
- 16
- 17
- 18
- 19
- 20
- 21
- 22
- 23
- 24
- 25
- 26
- 27
- 28
- 29
- 30
- 31
- 32
- 33
- 34
- 35
- 36
- 37
- 38
- 39
- 40
- 41
- 42
- 43
- 44
- 45
- 46
- 47
- 48
- 49
- 50
- 51
- 52
- 53
- 54
- 55
- 56
当然,这将不会在线保存任何内容,并且在重新加载页面时所做的更改将丢失。
您可以通过将请求发送到将输入保存在数据库中的服务器来改进此示例。
组件库
我很懒。成为高效的开发人员通常意味着要懒惰。
除了创建所有组件之外,我们还可以使用现有的组件库。这样,我们可以将更多精力放在内容上,而不是如何正确设计日期选择器。
由于使用Vue,因此我选择了Vue兼容库Vuetify。
npm install vuetify
- 1
只需很少的更改即可激活它index.js。
import Vue from "vue/dist/vue.esm.js";
// Get Vuetify and its CSS
import Vuetify from "vuetify";
import "vuetify/dist/vuetify.min.css";

import Home from "./views/Home.vue";

// Prepare the usage of vuetify
Vue.use(Vuetify);
const vuetify = new Vuetify();

new Vue({ // Pass the instance to Vue vuetify, el: "#app", components: { Home, }, template: "<Home/>",
});
- 1
- 2
- 3
- 4
- 5
- 6
- 7
- 8
- 9
- 10
- 11
- 12
- 13
- 14
- 15
- 16
- 17
- 18
- 19
- 20
然后,我们可以在应用程序中的任何地方(在Film.vue)中使用它。
<template> <!-- All Vuetify components are prefixed with "v-" --> <v-col cols="12"> <v-card shaped> <v-card-title>{{ title }}</v-card-title> <v-card-text>{{ text }}</v-card-text> </v-card> </v-col>
</template>

<script> // ...
</script>

<!-- I don't need my crappy style anymore -->
- 1
- 2
- 3
- 4
- 5
- 6
- 7
- 8
- 9
- 10
- 11
- 12
- 13
- 14
- 15
部署方式
我最近最喜欢的发现之一是无服务器。基本上,只要您的应用程序是无状态的(总是使用相同的参数返回相同的结果),就不需要拥有复杂且始终在运行的服务器。通过利用缓存和资源共享的功能,您可以将服务器几乎减少为零。
使用Vercel,我们只需单击几下就可以自由托管,部署和提供服务。只需要将该项目放在Github上即可。
故障排除
You are using the runtime-only build of Vue where the template compiler is not available.(您正在使用Vue的仅运行时版本,而模板编译器不可用。)
您输入的Vue错误。如果您还记得的话,有很多导入Vue的方法。默认情况下,import "vue"将调用该vue.runtime.common.js文件。
在这里的代码中,将ESM与模板配合使用(因此需要vue.esm.js)。
[Vuetify] Multiple instances of Vue detected / this.$vuetify is undefined([Vuetify]检测到多个Vue实例/ this。$ vuetify未定义)
您的应用程序和Vuetify没有导入“相同”的Vue。如上所述,导入适合您的用法的Vue非常重要。一个好的解决方案是在webpack中创建一个别名。
// In webpack.config.js
module.exports = { // This will tell all your code to use the same Vue. resolve: { alias: { vue$: "vue/dist/vue.esm.js", }, }, // ...
};
- 1
- 2
- 3
- 4
- 5
- 6
- 7
- 8
- 9
- 10
常见问题
使用它们时,为什么不需要导入每个Vuetify组件?
当我们执行操作Vue.use(Vuetify);在index.js中,它将在整个项目中将其激活。使用它们时,可能仅导入Vuetify组件。但这需要做一些超出本教程范围的工作。
为什么不使用X代替Y?
我习惯了。我相信您会找到我上面描述的任何工具或方法的更好替代方法。但是我熟悉他们。
归根结底,deliver比无休止地学习新技术更重要。
我有什么选择?
Vue:
- React
- Angular
- Svelte
Vuetify:
- Material-UI
- Any CSS frameworks:
- Bootstrap
- Bulma
- Tailwind
Webpack:
- Rollup
- Skypack
Vercel:
- Netlify
- Heroku
文章来源: haiyong.blog.csdn.net,作者:海拥✘,版权归原作者所有,如需转载,请联系作者。
原文链接:haiyong.blog.csdn.net/article/details/113786347

- 点赞
- 收藏
- 关注作者
评论(0)