华为云IoT智慧物流案例05 | QT应用开发

第一章 新建QT项目验证交叉编译环境
选项设置一览
1.编译器

2.qmake路径

3.kit构建套件

测试例程
用示例测试环境是否可行

弹出选项后选择“复制并打开”,自行选择复制示例项目所在路径

测试Ubuntu环境下应用能否运行(笔者Ubuntu已有自行安装过g++编译器 命令:sudo apt-get install g++)
如果构建后出现:没有找到对应的文件(No such file...可以搜索一下网上如何安装对应的库)

构建成功后显示应用窗口

Ubuntu环境下没问题我们更改Debug(Kit构建套件)到前面配置的YA157开发板的环境

构建后的应用文件在我们之前复制示例时的所在路径
可以看到是用YA157C_dev_kit-Debug的方式构建的

进入此文件夹后找到我们的应用文件,在文件夹里打开终端
用scp命令传输到开发板

开发板如果已有米尔官方默认启动的QT应用,可以修改启动脚本
命令:vi /usr/bin/start.sh

这里我屏蔽了开机默认运行官方QT命令行

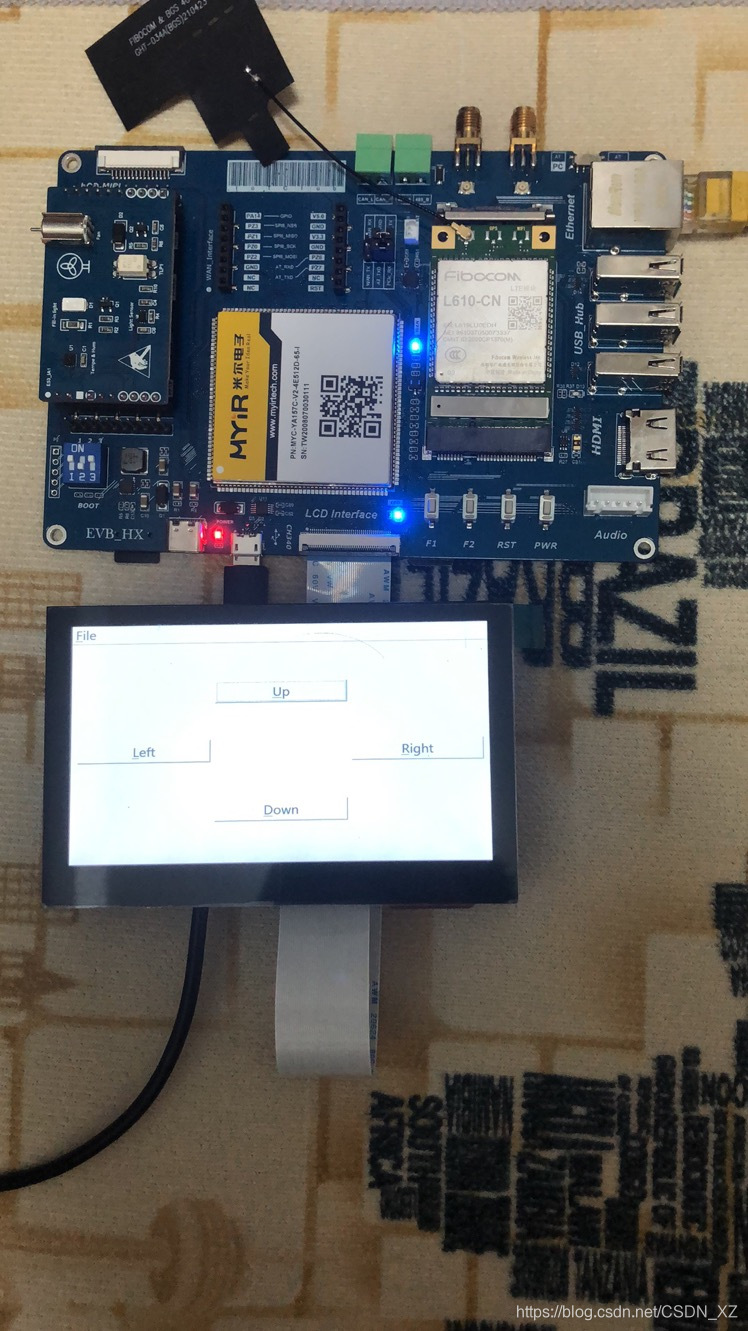
reboot重启后开发板屏幕如图:

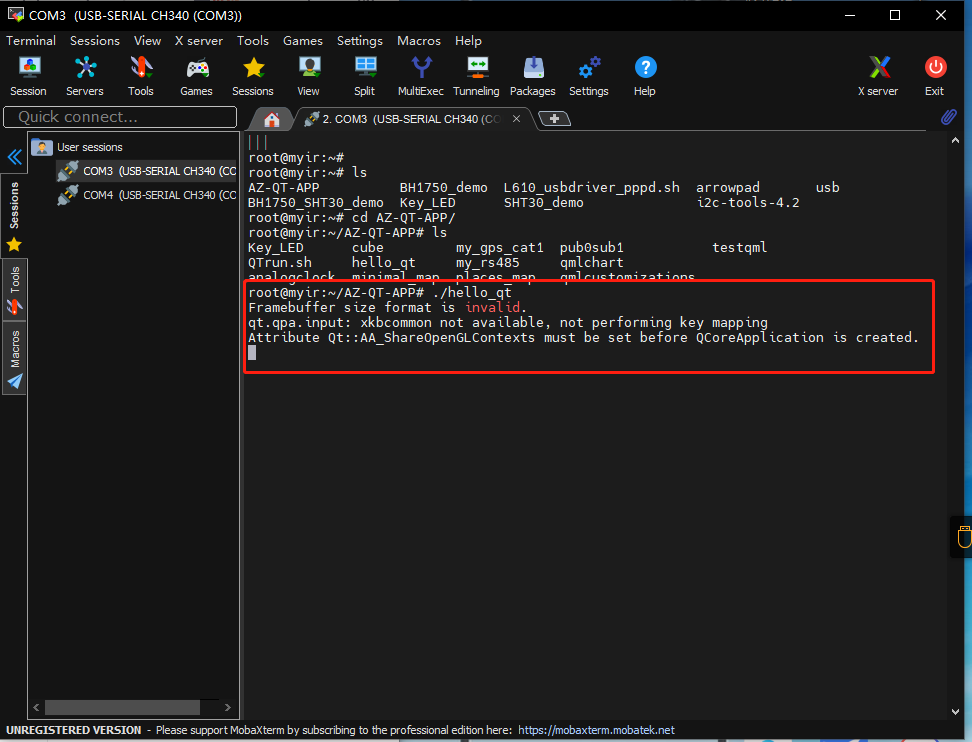
运行例程QT应用文件./arrowpad

运行例程Qt应用成功,环境测试完成
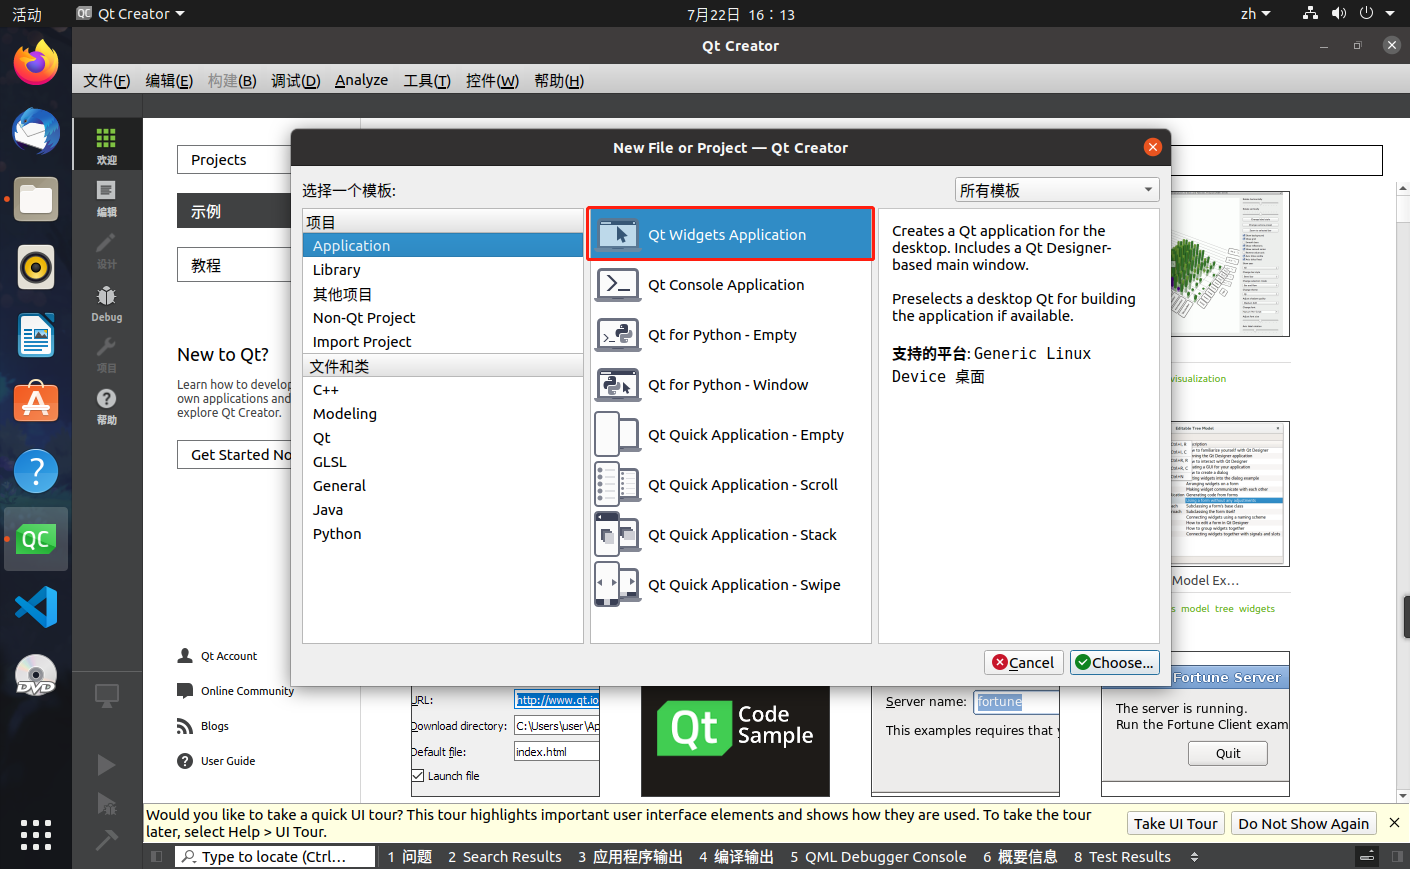
新建QT项目进行验证(hello_qt)
- 模板:默认模板
- 名称/存放路径:hello_qt/自定义
- 构建方式:qmake
- Base class:QWidget
- Language:中文
- Kit(构建套件):把我们前面配置的开发板环境Kit勾选上✔

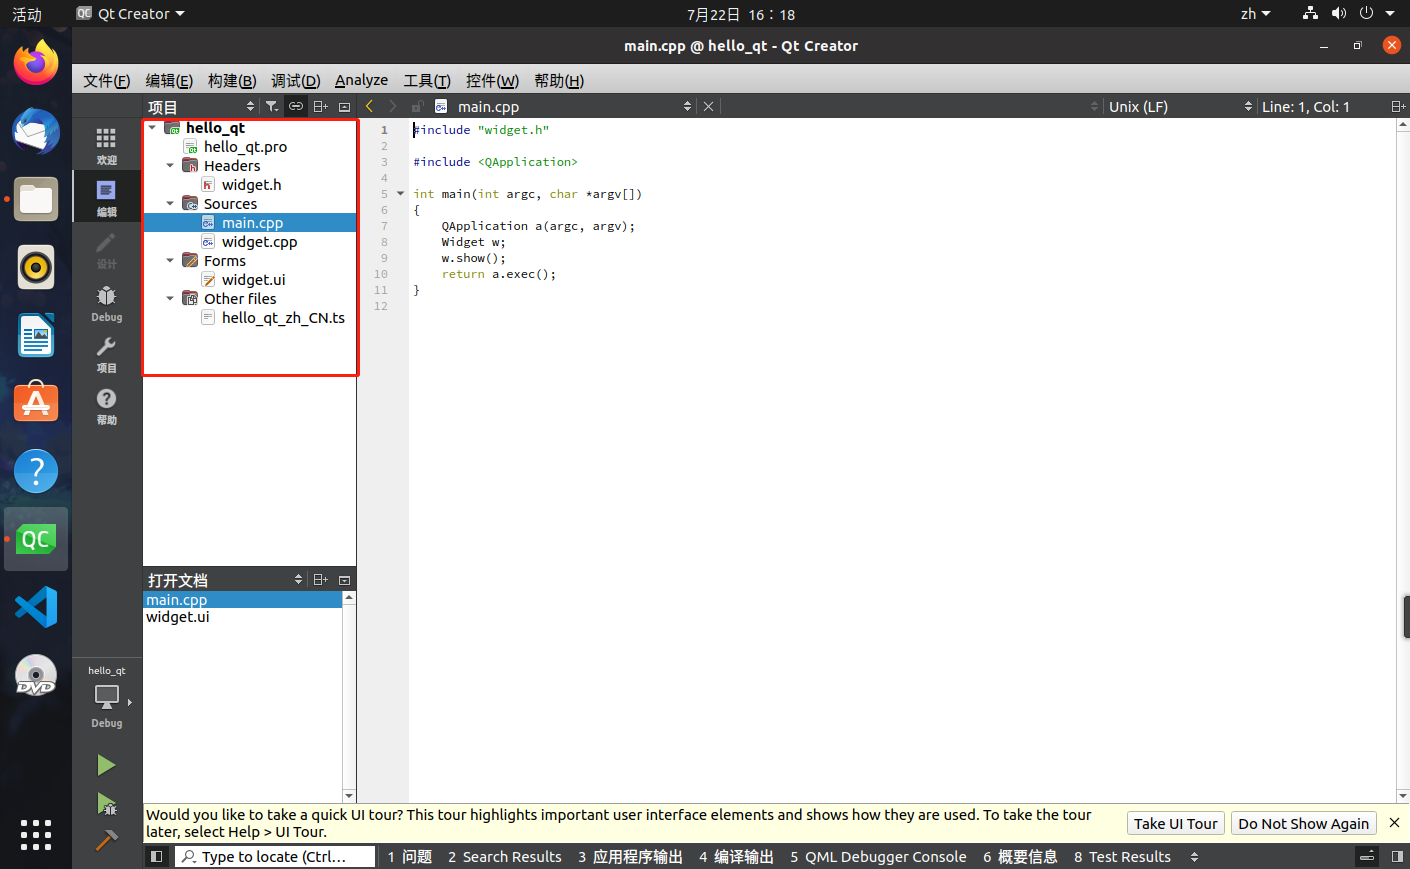
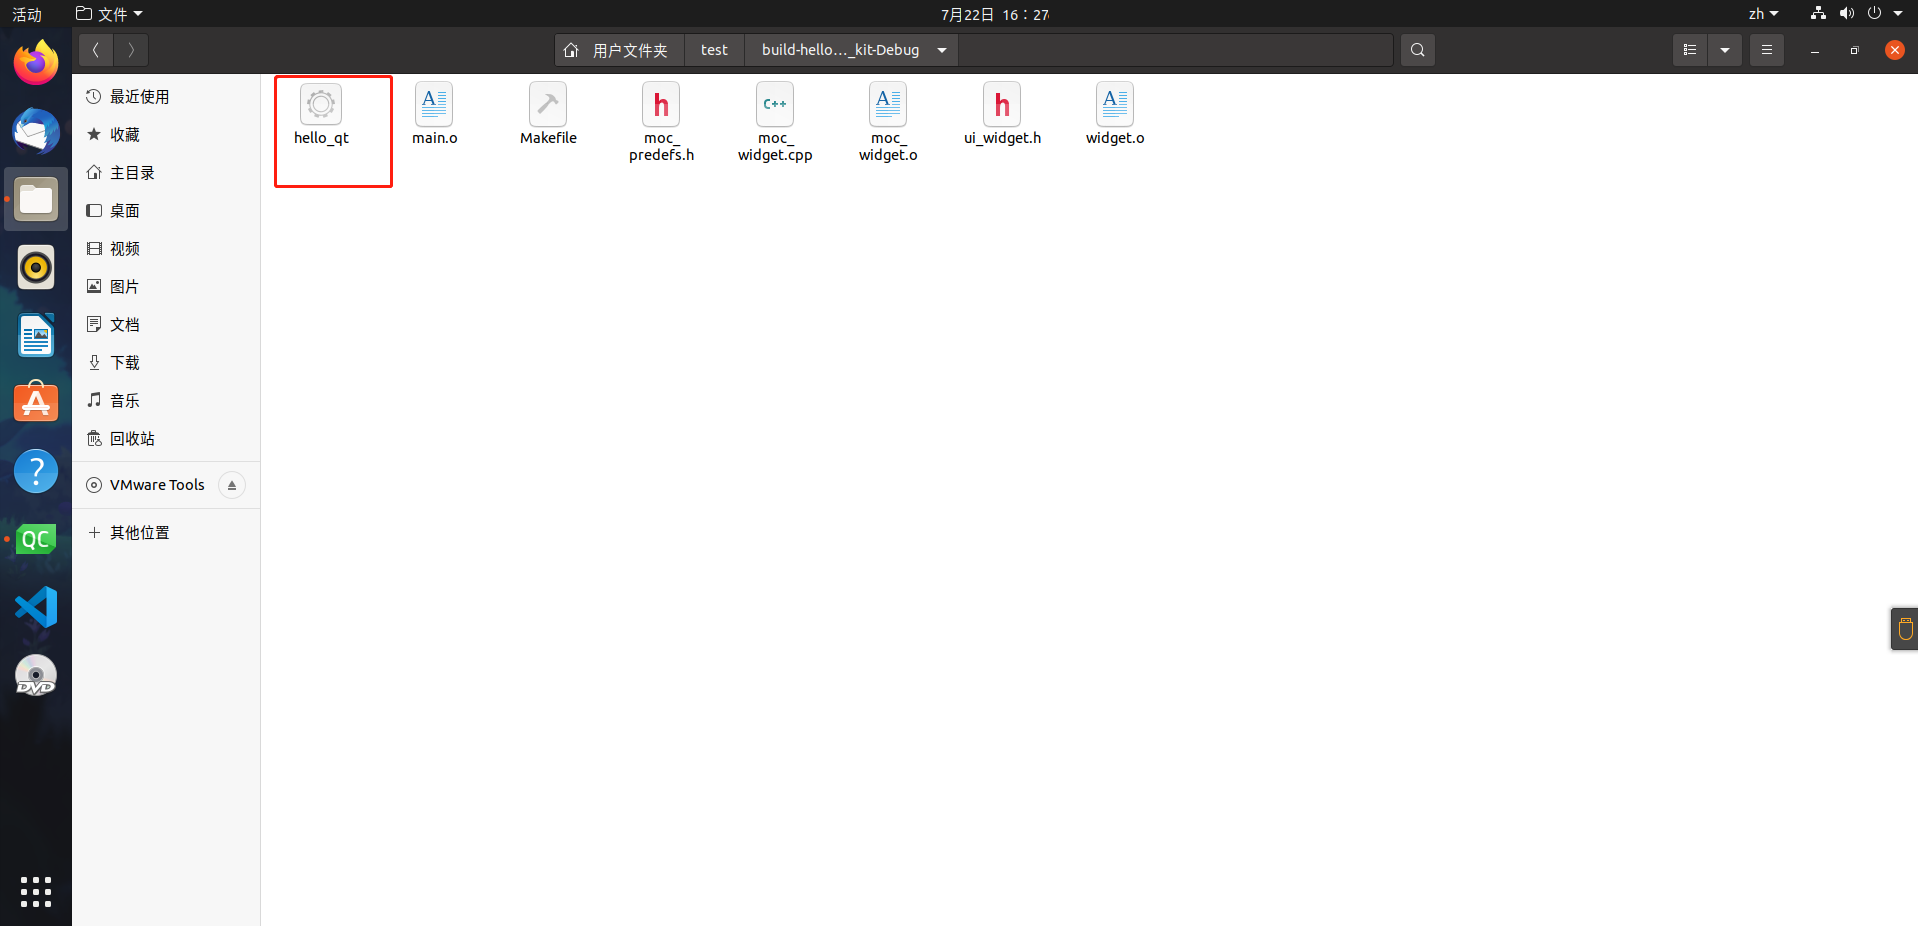
新建完成文件目录如图
应用界面开发
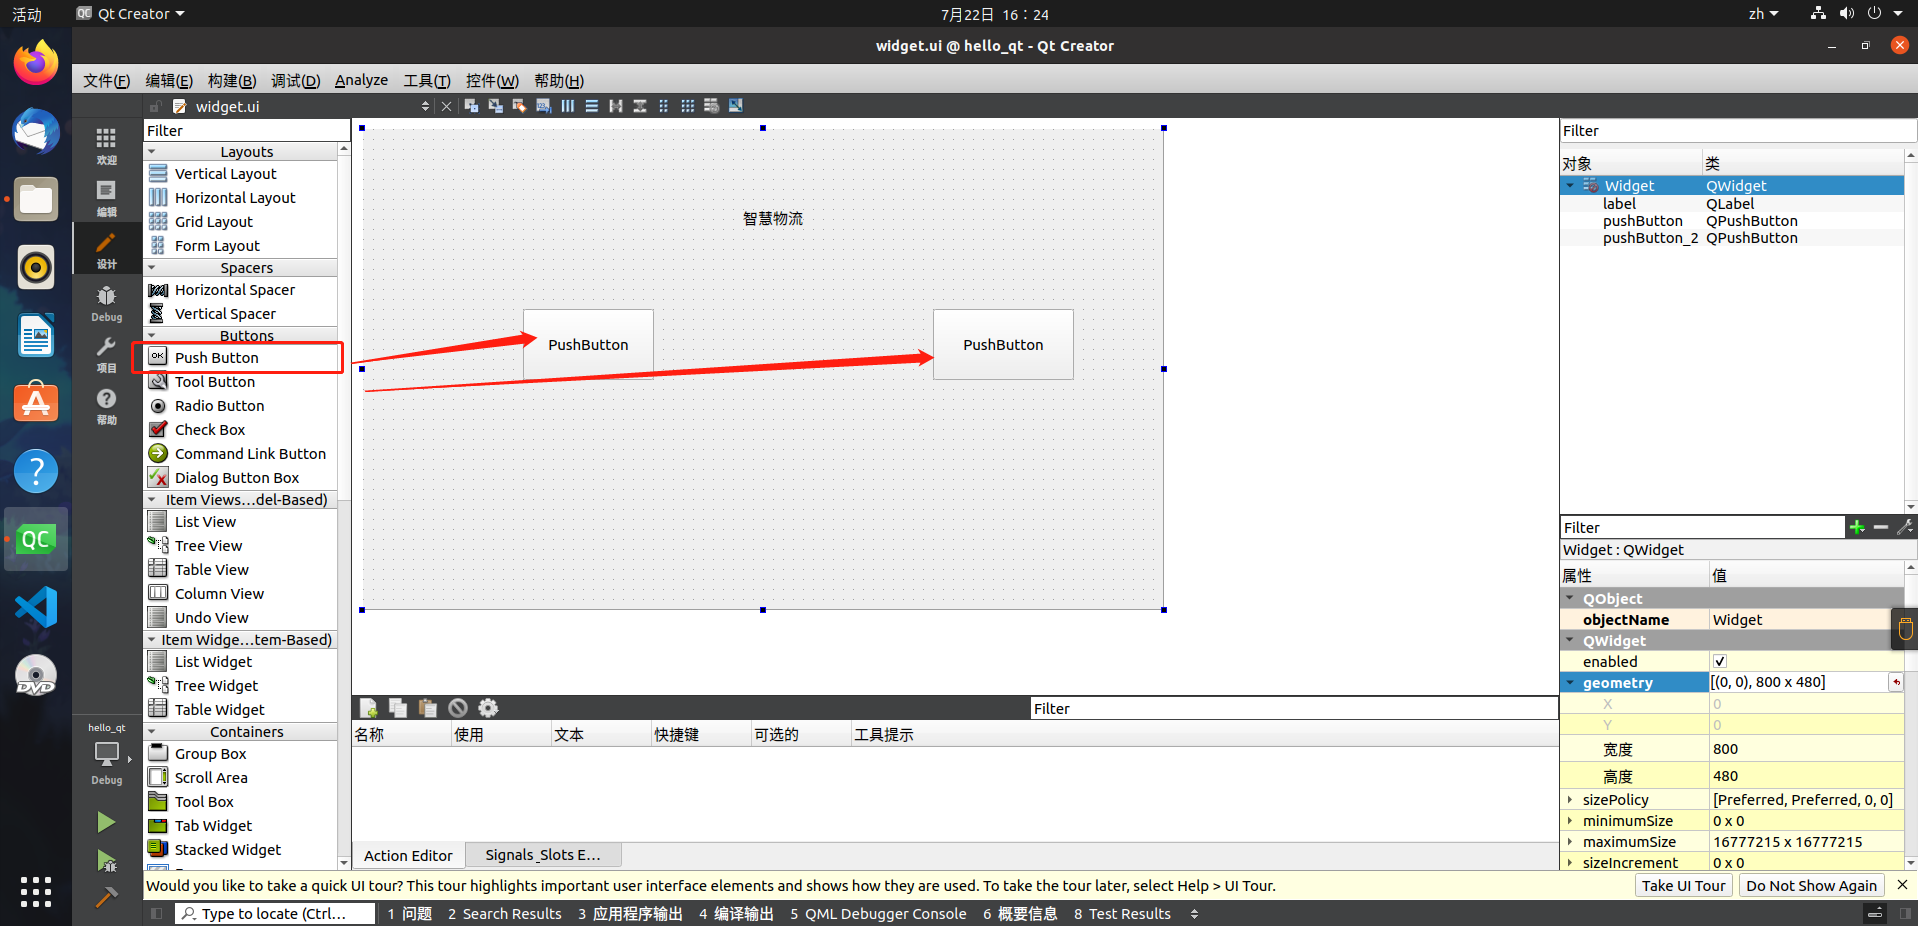
双击widget.ui文件
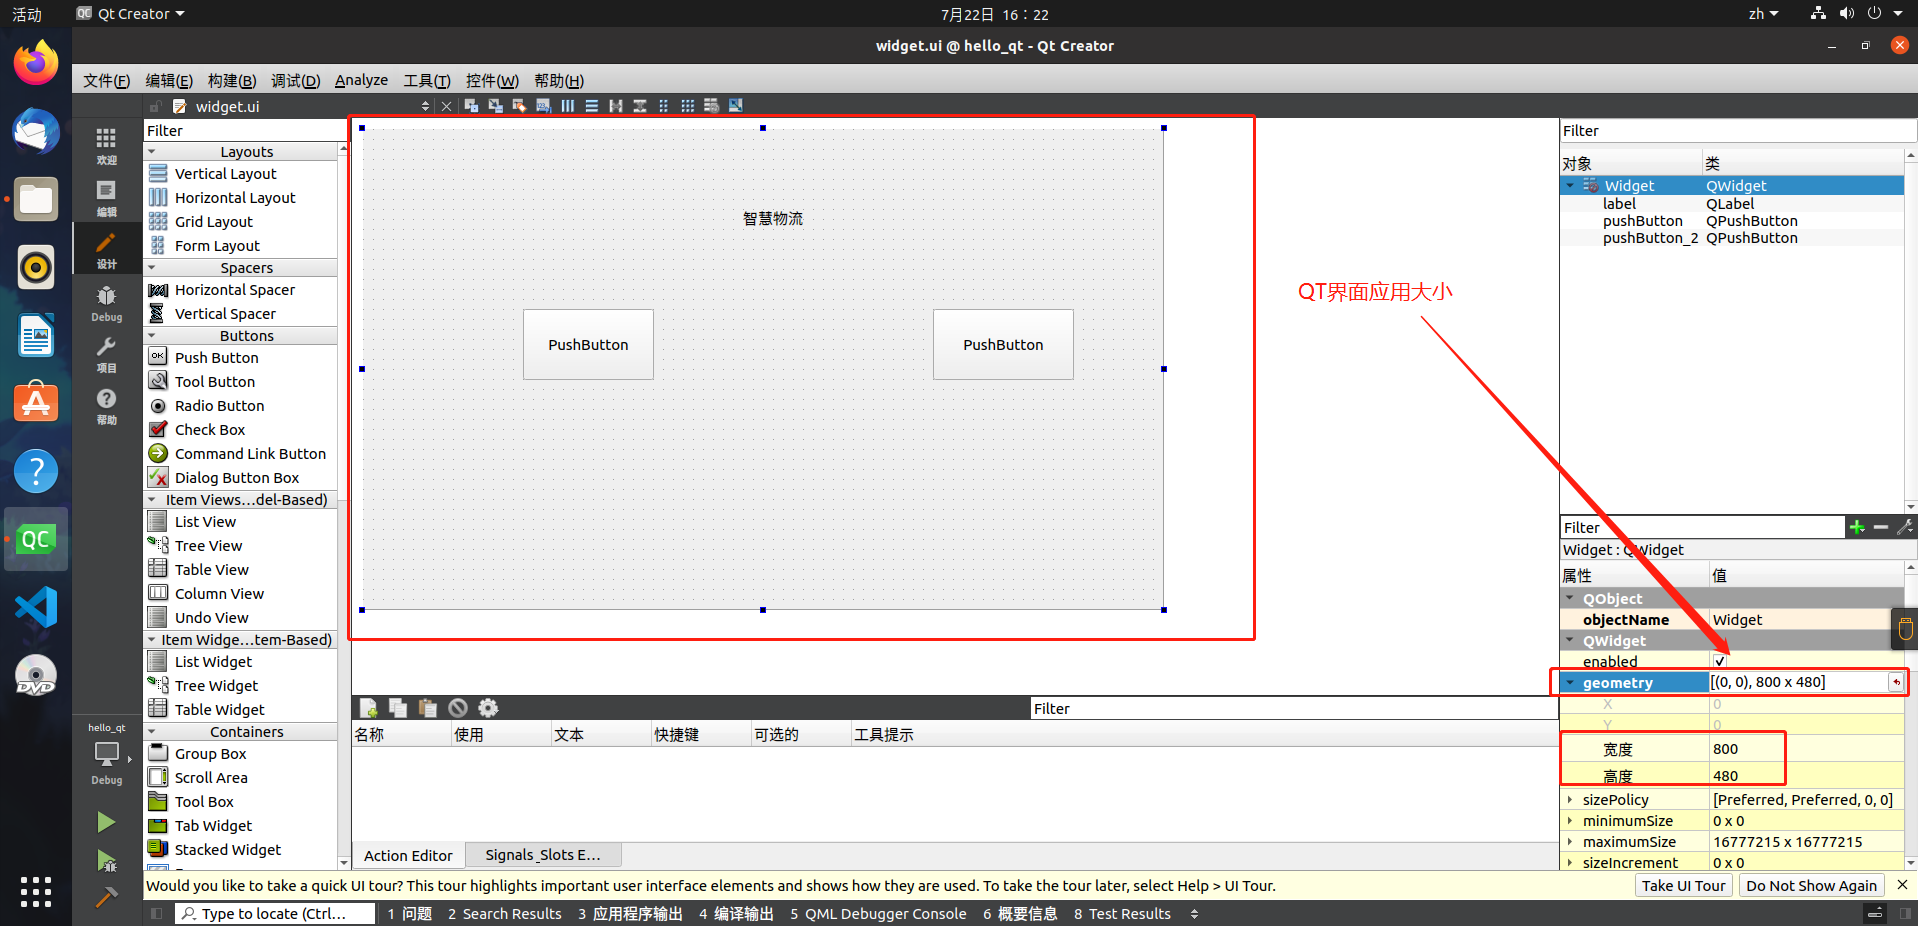
1.根据我们LCD屏(800*480)修改QT应用界面大小为800*480
geometry
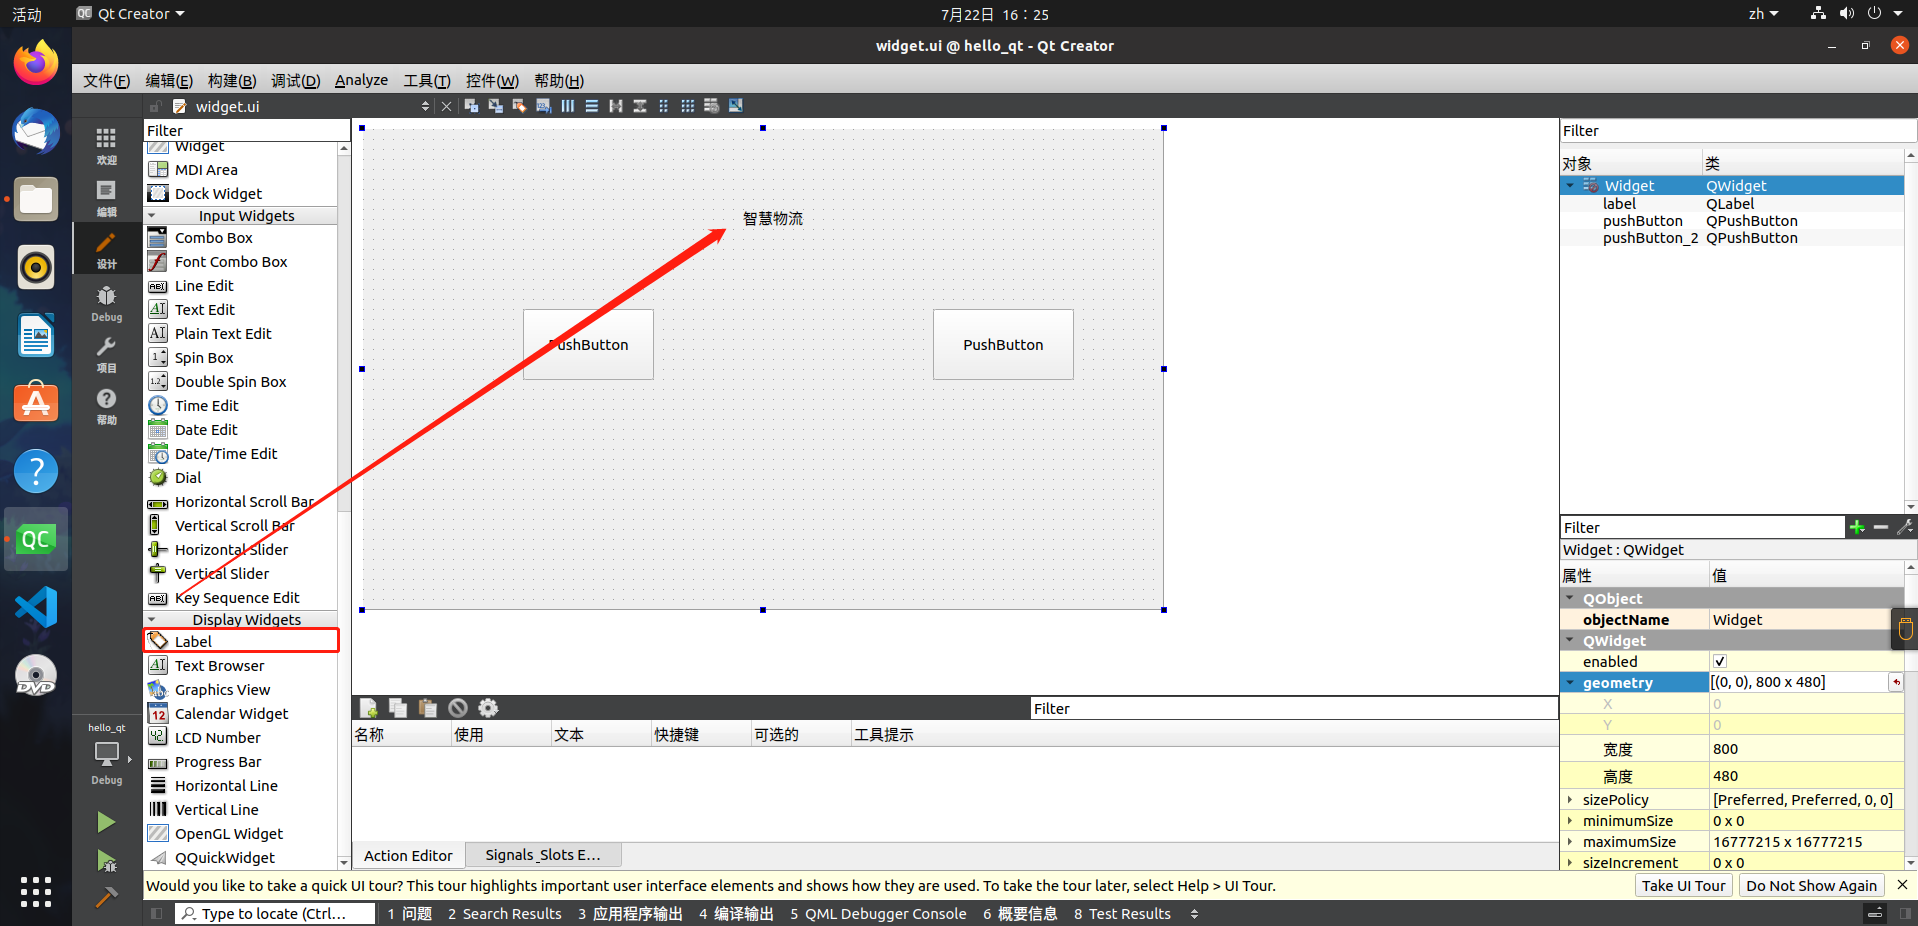
2.添加1个label控件和2个按钮控件进行初步测试
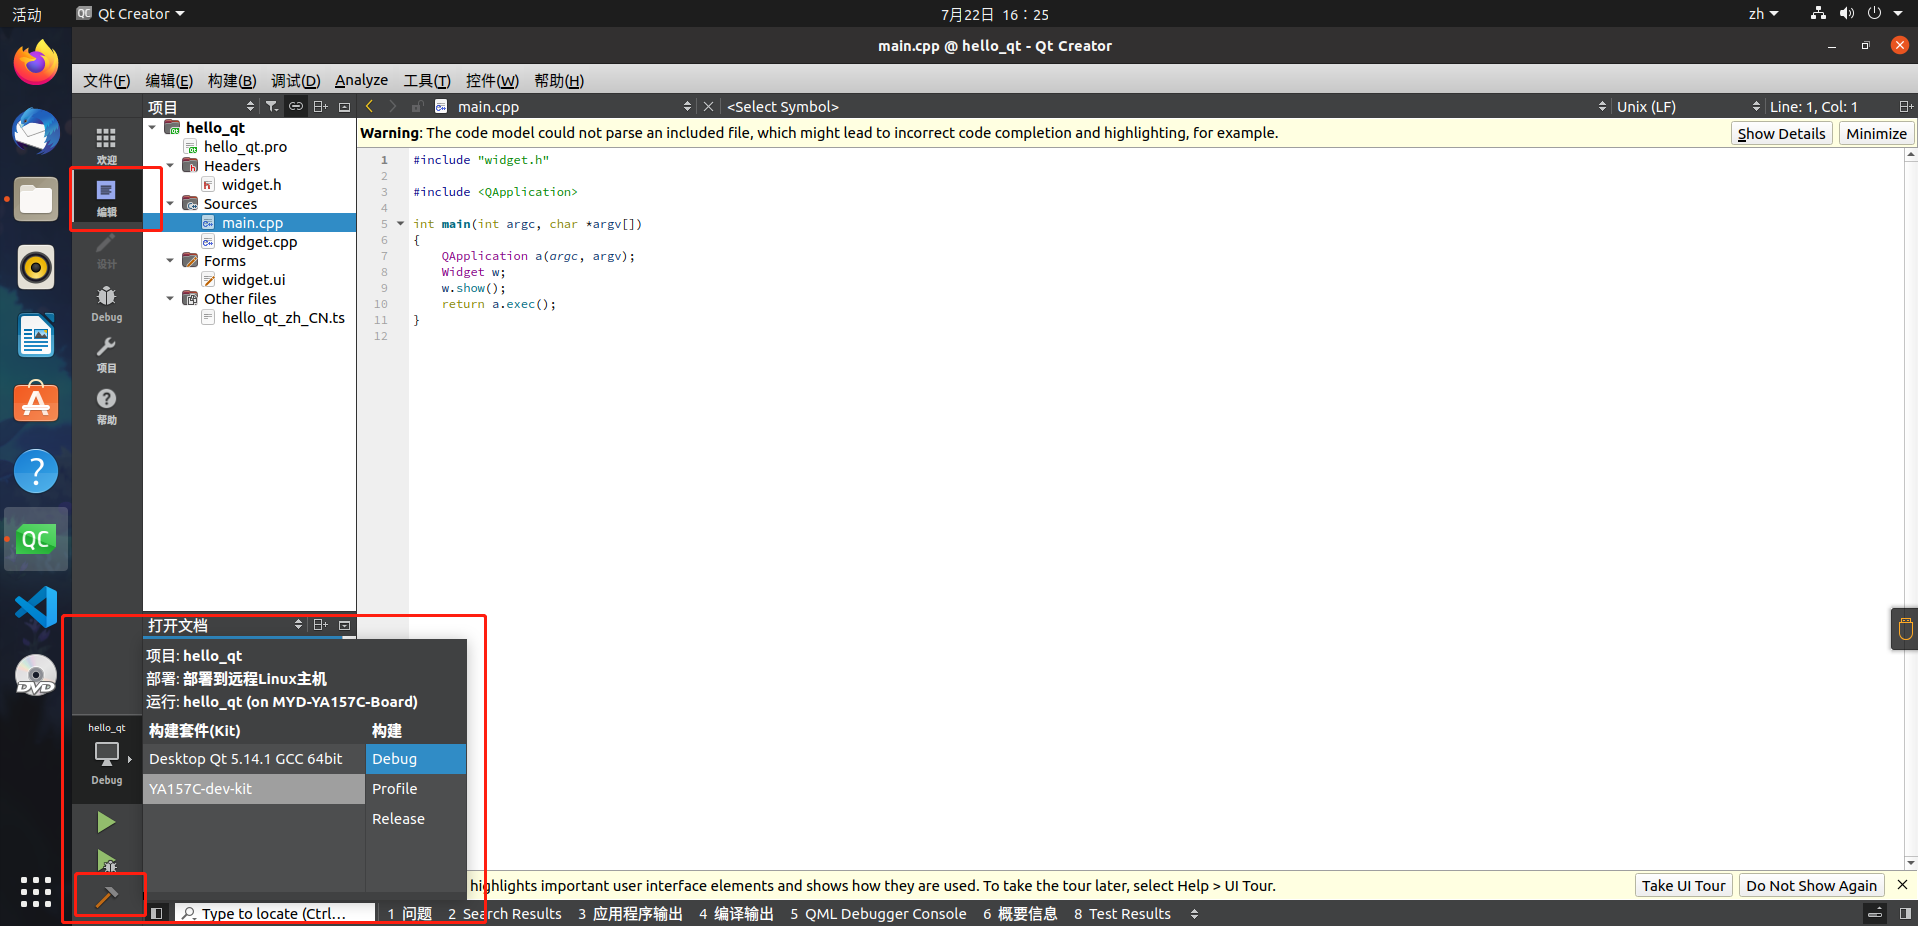
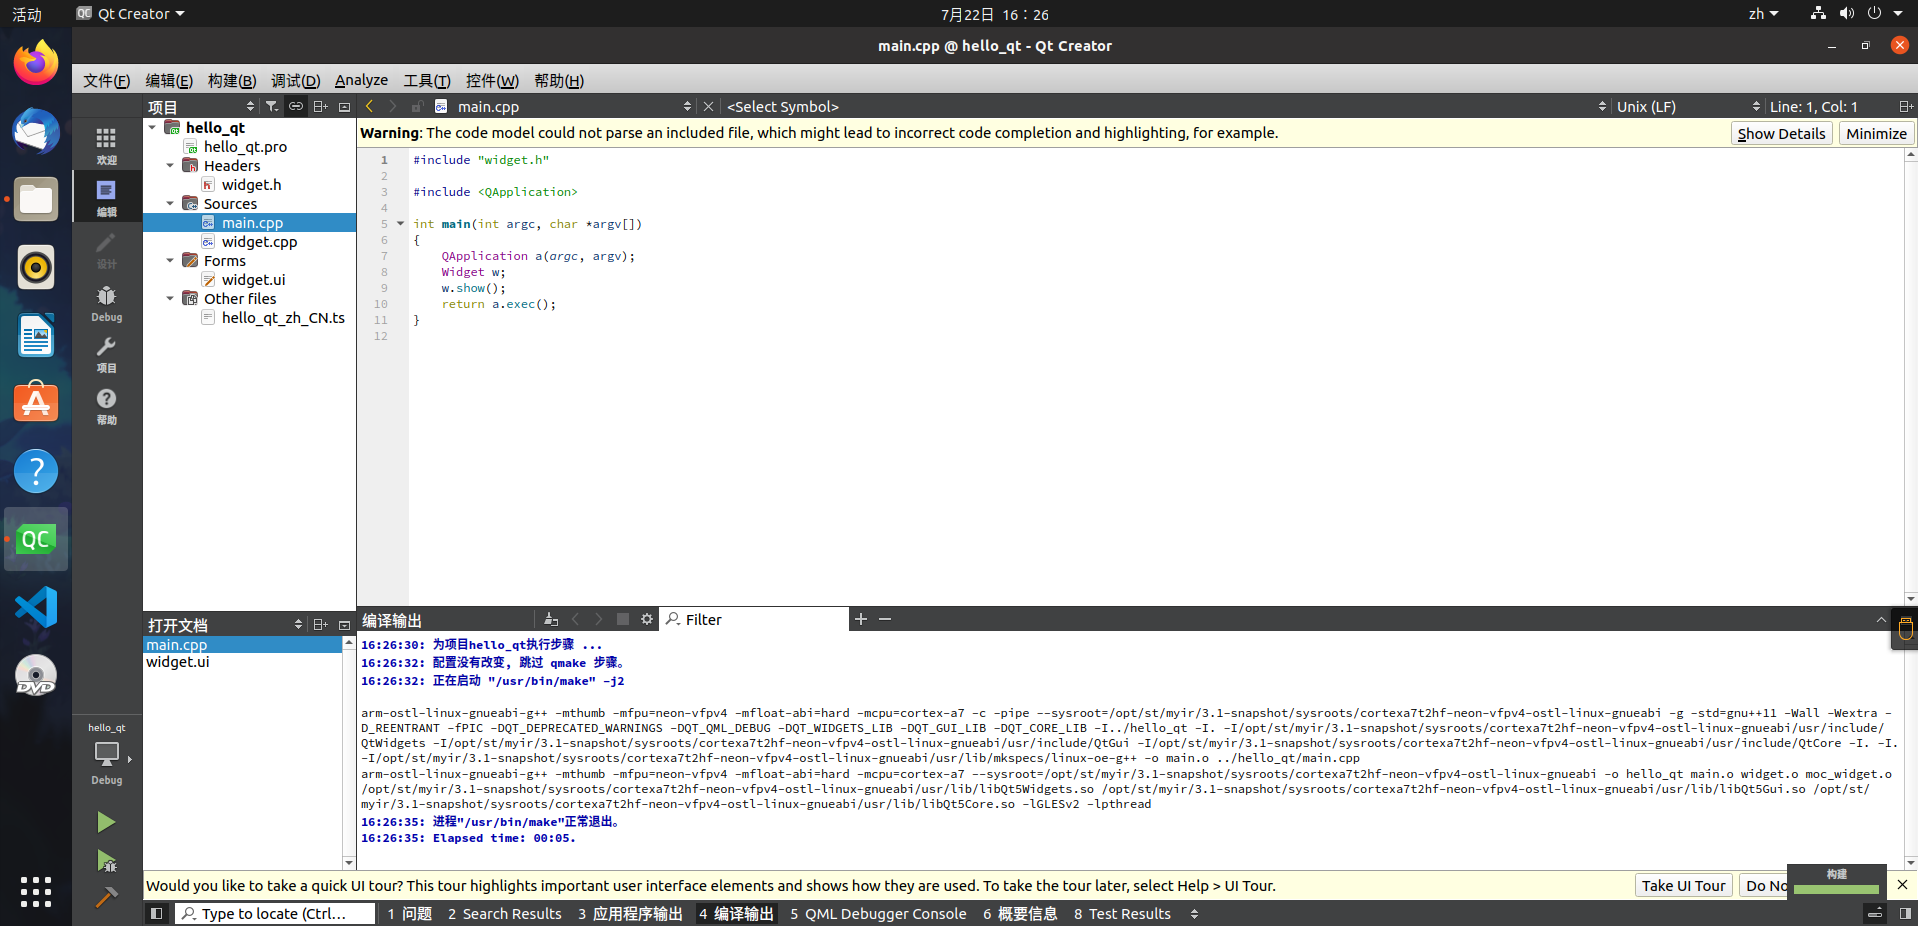
3.回到“编辑”界面构建项目
4.找到存放路径的文件夹将构建好的应用用SCP命令传输至开发板
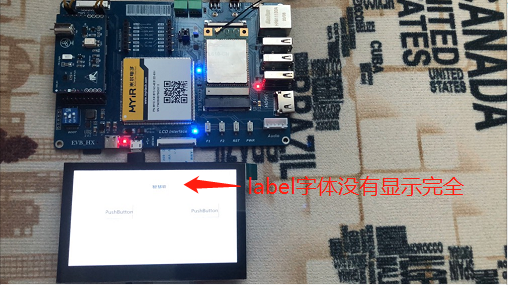
5.运行QT应用,验证功能是否正常,发现分辨率不对劲
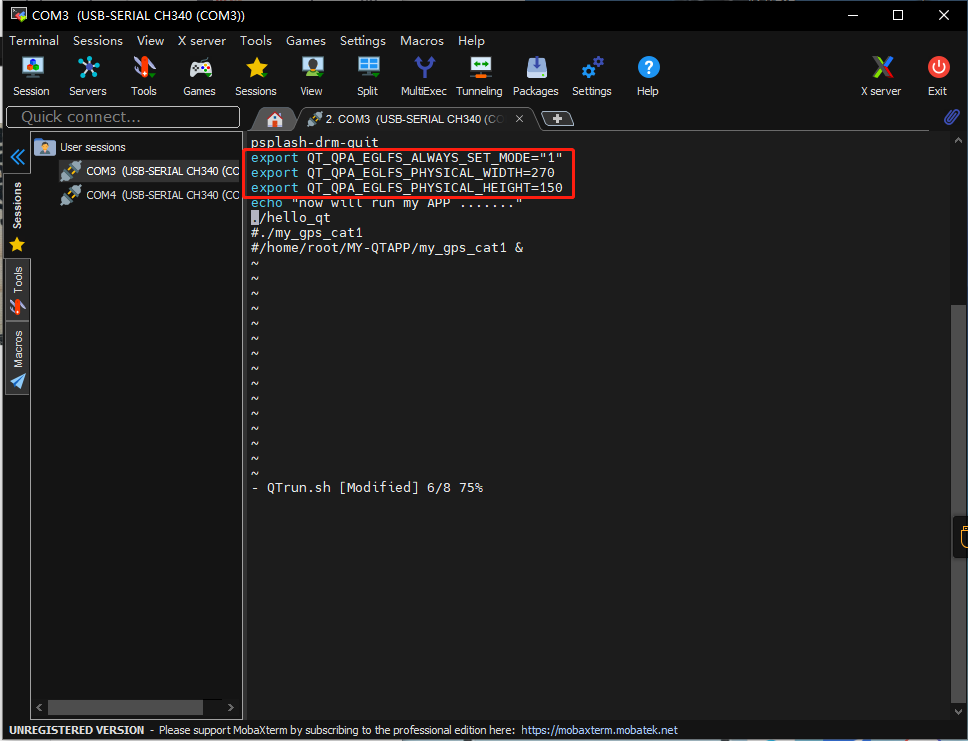
6.编写QT应用运行脚本(脚本设置好LCD屏参数)
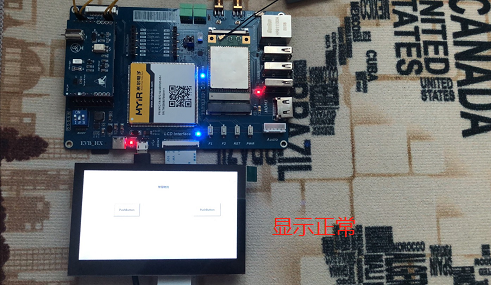
7.wq保存后通过脚本运行应用(应用显示正常)

第二章 学习编写QT智慧物流应用(基于阿正前辈已编译成功的应用)
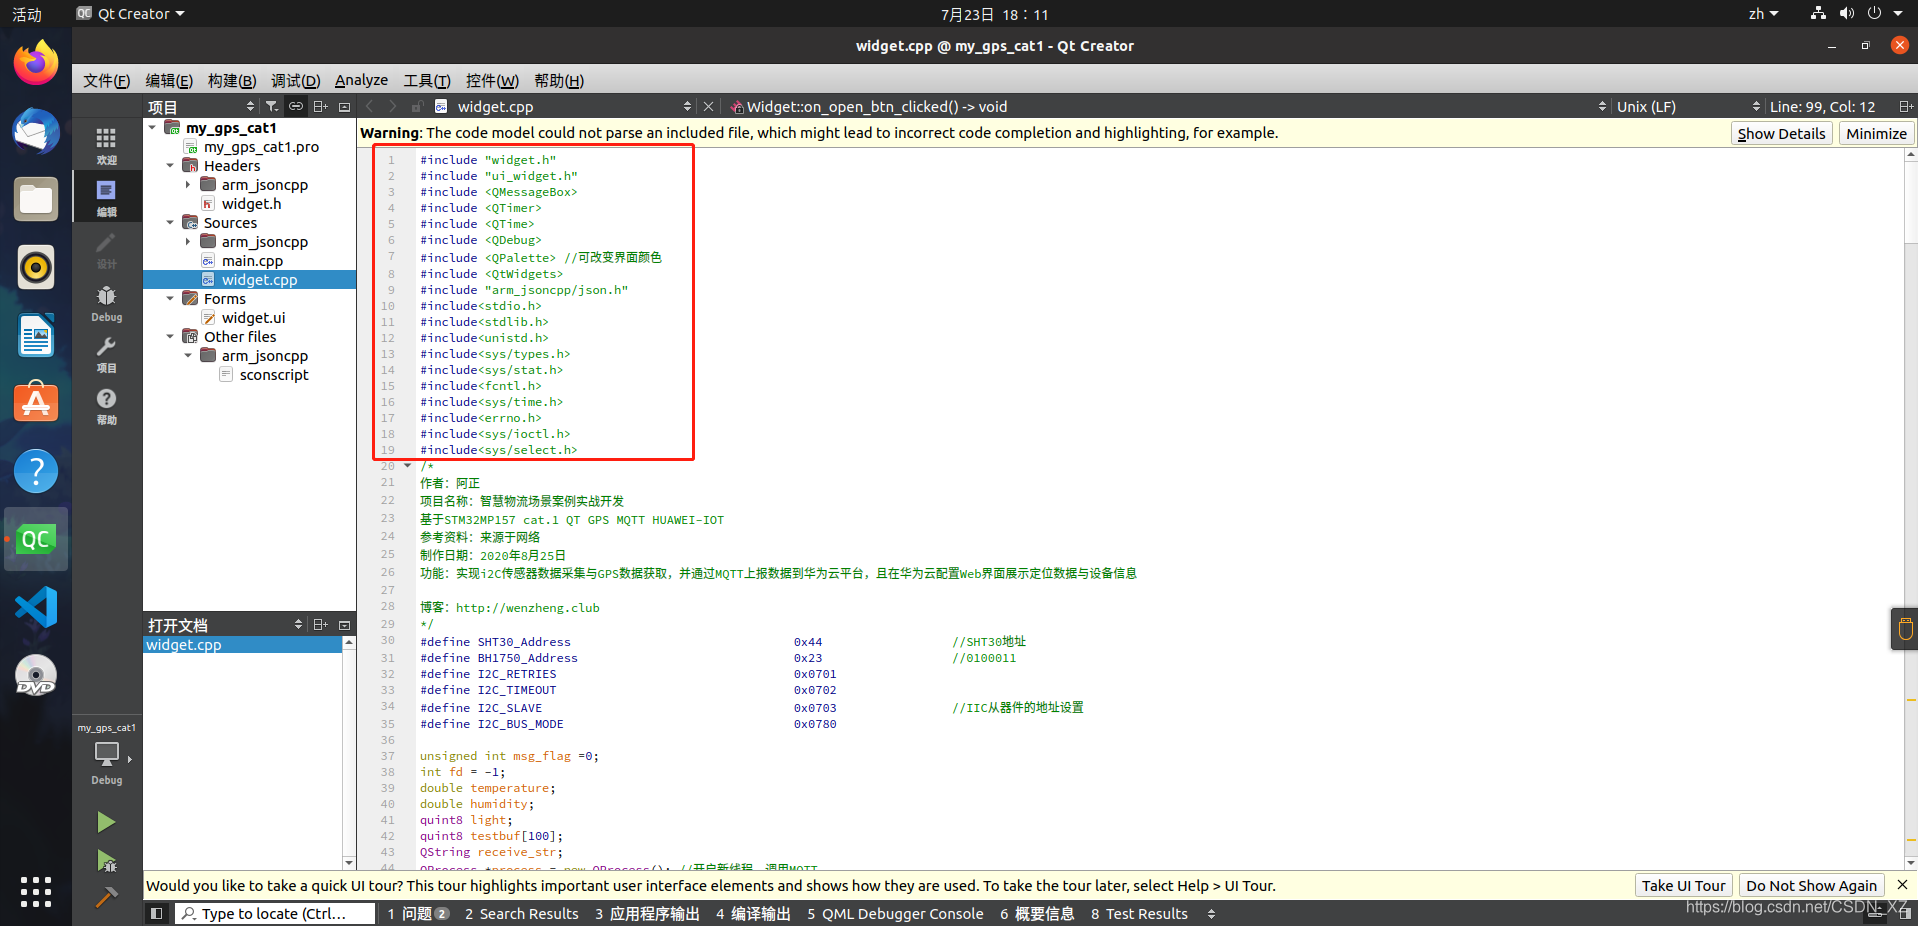
1.cpp头文件配置
#include "widget.h"
#include "ui_widget.h"
#include <QMessageBox>
#include <QTimer>
#include <QTime>
#include <QDebug>
#include <QPalette> //可改变界面颜色
#include <QtWidgets>
#include "arm_jsoncpp/json.h"
#include<stdio.h>
#include<stdlib.h>
#include<unistd.h>
#include<sys/types.h>
#include<sys/stat.h>
#include<fcntl.h>
#include<sys/time.h>
#include<errno.h>
#include<sys/ioctl.h>
#include<sys/select.h>
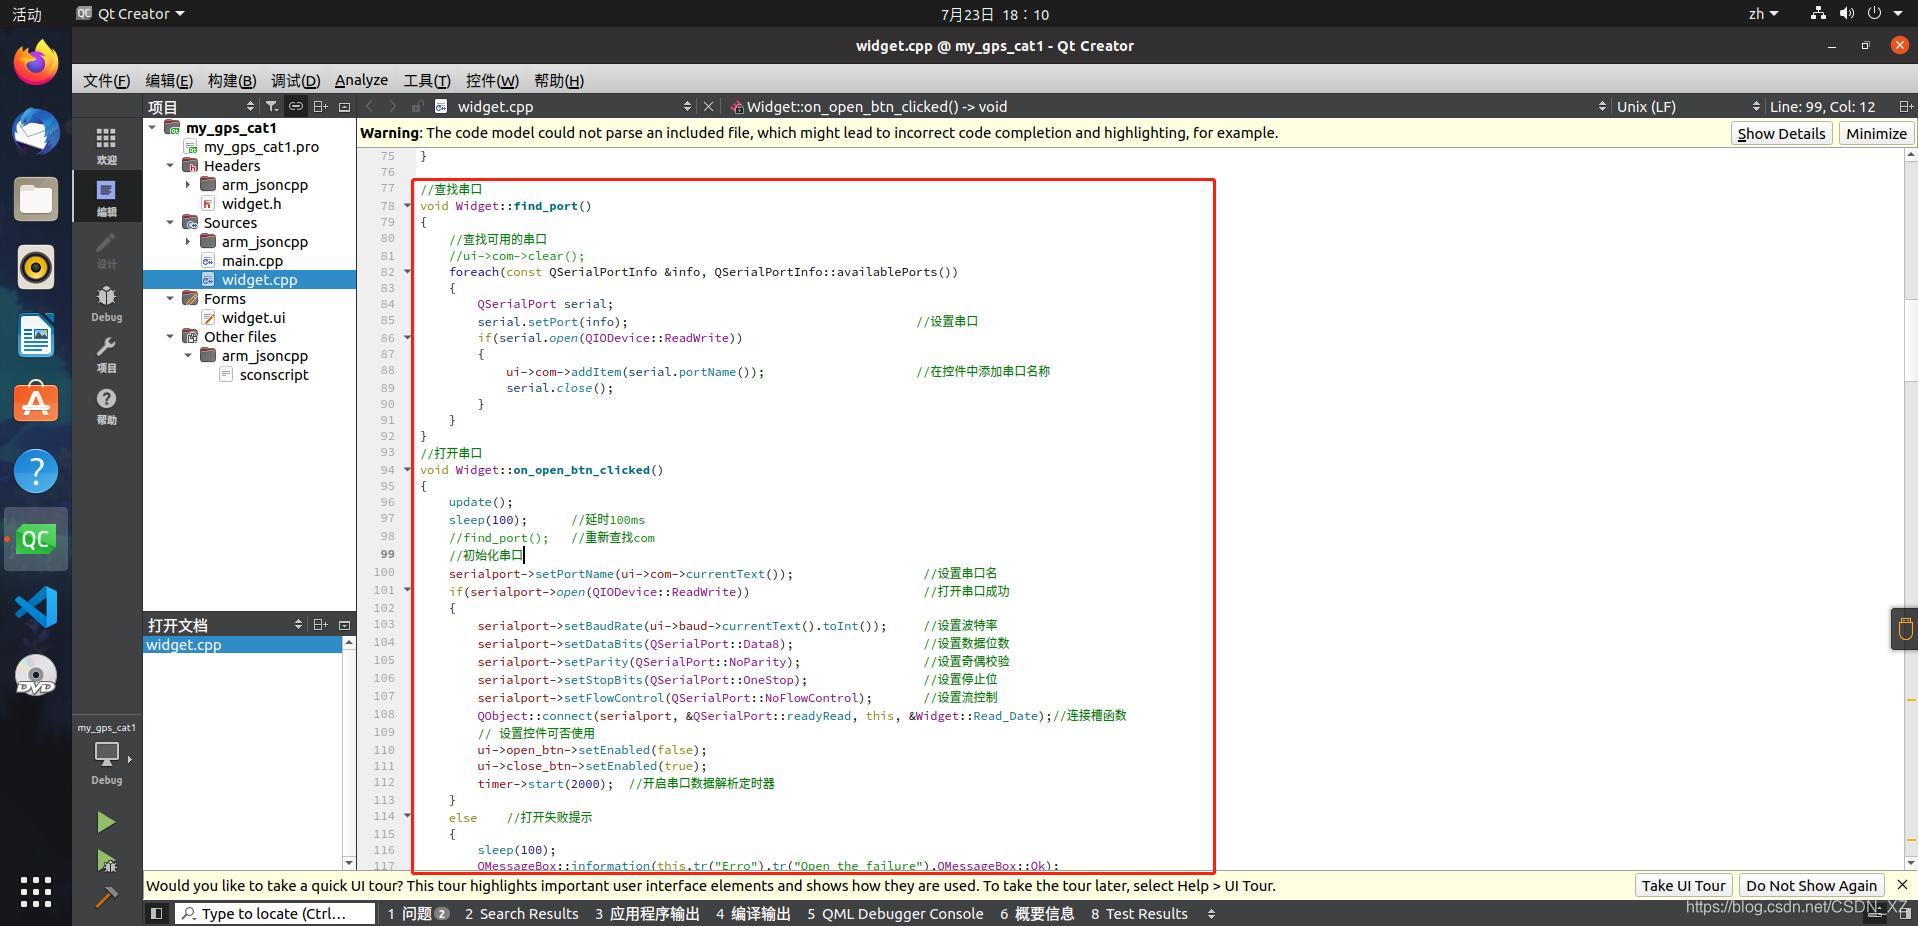
2.编写串口数据读写函数
pro文件
QT += serialport

cpp文件
//查找串口
void Widget::find_port()
{
    //查找可用的串口
    //ui->com->clear();
    foreach(const QSerialPortInfo &info, QSerialPortInfo::availablePorts())
    {
        QSerialPort serial;
        serial.setPort(info);                                        //设置串口
        if(serial.open(QIODevice::ReadWrite))
        {
            ui->com->addItem(serial.portName());                     //在控件中添加串口名称
            serial.close();
        }
    }
}
//打开串口
void Widget::on_open_btn_clicked()
{
    update();
    sleep(100);      //延时100ms
    //find_port();   //重新查找com
    //初始化串口
    serialport->setPortName(ui->com->currentText());                  //设置串口名
    if(serialport->open(QIODevice::ReadWrite))                        //打开串口成功
    {
        serialport->setBaudRate(ui->baud->currentText().toInt());     //设置波特率
        serialport->setDataBits(QSerialPort::Data8);                  //设置数据位数
        serialport->setParity(QSerialPort::NoParity);                 //设置奇偶校验
        serialport->setStopBits(QSerialPort::OneStop);                //设置停止位
        serialport->setFlowControl(QSerialPort::NoFlowControl);       //设置流控制
        QObject::connect(serialport, &QSerialPort::readyRead, this, &Widget::Read_Date);//连接槽函数
        // 设置控件可否使用
        ui->open_btn->setEnabled(false);
        ui->close_btn->setEnabled(true);
        timer->start(2000);  //开启串口数据解析定时器
    }
    else    //打开失败提示
    {
        sleep(100);
        QMessageBox::information(this,tr("Erro"),tr("Open the failure"),QMessageBox::Ok);
    }
}
//窗口显示串口传来的数据
void Widget::Read_Date()
{
    QByteArray buf;
    buf = serialport->readAll();
    if(!buf.isEmpty())          //将数据显示到文本串口
    {
        receive_str = ui->Receive_text_window->toPlainText(); //获取上次的文本
        receive_str+=tr(buf);
        ui->Receive_text_window->clear();                     //把上次的清空
        ui->Receive_text_window->append(receive_str);         //添加文本
    }else
    {
        ui->Receive_text_window->clear();
    }
    buf.clear();    //清空缓存区
}
//  $GNRMC,000400.028,V,3445.8715,N,11337.8655,E,0.000,0.00,060180,,,N*5D
// 经度 Longitude 纬度 latitude
//定时处理串口数据
void Widget::gpsparse()
{
    if(  receive_str.contains("*") && receive_str.contains("RMC"))
    {
        QStringList gpsByteArrays = receive_str.split("\n"); //以结尾符分割
        int count = gpsByteArrays.count();
        QString RMC_str,GGA_str;
        ui->debug_text->clear();
        for(int i =0;i<count;i++)  //遍历数据,查找定位信息
        {
            receive_str = gpsByteArrays.at(i);
            //qDebug()<< receive_str; //打印遍历数据
            if( receive_str.contains("RMC"))
            {
                RMC_str =   receive_str  ;
            }else if(receive_str.contains("GGA"))
            {
                GGA_str =  receive_str ;
            }

        }
        QStringList RMCArrays = RMC_str.split(','); //以逗号符分割
        QStringList GGAArrays = GGA_str.split(','); //以逗号符分割
        // qDebug()<< RMCArrays.at(3)<< RMCArrays.at(5) ;
        int  gpsLat_1 = static_cast<int>(RMCArrays.at(3).toDouble()/100);
        double gpsLat_2 = (RMCArrays.at(3).toDouble() - gpsLat_1 * 100)/60;
        double gpslat=gpsLat_1 + gpsLat_2;
        int gpsLong_1 = static_cast<int>(RMCArrays.at(5).toDouble()/100);
        double gpsLong_2 = (RMCArrays.at(5).toDouble()-gpsLong_1 * 100)/60;
        double gpsLong = gpsLong_1 + gpsLong_2;
        //qDebug() << QString::number(gpsLat_1, 'f', 4);  //double小数点后真实存在,只是显示问题
        if(RMC_str.contains("GNRMC")) ui->locate_mode->setText("GNSS系统");
        if(RMC_str.contains("GPRMC")) ui->locate_mode->setText("GPS系统");
        if(RMC_str.contains("BDRMC")) ui->locate_mode->setText("北斗系统");
        if(RMC_str.contains("GLRMC")) ui->locate_mode->setText("GLONASS系统");
        if(RMC_str.contains("GARMC")) ui->locate_mode->setText("Galileo系统");
        ui->satellite_number->setText(QString::number(GGAArrays.at(8).toInt())); //显示卫星数量
        ui->latitude_text->setText(QString::number(gpslat));   //显示纬度
        ui->Longitude_text->setText(QString::number(gpsLong)); //显示经度
        ui->debug_text->append(RMC_str); //
        ui->debug_text->append(GGA_str);
        ui->Receive_text_window->clear(); //把上次的清空
        receive_str = " ";
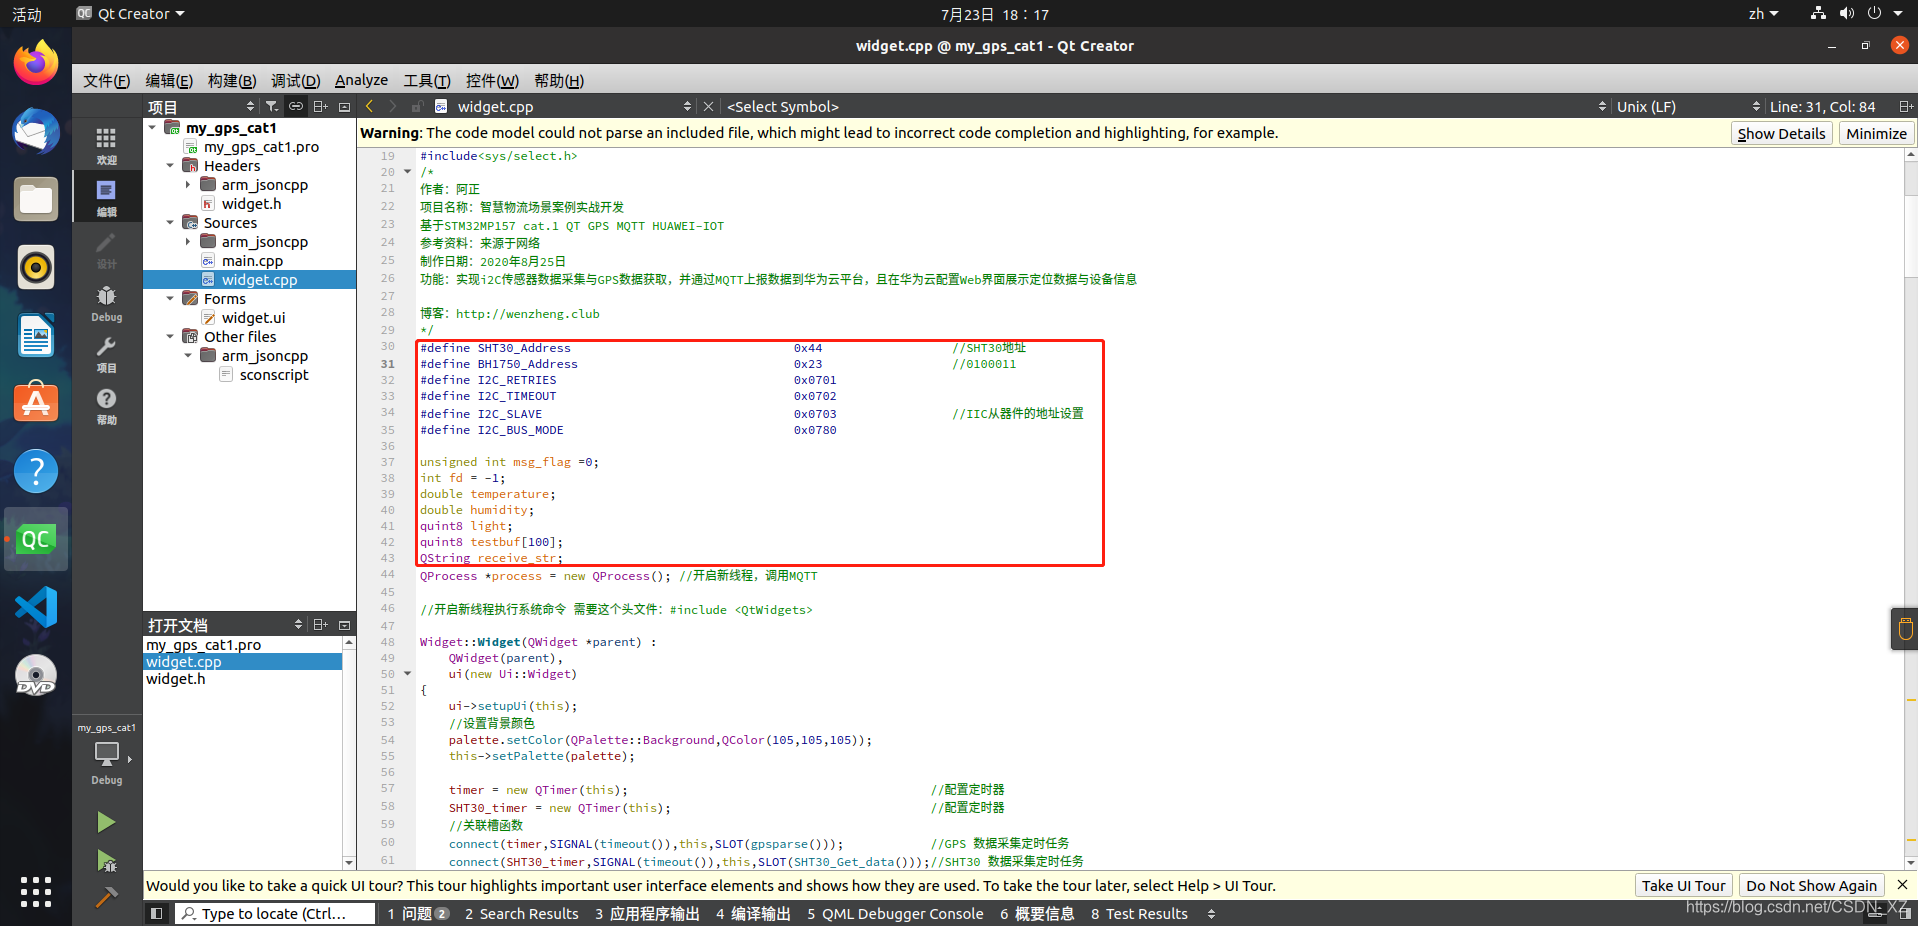
3.调用之前章节编写的I2C读写接口进行温湿度及光照强度采集
cpp文件
IIC设备地址、参数初始化
#define SHT30_Address                               0x44                  //SHT30地址
#define BH1750_Address                              0x23                  //0100011
#define I2C_RETRIES                                 0x0701
#define I2C_TIMEOUT                                 0x0702
#define I2C_SLAVE                                   0x0703                //IIC从器件的地址设置
#define I2C_BUS_MODE                                0x0780

unsigned int msg_flag =0;
int fd = -1;
double temperature;
double humidity;
quint8 light;
quint8 testbuf[100];
QString receive_str;
QProcess *process = new QProcess(); //开启新线程,调用MQTT
延时、IIC、CRC校验代码块
//延时函数
void Widget::sleep( int msec)
{
QTime dieTime = QTime::currentTime().addMSecs(msec);
while( QTime::currentTime() < dieTime )
QCoreApplication::processEvents(QEventLoop::AllEvents, 100);
}
void Widget::on_close_btn_clicked()
{
timer->stop();
serialport->clear(); //清空缓存区
serialport->close(); //关闭串口
//使某些串口不可使用
ui->open_btn->setEnabled(true);
ui->close_btn->setEnabled(false);
}
//IIC_dev 初始化函数
int Widget::dev_Init(void)
{
fd = open("/dev/i2c-0", O_RDWR); // open file and enable read and write
if (fd < 0)
{
perror("Can't open /dev/BH1750 \n"); // open i2c dev file fail
return -1;
}
printf("open /dev/i2c-0 success !\n"); // open i2c dev file succes
}
int Widget::BH1750_IIC(void)
{
if (ioctl(fd, I2C_SLAVE,BH1750_Address) < 0)
{ //set i2c address
printf("fail to set i2c device slave address!\n");
::close(fd);
return - 1;
}
printf("set slave address to 0x%x success!\n", BH1750_Address);
return (1);
}
int Widget::SHT30_IIC(void)
{
if (ioctl(fd, I2C_SLAVE,SHT30_Address) < 0)
{ //set i2c address
printf("fail to set i2c device slave address!\n");
::close(fd);
return - 1;
}
printf("set slave address to 0x%x success!\n", SHT30_Address);
return (1);
}
int Widget::BH1750_Dat_To_Lux(quint8* buf)
{
quint8 lux = 0;
lux = buf[0];
lux <<=8;
lux += buf[1];
lux = (int)(lux / 1.2);
}
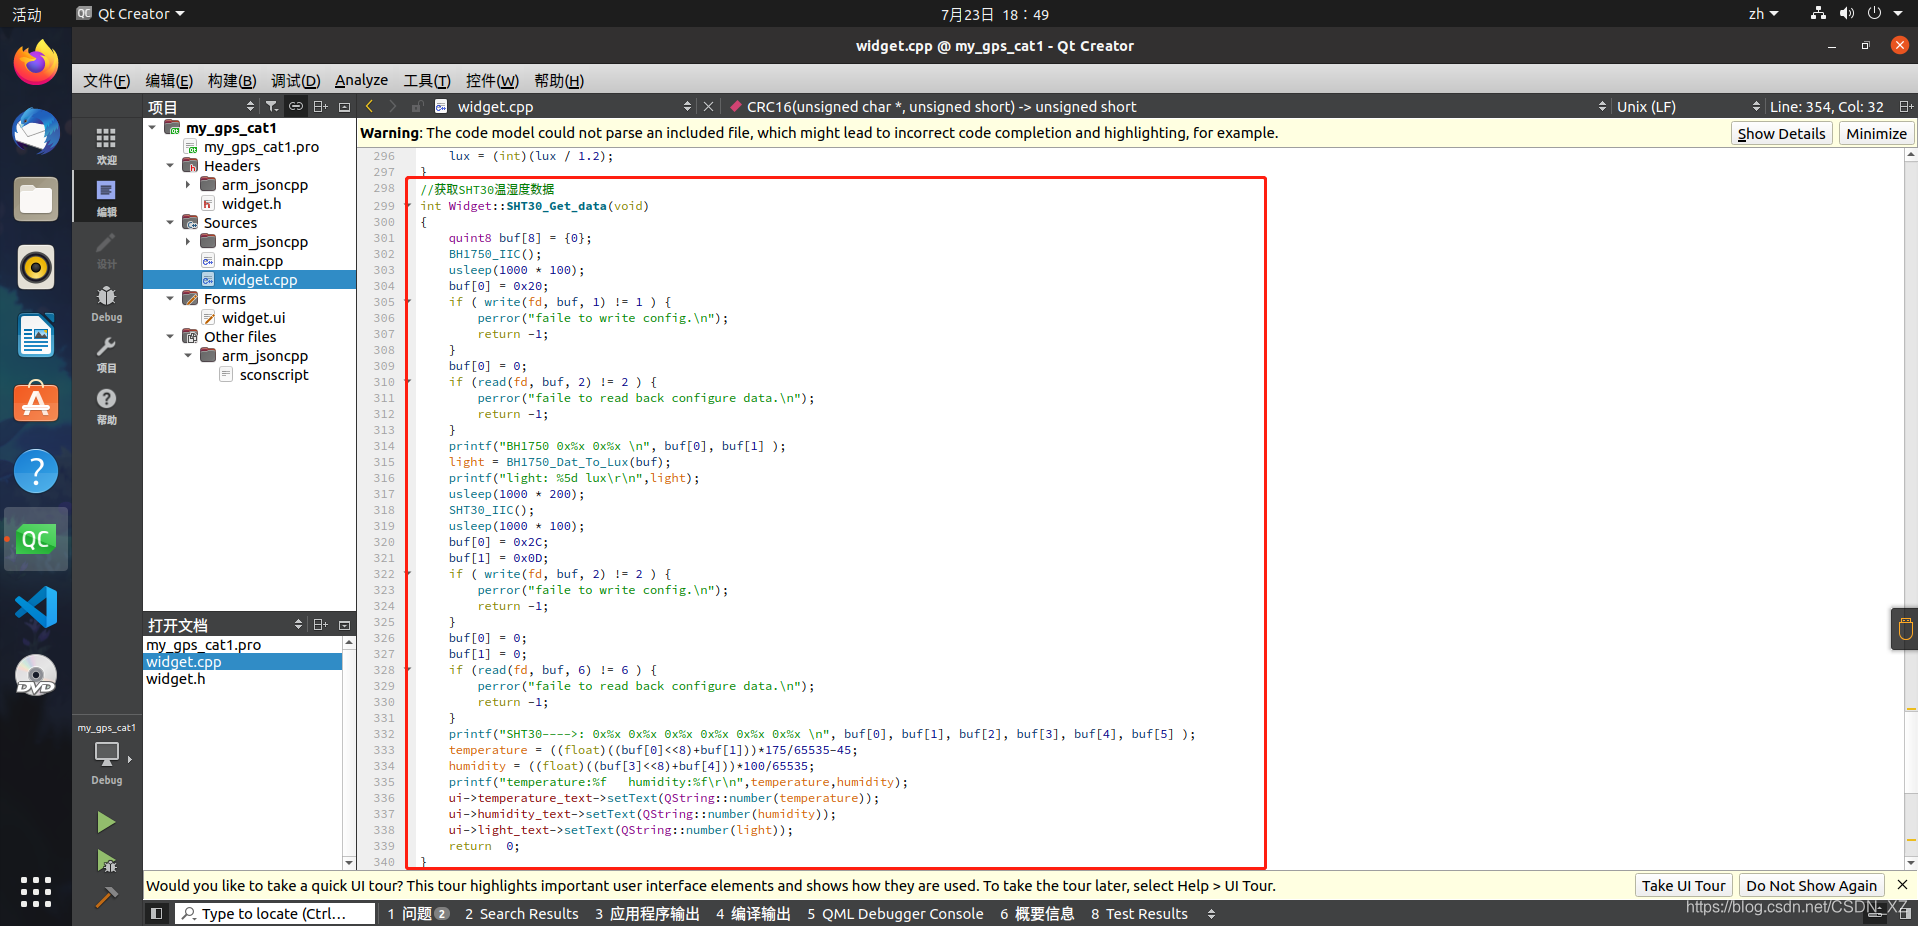
//获取SHT30温湿度数据
int Widget::SHT30_Get_data(void)
{
quint8 buf[8] = {0};
BH1750_IIC();
usleep(1000 * 100);
buf[0] = 0x20;
if ( write(fd, buf, 1) != 1 ) {
perror("faile to write config.\n");
return -1;
}
buf[0] = 0;
if (read(fd, buf, 2) != 2 ) {
perror("faile to read back configure data.\n");
return -1;
}
printf("BH1750 0x%x 0x%x \n", buf[0], buf[1] );
light = BH1750_Dat_To_Lux(buf);
printf("light: %5d lux\r\n",light);
usleep(1000 * 200);
SHT30_IIC();
usleep(1000 * 100);
buf[0] = 0x2C;
buf[1] = 0x0D;
if ( write(fd, buf, 2) != 2 ) {
perror("faile to write config.\n");
return -1;
}
buf[0] = 0;
buf[1] = 0;
if (read(fd, buf, 6) != 6 ) {
perror("faile to read back configure data.\n");
return -1;
}
printf("SHT30---->: 0x%x 0x%x 0x%x 0x%x 0x%x 0x%x \n", buf[0], buf[1], buf[2], buf[3], buf[4], buf[5] );
temperature = ((float)((buf[0]<<8)+buf[1]))*175/65535-45;
humidity = ((float)((buf[3]<<8)+buf[4]))*100/65535;
printf("temperature:%f humidity:%f\r\n",temperature,humidity);
ui->temperature_text->setText(QString::number(temperature));
ui->humidity_text->setText(QString::number(humidity));
ui->light_text->setText(QString::number(light));
return 0;
}
//CRC校验码计算
unsigned short CRC16(unsigned char *pBuf,unsigned short len)
{
unsigned short uCRC=0xFFFF;
int i,j;
for(i=0;i<len;i++)
{
uCRC^=(*(pBuf+i));
for(j=0;j<8;j++)
{
if((uCRC&0x0001)==0x0001)
{
uCRC=(uCRC>>1);
uCRC^=0xA001;
}
else
uCRC=(uCRC>>1);
}
}
return uCRC;
}
4.添加jsoncpp库并封装数据(通过MQTT通讯协议与华为云平台进行通信)
/*********************************json数据封装*******************************************/
        Json::Value root;
        Json::Value A;
        Json::Value B;
        Json::Value C;
        Json::FastWriter writer;

        B["Longitude"] = gpsLong;
        B["Latitude"] = gpslat;
        A["service_id"] = "Track";
        A["properties"]=B;
        root["services"].append(A);

        B["temperature"] = temperature;
        B["humidity"] = humidity;
        B["light"] = light;
        A["service_id"] = "Sensor";
        A["properties"]=B;
        root["services"].append(A);

        std::string json_file = writer.write(root);
        QString qstr = QString::fromStdString(json_file);   //std::string 转QString
        qDebug() << "mqtt--->start--->" << qstr;
        QString str_exe;
        QStringList args;
        str_exe = "./pub0sub1";       //相对于Qt执行程序的相对路径,也可以改成绝对路径
        args << qstr;                 //传递的参数,可以改成实时变化的
        process->start(str_exe,args); // 外部程序启动后,将随主程序的退出而退出。
        if(process->waitForStarted())
        {
            //qDebug() << "mqtt--->start--->" << qstr;
        }

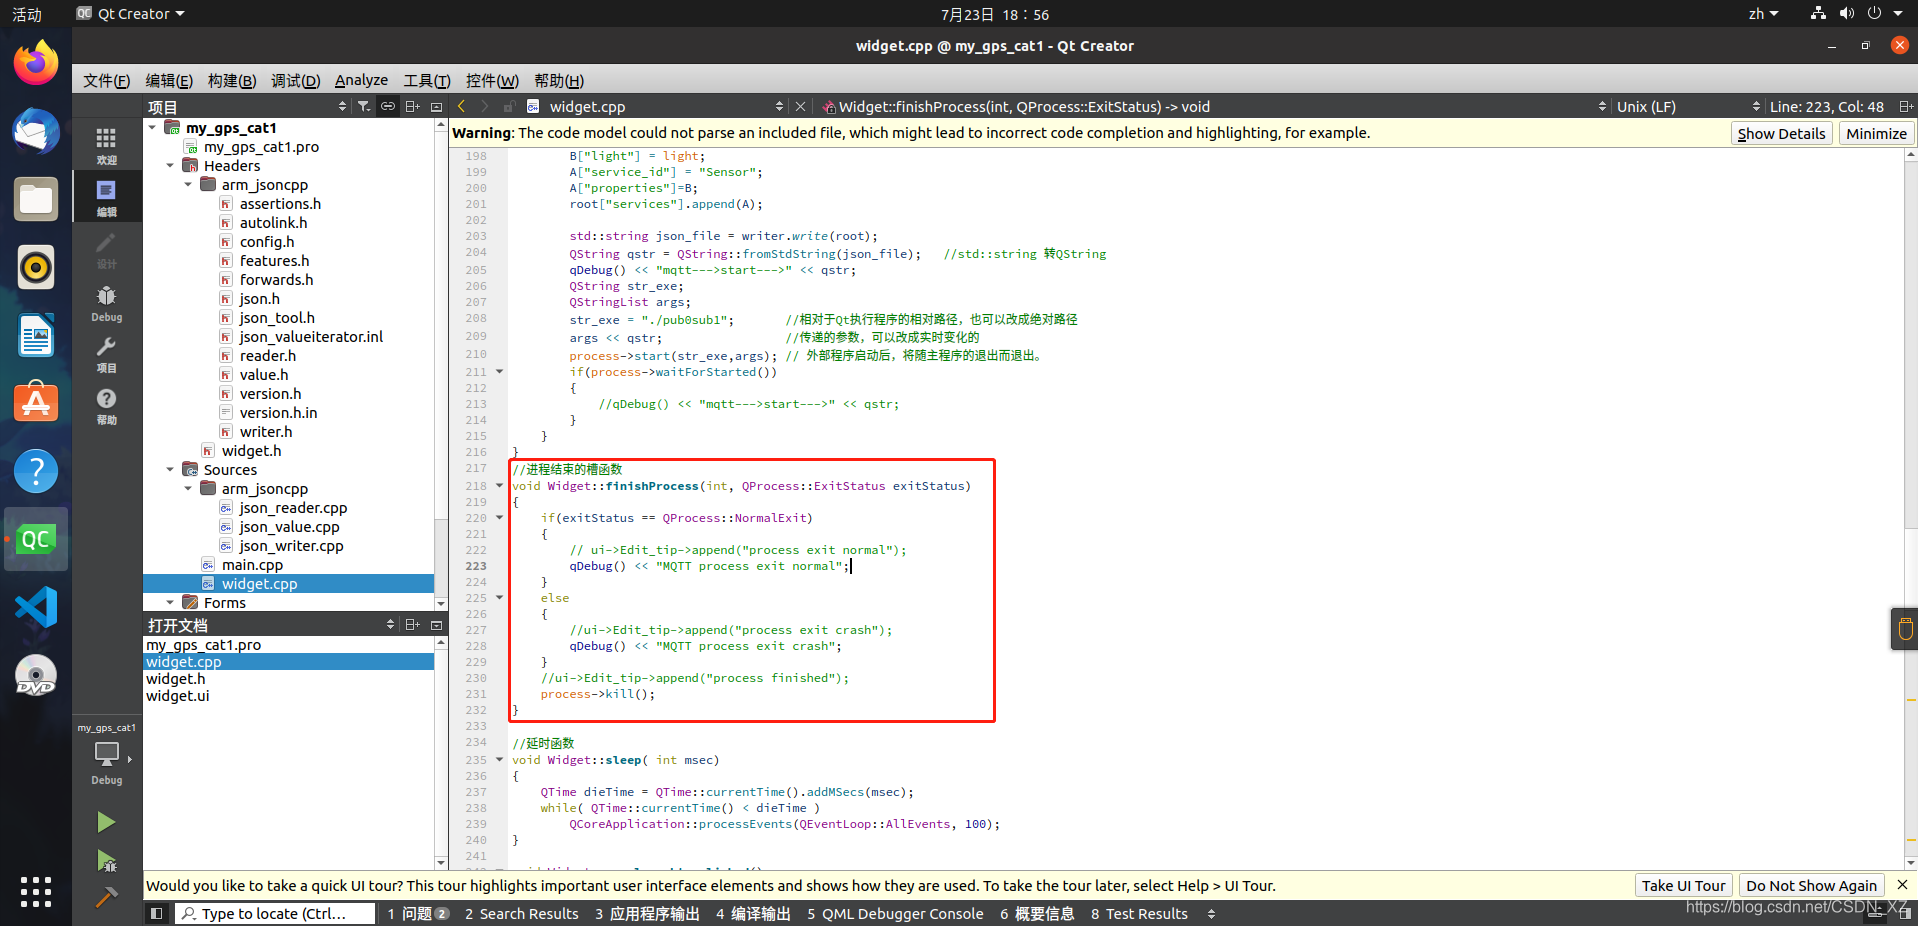
MQTT进程结束槽函数
//进程结束的槽函数
void Widget::finishProcess(int, QProcess::ExitStatus exitStatus)
{
    if(exitStatus == QProcess::NormalExit)
    {
        // ui->Edit_tip->append("process exit normal");
        qDebug() << "MQTT process exit normal";
    }
    else
    {
        //ui->Edit_tip->append("process exit crash");
        qDebug() << "MQTT process exit crash";
    }
    //ui->Edit_tip->append("process finished");
    process->kill();
}
构建并传输应用至开发板运行
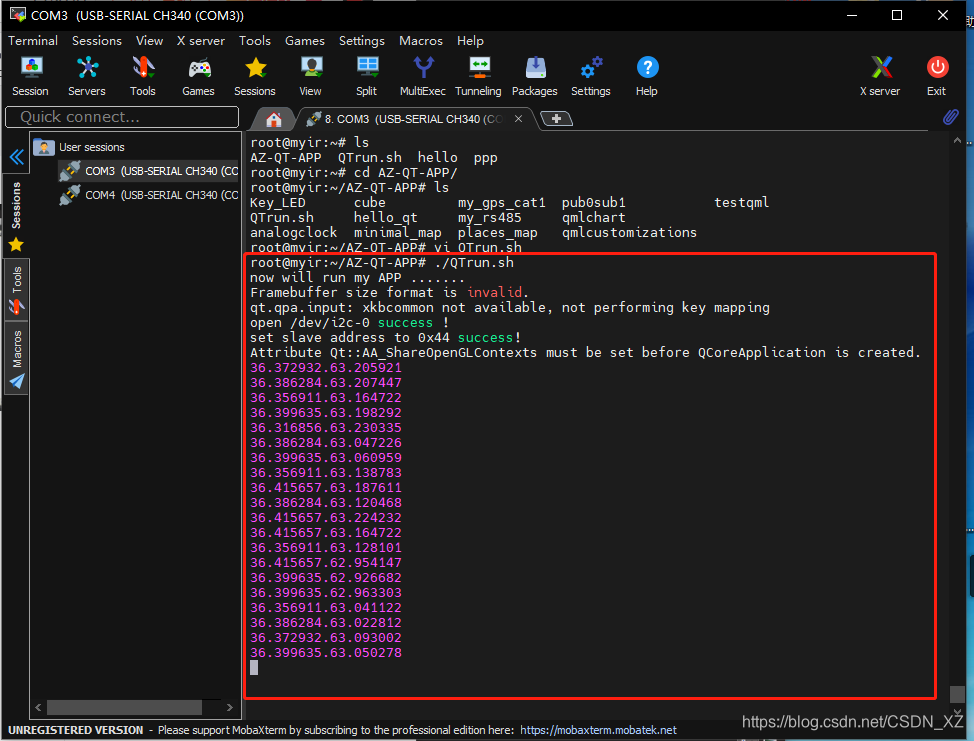

总结:清楚QT应用的开发流程,通过控件进行GUI界面的设计,学会通过信号和槽对控件进行交互逻辑,还知晓了jsoncpp库来封装MQTT协议的json数据来与云平台通信。
技术指导:
华为云社区与华为云学院:https://edu.huaweicloud.com/

- 点赞
- 收藏
- 关注作者
评论(0)