吃透nginx 403 forbidden报错

目录
问题
按照网上的教程,我们顺利启动了默认80端口的nginx服务。

具体安装教程可以参考:https://liuzhen.blog.csdn.net/article/details/83898155
接下来,我们开始将它修改成自己的静态服务,但是遇到了“nginx 403 forbidden”的报错。
解决
首先需要说明一下mac和linux的nginx配置文件的位置略有不同,具体情况如下:
mac:/usr/local/etc/nginx/nginx.conf
linux:/etc/nginx/nginx.conf
好了,开始我们坎坷的一路吧:
修改配置后,重新启动nginx服务:
sudo nginx -s reload
报错:
nginx: [emerg] bind() to 0.0.0.0:8066 failed (48: Address already in use)
#tcp_nopush on;
nginx: [emerg] bind() to 0.0.0.0:8066 failed (48: Address already in use)
nginx: [emerg] bind() to 0.0.0.0:8066 failed (48: Address already in use)
nginx: [emerg] bind() to 0.0.0.0:8066 failed (48: Address already in use)
nginx: [emerg] bind() to 0.0.0.0:8066 failed (48: Address already in use)
nginx: [emerg] still could not bind()
自己以为很简单,不就是端口占用了嘛,查找对应的进程:
localhost:nginx lz$ lsof -i:8066
COMMAND PID USER FD TYPE DEVICE SIZE/OFF NODE NAME
Google 31199 lz 33u IPv4 0x44b485117ae7339 0t0 TCP localhost:62265->localhost:8066 (ESTABLISHED)
Google 31199 lz 34u IPv4 0x44b48510e8b1de9 0t0 TCP localhost:62266->localhost:8066 (ESTABLISHED)
原来元凶是31199,那就干掉它吧。
localhost:nginx lz$ kill 31199
localhost:nginx lz$ kill 31199
-bash: kill: (31199) - No such process
通过上述的结果,说明第一次确实杀掉31199了。
这时神奇的现象出现了,我刷新页面,服务还能访问????
再次查看8066端口,居然还有进程存在:
localhost:nginx lz$ lsof -i:8066
COMMAND PID USER FD TYPE DEVICE SIZE/OFF NODE NAME
Google 71351 lz 18u IPv4 0x44b485117694179 0t0 TCP localhost:62488->localhost:8066 (ESTABLISHED)
Google 71351 lz 22u IPv4 0x44b4851157d2971 0t0 TCP localhost:62489->localhost:8066 (ESTABLISHED)
那么问题来了,意思是对应的nginx进程杀不掉吗?
那就尝试停止服务命令关闭nginx:
sudo nginx -s stop
结果却报错了:
nginx: [alert] kill(1668, 1) failed (3: No such process)
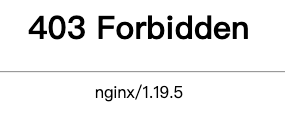
同时,页面也不能访问了,出现了403。
于是开始了疯狂尝试。。。
1. 设置启动用户owner
在nginx.conf配置文件首行增加用户权限声明,注意不要丢了分号。
user root owner;
具体如下图所示:

2. 切换管理员模式
sudo su
输入密码完成切换,再执行相关命令。
3. 开放访问目录权限
如果访问的目录没有对应的权限,也会出现403报错。
所以尝试了如下方式,但是本人遇到的不是这个问题。
chmod -R 777 /Users/lz/job/resource
4. 明确index索引文件
本来想实现最简单的静态服务,可以直接访问所有文件和目录列表,自己将index配置项改成了*.*。但是,这样就导致了403的问题。
后来明确index索引文件后,问题消失。
遇到报错时,我们可以通过借助日志定位一部分问题,如果不知道日志的存储路径,可以使用如下命令:
nginx -V
注意:V是大写的,小写的是显示版本号。
实际对比效果如下:
localhost:nginx lz$ nginx -v
nginx version: nginx/1.19.5
localhost:nginx lz$ nginx -V
nginx version: nginx/1.19.5
built by clang 12.0.0 (clang-1200.0.32.27)
built with OpenSSL 1.1.1h 22 Sep 2020 (running with OpenSSL 1.1.1i 8 Dec 2020)
TLS SNI support enabled
configure arguments: --prefix=/usr/local/Cellar/nginx/1.19.5 --sbin-path=/usr/local/Cellar/nginx/1.19.5/bin/nginx --with-cc-opt='-I/usr/local/opt/pcre/include -I/usr/local/opt/openssl@1.1/include' --with-ld-opt='-L/usr/local/opt/pcre/lib -L/usr/local/opt/openssl@1.1/lib' --conf-path=/usr/local/etc/nginx/nginx.conf --pid-path=/usr/local/var/run/nginx.pid --lock-path=/usr/local/var/run/nginx.lock --http-client-body-temp-path=/usr/local/var/run/nginx/client_body_temp --http-proxy-temp-path=/usr/local/var/run/nginx/proxy_temp --http-fastcgi-temp-path=/usr/local/var/run/nginx/fastcgi_temp --http-uwsgi-temp-path=/usr/local/var/run/nginx/uwsgi_temp --http-scgi-temp-path=/usr/local/var/run/nginx/scgi_temp --http-log-path=/usr/local/var/log/nginx/access.log --error-log-path=/usr/local/var/log/nginx/error.log --with-compat --with-debug --with-http_addition_module --with-http_auth_request_module --with-http_dav_module --with-http_degradation_module --with-http_flv_module --with-http_gunzip_module --with-http_gzip_static_module --with-http_mp4_module --with-http_random_index_module --with-http_realip_module --with-http_secure_link_module --with-http_slice_module --with-http_ssl_module --with-http_stub_status_module --with-http_sub_module --with-http_v2_module --with-ipv6 --with-mail --with-mail_ssl_module --with-pcre --with-pcre-jit --with-stream --with-stream_realip_module --with-stream_ssl_module --with-stream_ssl_preread_module
因此,我们可以非常轻易的找到对应的错误日志路径 :/usr/local/var/log/nginx/error.log。

- 点赞
- 收藏
- 关注作者
评论(0)