《三次给你聊清楚Redis》之说说简单的应用

《三天给你聊清楚redis》第3天说说redis大概怎么用,和面试题(18000字)
五、实战
5.1基础实战
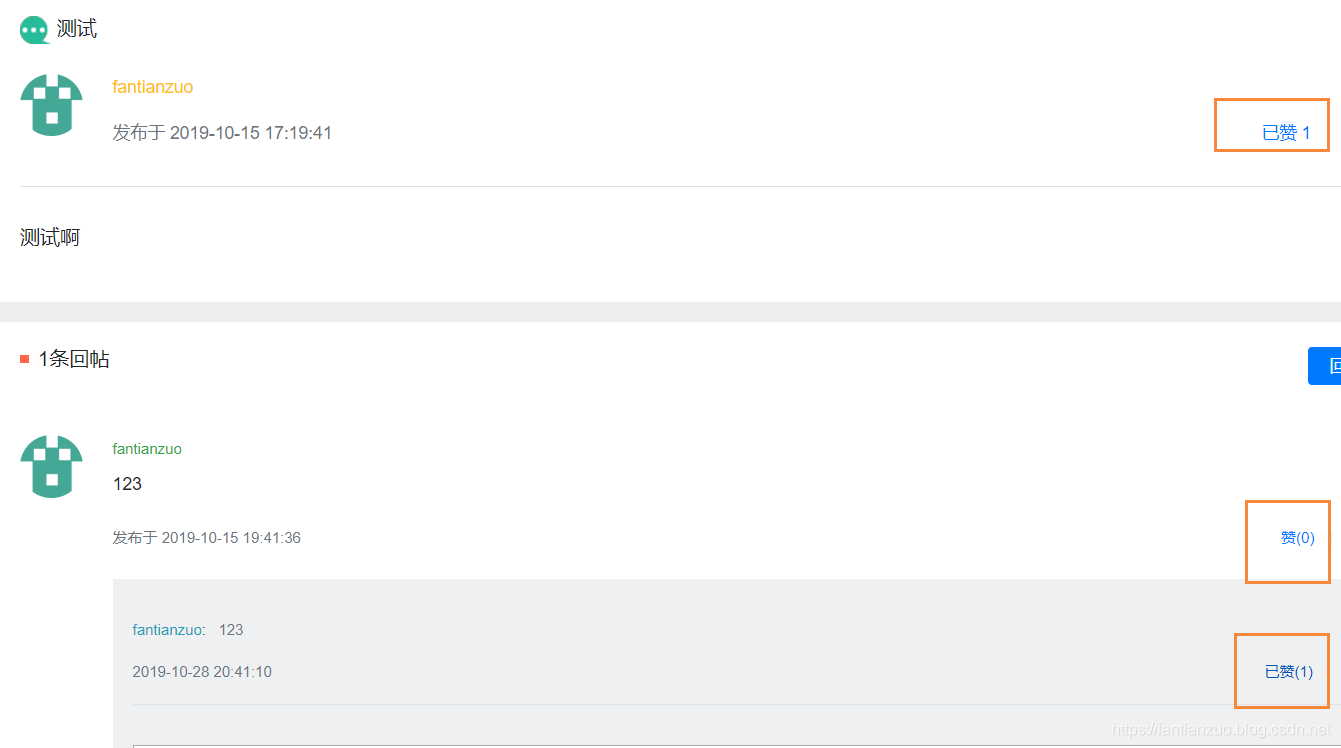
5.1.1实战点赞
点赞功能随处可见,我们都知道点赞是一个非常高频的操作,redis就非常适合做这种工作。
实现效果:
![]()
分析:三种类型:给帖子点赞,给评论点赞,给回复点赞
我们只实现查看点赞数量的话,只要一个int记录一下就可以,但是我们之后还想查看点赞的人,所以要把每一个点赞的信息都记录好,方便后面的功能继续做出来。
思路:
点赞:把点赞的信息放进去。
取消:把点赞的信息删除。
在此之前,我们要封装一个get到key的类,方便后面复用。
package com.now.community.community.util;

public class RedisKeyUtil {

    private static final String SPLIT = ":";
    private static final String PREFIX_ENTITY_LIKE = "like:entity";
    private static final String PREFIX_USER_LIKE = "like:user";

    // 某个实体的赞
    // like:entity:entityType:entityId -> set(userId)
    public static String getEntityLikeKey(int entityType, int entityId) {
        return PREFIX_ENTITY_LIKE + SPLIT + entityType + SPLIT + entityId;
    }

    // 某个用户的赞
    // like:user:userId -> int
    public static String getUserLikeKey(int userId) {
        return PREFIX_USER_LIKE + SPLIT + userId;
    }
}
点赞业务:
    // 点赞
    public void like(int userId, int entityType, int entityId, int entityUserId) {
        redisTemplate.execute(new SessionCallback() {
            @Override
            public Object execute(RedisOperations operations) throws DataAccessException {
                String entityLikeKey = RedisKeyUtil.getEntityLikeKey(entityType, entityId);
                boolean isMember = operations.opsForSet().isMember(entityLikeKey, userId);
                operations.multi();
                if (isMember) {
                    operations.opsForSet().remove(entityLikeKey, userId);
                } else {
                    operations.opsForSet().add(entityLikeKey, userId);
                }
                return operations.exec();
            }
        });
    }
我们要查找是否点赞,还有点赞数量,方便页面显示:
    // 查询某实体点赞的数量
    public long findEntityLikeCount(int entityType, int entityId) {
        String entityLikeKey = RedisKeyUtil.getEntityLikeKey(entityType, entityId);
        return redisTemplate.opsForSet().size(entityLikeKey);
    }

    // 查询某人对某实体的点赞状态
    public int findEntityLikeStatus(int userId, int entityType, int entityId) {
        String entityLikeKey = RedisKeyUtil.getEntityLikeKey(entityType, entityId);
        return redisTemplate.opsForSet().isMember(entityLikeKey, userId) ? 1 : 0;
    }
点赞LikeController
@RequestMapping(path = "/like", method = RequestMethod.POST)
@ResponseBody
public String like(int entityType, int entityId,int entityUserId,int postId) {
User user = hostHolder.getUser();
// 点赞
likeService.like(user.getId(), entityType, entityId,entityUserId);
// 数量
long likeCount = likeService.findEntityLikeCount(entityType, entityId);
// 状态
int likeStatus = likeService.findEntityLikeStatus(user.getId(), entityType, entityId);
// 返回的结果
Map<String, Object> map = new HashMap<>();
map.put("likeCount", likeCount);
map.put("likeStatus", likeStatus);
return CommunityUtil.getJSONString(0, null, map);
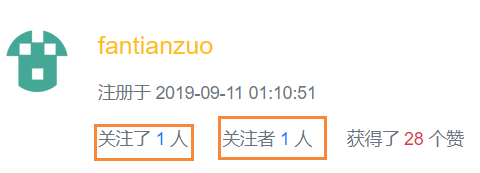
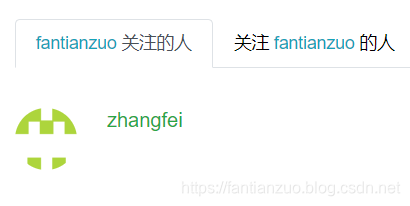
}5.1.2实战关注
效果:
![]()
![]()
思路:很好想,把自己的粉丝和自己关注的人都存起来(set即可),做增删改查。
package com.now.community.community.service;

import com.now.community.community.entity.User;
import com.now.community.community.util.CommunityConstant;
import com.now.community.community.util.RedisKeyUtil;
import org.springframework.beans.factory.annotation.Autowired;
import org.springframework.dao.DataAccessException;
import org.springframework.data.redis.core.RedisOperations;
import org.springframework.data.redis.core.RedisTemplate;
import org.springframework.data.redis.core.SessionCallback;
import org.springframework.stereotype.Service;

import java.util.*;

@Service
public class FollowService implements CommunityConstant {

    @Autowired
    private RedisTemplate redisTemplate;

    @Autowired
    private UserService userService;
    public void follow(int userId, int entityType, int entityId) {
        redisTemplate.execute(new SessionCallback() {
            @Override
            public Object execute(RedisOperations operations) throws DataAccessException {
                String followeeKey = RedisKeyUtil.getFolloweeKey(userId, entityType);
                String followerKey = RedisKeyUtil.getFollowerKey(entityType, entityId);

                operations.multi();

                operations.opsForZSet().add(followeeKey, entityId, System.currentTimeMillis());
                operations.opsForZSet().add(followerKey, userId, System.currentTimeMillis());

                return operations.exec();
            }
        });
    }

    public void unfollow(int userId, int entityType, int entityId) {
        redisTemplate.execute(new SessionCallback() {
            @Override
            public Object execute(RedisOperations operations) throws DataAccessException {
                String followeeKey = RedisKeyUtil.getFolloweeKey(userId, entityType);
                String followerKey = RedisKeyUtil.getFollowerKey(entityType, entityId);

                operations.multi();

                operations.opsForZSet().remove(followeeKey, entityId);
                operations.opsForZSet().remove(followerKey, userId);

                return operations.exec();
            }
        });
    }

    // 查询关注的实体的数量
    public long findFolloweeCount(int userId, int entityType) {
        String followeeKey = RedisKeyUtil.getFolloweeKey(userId, entityType);
        return redisTemplate.opsForZSet().zCard(followeeKey);
    }

    // 查询实体的粉丝的数量
    public long findFollowerCount(int entityType, int entityId) {
        String followerKey = RedisKeyUtil.getFollowerKey(entityType, entityId);
        return redisTemplate.opsForZSet().zCard(followerKey);
    }

    // 查询当前用户是否已关注该实体
    public boolean hasFollowed(int userId, int entityType, int entityId) {
        String followeeKey = RedisKeyUtil.getFolloweeKey(userId, entityType);
        return redisTemplate.opsForZSet().score(followeeKey, entityId) != null;
    }

    // 查询某用户关注的人
    public List<Map<String, Object>> findFollowees(int userId, int offset, int limit) {
        String followeeKey = RedisKeyUtil.getFolloweeKey(userId, ENTITY_TYPE_USER);
        Set<Integer> targetIds = redisTemplate.opsForZSet().reverseRange(followeeKey, offset, offset + limit - 1);

        if (targetIds == null) {
            return null;
        }

        List<Map<String, Object>> list = new ArrayList<>();
        for (Integer targetId : targetIds) {
            Map<String, Object> map = new HashMap<>();
            User user = userService.findUserById(targetId);
            map.put("user", user);
            Double score = redisTemplate.opsForZSet().score(followeeKey, targetId);
            map.put("followTime", new Date(score.longValue()));
            list.add(map);
        }

        return list;
    }

    // 查询某用户的粉丝
    public List<Map<String, Object>> findFollowers(int userId, int offset, int limit) {
        String followerKey = RedisKeyUtil.getFollowerKey(ENTITY_TYPE_USER, userId);
        Set<Integer> targetIds = redisTemplate.opsForZSet().reverseRange(followerKey, offset, offset + limit - 1);

        if (targetIds == null) {
            return null;
        }

        List<Map<String, Object>> list = new ArrayList<>();
        for (Integer targetId : targetIds) {
            Map<String, Object> map = new HashMap<>();
            User user = userService.findUserById(targetId);
            map.put("user", user);
            Double score = redisTemplate.opsForZSet().score(followerKey, targetId);
            map.put("followTime", new Date(score.longValue()));
            list.add(map);
        }

        return list;
    }
}
5.1.3实战统计访问量
过于简单不解释

![]()
5.1.4实战排行榜
const REDIS_TB_NAME='user:actId';		//表名
const REDIS_SEP=":";		//命名分隔符
const REDIS_FIELDS="username|regtime";   //表字段名称
const REDIS_FIELD_RANK="rank";      //排行
const REDIS_FIELD_ID="id";   	//表的自增ID
//插入排行榜数据
for($i=0;$i<RANK_REC_NUM;$i++)   //填充数据
{
	$redis_increase_id=$redis->get(REDIS_TB_NAME.REDIS_SEP.REDIS_FIELD_ID);
	//事务机制,插入用户信息及排行信息,自增id
	$ret=$redis->multi()  //开始事务
	->hMset(REDIS_TB_NAME.REDIS_SEP.$redis_increase_id,array($fields[0]=>"username".$redis_increase_id, $fields[1]=>(time()+intval(rand(0,1000)))))   //username   用户名 //regtime  注册时间
	->Zadd(REDIS_TB_NAME.REDIS_SEP.REDIS_FIELD_RANK,intval(rand(1,100)),$redis_increase_id)     //插入排行
	->incr(REDIS_TB_NAME.REDIS_SEP.REDIS_FIELD_ID)		//自增id
	->exec();  //执行事务

	if($ret==false)  //插入失败,重新插入
	{
		$i--;
	}
}
echo "插入".$i."条记录成功<br>";
<table>
<thead>
<tr style="font-size:bold;color:red"><td>名次</td><td>分数</td><td>姓名</td><td>注册时间</td></tr>
</thead>
<tbody>
<?php
const REDIS_FIELDS="username|regtime"; //表字段名称
$fields=explode('|',REDIS_FIELDS);
foreach($rank as $k=>$v)
{
//echo REDIS_TB_NAME.REDIS_SEP.$k.REDIS_SEP.$fields[0];
echo "<tr><td>$i</td><td>$v</td><td>".$redis->hget(REDIS_TB_NAME.REDIS_SEP.$k,$fields[0])."</td><td>".date("Y-m-d H:i:s",$redis->hget(REDIS_TB_NAME.REDIS_SEP.$k,$fields[1]))."</td></tr>";
$i++;
}
}
?>
</tbody>
</table>Redis本身支持一些简单的组合型的命令,比如以NX结尾命令都是判断在这个值没有时才进行某个命令
• Redis支持自定义的命令组合,通过MULTI和EXEC,将几个命令组合起来执行
• 如:插入排行数据和用户信息,并自增id
$redis->multi()
->hmset("user:1",array("username"=>"hirryli","regtime"=>1234123483))
->Zadd("user:rank",$scores,$userId)
->incr("user:id")
->exec();
5.2实战优化小项目
这是我们之前项目的业务流程,做一下简单介绍。
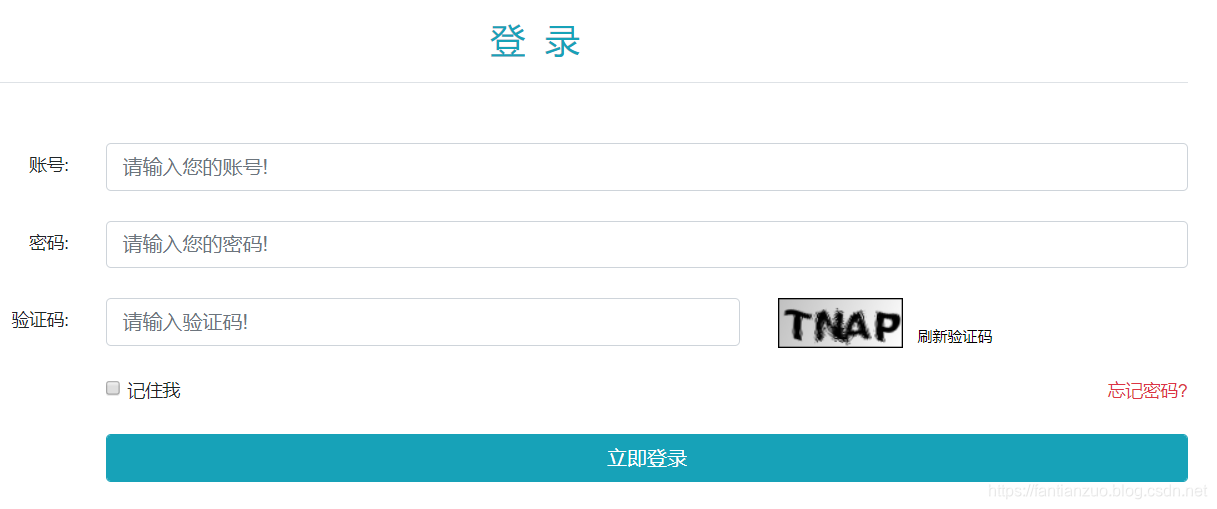
登录:
![]()
用户输入账号、密码、验证码。我们先判断用户输入的验证码是不是我们session存的验证码,然后去查账号密码是否正确。
如果登录成功,发送给用户一张凭证(ticket)。
登录后
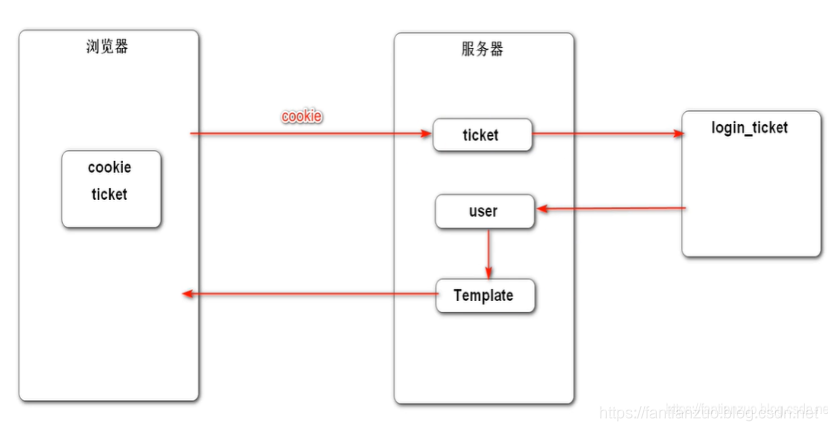
![]()
之后的每次请求,用户携带ticket,服务器得到后,根据ticket去login_ticket表中查找登录信息,并且根据登录信息再查user表获得更多的用户信息。
使用Redis存储验证码
- 验证码需要频繁的访问与刷新,对性能要求较高。
- 验证码不需永久保存,通常在很短的时间后就会失效。
- 分布式部署时,存在Session共享的问题。
我们重构思路:进入登录页面会访问验证码方法,此方法会自动生成一个验证码和图片,将验证码和图片输出给浏览器,并且下发一个cookies,这个cookies里面存的是一段随机数,这段随机数作为key存在redis里面(之前是存session),value就是验证码,并设置一个过期时间;
    //验证码
    @RequestMapping(path = "/kaptcha", method = RequestMethod.GET)
    public void getKaptcha(HttpServletResponse response/*, HttpSession session*/) {
        // 生成验证码
        String text = kaptchaProducer.createText();
        BufferedImage image = kaptchaProducer.createImage(text);

        // 将验证码存入session
        //session.setAttribute("kaptcha", text);

        //验证码的归属
        String owner= CommunityUtil.generateUUID();
        Cookie cookie=new Cookie("kaptchaOwner",owner);
        cookie.setMaxAge(60);
        cookie.setPath(contextPath);
        response.addCookie(cookie);

        //存入redis
        String redisKey= RedisKeyUtil.getKaptchaKey(owner);
        redisTemplate.opsForValue().set(redisKey,text,60, TimeUnit.SECONDS);

        // 将图片输出给浏览器
        response.setContentType("image/png");
        try {
            OutputStream os = response.getOutputStream();
            ImageIO.write(image, "png", os);
        } catch (IOException e) {
            logger.error("响应验证码失败:" + e.getMessage());
        }
    }
@RequestMapping(path = "/login",method = RequestMethod.POST)
public String login(String username,String password,String code,boolean rememberme,
Model model,/*HttpSession session,*/HttpServletResponse response,
@CookieValue("kaptchaOwner") String kaptchaOwner){
// 检查验证码
//String kaptcha = (String) session.getAttribute("kaptcha");
String kaptcha=null;
if(StringUtils.isNotBlank(kaptchaOwner)){
String redisKey=RedisKeyUtil.getKaptchaKey(kaptchaOwner);
kaptcha=(String) redisTemplate.opsForValue().get(redisKey);
}
if(StringUtils.isBlank(kaptcha) || StringUtils.isBlank(code) || !kaptcha.equalsIgnoreCase(code)){
model.addAttribute("codeMsg", "验证码不正确!");
return "/site/login";
}
// 检查账号,密码
int expiredSeconds = rememberme ? REMEMBER_EXPIRED_SECONDS : DEFAULT_EXPIRED_SECONDS;
Map<String, Object> map = userService.login(username, password, expiredSeconds);
if (map.containsKey("ticket")) {
Cookie cookie = new Cookie("ticket", map.get("ticket").toString());
cookie.setPath(contextPath);
cookie.setMaxAge(expiredSeconds);
response.addCookie(cookie);
return "redirect:/index";
} else {
...
}
}
使用Redis存储登录凭证
- 处理每次请求时,都要查询用户的登录凭证,访问的频率非常高。
登录时不存MySQL里,存redis里
    public Map<String,Object> login(String username,String password,int expiredSeconds){
        Map<String,Object> map=new HashMap<>();

        // 生成登录凭证
        LoginTicket loginTicket = new LoginTicket();
        loginTicket.setUserId(user.getId());
        loginTicket.setTicket(CommunityUtil.generateUUID());
        loginTicket.setStatus(0);
        loginTicket.setExpired(new Date(System.currentTimeMillis() + expiredSeconds * 1000));
        //loginTicketMapper.insertLoginTicket(loginTicket);

        String redisKey= RedisKeyUtil.getTicketKey(loginTicket.getTicket());
        redisTemplate.opsForValue().set(redisKey,loginTicket);
        ...
    }
查找
退出时也是改redis
    public void logout(String ticket) {

        //loginTicketMapper.updateStatus(ticket, 1);
        String redisKey= RedisKeyUtil.getTicketKey(ticket);
        LoginTicket loginTicket=(LoginTicket) redisTemplate.opsForValue().get(redisKey);
        loginTicket.setStatus(1);
        redisTemplate.opsForValue().set(redisKey,loginTicket);
    }
使用Redis缓存用户信息
- 处理每次请求时,都要根据凭证查询用户信息,访问的频率非常高。
缓存用户信息:因为会经常根据userid来查询user对象,所以使用redis来缓存提高服务器性能。使用redis的String类型,存入user对象,会自动将整个对象转换成json字符串,同时设置过期时间;
取值:优先从redis中取,取不到的时候从mysql中取,并将数据初始化到redis中
更新:更新的时候先更新mysql中的值,然后清除缓存数据;
    // 1.优先从缓存中取值
    private User getCache(int userId) {
        String redisKey = RedisKeyUtil.getUserKey(userId);
        return (User) redisTemplate.opsForValue().get(redisKey);
    }

    // 2.取不到时初始化缓存数据
    private User initCache(int userId) {
        User user = userMapper.selectById(userId);
        String redisKey = RedisKeyUtil.getUserKey(userId);
        redisTemplate.opsForValue().set(redisKey, user, 3600, TimeUnit.SECONDS);
        return user;
    }

    // 3.数据变更时清除缓存数据
    private void clearCache(int userId) {
        String redisKey = RedisKeyUtil.getUserKey(userId);
        redisTemplate.delete(redisKey);
    }
public User findUserById(int id) {
// return userMapper.selectById(id);
User user = getCache(id);
if (user == null) {
user = initCache(id);
}
return user;
} public int updateHeader(int userId, String headerUrl) {
//return userMapper.updateHeader(userId, headerUrl);
int rows=userMapper.updateHeader(userId, headerUrl);
clearCache(userId);
return rows;
}5.3讨论一下为啥用redis解决会话?
什么是会话?
会话可简单理解为:用户开一个浏览器,点击多个超链接,访问服务器多个web资源,然后关闭浏览器,整个过程称之为一个会话。
•会话过程中要解决的一些问题?
–每个用户不可避免各自会产生一些数据,程序要想办法为每个用户保存这些数据。
–例如:用户点击超链接通过一个servlet购买了一个商品,程序应该想办法保存用户购买的商品,以便于用户点结帐servlet时,结帐servlet可以得到用户购买的商品为用户结帐。
•Cookie
–Cookie是客户端技术,程序把每个用户的数据以cookie的形式写给用户各自的浏览器。当用户使用浏览器再去访问服务器中的web资源时,就会带着各自的数据去。这样,web资源处理的就是用户各自的数据了。
•HttpSession
–Session是服务器端技术,利用这个技术,服务器在运行时可以为每一个用户的浏览器创建一个其独享的HttpSession对象,由于session为用户浏览器独享,所以用户在访问服务器的web资源时,可以把各自的数据放在各自的session中,当用户再去访问服务器中的其它web资源时,其它web资源再从用户各自的session中取出数据为用户服务。
总结:cookie存在客户端,session存在服务器端
通常结合使用。
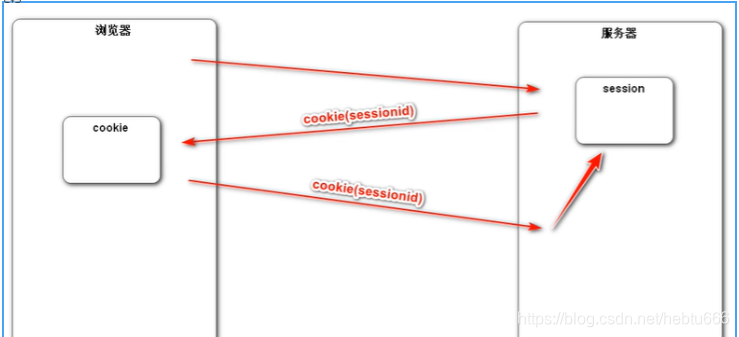
![]()
我们先用sprintboot演示一下cookie和session操作
    @RequestMapping(path = "/cookie/set",method = RequestMethod.GET)
    @ResponseBody
    public String setCookie(HttpServletResponse httpServletResponse){
        Cookie cookie=new Cookie("code", CommunityUtil.generateUUID());
        cookie.setPath("/community/alpha");
        cookie.setMaxAge(60*10);
        httpServletResponse.addCookie(cookie);
        return "set cookie";
    }


    @RequestMapping(path = "/cookie/get",method = RequestMethod.GET)
    @ResponseBody
    public String getCookie(@CookieValue("code") String code){
        System.out.println(code);
        return "get cookie";
    }


    @RequestMapping(path = "/session/set", method = RequestMethod.GET)
    @ResponseBody
    public String setSession(HttpSession session){
        session.setAttribute("id",1);
        session.setAttribute("name","Test");
        return "set session";
    }


    @RequestMapping(path = "/session/get", method = RequestMethod.GET)
    @ResponseBody
    public String getSession(HttpSession session) {
        System.out.println(session.getAttribute("id"));
        System.out.println(session.getAttribute("name"));
        return "get session";
    }
随着服务器要处理的请求越来越多,我们不得不分布式部署,减小服务器压力。
为了负载均衡,我们一般采用nginx来分发请求给各个服务器处理
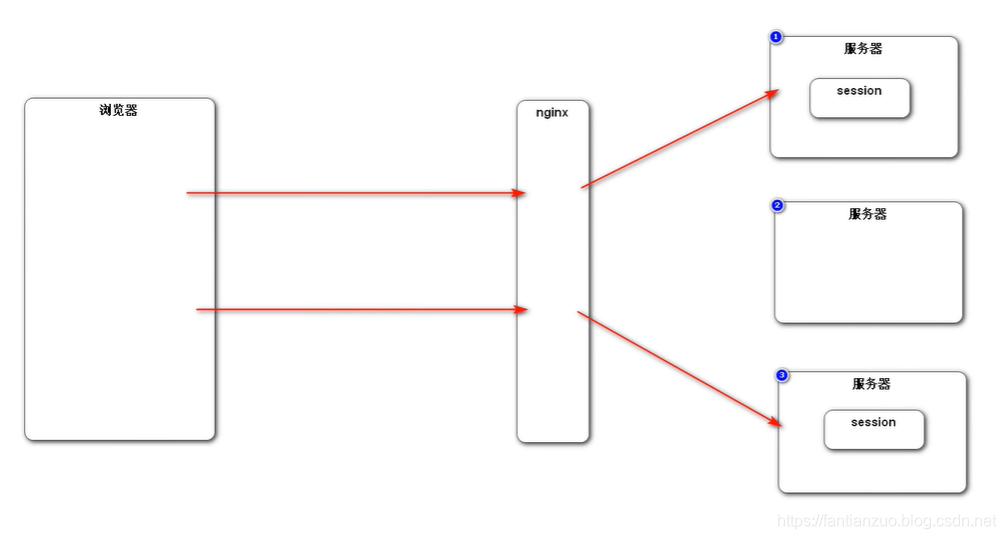
![]()
但是这样session是无法共享的。
(粘性session)
你可以设置nginx的分配策略,下次同一个还让同一个服务器来处理
但是很显然,这就和分布式和nginx初衷违背了:负载很难保证均衡。
(同步session)
一台服务器的session给所有服务器复制一份
第一,性能不好。第二,产生了一定的耦合
(专门session)
专门一台服务器来解决,存session,其它服务器来这个服务器取session再用。
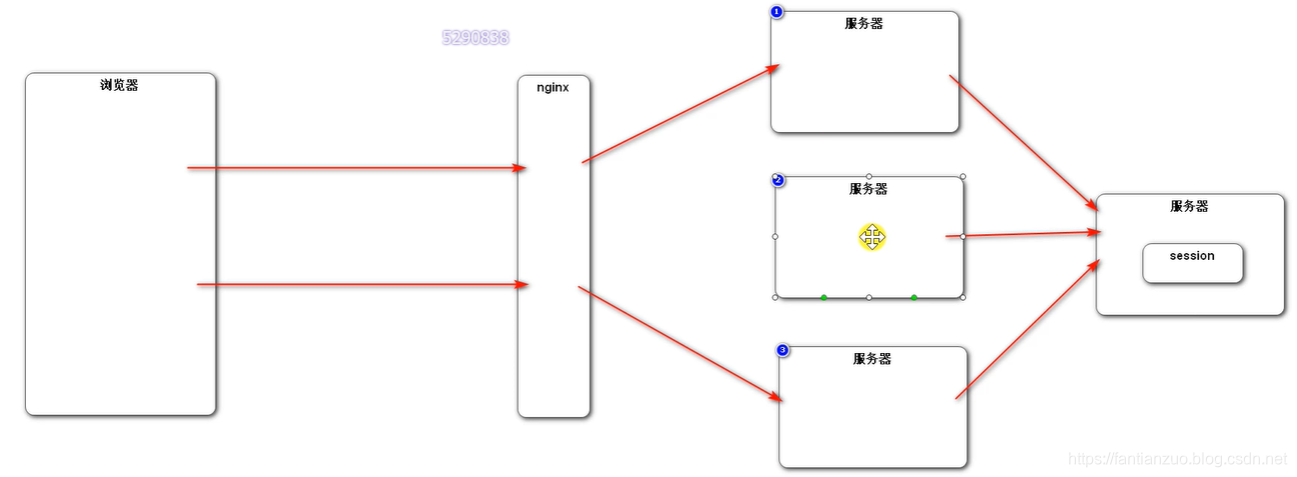
![]()
但是也有问题:你这个服务器挂了怎么办?别的服务器都是依赖这个服务器工作的。我们分布式部署本来就是为了解决性能的瓶颈啊。
很容易想到,我们把那个处理session的服务器搞个集群:
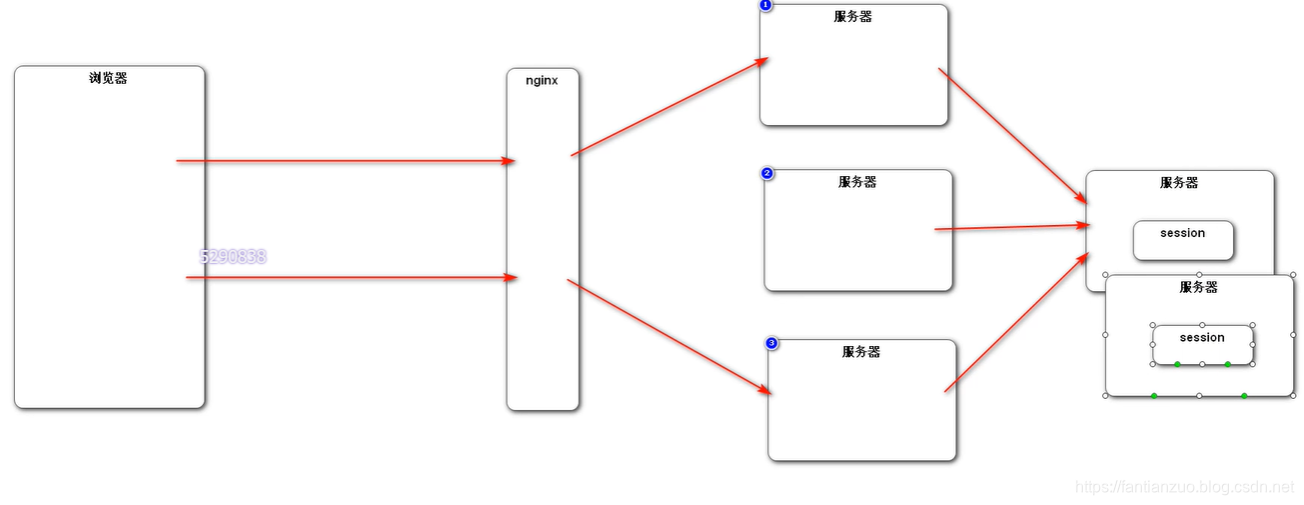
![]()
更不行,想想就知道,本来就是为了解决分布式部署的问题,你把单独解决session的服务器又搞集群,和之前有什么区别呢?还不如一个服务器存一份简单呢。
(存数据库)
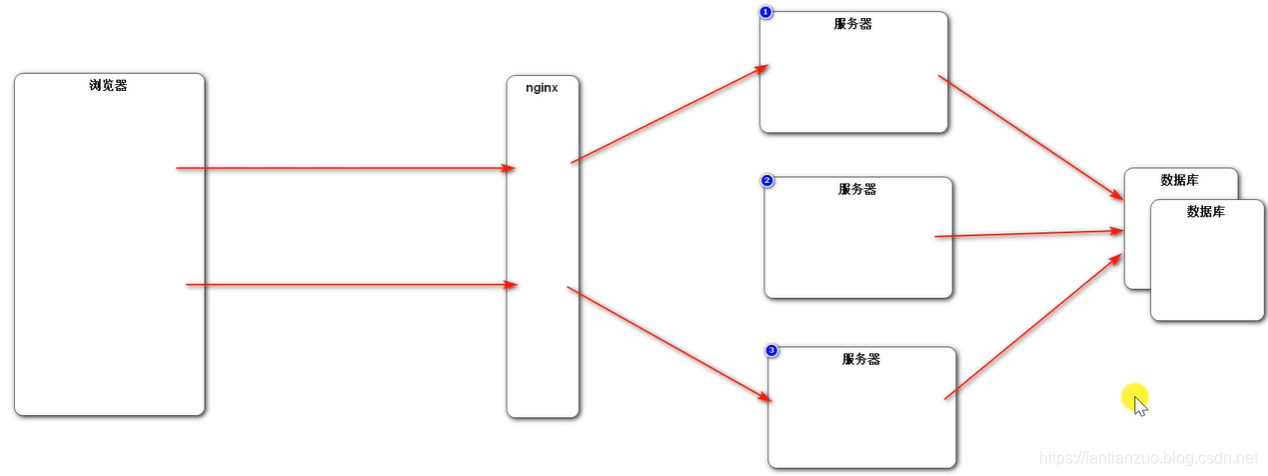
![]()
可以,但是传统的关系数据库是存到硬盘里,速度太慢。
(nosql)
最终,我们的主流办法使用nosql数据库,比如redis,来解决这个问题的,如果有不同意见,欢迎讨论。
5.4插曲:RedLock小专栏
概念
Redis 官方站这篇文章提出了一种权威的基于 Redis 实现分布式锁的方式名叫 Redlock,此种方式比原先的单节点的方法更安全。它可以保证以下特性:
- 安全特性:互斥访问,即永远只有一个 client 能拿到锁
- 避免死锁:最终 client 都可能拿到锁,不会出现死锁的情况,即使原本锁住某资源的 client crash 了或者出现了网络分区
- 容错性:只要大部分 Redis 节点存活就可以正常提供服务
单节点实现
SET resource_name my_random_value NX PX 30000
主要依靠上述命令,该命令仅当 Key 不存在时(NX保证)set 值,并且设置过期时间 3000ms (PX保证),值 my_random_value 必须是所有 client 和所有锁请求发生期间唯一的,释放锁的逻辑是:
if redis.call("get",KEYS[1]) == ARGV[1] then
    return redis.call("del",KEYS[1])
else
    return 0
end
上述实现可以避免释放另一个client创建的锁,如果只有 del 命令的话,那么如果 client1 拿到 lock1 之后因为某些操作阻塞了很长时间,此时 Redis 端 lock1 已经过期了并且已经被重新分配给了 client2,那么 client1 此时再去释放这把锁就会造成 client2 原本获取到的锁被 client1 无故释放了,但现在为每个 client 分配一个 unique 的 string 值可以避免这个问题。至于如何去生成这个 unique string,方法很多随意选择一种就行了。
redlock算法
算法很易懂,起 5 个 master 节点,分布在不同的机房尽量保证可用性。为了获得锁,client 会进行如下操作:
- 得到当前的时间,微秒单位
- 尝试顺序地在 5 个实例上申请锁,当然需要使用相同的 key 和 random value,这里一个 client 需要合理设置与 master 节点沟通的 timeout 大小,避免长时间和一个 fail 了的节点浪费时间
- 当 client 在大于等于 3 个 master 上成功申请到锁的时候,且它会计算申请锁消耗了多少时间,这部分消耗的时间采用获得锁的当下时间减去第一步获得的时间戳得到,如果锁的持续时长(lock validity time)比流逝的时间多的话,那么锁就真正获取到了。
- 如果锁申请到了,那么锁真正的 lock validity time 应该是 origin(lock validity time) - 申请锁期间流逝的时间
- 如果 client 申请锁失败了,那么它就会在少部分申请成功锁的 master 节点上执行释放锁的操作,重置状态
失败重试
如果一个 client 申请锁失败了,那么它需要稍等一会在重试避免多个 client 同时申请锁的情况,最好的情况是一个 client 需要几乎同时向 5 个 master 发起锁申请。另外就是如果 client 申请锁失败了它需要尽快在它曾经申请到锁的 master 上执行 unlock 操作,便于其他 client 获得这把锁,避免这些锁过期造成的时间浪费,当然如果这时候网络分区使得 client 无法联系上这些 master,那么这种浪费就是不得不付出的代价了。
放锁
放锁操作很简单,就是依次释放所有节点上的锁就行了
性能、崩溃恢复
如果我们的节点没有持久化机制,client 从 5 个 master 中的 3 个处获得了锁,然后其中一个重启了,这是注意 整个环境中又出现了 3 个 master 可供另一个 client 申请同一把锁! 违反了互斥性。如果我们开启了 AOF 持久化那么情况会稍微好转一些,因为 Redis 的过期机制是语义层面实现的,所以在 server 挂了的时候时间依旧在流逝,重启之后锁状态不会受到污染。但是考虑断电之后呢,AOF部分命令没来得及刷回磁盘直接丢失了,除非我们配置刷回策略为 fsnyc = always,但这会损伤性能。解决这个问题的方法是,当一个节点重启之后,我们规定在 max TTL 期间它是不可用的,这样它就不会干扰原本已经申请到的锁,等到它 crash 前的那部分锁都过期了,环境不存在历史锁了,那么再把这个节点加进来正常工作。

- 点赞
- 收藏
- 关注作者
评论(0)