【SpringBoot】快速入门
一、SpringBoot快速入门
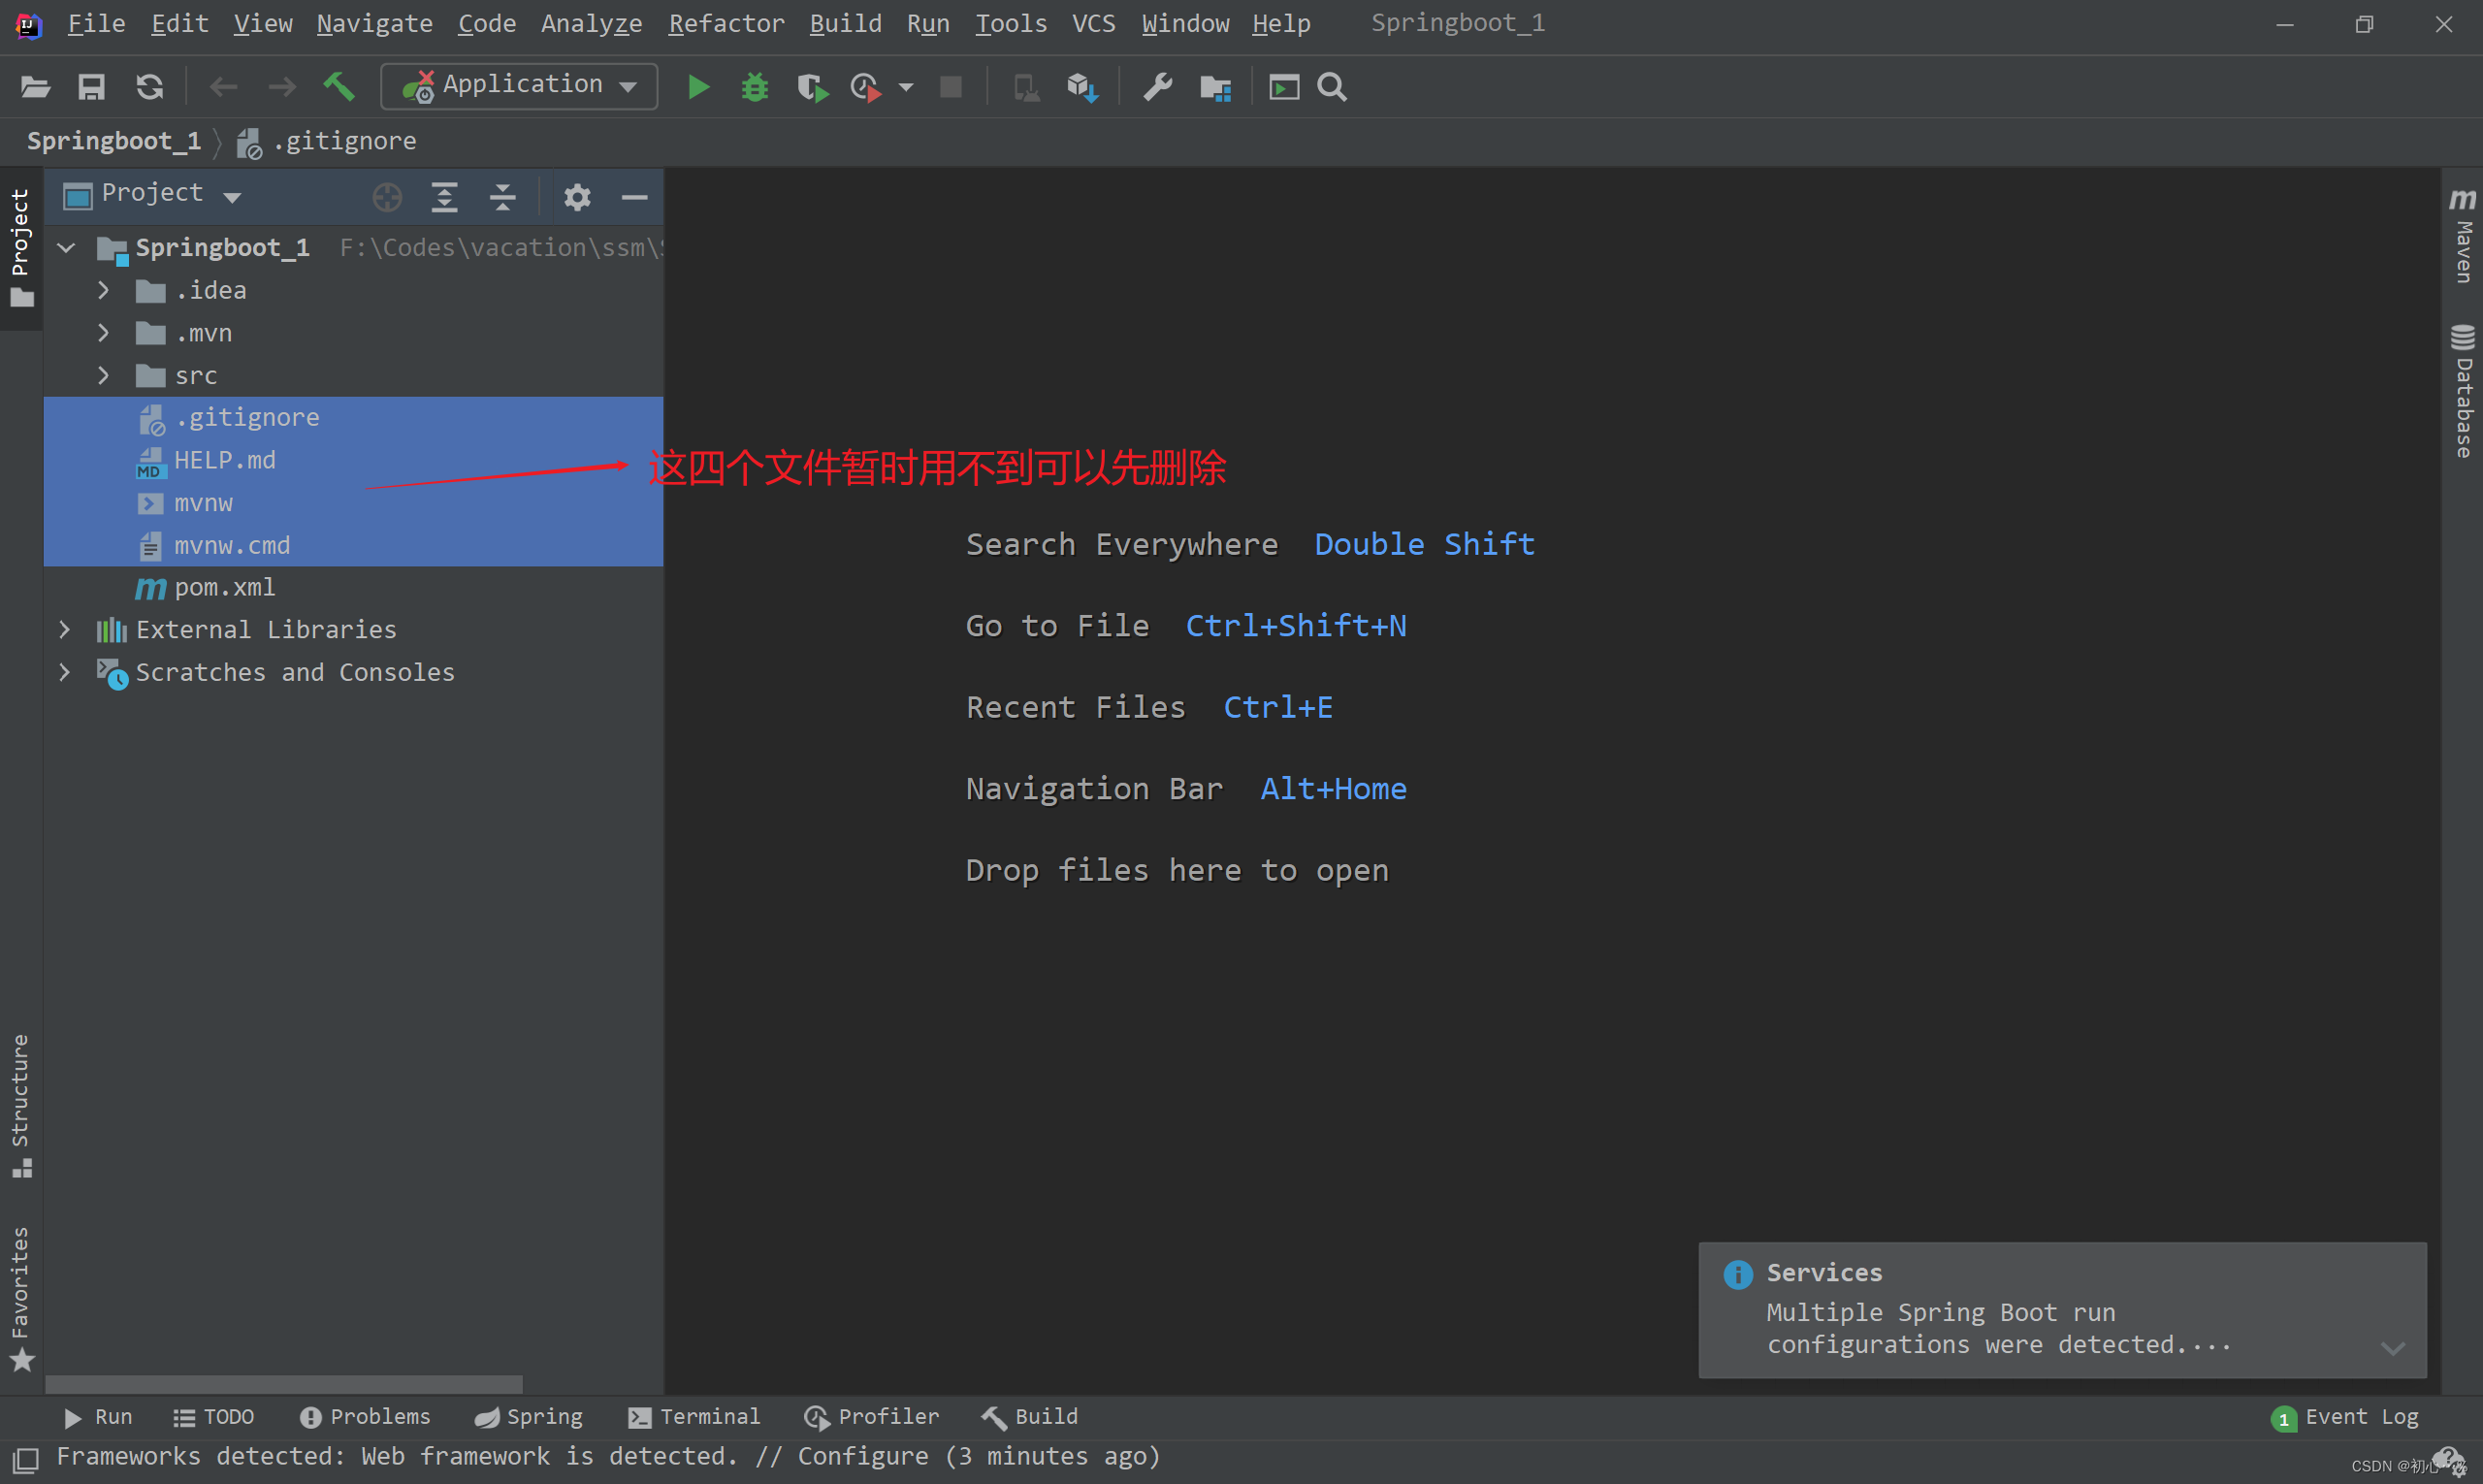
(1)新建模块,选择Spring Initializer,一定要记得选择SpringBoot的版本为2.7.7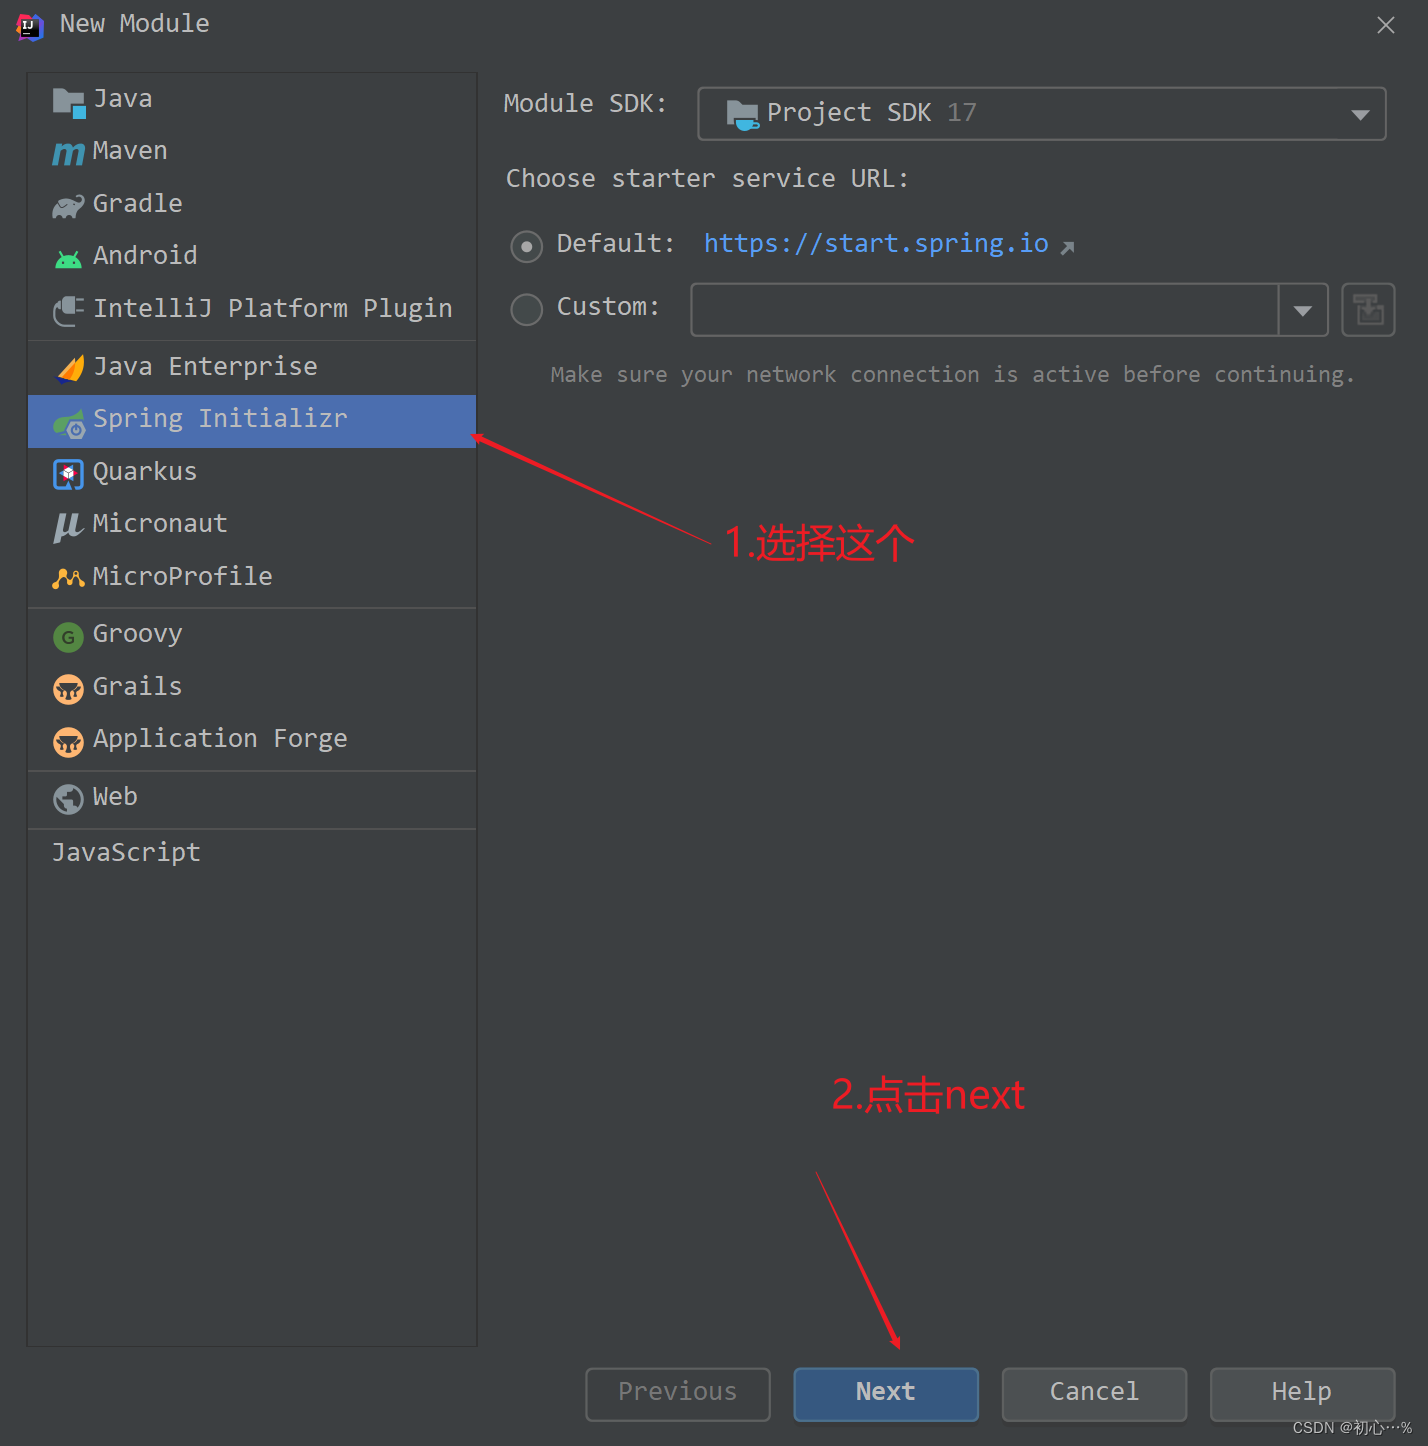
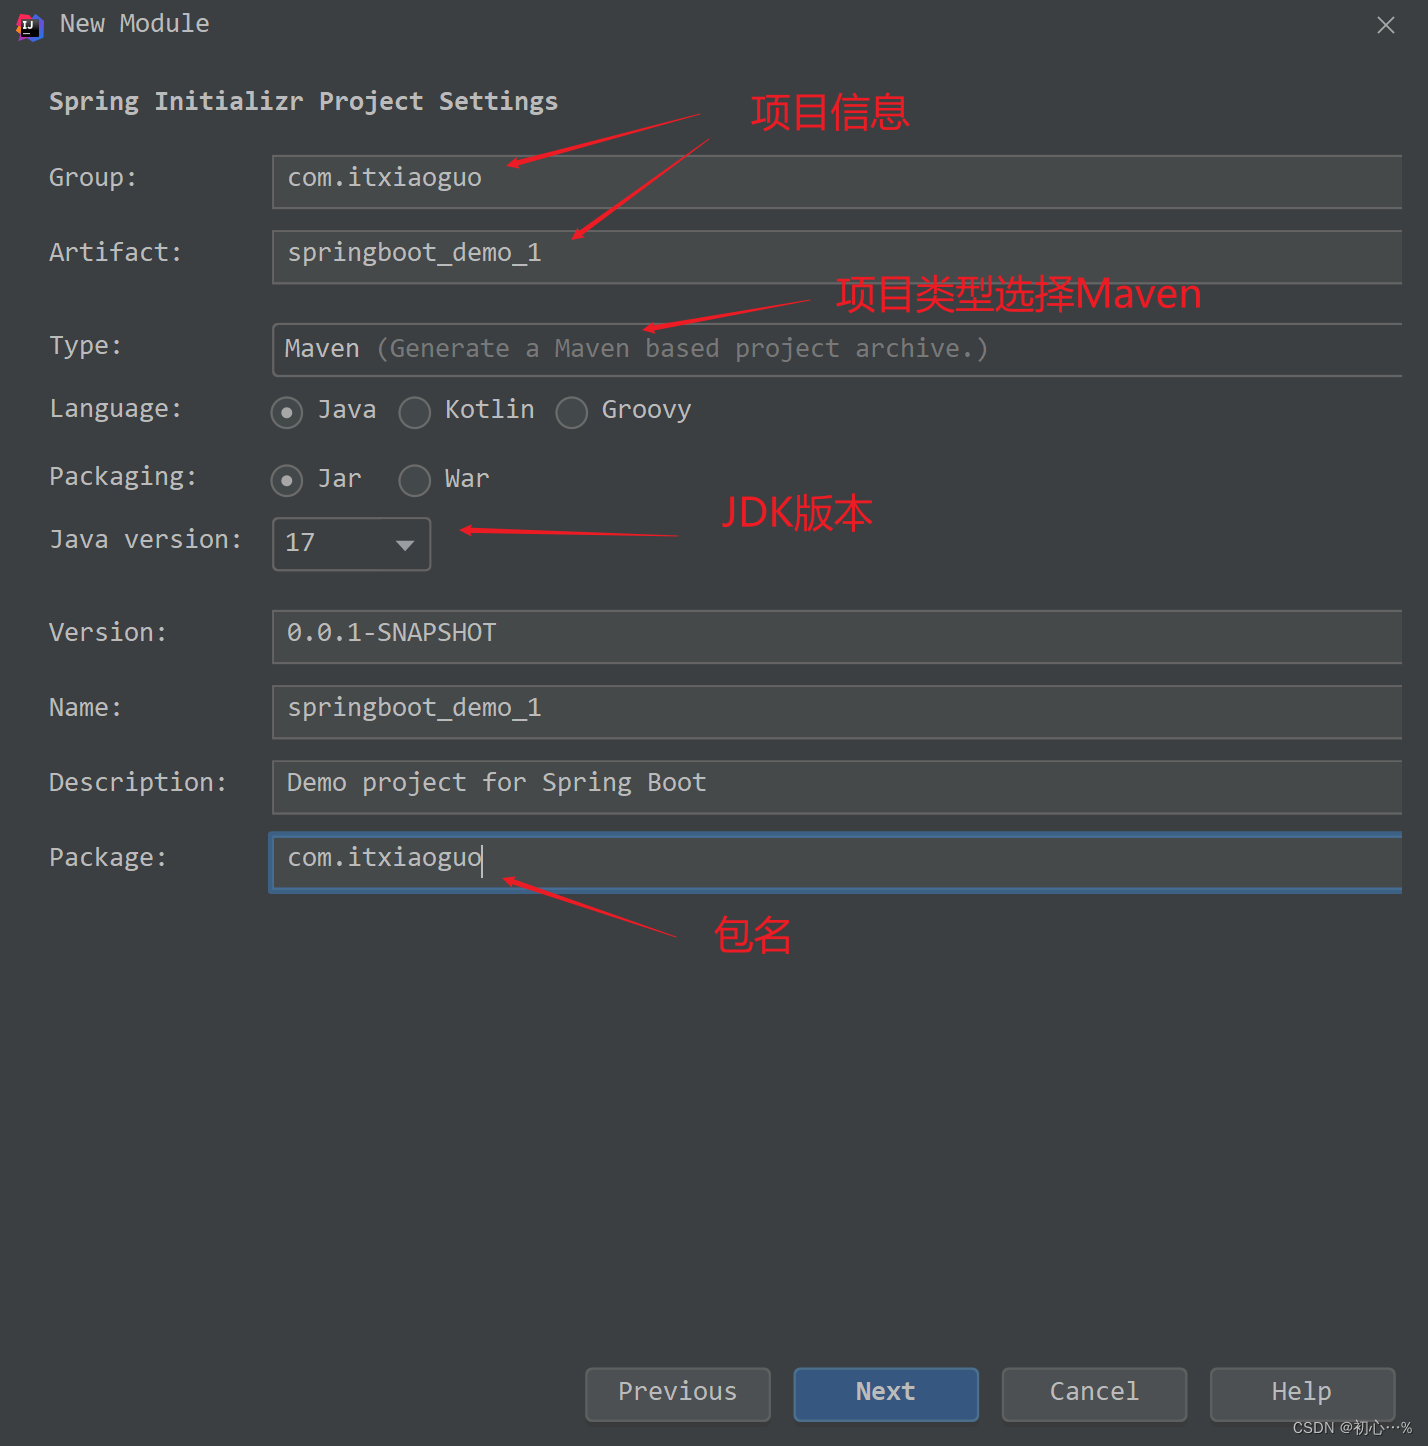

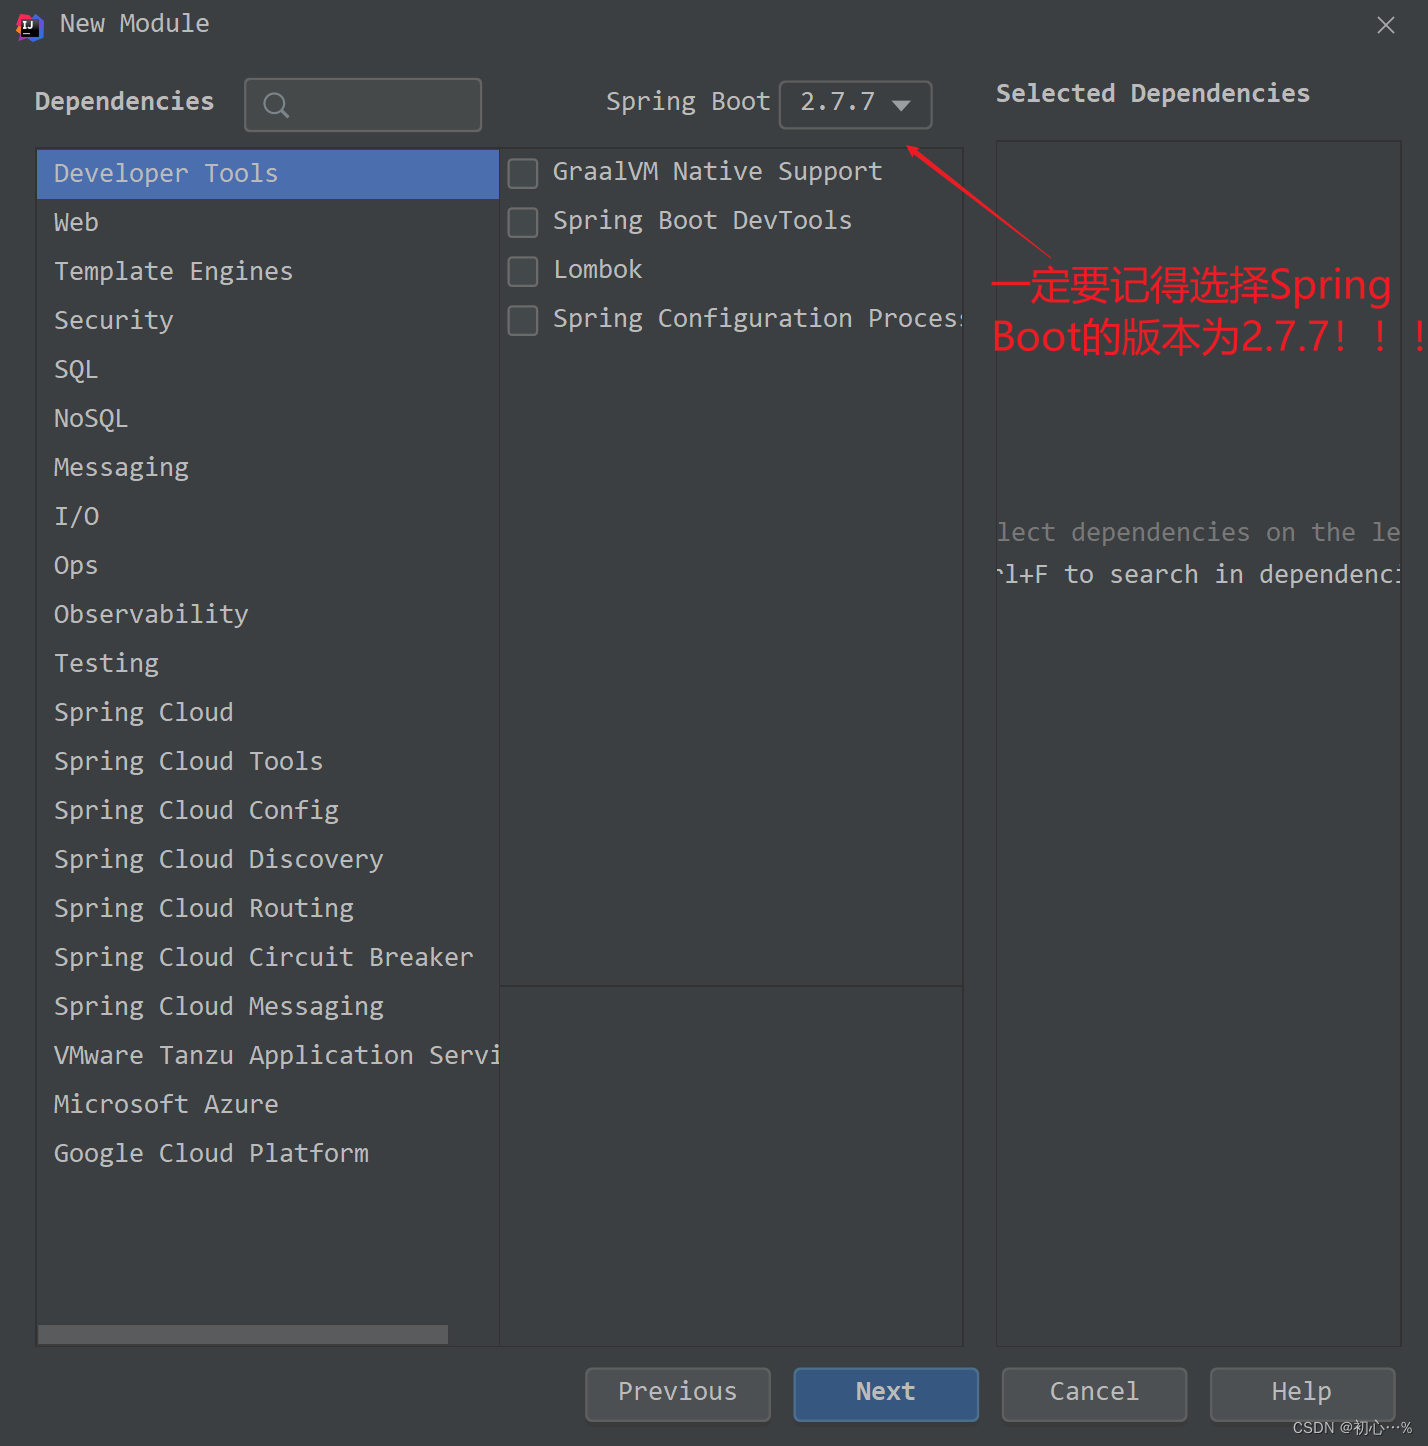

注意上面的两个目录一定要是空目录,然后点击apply,OK即可,之后进入到主界面。
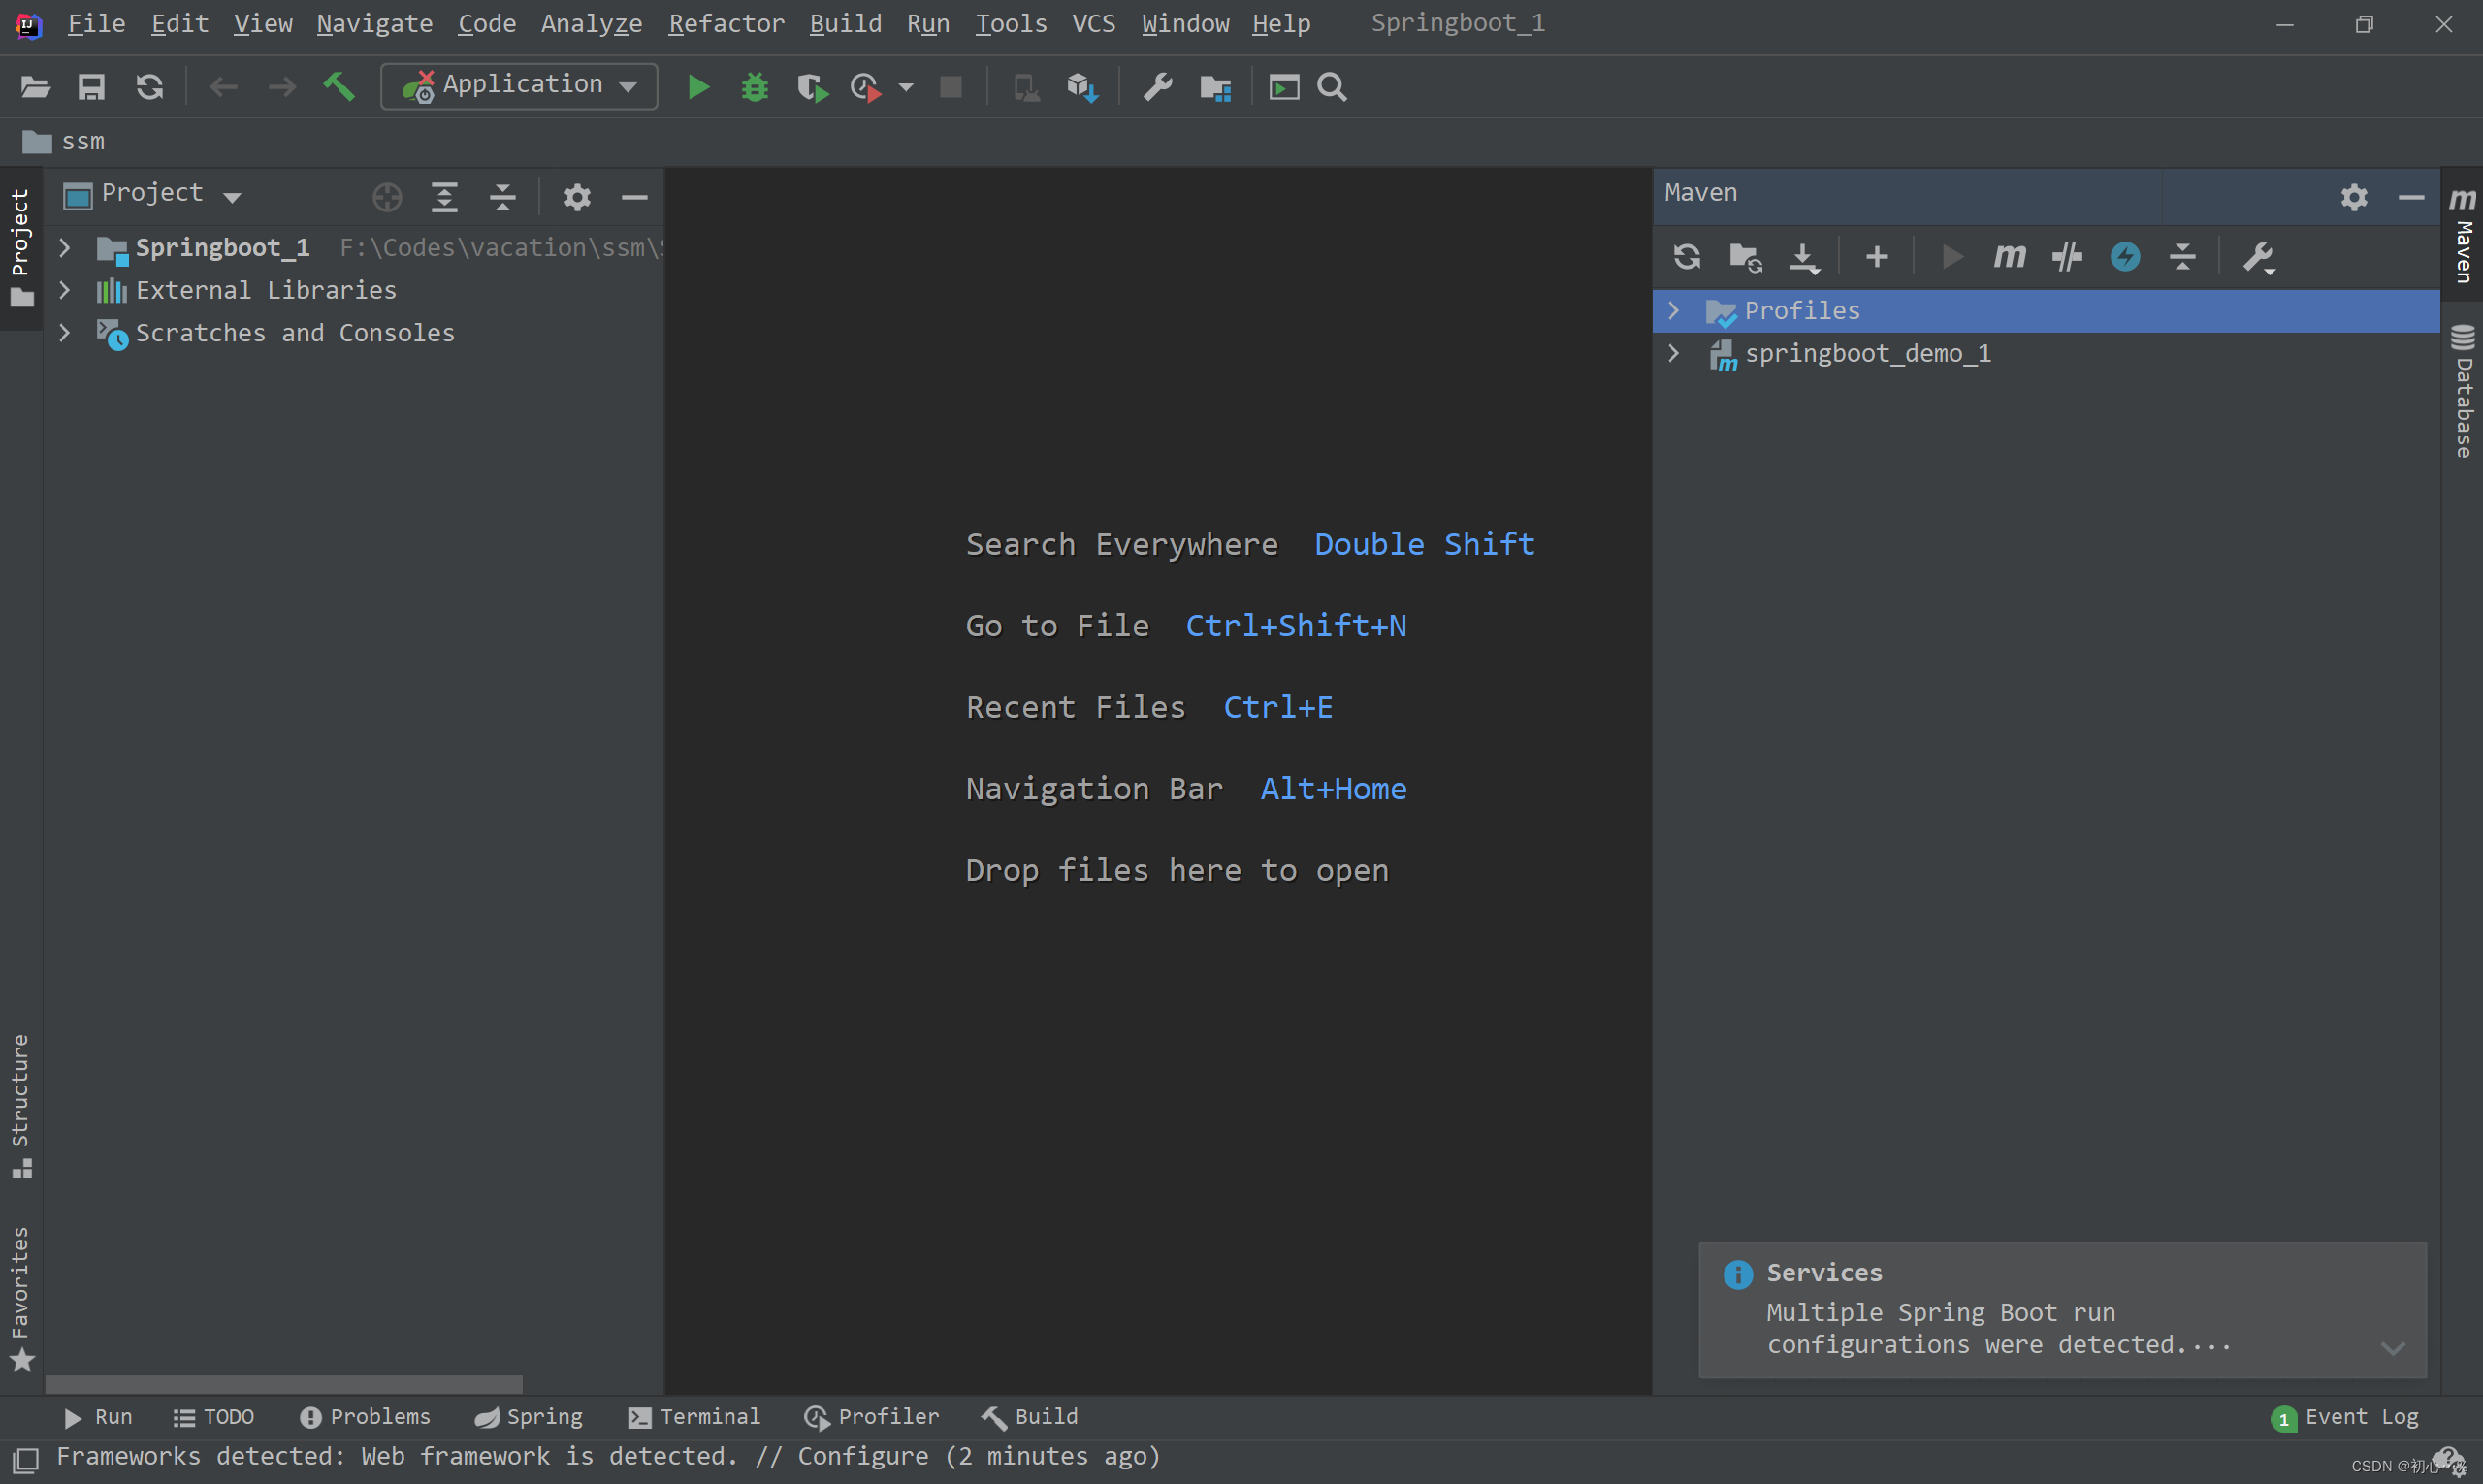
(2)编写UserController类
package com.itxiaoguo.controller;

import org.springframework.web.bind.annotation.GetMapping;
import org.springframework.web.bind.annotation.PathVariable;
import org.springframework.web.bind.annotation.RequestMapping;
import org.springframework.web.bind.annotation.RestController;

@RestController
@RequestMapping("/users")
public class UserController {

    @GetMapping("/{id}")
    public String selectById(@PathVariable Integer id) {
        System.out.println("id --> "+ id);
        return "id --> "+id;
    }
}
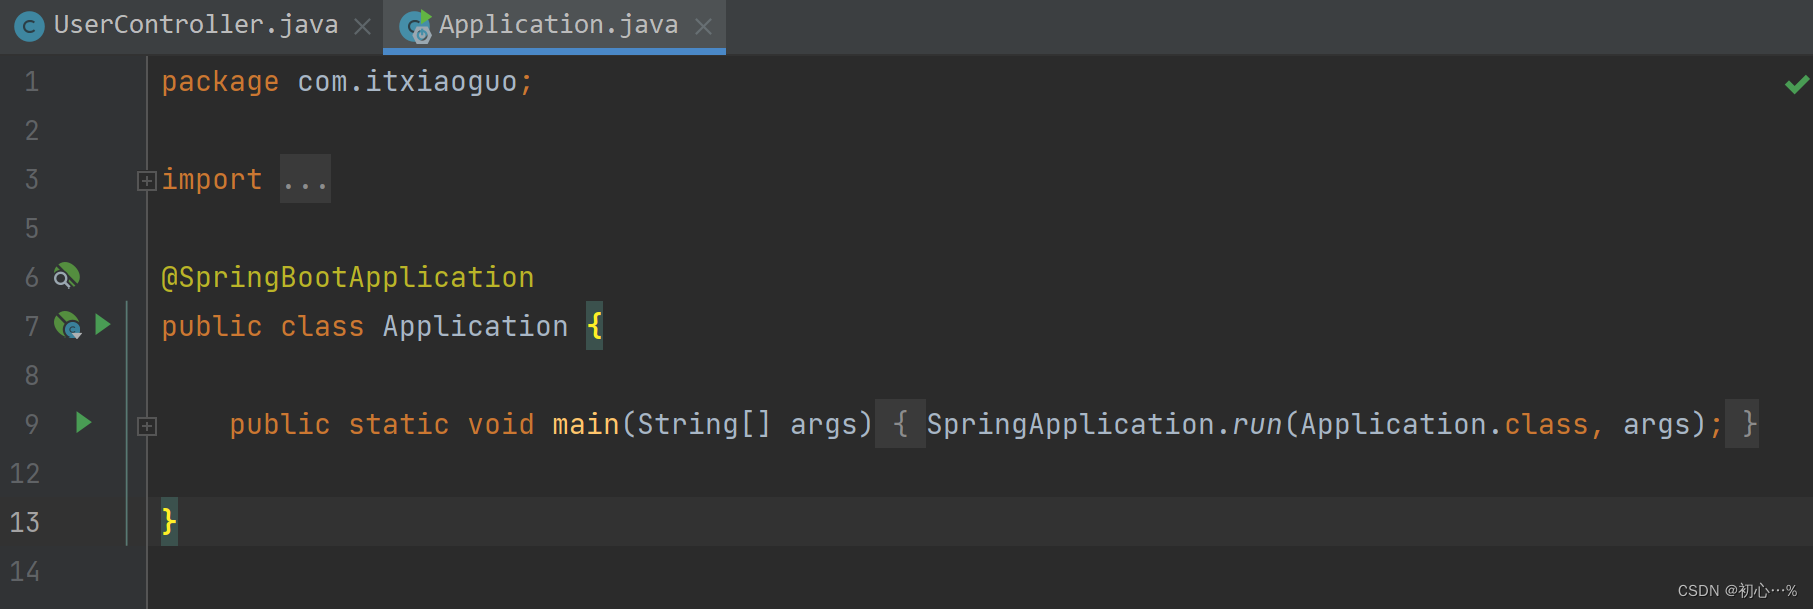
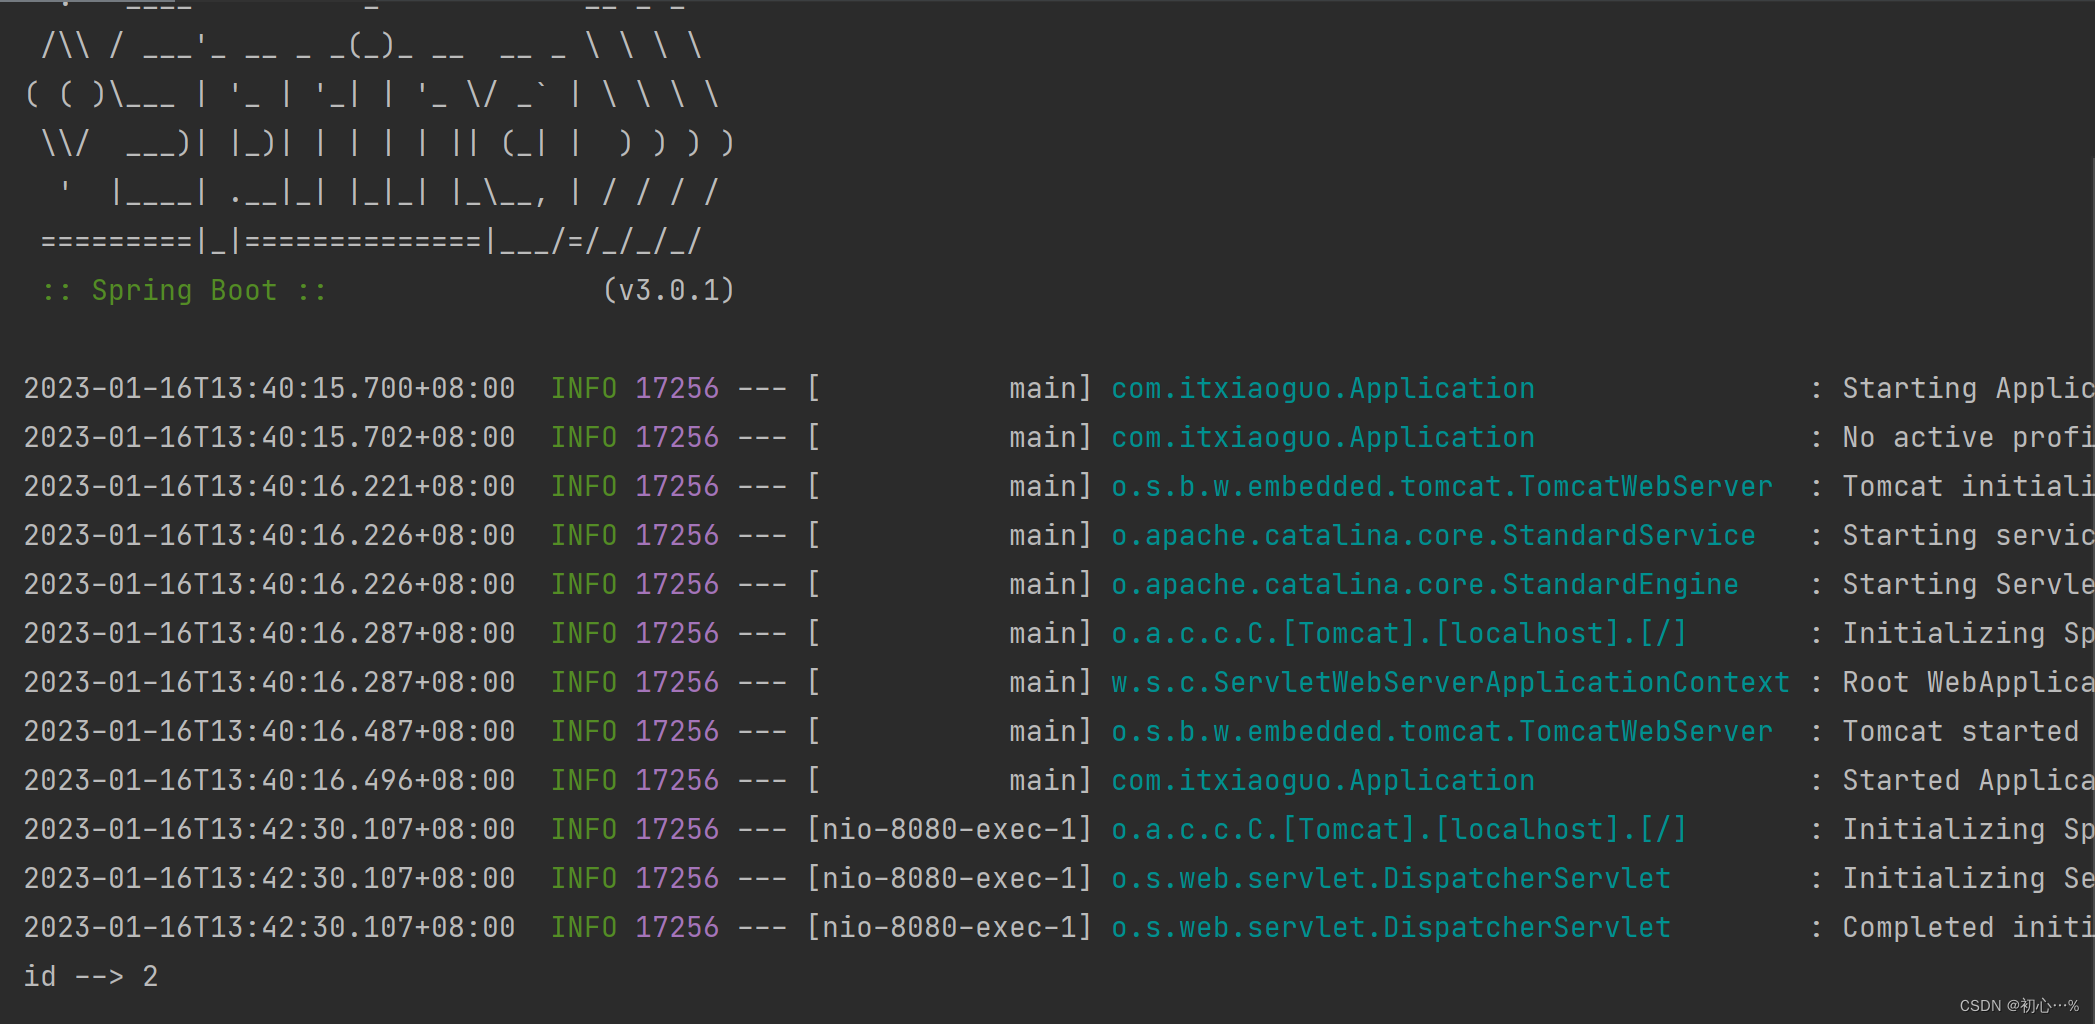
(3)运行Application并使用Postman测试

| 遇到的问题 | 无法使用RestController注解 | 运行主类报错无法运行主类 | JVM热重载 |
|---|---|---|---|
| 原因 | 新建SpringBoot项目时没有勾选Spring Web | 找不到主类 | 虚拟机创建时分配的内存不足 |
| 解决方案 | 删掉当前项目新建(不建议);在pom文件中添加如下依赖 | 执行mvn clean、mvn compile、mvn install、mvn spring-boot run | 暂不理会 |
		<dependency>
            <groupId>org.springframework.boot</groupId>
            <artifactId>spring-boot-starter-web</artifactId>
        </dependency>
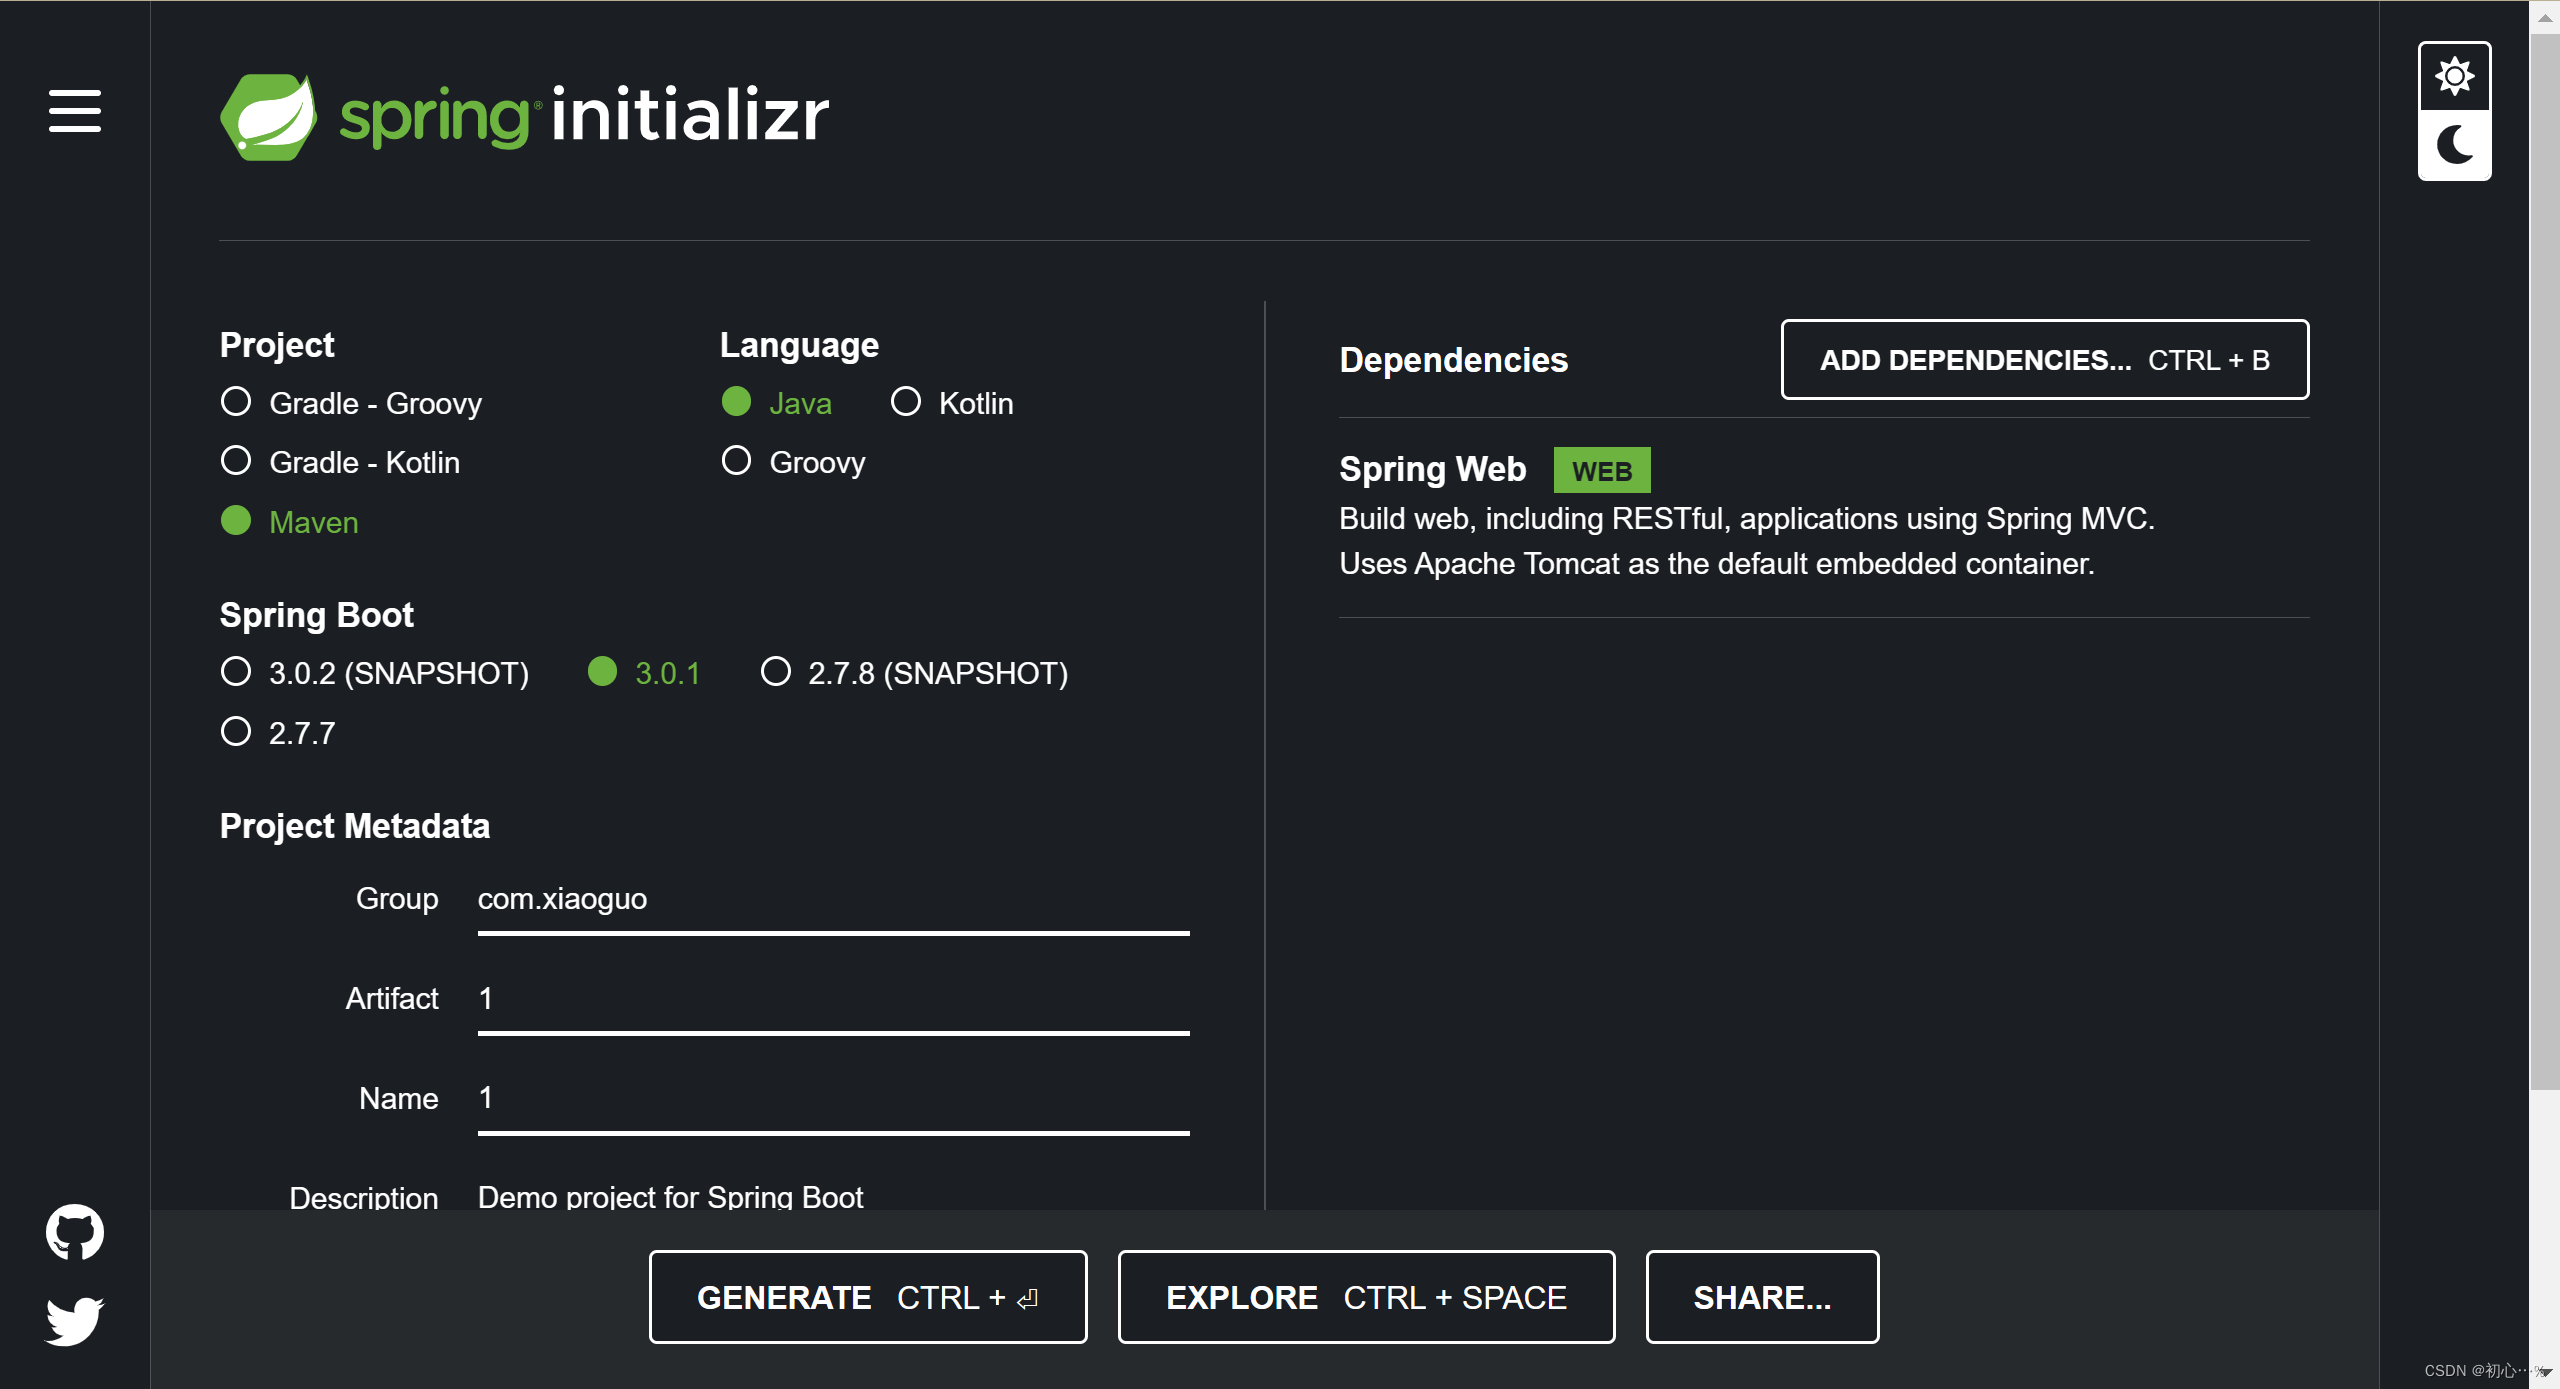
点击Spring Initializer官网,选择要生成的项目骨架,下载解压下来。


| 启动方式 | 主类启动 | maven指令启动 | 命令行启动 |
|---|---|---|---|
| 具体步骤 |  |
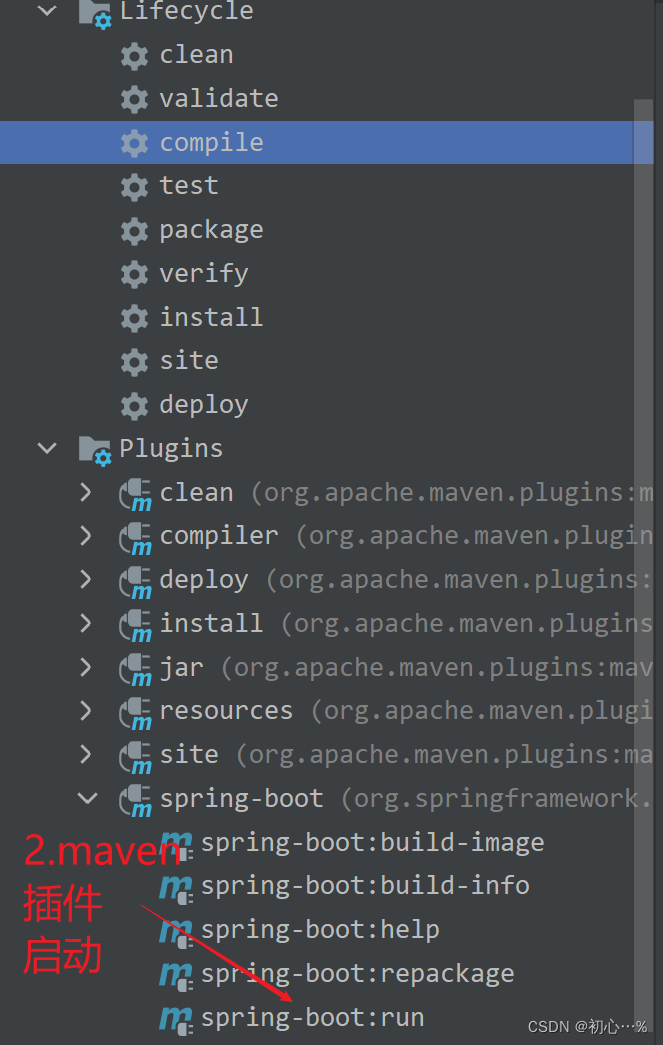 |
 |
	<dependencies>
        <dependency>
            <groupId>org.springframework.boot</groupId>
            <artifactId>spring-boot-starter-web</artifactId>
        </dependency>

        <dependency>
            <groupId>org.springframework.boot</groupId>
            <artifactId>spring-boot-starter-test</artifactId>
            <scope>test</scope>
        </dependency>
    </dependencies>
pom文件中这些原本存在的、带有starter前缀的依赖称为起步依赖,通过起步依赖,SpringBoot项目一开始就导入了大量的依赖,定义了大量的依赖版本号,官方的starter一般都是spring-boot-starter-xxx的格式。
这里举例不使用默认的tomcat服务器,使用jetty服务器。
(1)启动tomcat时的日志信息

(2)排除默认的tomcat,添加jetty起步依赖,之后刷新pom文件
		<dependency>
            <groupId>org.springframework.boot</groupId>
            <artifactId>spring-boot-starter-web</artifactId>
            <!--            排除默认的tomcat -->
            <exclusions>
                <exclusion>
                    <groupId>org.springframework.boot</groupId>
                    <artifactId>spring-boot-starter-tomcat</artifactId>
                </exclusion>
            </exclusions>
        </dependency>
        <!--        添加jetty起步依赖-->
        <dependency>
            <groupId>org.springframework.boot</groupId>
            <artifactId>spring-boot-starter-jetty</artifactId>
        </dependency>
(3) 启动jetty时的日志信息

SpringBoot项目默认的配置文件是application.properties,并且所有的配置文件都要以application-开头。 下面通过修改tomcat服务器端口的例子介绍三种配置文件的格式。
| 配置文件格式 | .properties | .yml(后续主要写) | .yaml |
|---|---|---|---|
| 优先级 | 1 | 2 | 3 |


(1)查看tomcat使用的端口:

(2)注释掉application.properties文件,查看端口:

由此可以得出优先级,properties文件大于yml文件大于yaml文件。
修改了配置文件后不生效,先更改下面的内容,再重启。

YAML 是 “YAML Ain’t a Markup Language”(YAML 不是一种标记语言)的递归缩写。在开发的这种语言时,YAML 的意思其实是:“Yet Another Markup Language”(仍是一种标记语言)。

下面看使用yaml语法的例子
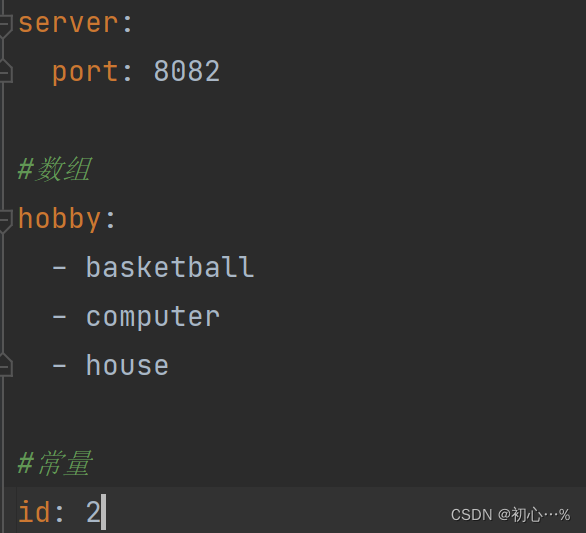
| 方式 | @Value读取 | 使用Environment对象+@AutoWired读取 | 定义一个Enterprise实体类 |
|---|
下面介绍三种方式的代码,再省略再Postman发送请求的过程。
server:
  port: 8080

#数组
test:
  hobby:
    - basketball
    - computer
    - house

#常量
id: 2
@Component
@ConfigurationProperties(prefix = "test")
public class Enterprise {

    private String[] hobby;

   // 省略getter、setter、有参、空参、toString()方法
}
@RestController
@RequestMapping("/users")
public class UserController {

//    1.直接获取yml文件的数据

    @Value("${id}")
    private Integer id;
    @Value("${server.port}")
    private String port;

//    2.通过Environment对象获取

    @Autowired
    private Environment environment;

    //    3.通过实体类获取
    @Autowired
    private Enterprise enterprise;

    @GetMapping
    public String selectAll() {
        System.out.println("--------1------");
        System.out.println("id --> " + id + ",port --> " + port);
        System.out.println("-------2-------");
        System.out.println("id --> " + environment.getProperty("id") + ",port --> " + environment.getProperty("server.port"));
        System.out.println("--------3------");
        System.out.println(enterprise);
        return "id --> " + id;
    }
}

| 环境配置方式 | yaml文件配置多环境(推荐) | properties文件设置多环境 |
|---|---|---|
| 使用方式 | 在yml文件中选择环境 | 每一个环境是独立的properties文件,根据文件名识别 |
# yml文件多环境开发配置(使用---将多个环境分开)
---
server:
  port: 81
spring:
  config:
    activate:
      on-profile: dev # 开发环境
---
server:
  port: 82
spring:
  config:
    activate:
      on-profile: pro # 生产环境
---
server:
  port: 83
spring:
  config:
    activate:
      on-profile: test # 测试环境
---

# 选择环境
spring:
  profiles:
    active: pro
根据上面的配置,选择的是生产环境,端口应该是82,启动服务器查看端口:

验证成功!下面看使用properties文件配置多环境:


验证成功!

上面的环境在项目打包好之后就不能改变了,显然不够灵活,通过命令行带参数启动springboot的形式,达到临时切换环境的目的。
注意事项:
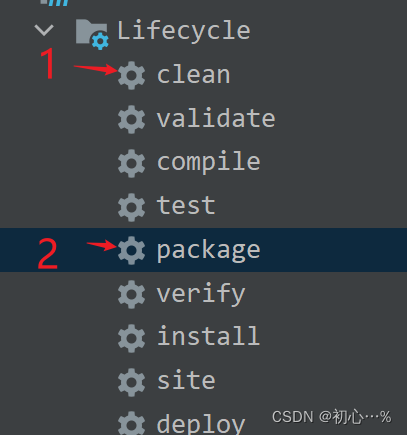
打包(package)之前先清除target目录(clean)

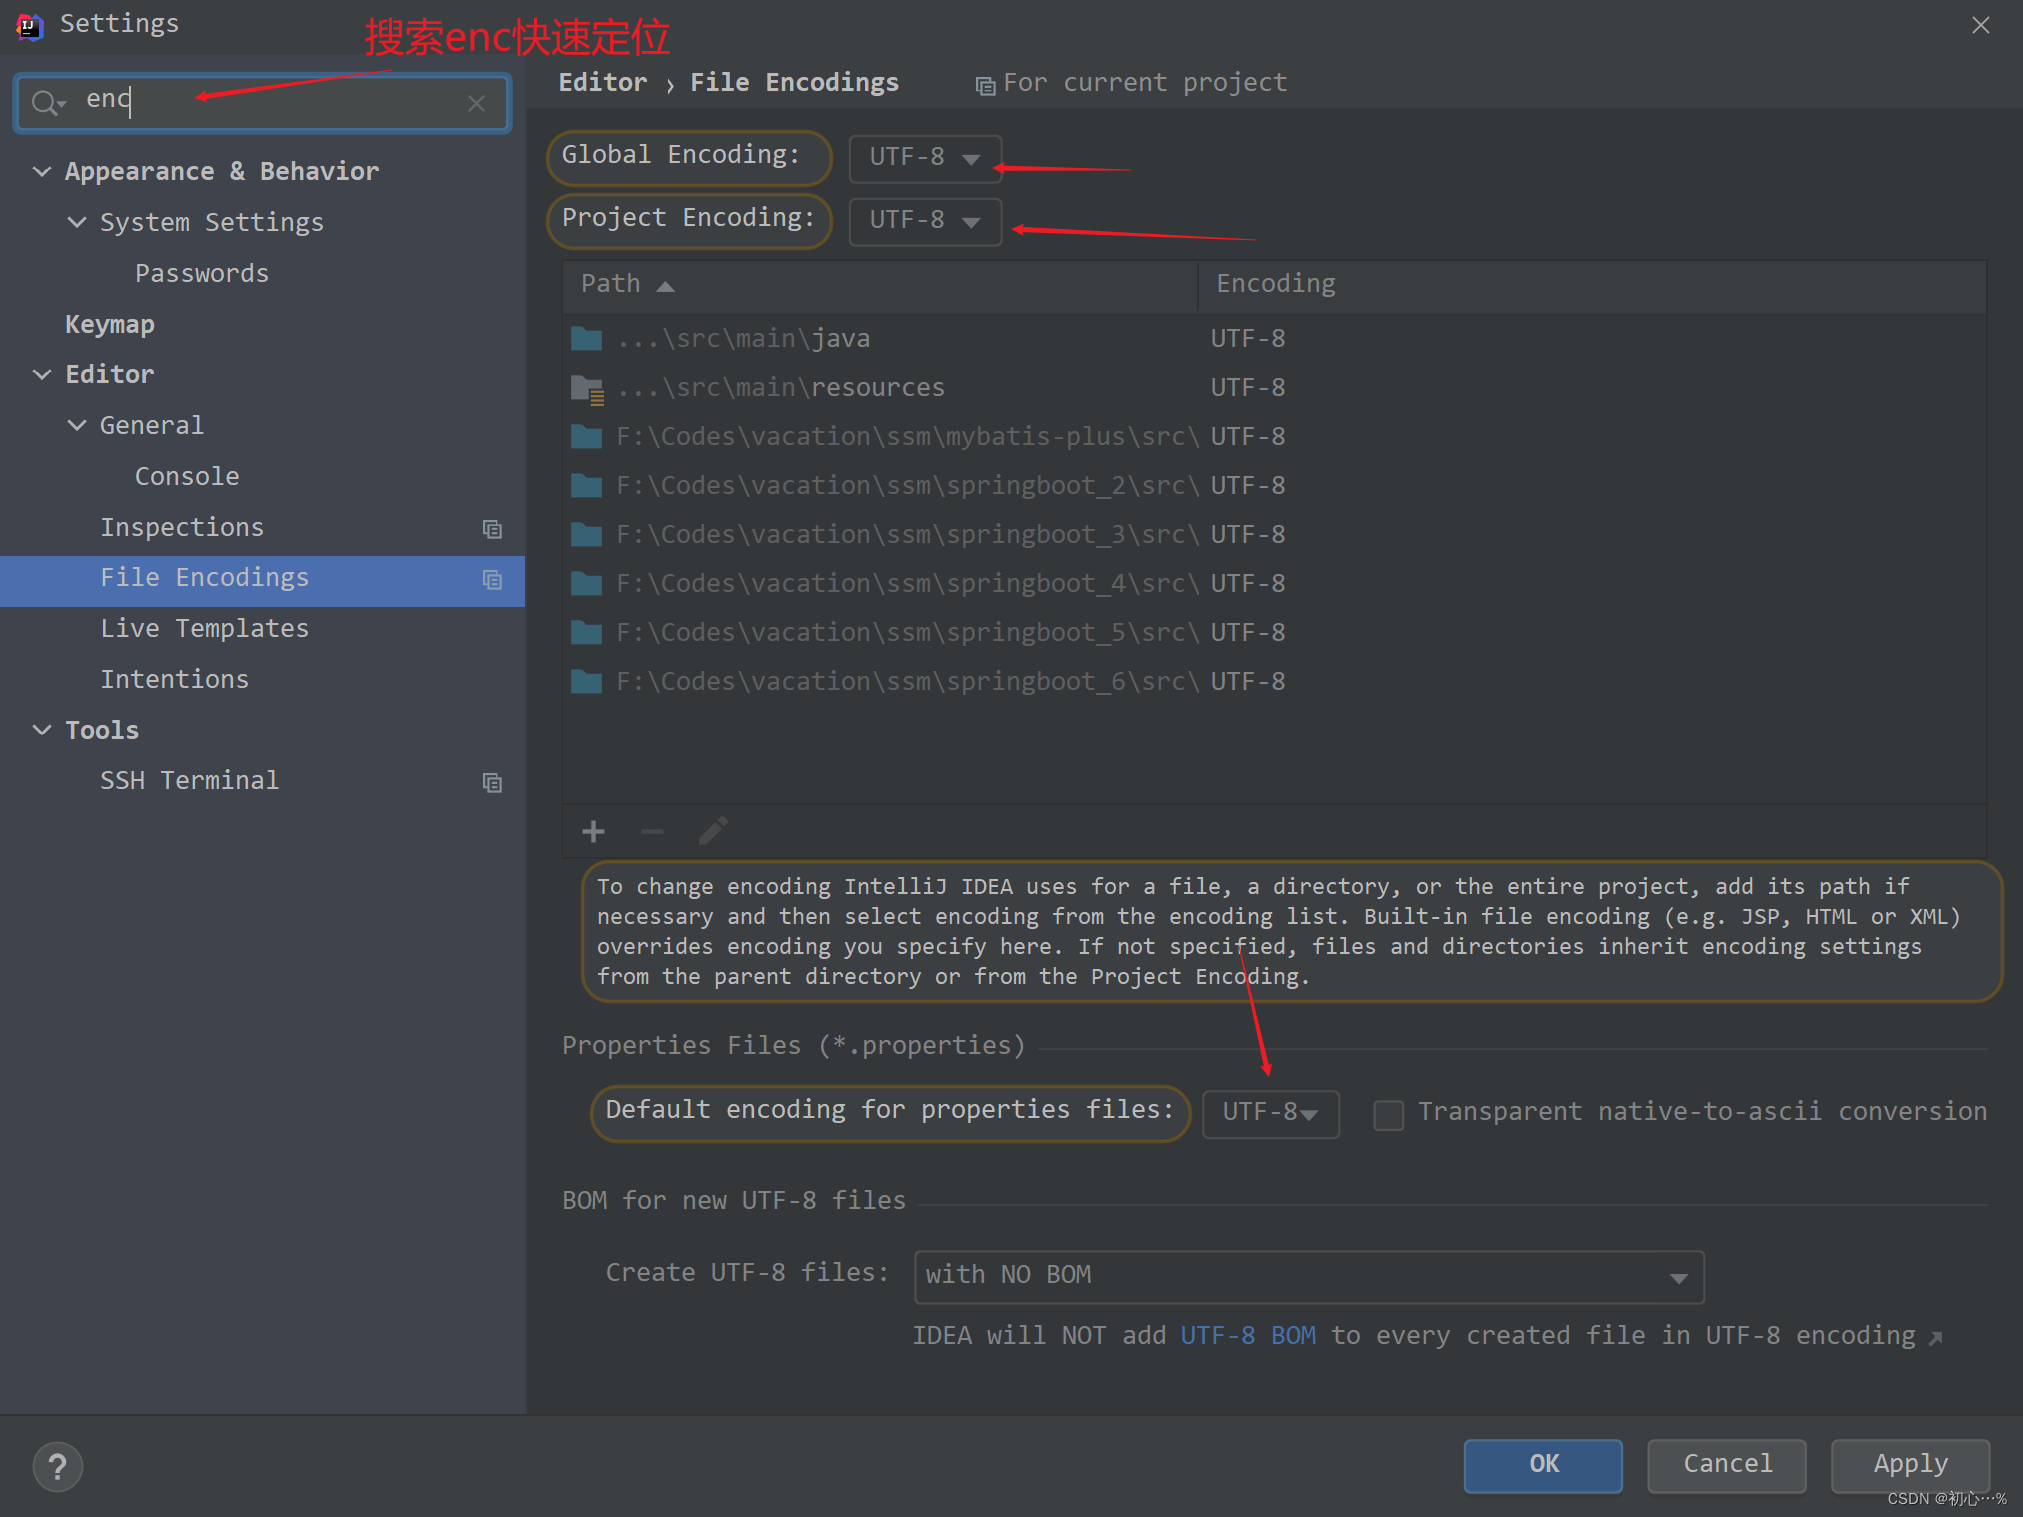
将IDEA文件编码设置为UTF-8

| 命令行切换环境 | 命令行切换端口 |
|---|---|
| java -jar **.jar --spring.profiles.active=环境名 | java -jar **.jar --server.port=85 |


Maven和SpringBoot都有多环境,当都配置了多环境时,SpringBoot使用Maven的环境,便于项目管理。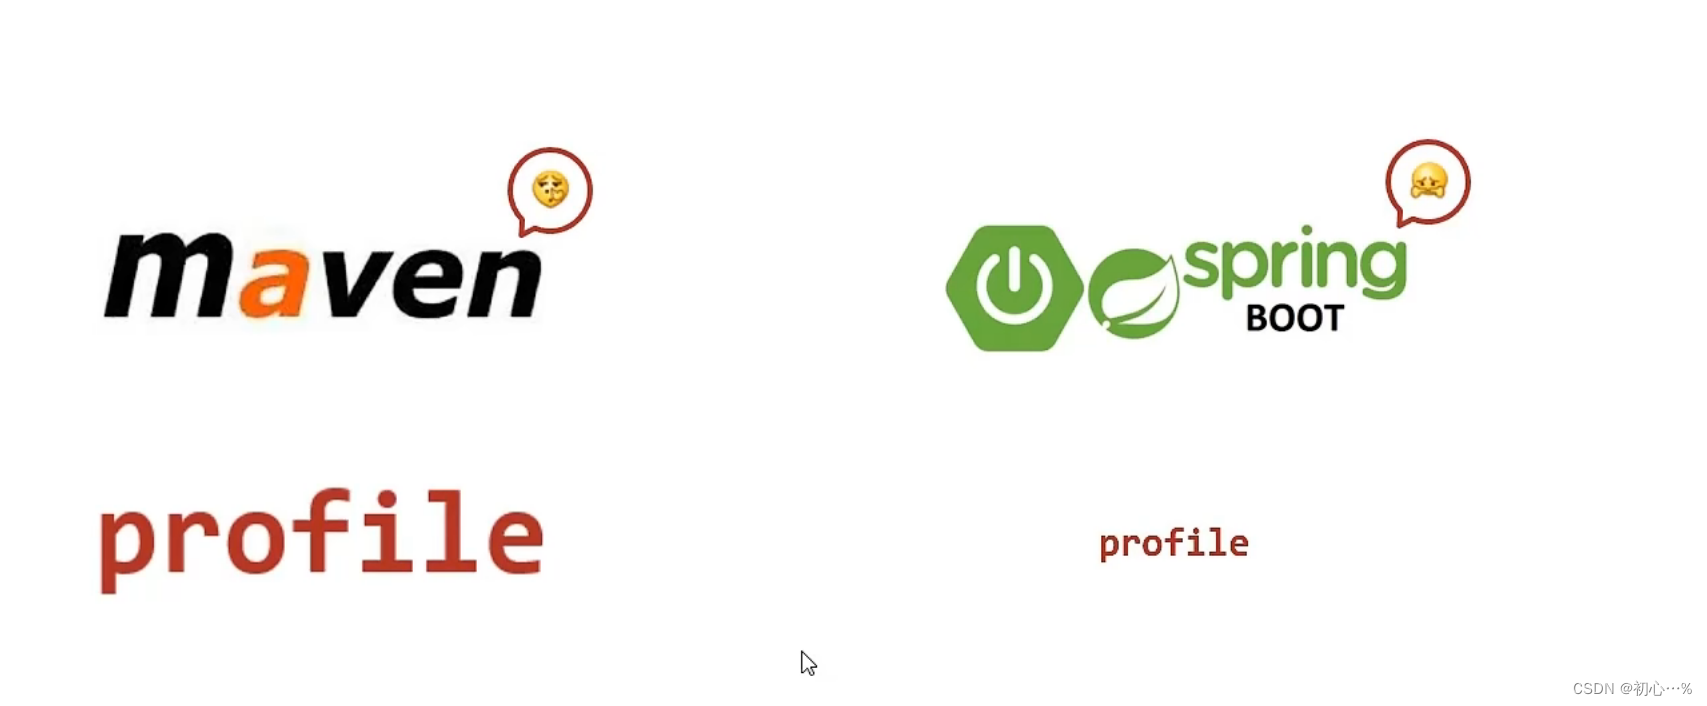
(1)Maven的pom文件设置多环境
 	<build>
        <plugins>
            <!--            让非pom文件也能识别${},从而获取到Maven中的环境-->
            <plugin>
                <groupId>org.apache.maven.plugins</groupId>
                <artifactId>maven-resources-plugin</artifactId>
                <configuration>
                    <encoding>UTF-8</encoding>
                    <useDefaultDelimiters>true</useDefaultDelimiters>
                </configuration>
            </plugin>
        </plugins>
    </build>

    <!--    Maven配置多环境-->
    <profiles>
        <!--        生产环境-->
        <profile>
            <id>pro</id>
            <properties>
                <profile.active>pro</profile.active>
            </properties>
            <!--            默认使用这个环境-->
            <activation>
                <activeByDefault>true</activeByDefault>
            </activation>
        </profile>
        <!--        开发环境-->
        <profile>
            <id>dev</id>
            <properties>
                <profile.active>dev</profile.active>
            </properties>
        </profile>
        <!--        测试环境-->
        <profile>
            <id>test</id>
            <properties>
                <profile.active>test</profile.active>
            </properties>
        </profile>
    </profiles>
(2)yml文件中引用Maven属性,从而获取环境
# 选择环境
spring:
  profiles:
    active: ${profile.active}
(3)执行打包命令查看端口
当不要用命令行启动时要及时关闭,不能双击jar包,否则会导致IO异常,clean,package报错。
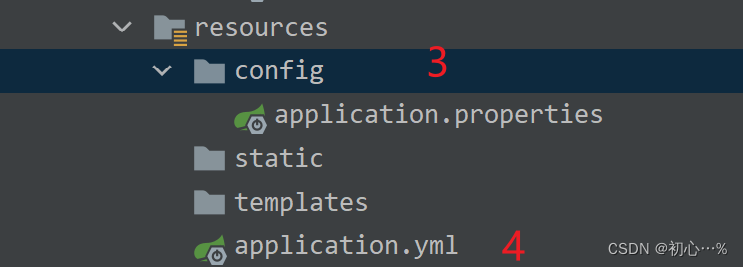
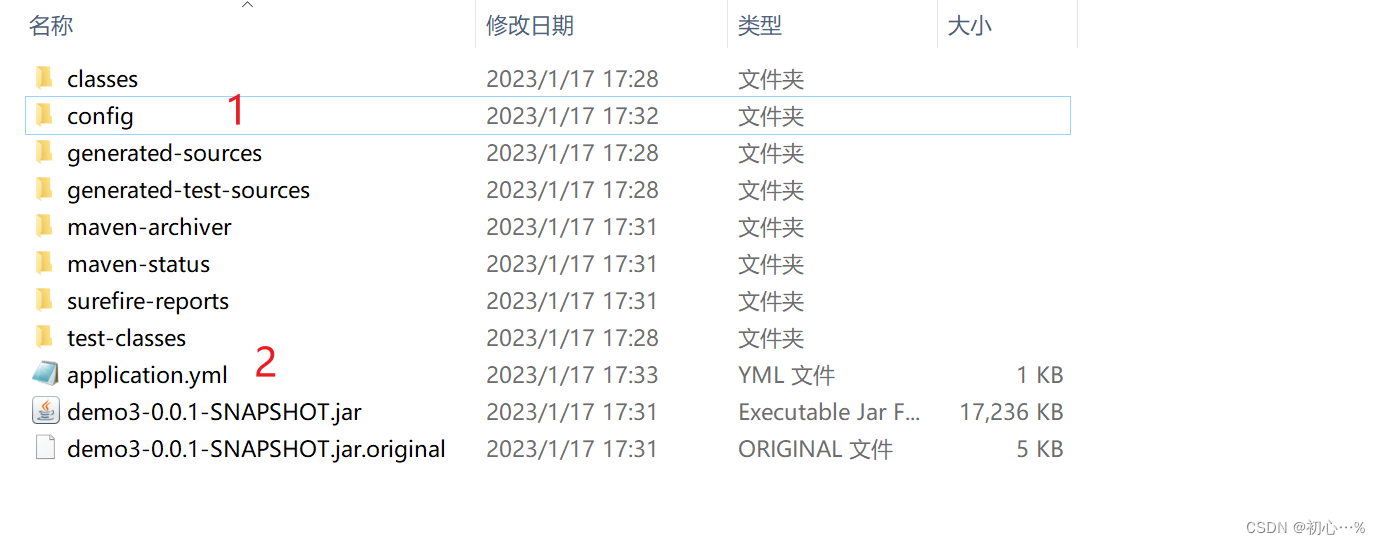
| 配置文件类别 | resources下的配置文件 | config目录下的配置文件 | target目录下的application.yml文件 | target目录下的config文件夹下的application.yml文件 |
|---|---|---|---|---|
| 优先级 | 4 | 3 | 2 | 1 |
- 点赞
- 收藏
- 关注作者


评论(0)