Java进阶(五十七)-基于感知哈希算法的pHash图像配准算法

#Java进阶(五十七)-基于感知哈希算法的pHash图像配准算法
毕业论文提交之后,老师交给自己一项任务:图像配准,也就是给你两幅图像,通过系统来判定两幅图像是否为同一副图像。自己作为这一方面的小白,先去网上搜索一下相应的检测方法,当然有现成的API调用最好,花钱也无所谓。
我们这里采用的基础关键技术叫做 “感知哈希算法”(Perceptual hash algorithm),它的作用是对每张图片生成一个"指纹"(fingerprint)字符串,然后比较不同图片的指纹。结果越接近,就说明图片越相似。
##感知哈希算法
下面是一个最简单的实现:
###第一步,缩小尺寸。
将图片缩小到8x8的尺寸,总共64个像素。这一步的作用是去除图片的细节,只保留结构、明暗等基本信息,摒弃不同尺寸、比例带来的图片差异。
###第二步,简化色彩。
将缩小后的图片,转为64级灰度。也就是说,所有像素点总共只有64种颜色。
###第三步,计算平均值。
计算所有64个像素的灰度平均值。
###第四步,比较像素的灰度。
将每个像素的灰度,与平均值进行比较。大于或等于平均值,记为1;小于平均值,记为0。
###第五步,计算哈希值。
将上一步的比较结果,组合在一起,就构成了一个64位的整数,这就是这张图片的指纹。组合的次序并不重要,只要保证所有图片都采用同样次序就行了。
得到指纹以后,就可以对比不同的图片,看看64位中有多少位是不一样的。在理论上,这等同于计算"汉明距离"(Hamming distance)。如果不相同的数据位不超过5,就说明两张图片很相似;如果大于10,就说明这是两张不同的图片。
具体的代码实现,可以参见Wote用Python语言写的imgHash.py。代码很短,只有53行。使用的时候,第一个参数是基准图片,第二个参数是用来比较的其他图片所在的目录,返回结果是两张图片之间不相同的数据位数量(汉明距离)。
这种算法的优点是简单快速,不受图片大小缩放的影响,缺点是图片的内容不能变更。如果在图片上加几个文字,它就认不出来了。所以,它的最佳用途是根据缩略图,找出原图。
实际应用中,往往采用更强大的pHash算法和SIFT算法,它们能够识别图片的变形。只要变形程度不超过25%,它们就能匹配原图。这些算法虽然更复杂,但是原理与上面的简便算法是一样的,就是先将图片转化成Hash字符串,然后再进行比较。
均值哈希虽然简单,但受均值的影响非常大。例如对图像进行伽马校正或直方图均衡就会影响均值,从而影响最终的hash值。存在一个更健壮的算法叫pHash。它将均值的方法发挥到极致。使用离散余弦变换(DCT)来获取图片的低频成分。
离散余弦变换(DCT)是种图像压缩算法,它将图像从像素域变换到频率域。然后一般图像都存在很多冗余和相关性的,所以转换到频率域之后,只有很少的一部分频率分量的系数才不为0,大部分系数都为0(或者说接近于0)。
##pHash
pHash的工作过程如下:
- (1)缩小尺寸:pHash以小图片开始,但图片大于88,3232是最好的。这样做的目的是简化了DCT的计算,而不是减小频率。
- (2)简化色彩:将图片转化成灰度图像,进一步简化计算量。
- (3)计算DCT:计算图片的DCT变换,得到32*32的DCT系数矩阵。
- (4)缩小DCT:虽然DCT的结果是3232大小的矩阵,但我们只要保留左上角的88的矩阵,这部分呈现了图片中的最低频率。
- (5)计算平均值:如同均值哈希一样,计算DCT的均值。
- (6)计算hash值:这是最主要的一步,根据8*8的DCT矩阵,设置0或1的64位的hash值,大于等于DCT均值的设为”1”,小于DCT均值的设为“0”。组合在一起,就构成了一个64位的整数,这就是这张图片的指纹。
结果并不能告诉我们真实性的低频率,只能粗略地告诉我们相对于平均值频率的相对比例。只要图片的整体结构保持不变,hash结果值就不变。能够避免伽马校正或颜色直方图被调整带来的影响。
与均值哈希一样,pHash同样可以用汉明距离来进行比较。(只需要比较每一位对应的位置并算计不同的位的个数)
下面我们来看下上述理论用Java来做一个DEMO版的具体实现:
import java.awt.Graphics2D;
import java.awt.color.ColorSpace;
import java.awt.image.BufferedImage;
import java.awt.image.ColorConvertOp;
import java.io.File;
import java.io.FileInputStream;
import java.io.FileNotFoundException;
import java.io.InputStream;

import javax.imageio.ImageIO;
/*
* function: 用汉明距离进行图片相似度检测的Java实现
* pHash-like image hash.
* Author: Sun Huaqiang
* Based On: http://www.hackerfactor.com/blog/index.php?/archives/432-Looks-Like-It.html
*/
public class ImagePHash { private int size = 32; private int smallerSize = 8; public ImagePHash() { initCoefficients(); } private ImagePHash(int size, int smallerSize) { this.size = size; this.smallerSize = smallerSize; initCoefficients(); } private int distance(String s1, String s2) { int counter = 0; for (int k = 0; k < s1.length();k++) { if(s1.charAt(k) != s2.charAt(k)) { counter++; } } return counter; } // Returns a 'binary string' (like. 001010111011100010) which is easy to do a hamming distance on. private String getHash(InputStream is) throws Exception { BufferedImage img = ImageIO.read(is);

/* 1. Reduce size(缩小尺寸).
Like Average Hash, pHash starts with a small image.
However, the image is larger than 8x8; 32x32 is a good size.This is really done to simplify the DCT computation and not because it is needed to reduce the high frequencies.
*/ img = resize(img, size, size);

/* 2. Reduce color(简化色彩).
The image is reduced to a grayscale just to further simplify the number of computations.
*/ img = grayscale(img); double[][] vals = new double[size][size]; for (int x = 0; x < img.getWidth(); x++) { for (int y = 0; y < img.getHeight(); y++) { vals[x][y] = getBlue(img, x, y); } }

/* 3. Compute the DCT(计算DCT).
The DCT(Discrete Cosine Transform,离散余弦转换) separates the image into a collection of frequencies and scalars. While JPEG uses an 8x8 DCT, this algorithm uses a 32x32 DCT.
*/ long start = System.currentTimeMillis(); double[][] dctVals = applyDCT(vals);
// System.out.println("DCT_COST_TIME: " + (System.currentTimeMillis() - start));

/* 4. Reduce the DCT.
This is the magic step. While the DCT is 32x32, just keep the top-left 8x8. Those represent the lowest frequencies in the picture.
*/
/* 5. Compute the average value.
Like the Average Hash, compute the mean DCT value (using only the 8x8 DCT low-frequency values and excluding the first term since the DC coefficient can be significantly different from the other values and will throw off the average).
*/ double total = 0; for (int x = 0; x < smallerSize; x++) { for (int y = 0; y < smallerSize; y++) { total += dctVals[x][y]; } } total -= dctVals[0][0]; double avg = total / (double) ((smallerSize * smallerSize) - 1);

/* 6. Further reduce the DCT.
This is the magic step. Set the 64 hash bits to 0 or 1
depending on whether each of the 64 DCT values is above or below the average value. The result doesn't tell us the
actual low frequencies; it just tells us the very-rough
relative scale of the frequencies to the mean. The result
will not vary as long as the overall structure of the image remains the same; this can survive gamma and color histogram adjustments without a problem.
*/ String hash = ""; for (int x = 0; x < smallerSize; x++) { for (int y = 0; y < smallerSize; y++) { if (x != 0 && y != 0) { hash += (dctVals[x][y] > avg?"1":"0"); } } } return hash; } private BufferedImage resize(BufferedImage image, int width, int height) { BufferedImage resizedImage = new BufferedImage(width, height, BufferedImage.TYPE_INT_ARGB); Graphics2D g = resizedImage.createGraphics(); g.drawImage(image, 0, 0, width, height, null); g.dispose(); return resizedImage; } private ColorConvertOp colorConvert = new ColorConvertOp(ColorSpace.getInstance(ColorSpace.CS_GRAY), null); private BufferedImage grayscale(BufferedImage img) { colorConvert.filter(img, img); return img; } private static int getBlue(BufferedImage img, int x, int y) { return (img.getRGB(x, y)) & 0xff; }

// DCT function stolen from http://stackoverflow.com/questions/4240490/problems-with-dct-and-idct-algorithm-in-java private double[] c; private void initCoefficients() { c = new double[size]; for (int i=1;i<size;i++) { c[i]=1; } c[0]=1/Math.sqrt(2.0); } private double[][] applyDCT(double[][] f) { int N = size; double[][] F = new double[N][N]; for (int u=0;u<N;u++) { for (int v=0;v<N;v++) { double sum = 0.0; for (int i=0;i<N;i++) { for (int j=0;j<N;j++) { sum+=Math.cos(((2*i+1)/(2.0*N))*u*Math.PI)*Math.cos(((2*j+1)/(2.0*N))*v*Math.PI)*(f[i][j]); } } sum*=((c[u]*c[v])/4.0); F[u][v] = sum; } } return F; } /** * * @param img1 * @param img2 * @param tv * @return boolean */ public boolean imgChk(String img1, String img2, int tv){ ImagePHash p = new ImagePHash(); String image1; String image2; try { image1 = p.getHash(new FileInputStream(new File(img1))); image2 = p.getHash(new FileInputStream(new File(img2))); int dt = p.distance(image1, image2); System.out.println("["+img1 + "] : [" + img2 + "] Score is " + dt); if (dt <= tv) return true; } catch (FileNotFoundException e) { e.printStackTrace(); } catch (Exception e) { e.printStackTrace(); } return false; } public static void main(String[] args) { ImagePHash p = new ImagePHash(); String imagePath = "C:/Users/SHQ/Desktop/image/"; System.out.println(p.imgChk(imagePath+"1.jpg", imagePath+"2.jpg", 10)); System.out.println(p.imgChk(imagePath+"1.jpg", imagePath+"3.jpg", 10)); System.out.println(p.imgChk(imagePath+"1.jpg", imagePath+"4.jpg", 10)); System.out.println(p.imgChk(imagePath+"1.jpg", imagePath+"5.jpg", 10)); System.out.println(p.imgChk(imagePath+"1.jpg", imagePath+"6.png", 10)); System.out.println(p.imgChk(imagePath+"1.jpg", imagePath+"7.jpg", 10)); System.out.println(p.imgChk(imagePath+"2.jpg", imagePath+"3.jpg", 10)); }
}
- 1
- 2
- 3
- 4
- 5
- 6
- 7
- 8
- 9
- 10
- 11
- 12
- 13
- 14
- 15
- 16
- 17
- 18
- 19
- 20
- 21
- 22
- 23
- 24
- 25
- 26
- 27
- 28
- 29
- 30
- 31
- 32
- 33
- 34
- 35
- 36
- 37
- 38
- 39
- 40
- 41
- 42
- 43
- 44
- 45
- 46
- 47
- 48
- 49
- 50
- 51
- 52
- 53
- 54
- 55
- 56
- 57
- 58
- 59
- 60
- 61
- 62
- 63
- 64
- 65
- 66
- 67
- 68
- 69
- 70
- 71
- 72
- 73
- 74
- 75
- 76
- 77
- 78
- 79
- 80
- 81
- 82
- 83
- 84
- 85
- 86
- 87
- 88
- 89
- 90
- 91
- 92
- 93
- 94
- 95
- 96
- 97
- 98
- 99
- 100
- 101
- 102
- 103
- 104
- 105
- 106
- 107
- 108
- 109
- 110
- 111
- 112
- 113
- 114
- 115
- 116
- 117
- 118
- 119
- 120
- 121
- 122
- 123
- 124
- 125
- 126
- 127
- 128
- 129
- 130
- 131
- 132
- 133
- 134
- 135
- 136
- 137
- 138
- 139
- 140
- 141
- 142
- 143
- 144
- 145
- 146
- 147
- 148
- 149
- 150
- 151
- 152
- 153
- 154
- 155
- 156
- 157
- 158
- 159
- 160
- 161
- 162
- 163
- 164
- 165
- 166
- 167
- 168
- 169
- 170
- 171
- 172
- 173
- 174
- 175
- 176
- 177
- 178
- 179
- 180
- 181
- 182
- 183
- 184
- 185
- 186
- 187
- 188
- 189
- 190
- 191
- 192
- 193
- 194
- 195
- 196
- 197
- 198
- 199
- 200
##测试结果
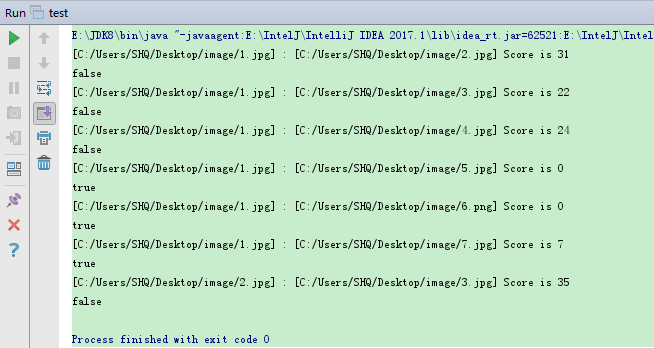
结果说明:汉明距离越大表明图片差异越大,如果不相同的数据位不超过5,就说明两张图片很相似;如果大于10,就说明这是两张不同的图片。从结果可以看到1、5、6、7是相似图片,1、2、3差异太大,是两张不同的图片。
##附 测试图片
图1 1.jpg

图2 2.jpg

图3 3.jpg
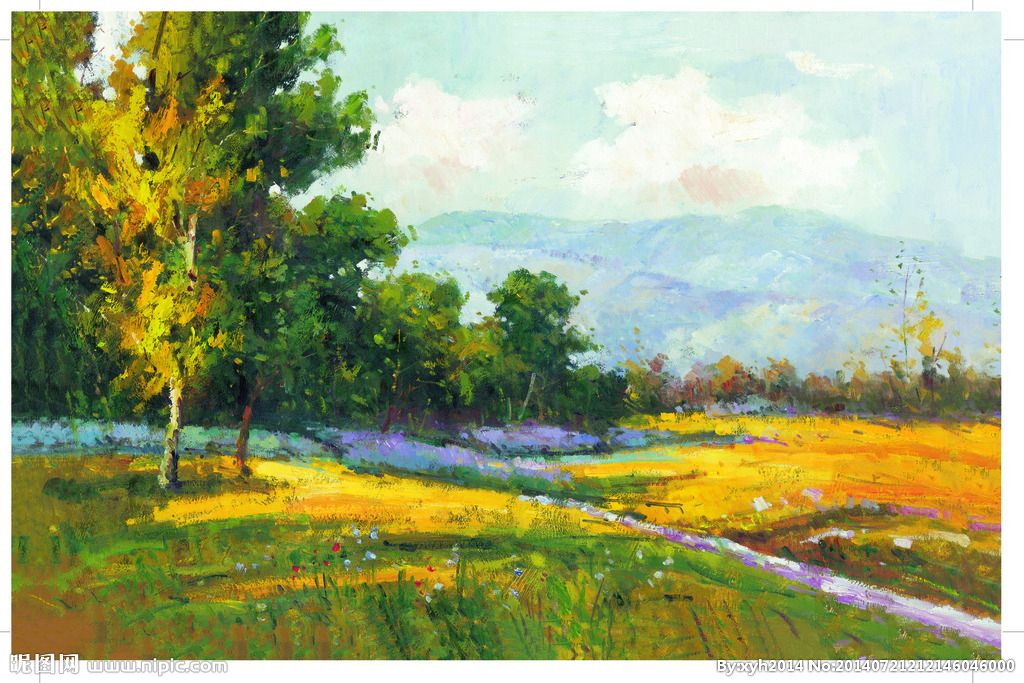
图4 4.jpg

图5 5.png

图6 6.jpg(图1的缩略图)

图7 7.jpg(图1的缩略图)

文章来源: shq5785.blog.csdn.net,作者:No Silver Bullet,版权归原作者所有,如需转载,请联系作者。
原文链接:shq5785.blog.csdn.net/article/details/70232679

- 点赞
- 收藏
- 关注作者
评论(0)