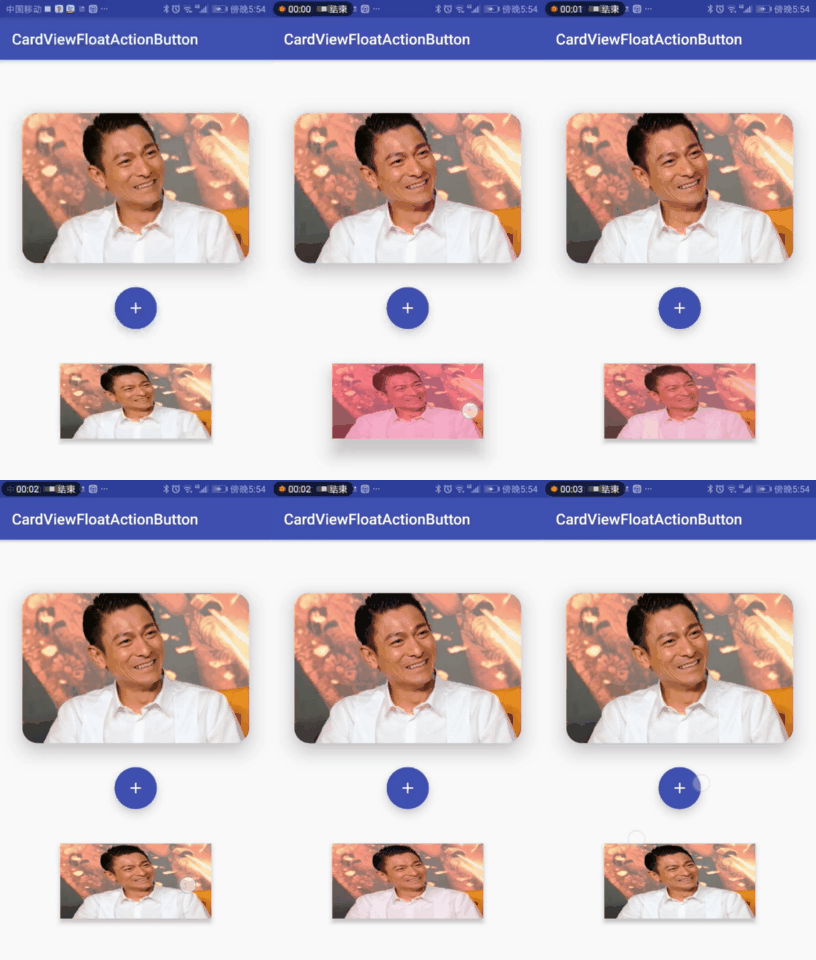
Android高级UI开发(十七)CardView+FloatActionButton+普通Button水波纹问题
自动Android5.0的Material design设计规范推出之后,新增了许多设计比较好的控件,如CardView,浮动按钮等。这些控件来自于com.android.support:design包中。今天我们主要讲布局界面及展示效果,无需额外编写程序代码。
1. CardView在布局中的运用:

-
<LinearLayout xmlns:android="http://schemas.android.com/apk/res/android"
-
xmlns:app="http://schemas.android.com/apk/res-auto"
-
xmlns:tools="http://schemas.android.com/tools"
-
android:layout_width="match_parent"
-
android:layout_height="match_parent"
-
android:gravity="center"
-
android:orientation="vertical">
-
-
<android.support.v7.widget.CardView
-
android:id="@+id/cardView"
-
android:layout_width="300dp"
-
android:layout_height="200dp"
-
android:layout_margin="16dp"
-
android:clickable="true"
-
android:foreground="?attr/selectableItemBackground"
-
android:stateListAnimator="@drawable/z_translation"
-
app:cardCornerRadius="20dp"
-
app:cardElevation="20dp">
-
-
<ImageView
-
android:id="@+id/iv"
-
android:layout_width="match_parent"
-
android:layout_height="wrap_content"
-
android:scaleType="centerCrop"
-
android:src="@drawable/andy" />
-
</android.support.v7.widget.CardView>
-
</LinearLayout>
-
从上述布局中我们可以看出以下几点:
-
(1)CardView显示效果表现为一个卡片,例如信用卡,身份证。
-
(2)CardView可以嵌套任何布局,在这里嵌套的是ImageView
-
(3)可以设置水波纹效果与阴影。
-
-
android:clickable="true" 只有设置为可点击,水波纹效果才能表现出来。
-
android:foreground="?attr/selectableItemBackground" 设置为水波纹效果。
-
android:stateListAnimator="@drawable/z_translation" 当按下卡片时Z轴上执行一个属性动画(Z轴上平移),改变阴影大小。
-
app:cardCornerRadius="20dp" 卡片的圆角
-
app:cardElevation="20dp 通过设置卡片Z轴高度,来设置阴影。
上述@drawable/z_translation属性动画XML配置如下:
-
<?xml version="1.0" encoding="utf-8"?>
-
<selector
-
xmlns:android="http://schemas.android.com/apk/res/android"
-
>
-
<item
-
android:state_pressed="true">
-
<objectAnimator
-
android:duration="@android:integer/config_shortAnimTime"
-
android:propertyName="translationZ"
-
android:valueTo="15dp"
-
android:valueType="floatType"
-
></objectAnimator>
-
</item>
-
-
<item
-
>
-
<objectAnimator
-
android:duration="@android:integer/config_shortAnimTime"
-
android:propertyName="translationZ"
-
android:valueTo="0dp"
-
android:valueType="floatType"
-
></objectAnimator>
-
</item>
-
</selector>
2. 浮动按钮在布局中的运用:
效果图(最下面那个+号是浮动按钮)

-
<android.support.design.widget.FloatingActionButton
-
android:id="@+id/fab"
-
android:layout_width="wrap_content"
-
android:layout_height="wrap_content"
-
android:layout_alignParentBottom="true"
-
android:layout_alignParentRight="true"
-
android:layout_margin="16dp"
-
android:clickable="true"
-
android:src="@drawable/ic_add_white_24dp"
-
app:backgroundTint="?attr/colorPrimary"
-
app:elevation="10dp"
-
app:fabSize="normal"
-
app:pressedTranslationZ="12dp"
-
app:rippleColor="#ff0" />
app:backgroundTint="?attr/colorPrimary" 设置浮动按钮 表面颜色 为主题颜色,也可以设置其它颜色
app:elevation="10dp" 设置Z轴阴影高度,这个相当于卡片中的app:cardElevation属性
app:fabSize="normal" 设置浮动按钮大小为中等大小。
app:pressedTranslationZ="12dp" 设置按下时阴影的变化,这个相当于第1节所讲的阴影在Z轴上的属性动画 ( android:stateListAnimator="@drawable/z_translation")
3.普通Button
普通Button默认是有水波纹效果的,但是当给Button设置了background图片后,Button自带的水波纹效果与阴影就不起作用了。
解决方法,我们以ImageButton为例,需要设置一个background为一个@drawable/ripple.具体请看下面内容。
效果图(最下面那张图片为ImageButton):

ImageButton布局文件:
-
<ImageButton
-
android:id="@+id/btButton"
-
android:layout_width="200dp"
-
android:layout_height="100dp"
-
android:layout_marginTop="30dp"
-
android:background="@drawable/ripple"
-
android:clickable="true"
-
android:elevation="5dp"
-
android:stateListAnimator="@drawable/z_translation" />
其中background=@drawable/ripple用来恢复水波纹效果,那么我们在drawable下新建一个ripple.xml,内容如下:
-
<?xml version="1.0" encoding="utf-8"?>
-
<ripple
-
xmlns:android="http://schemas.android.com/apk/res/android"
-
android:color="@color/colorAccent">//点击时波纹的颜色
-
<item android:drawable="@drawable/andy"/>//未点击时控件的背景(可以是图片,可以是颜色,也可以是drawable里的xml背景(比如圆角))
-
</ripple>
相信,至此ImageButton里的属性不用解释也可以理解了吧。最后送上Demo源码:
https://download.csdn.net/download/gaoxiaoweiandy/10825219
文章来源: blog.csdn.net,作者:冉航--小虾米,版权归原作者所有,如需转载,请联系作者。
原文链接:blog.csdn.net/gaoxiaoweiandy/article/details/84772210
- 点赞
- 收藏
- 关注作者


评论(0)