【Hexo】笔记03:修改Theme

【摘要】 当你看到这里的时候,应该已经有一个自己的 Hexo 博客了。点击 这里 下载 master 分支的最新稳定版的代码,解压缩后,将 hexo-theme-matery 的文件夹复制到你 Hexo 的 themes 文件夹中即可。当然你也可以在你的 themes 文件夹下使用 Git clone 命令来下载:git clone https://github.com/blinkfox/hexo-t...
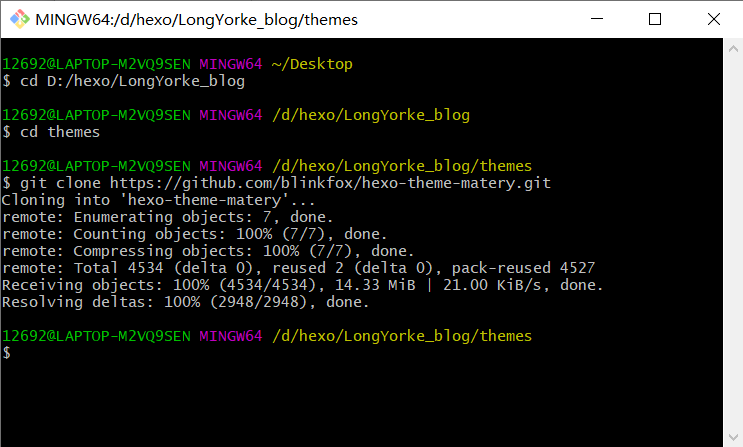
当然你也可以在你的 themes 文件夹下使用 Git clone 命令来下载:
git clone https://github.com/blinkfox/hexo-theme-matery.git
需要提醒一下:比如新建我的博客文件夹,名称为 LongYorke_blog,那么站点配置文件的路径为 LongYorke_blog/_config.yml,而主题配置文件路径为LongYorke_blog/themes/hexo-theme-matery/_config.yml。
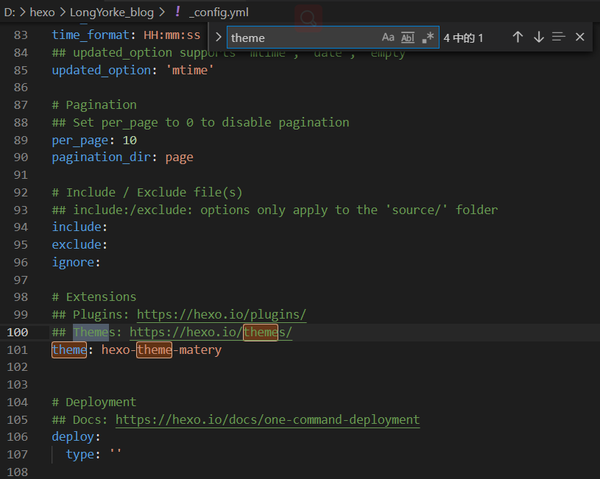
修改 Hexo 根目录下的 _config.yml 的 theme 的值:theme: hexo-theme-matery
_config.yml 文件的其它修改建议:
-
请修改 _config.yml 的 url 的值为你的网站主 URL(如:http://xxx.github.io)。
-
建议修改两个 per_page 的分页条数值为 6 的倍数,如:12、18 等,这样文章列表在各个屏幕下都能较好的显示。
-
如果您是中文用户,则建议修改 language 的值为 zh-CN
一、更改导航栏颜色
在主题文件的theme/matery /source/css/matery.css 文件中,搜索 .bg-color 来修改背景颜色:
.bg-color {
    background-image: linear-gradient(to right, #30aebf 0%, #0f709d 100%);
}
/* .bg-color {
    background-image: linear-gradient(to right, #4cbf30 0%, #0f9d58 100%);
} */

二、取消蒙版特效
在主题文件的 theme/matery /source/css/matery.css 文件中,搜索 .bg-cover:after 注释它(选中+Ctrl+/):

三、修改主题的 logo 图和 favicon 图标
打开你的主题配置文件,找到如下的配置,将其更改为你的 logo 和 favicon 路径即可:
# 配置网站favicon和网站LOGO
favicon: /favicon.png
logo: /favicon.png
原来的logo 和 favicon 路径为LongYorke_blog\themes\hexo-theme-matery\source\medias
四、去掉右上角的 github 图标
打开你的主题配置文件,找到下面的配置:
# Whether to display fork me on github icon and link, default true, You can change it to your repo address
# 配置是否在 header 中显示 fork me on github 的图标,默认为true,你可以修改为你的仓库地址.
githubLink:
  enable: true
  url: https://github.com/blinkfox/hexo-theme-matery
  title: Fork Me
将 enable 的属性值由 true 改为 false 即可。
五、修改 banner 图和文章特色图
你可以直接在 /source/medias/banner 文件夹中更换你喜欢的 banner 图片,主题代码中是每天动态切换一张,只需 7 张即可。如果你会 JavaScript 代码,可以修改成你自己喜欢切换逻辑,如:随机切换等,banner 切换的代码位置在 /layout/_partial/bg-cover-content.ejs 文件的 <script></script> 代码中:
$('.bg-cover').css('background-image', 'url(/medias/banner/' + new Date().getDay() + '.jpg)');
在 /source/medias/featureimages 文件夹中默认有 24 张特色图片,你可以再增加或者减少,并需要在 _config.yml 做同步修改。
如果想改为每小时或者每分钟切换 banner 图的话,需要将 getDay() 改为 getHours() 或者 getMinutes() 即可。
<% if (theme.banner.enable) { %>
<script>
    // 每秒切换 banner 图.  Switch banner image every day.
    //获取指定区间范围随机数,包括lowerValue和upperValue
    function randomFrom(lowerValue,upperValue)
    {
    return Math.floor(Math.random() * (upperValue - lowerValue + 1) + lowerValue);
    }
    var numberPicture = new Date().getSeconds()
    if(numberPicture>24){
        numberPicture-=randomFrom(0,24);
    }
    var bannerUrl = "<%- theme.jsDelivr.url %><%- url_for('/medias/banner/') %>" + numberPicture + '.jpg';
    $('.bg-cover').css('background-image', 'url(' + bannerUrl + ')');
</script>
六、修改社交链接
主页 banner 图中显示的社交链接与底部的社交链接是同步修改的,打开主题配置文件,将社交链接信息修改为你的信息。修改如下:
# 首页 banner 中的第二行个人信息配置,留空即不启用
socialLink:
 github:  https://github.com/LongYorke
 email: 1269217124@qq.com
 facebook: # https://www.facebook.com/xxx
 twitter: # https://twitter.com/xxx
 qq: 1269217124
 weibo: # https://weibo.com/xxx
 zhihu: # https://www.zhihu.com/xxx
 rss: true # true、false
如果想添加简书,CSDN,掘金,博客园等等,需要在主题配置文件添加相关配置:
socialLink:
 github:  https://github.com/LongYorke
 email: 1269217124@qq.com
 facebook: # https://www.facebook.com/xxx
 twitter: # https://twitter.com/xxx
 qq: 1269217124
 weibo: # https://weibo.com/xxx
 zhihu: # https://www.zhihu.com/xxx

 weixin: https://...

 rss: true # true、false
其中的 weixin 链接,会跳转到一个新的标签页,之后还需要修改 ejs 文件,文件在主题目录下的 layout 文件夹下的_partial 文件夹,修改 social-link.ejs,添加相关的配置,配置如下
<% if (theme.socialLink.weixin) { %>
    <a href="<%= theme.socialLink.weixin %>" class="tooltipped" target="_blank" data-tooltip="微信联系我: <%= theme.socialLink.weixin %>" data-position="top" data-delay="50">
        <i class="fab fa-weixin"></i>
    </a>
<% } %>
七、添加首页动态打字效果副标题
在主题配置文件中,找到下面的配置:
# 打字效果副标题.
# 如果有符号 ‘ ,请在 ’ 前面加上 \
subtitle:
  enable: true
  loop: true # 是否循环
  showCursor: true # 是否显示光标
  startDelay: 300 # 开始延迟
  typeSpeed: 100 # 打字速度
  backSpeed: 25 # 删除速度
  sub1: 欢迎访问新型电子标签
  sub2: Welcome to the new electronic tag
注意:
网站打字效果副标题默认有两个,即 sub1 和 sub2,如果想写多个,则需要修改两处地方,首先修改配置文件,如上面所示,在 sub1 和 sub2 后面继续添加即可,然后在去主题目录下的 layout 文件夹下的_partial 文件夹,修改 bg-cover-content.ejs 文件,大约在 12 行左右,如下面所示:
 <div class="description center-align">
     <% if (theme.subtitle.enable) { %>
         <span id="subtitle"></span>
         <script src="https://cdn.jsdelivr.net/npm/typed.js@2.0.11"></script>
        <script>
            var typed = new Typed("#subtitle", {
                strings: ['<%= theme.subtitle.sub1 %>',
                          '<%= theme.subtitle.sub2 %>',
                          '<%= theme.subtitle.sub3 %>',
                          '<%= theme.subtitle.sub4 %>',
                          '<%= theme.subtitle.sub5 %>',
                          '<%= theme.subtitle.sub6 %>'],
                 startDelay: <%= theme.subtitle.startDelay %>,
                 typeSpeed: <%= theme.subtitle.typeSpeed %>,
                 loop: <%= theme.subtitle.loop %>,
                 backSpeed: <%= theme.subtitle.backSpeed %>,
                 showCursor: <%= theme.subtitle.showCursor %>
              });
          </script>
      <% } else { %>
            <%= config.description %>
      <% } %>
</div>
八、鼠标点击烟花特效
在 matery/source/js/ 目录下新建 firework.js,然后将代码复制粘贴进 js 文件里,
"use strict";

function updateCoords(e) {
    pointerX = (e.clientX || e.touches[0].clientX) - canvasEl.getBoundingClientRect().left, pointerY = e.clientY || e.touches[
        0].clientY - canvasEl.getBoundingClientRect().top
}

function setParticuleDirection(e) {
    var t = anime.random(0, 360) * Math.PI / 180,
        a = anime.random(50, 180),
        n = [-1, 1][anime.random(0, 1)] * a;
    return {
        x: e.x + n * Math.cos(t),
        y: e.y + n * Math.sin(t)
    }
}

function createParticule(e, t) {
    var a = {};
    return a.x = e, a.y = t, a.color = colors[anime.random(0, colors.length - 1)], a.radius = anime.random(16, 32), a.endPos =
        setParticuleDirection(a), a.draw = function () {
            ctx.beginPath(), ctx.arc(a.x, a.y, a.radius, 0, 2 * Math.PI, !0), ctx.fillStyle = a.color, ctx.fill()
        }, a
}

function createCircle(e, t) {
    var a = {};
    return a.x = e, a.y = t, a.color = "#F00", a.radius = 0.1, a.alpha = 0.5, a.lineWidth = 6, a.draw = function () {
        ctx.globalAlpha = a.alpha, ctx.beginPath(), ctx.arc(a.x, a.y, a.radius, 0, 2 * Math.PI, !0), ctx.lineWidth =
            a.lineWidth, ctx.strokeStyle = a.color, ctx.stroke(), ctx.globalAlpha = 1
    }, a
}

function renderParticule(e) {
    for (var t = 0; t < e.animatables.length; t++) {
        e.animatables[t].target.draw()
    }
}

function animateParticules(e, t) {
    for (var a = createCircle(e, t), n = [], i = 0; i < numberOfParticules; i++) {
        n.push(createParticule(e, t))
    }
    anime.timeline().add({
        targets: n,
        x: function (e) {
            return e.endPos.x
        },
        y: function (e) {
            return e.endPos.y
        },
        radius: 0.1,
        duration: anime.random(1200, 1800),
        easing: "easeOutExpo",
        update: renderParticule
    }).add({
        targets: a,
        radius: anime.random(80, 160),
        lineWidth: 0,
        alpha: {
            value: 0,
            easing: "linear",
            duration: anime.random(600, 800)
        },
        duration: anime.random(1200, 1800),
        easing: "easeOutExpo",
        update: renderParticule,
        offset: 0
    })
}

function debounce(e, t) {
    var a;
    return function () {
        var n = this,
            i = arguments;
        clearTimeout(a), a = setTimeout(function () {
            e.apply(n, i)
        }, t)
    }
}
var canvasEl = document.querySelector(".fireworks");
if (canvasEl) {
    var ctx = canvasEl.getContext("2d"),
        numberOfParticules = 30,
        pointerX = 0,
        pointerY = 0,
        tap = "mousedown",
        colors = ["#FF1461", "#18FF92", "#5A87FF", "#FBF38C"],
        setCanvasSize = debounce(function () {
            canvasEl.width = 2 * window.innerWidth, canvasEl.height = 2 * window.innerHeight, canvasEl.style.width =
                window.innerWidth + "px", canvasEl.style.height = window.innerHeight + "px", canvasEl.getContext(
                    "2d").scale(2, 2)
        }, 500),
        render = anime({
            duration: 1 / 0,
            update: function () {
                ctx.clearRect(0, 0, canvasEl.width, canvasEl.height)
            }
        });
    document.addEventListener(tap, function (e) {
        "sidebar" !== e.target.id && "toggle-sidebar" !== e.target.id && "A" !== e.target.nodeName && "IMG" !==
            e.target.nodeName && (render.play(), updateCoords(e), animateParticules(pointerX, pointerY))
    }, !1), setCanvasSize(), window.addEventListener("resize", setCanvasSize, !1)
}
"use strict";

function updateCoords(e) {
    pointerX = (e.clientX || e.touches[0].clientX) - canvasEl.getBoundingClientRect().left, pointerY = e.clientY || e.touches[
        0].clientY - canvasEl.getBoundingClientRect().top
}

function setParticuleDirection(e) {
    var t = anime.random(0, 360) * Math.PI / 180,
        a = anime.random(50, 180),
        n = [-1, 1][anime.random(0, 1)] * a;
    return {
        x: e.x + n * Math.cos(t),
        y: e.y + n * Math.sin(t)
    }
}

function createParticule(e, t) {
    var a = {};
    return a.x = e, a.y = t, a.color = colors[anime.random(0, colors.length - 1)], a.radius = anime.random(16, 32), a.endPos =
        setParticuleDirection(a), a.draw = function () {
            ctx.beginPath(), ctx.arc(a.x, a.y, a.radius, 0, 2 * Math.PI, !0), ctx.fillStyle = a.color, ctx.fill()
        }, a
}

function createCircle(e, t) {
    var a = {};
    return a.x = e, a.y = t, a.color = "#F00", a.radius = 0.1, a.alpha = 0.5, a.lineWidth = 6, a.draw = function () {
        ctx.globalAlpha = a.alpha, ctx.beginPath(), ctx.arc(a.x, a.y, a.radius, 0, 2 * Math.PI, !0), ctx.lineWidth =
            a.lineWidth, ctx.strokeStyle = a.color, ctx.stroke(), ctx.globalAlpha = 1
    }, a
}

function renderParticule(e) {
    for (var t = 0; t < e.animatables.length; t++) {
        e.animatables[t].target.draw()
    }
}

function animateParticules(e, t) {
    for (var a = createCircle(e, t), n = [], i = 0; i < numberOfParticules; i++) {
        n.push(createParticule(e, t))
    }
    anime.timeline().add({
        targets: n,
        x: function (e) {
            return e.endPos.x
        },
        y: function (e) {
            return e.endPos.y
        },
        radius: 0.1,
        duration: anime.random(1200, 1800),
        easing: "easeOutExpo",
        update: renderParticule
    }).add({
        targets: a,
        radius: anime.random(80, 160),
        lineWidth: 0,
        alpha: {
            value: 0,
            easing: "linear",
            duration: anime.random(600, 800)
        },
        duration: anime.random(1200, 1800),
        easing: "easeOutExpo",
        update: renderParticule,
        offset: 0
    })
}

function debounce(e, t) {
    var a;
    return function () {
        var n = this,
            i = arguments;
        clearTimeout(a), a = setTimeout(function () {
            e.apply(n, i)
        }, t)
    }
}
var canvasEl = document.querySelector(".fireworks");
if (canvasEl) {
    var ctx = canvasEl.getContext("2d"),
        numberOfParticules = 30,
        pointerX = 0,
        pointerY = 0,
        tap = "mousedown",
        colors = ["#FF1461", "#18FF92", "#5A87FF", "#FBF38C"],
        setCanvasSize = debounce(function () {
            canvasEl.width = 2 * window.innerWidth, canvasEl.height = 2 * window.innerHeight, canvasEl.style.width =
                window.innerWidth + "px", canvasEl.style.height = window.innerHeight + "px", canvasEl.getContext(
                    "2d").scale(2, 2)
        }, 500),
        render = anime({
            duration: 1 / 0,
            update: function () {
                ctx.clearRect(0, 0, canvasEl.width, canvasEl.height)
            }
        });
    document.addEventListener(tap, function (e) {
        "sidebar" !== e.target.id && "toggle-sidebar" !== e.target.id && "A" !== e.target.nodeName && "IMG" !==
            e.target.nodeName && (render.play(), updateCoords(e), animateParticules(pointerX, pointerY))
    }, !1), setCanvasSize(), window.addEventListener("resize", setCanvasSize, !1)
};
然后在 layout.ejs 文件里引用,最后本地运行查看效果即可。
<canvas class="fireworks" style="position: fixed;left: 0;top: 0;z-index: 1; pointer-events: none;" ></canvas>
<script type="text/javascript" src="//cdn.bootcss.com/animejs/2.2.0/anime.min.js"></script>
<script type="text/javascript" src="/js/fireworks.js"></script>
九、添加天气小插件
配置自己的插件,选择自定义插件 —> 自定义样式 ——> 生成代码,然后会生成一段代码,复制粘贴到 themes/matery/layout/layout.ejs,插入到 </body> 标签之前即可。
十、修改页脚
找到theme/matery/layout/_partial/footer.ejs 文件,修改对应样式为
 注释掉theme
十一、新建 404 页
如果在你的博客 source 目录下还没有 404.md 文件,那么你就需要新建一个
编辑你刚刚新建的页面文件 /source/404.md,至少需要以下内容:
---
title: 404
date: 2020-10-3 18:19:22
type: "404"
layout: "404"
description: "(╯‵□′)╯︵┻━┻,我崩溃了!找不到你想要的页面"
---
紧接着再新建主题文件夹的 layout 目录下新建 404.ejs 文件,添加内容如下:
<style type="text/css">
    /* don't remove. */
    .about-cover {
        height: 90.2vh;
    }
</style>
<div class="bg-cover pd-header about-cover">
    <div class="container">
        <div class="row">
            <div class="col s10 offset-s1 m8 offset-m2 l8 offset-l2">
                <div class="brand">
                    <div class="title center-align">
                        404
                    </div>
                    <div class="description center-align">
                        <%= page.description %>
                    </div>
                </div>
            </div>
        </div>
    </div>
</div>

<% if (theme.banner.enable) { %>
    <script>
        // 每天切换 banner 图.  Switch banner image every day.
        var bannerUrl = "<%- theme.jsDelivr.url %><%- url_for('/medias/banner/') %>" + new Date().getDay() + '.jpg';
        $('.bg-cover').css('background-image', 'url(' + bannerUrl + ')');
    </script>
<% } else { %>
    <script>
        $('.bg-cover').css('background-image', 'url(<%- theme.jsDelivr.url %><%- url_for('/medias/banner/0.jpg') %>)');
    </script>
<% } %>
十二、代码高亮
npm i -S hexo-prism-plugin
然后,修改 Hexo 根目录下 _config.yml 文件中 highlight.enable 的值为 false,并新增 prism 插件相关的配置,主要配置如下:
highlight:
  enable: false

prism_plugin:
  mode: 'preprocess'    # realtime/preprocess
  theme: 'tomorrow'
  line_number: false    # default false
  custom_css:
十三、搜索
npm install hexo-generator-search --save
在 Hexo 根目录下的 _config.yml 文件中,新增以下的配置项:
search:
  path: search.xml
  field: post
十四、中文链接转拼音(建议安装)
如果你的文章名称是中文的,那么 Hexo 默认生成的永久链接也会有中文,这样不利于 SEO,且 gitment 评论对中文链接也不支持。我们可以用 hexo-permalink-pinyin Hexo 插件使在生成文章时生成中文拼音的永久链接。
安装命令如下:
npm i hexo-permalink-pinyin --save
在 Hexo 根目录下的 _config.yml 文件中,新增以下的配置项:
permalink_pinyin:
  enable: true
  separator: '-' # default: '-'
注:除了此插件外,hexo-abbrlink 插件也可以生成非中文的链接。
十五、修改打赏的二维码图片
在主题文件的 source/medias/reward 文件中,你可以替换成你的的微信和支付宝的打赏二维码图片。
十六、背景静止彩带
LongYorke_blog\themes\hexo-theme-matery下的__config.yml文件中
enable: true
# 背景静止彩带.
ribbon:
 enable: true
 size: 150 # 彩带大小, 默认: 90.
 alpha: 0.6 # 彩带透明度 (0 ~ 1), 默认: 0.6.
 zIndex: -1 # 背景的z-index属性,css属性用于控制所在层的位置, 默认: -1.
 clickChange: false # 设置是否每次点击都更换彩带.

# 背景动态彩带.
ribbon_dynamic:
 enable: true
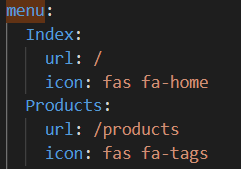
十七、菜单导航配置
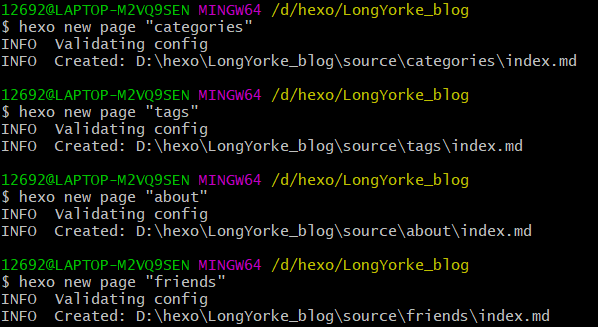
首先新建页面,执行下面的命令
hexo new page "(菜单名字)"
编辑你刚刚新建的页面文件/source/products/index.md,至少需要以下内容:
---
title: products
date: 2020-10-17 11:11:46
type: "products"
layout: "products"
---
在LongYorke_blog\themes\hexo-theme-matery中修改_config.yml文件
再于LongYorke_blog\themes\hexo-theme-matery\layout\_partial找到两个文件
mobile-nav.ejs
navgation.ejs
再于LongYorke_blog\themes\hexo-theme-matery\layout\_partial找到两个文件 mobile-nav.ejs navgation.ejs
在<%
....
%> 中添加 menuMap.set("Products", "产品");
同理可得
新建留言板 contact 页(可选的)
contact 页是用来展示留言板信息的页面,如果在你的博客 source 目录下还没有 contact/index.md 文件,那么你就需要新建一个,命令如下:
hexo new page "contact"
编辑你刚刚新建的页面文件 /source/contact/index.md,至少需要以下内容:
---
title: contact
date: 2020-10-03 18:02:36
type: "contact"
layout: "contact"
---
注:本留言板功能依赖于第三方评论系统,请激活你的评论系统才有效果。并且在主题的 _config.yml 文件中,第 19 至 21 行的“菜单”配置,取消关于留言板的注释即可。
新建友情链接 friends 页(可选的)
friends 页是用来展示友情链接信息的页面,如果在你的博客 source 目录下还没有 friends/index.md 文件,那么你就需要新建一个,命令如下:
hexo new page "friends"
编辑你刚刚新建的页面文件 /source/friends/index.md,至少需要以下内容:
---
title: friends
date: 2020-10-03 18:07:05
type: "friends"
layout: "friends"
---
同时,在你的博客 source 目录下新建 _data 目录,在 _data 目录中新建 friends.json 文件,文件内容如下所示:
[{
    "avatar": "http://image.luokangyuan.com/1_qq_27922023.jpg",
    "name": "码酱",
    "introduction": "我不是大佬,只是在追寻大佬的脚步",
    "url": "http://luokangyuan.com/",
    "title": "前往"
}, {
    "avatar": "http://image.luokangyuan.com/4027734.jpeg",
    "name": "前往",
    "introduction": "编程界大佬,技术牛,人还特别好,不懂的都可以请教大佬",
    "url": "https://blinkfox.github.io/",
    "title": "前去学习"
}, {
    "avatar": "http://image.luokangyuan.com/avatar.jpg",
    "name": "ja_rome",
    "introduction": "平凡的脚步也可以走出伟大的行程",
    "url": "https://me.csdn.net/jlh912008548",
    "title": "前往"
}]
如果碰到主页可以正常访问,但是文章访问不了的情况,应该是Matery主题的问题,mculover666告诉我们解决方案是,使用命令npm i --save hexo-wordcount安装这个插件,然后重新清除生成部署三连即可

【声明】本内容来自华为云开发者社区博主,不代表华为云及华为云开发者社区的观点和立场。转载时必须标注文章的来源(华为云社区)、文章链接、文章作者等基本信息,否则作者和本社区有权追究责任。如果您发现本社区中有涉嫌抄袭的内容,欢迎发送邮件进行举报,并提供相关证据,一经查实,本社区将立刻删除涉嫌侵权内容,举报邮箱:
cloudbbs@huaweicloud.com
- 点赞
- 收藏
- 关注作者
评论(0)