HDFS系列(7) | HDFS的 I/O流 API操作

【摘要】
上一篇博文我们分享的API操作HDFS系统都是框架封装好的。那么如果我们想自己实现上述API的操作该怎么实现呢? 此次物品们介绍的是采用I/O流的方式实现数据的上传和下载。
目录
一. HDFS文件上传二. HDFS文件下载三. 定位文件读取
一. HDFS文件上传
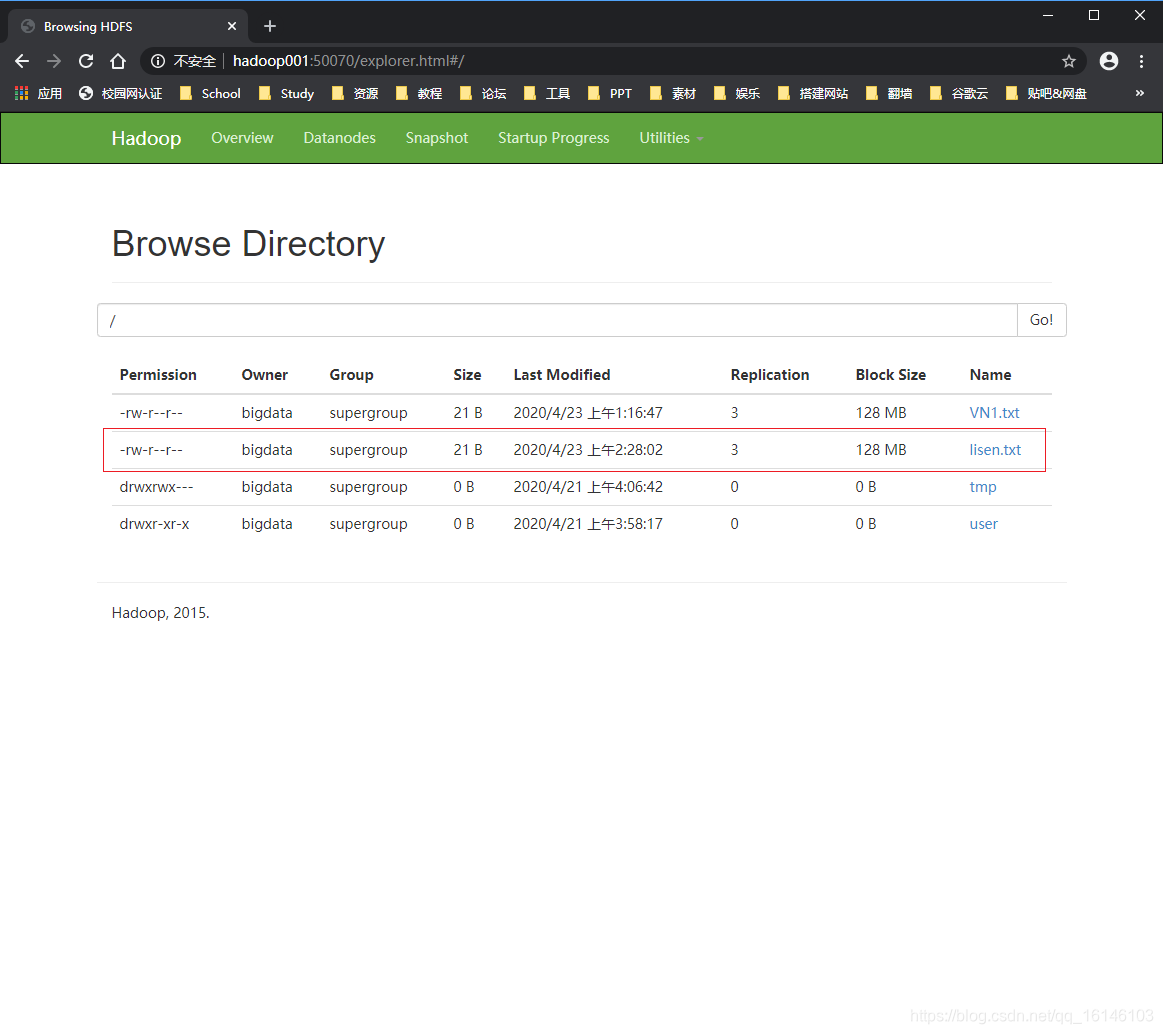
需求:把本地d盘上的lisen.txt文件上传到HDFS根目录
1....
上一篇博文我们分享的API操作HDFS系统都是框架封装好的。那么如果我们想自己实现上述API的操作该怎么实现呢?
此次物品们介绍的是采用I/O流的方式实现数据的上传和下载。
一. HDFS文件上传
需求:把本地d盘上的lisen.txt文件上传到HDFS根目录
- 1. 代码
package com.buwenbuhuo.hdfs;


import org.apache.hadoop.conf.Configuration;
import org.apache.hadoop.fs.*;
import org.apache.hadoop.io.IOUtils;
import org.junit.Test;

import java.io.File;
import java.io.FileInputStream;
import java.io.IOException;
import java.net.URI;
import java.net.URISyntaxException;

/**
 * @author buwenbuhuo
 * @create 2020-04-22 18:26
 * com.buwenbuhuo.hdfs - the name of the target package where the new class or interface will be created.
 * hdfs0422 - the name of the current project.
 */
public class HDFSClient { @Test public void putFileToHDFS() throws IOException, InterruptedException, URISyntaxException { // 1 获取文件系统 Configuration configuration = new Configuration(); FileSystem fs = FileSystem.get(URI.create("hdfs://hadoop001:9000"), configuration, "bigdata"); // 2 创建输入流 FileInputStream fis = new FileInputStream(new File("d:/lisen.txt")); // 3 获取输出流 FSDataOutputStream fos = fs.create(new Path("/lisen.txt")); // 4 流对拷 IOUtils.copyBytes(fis, fos, configuration); // 5 关闭资源 IOUtils.closeStream(fos); IOUtils.closeStream(fis); fs.close(); } }
- 1
- 2
- 3
- 4
- 5
- 6
- 7
- 8
- 9
- 10
- 11
- 12
- 13
- 14
- 15
- 16
- 17
- 18
- 19
- 20
- 21
- 22
- 23
- 24
- 25
- 26
- 27
- 28
- 29
- 30
- 31
- 32
- 33
- 34
- 35
- 36
- 37
- 38
- 39
- 40
- 41
- 42
- 43
- 44
- 45
- 46
- 2. 结果

二. HDFS文件下载
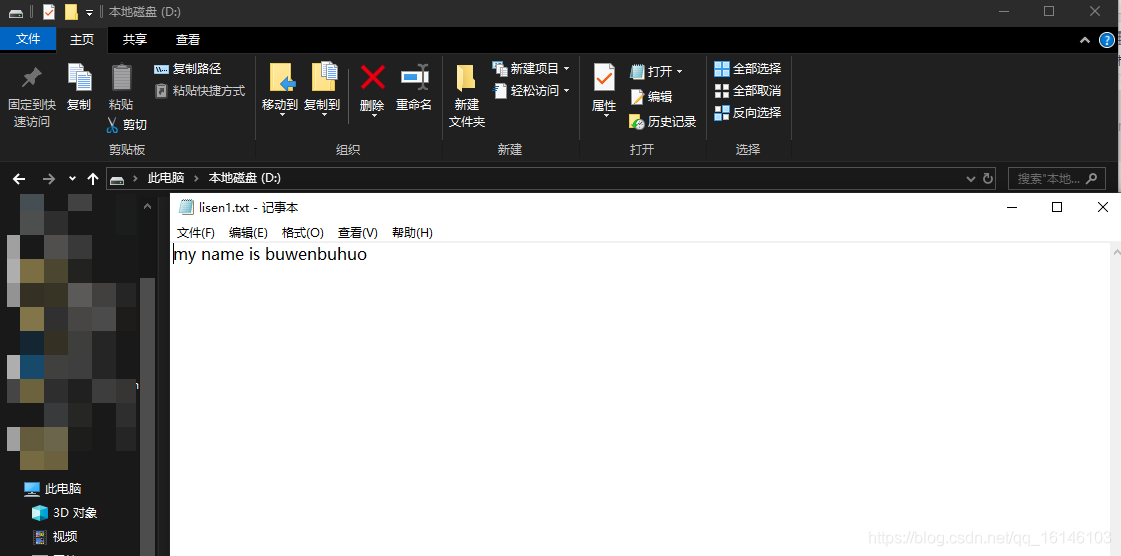
需求:从HDFS上下载lisen.txt文件到本地d盘上
- 1.代码
// 文件下载
@Test
public void getFileFromHDFS() throws IOException, InterruptedException, URISyntaxException{

	// 1 获取文件系统
	Configuration configuration = new Configuration();
	FileSystem fs = FileSystem.get(URI.create("hdfs://hadoop001:9000"), configuration, "bigdata"); // 2 获取输入流
	FSDataInputStream fis = fs.open(new Path("/lisen.txt")); // 3 获取输出流
	FileOutputStream fos = new FileOutputStream(new File("d:/lisen1.txt")); // 4 流的对拷
	IOUtils.copyBytes(fis, fos, configuration); // 5 关闭资源
	IOUtils.closeStream(fos);
	IOUtils.closeStream(fis);
	fs.close();
}
- 1
- 2
- 3
- 4
- 5
- 6
- 7
- 8
- 9
- 10
- 11
- 12
- 13
- 14
- 15
- 16
- 17
- 18
- 19
- 20
- 21
- 22
- 23
- 2. 结果
三. 定位文件读取
需求:分块读取HDFS上的大文件,比如根目录下的/hadoop-2.7.2.tar.gz
- 1. 下载第一块
@Test
public void readFileSeek1() throws IOException, InterruptedException, URISyntaxException{

	// 1 获取文件系统
	Configuration configuration = new Configuration();
	FileSystem fs = FileSystem.get(URI.create("hdfs://hadoop001:9000"), configuration, "bigdata"); // 2 获取输入流
	FSDataInputStream fis = fs.open(new Path("/hadoop-2.7.2.tar.gz")); // 3 创建输出流
	FileOutputStream fos = new FileOutputStream(new File("d:/hadoop-2.7.2.tar.gz.part1")); // 4 流的拷贝
	byte[] buf = new byte[1024]; for(int i =0 ; i < 1024 * 128; i++){
		fis.read(buf);
		fos.write(buf);
	} // 5关闭资源
	IOUtils.closeStream(fis);
	IOUtils.closeStream(fos);
fs.close();
}
- 1
- 2
- 3
- 4
- 5
- 6
- 7
- 8
- 9
- 10
- 11
- 12
- 13
- 14
- 15
- 16
- 17
- 18
- 19
- 20
- 21
- 22
- 23
- 24
- 25
- 26
- 27
- 2. 下载第二块
@Test
public void readFileSeek2() throws IOException, InterruptedException, URISyntaxException{

	// 1 获取文件系统
	Configuration configuration = new Configuration();
	FileSystem fs = FileSystem.get(URI.create("hdfs://hadoop001:9000"), configuration, "bigdata"); // 2 打开输入流
	FSDataInputStream fis = fs.open(new Path("/hadoop-2.7.2.tar.gz")); // 3 定位输入数据位置
	fis.seek(1024*1024*128); // 4 创建输出流
	FileOutputStream fos = new FileOutputStream(new File("d:/hadoop-2.7.2.tar.gz.part2")); // 5 流的对拷
	IOUtils.copyBytes(fis, fos, configuration); // 6 关闭资源
	IOUtils.closeStream(fis);
	IOUtils.closeStream(fos);
}
- 1
- 2
- 3
- 4
- 5
- 6
- 7
- 8
- 9
- 10
- 11
- 12
- 13
- 14
- 15
- 16
- 17
- 18
- 19
- 20
- 21
- 22
- 23
- 24
- 3. 合并文件
在Window命令窗口中进入到目录D:\,然后执行如下命令,对数据进行合并
type hadoop-2.7.2.tar.gz.part2 >> hadoop-2.7.2.tar.gz.part1
- 1
合并完成后,将hadoop-2.7.2.tar.gz.part1重新命名为hadoop-2.7.2.tar.gz。解压发现该tar包非常完整。
为了方便大家理解,在代码中博主都写有注释,因此在这里就不作过多的过程说明了。那么本次的分享就到这里了,小伙伴们有什么疑惑或好的建议可以积极在评论区留言,博主后续还会推出HDFS系列的其他内容,希望大家持续关注博主!
文章来源: buwenbuhuo.blog.csdn.net,作者:不温卜火,版权归原作者所有,如需转载,请联系作者。
原文链接:buwenbuhuo.blog.csdn.net/article/details/105689635

【版权声明】本文为华为云社区用户转载文章,如果您发现本社区中有涉嫌抄袭的内容,欢迎发送邮件进行举报,并提供相关证据,一经查实,本社区将立刻删除涉嫌侵权内容,举报邮箱:
cloudbbs@huaweicloud.com
- 点赞
- 收藏
- 关注作者
评论(0)