前端web开发用Vue框架实现几个简单的案例

【摘要】 一、用Vue 做一个简单的比较两个数字的大小的页面 二、用Vue做一个简单网页计算器 用插槽实现一个导航栏 编写一个登录页面,使用Tab栏实现“账号登录”和“二维码登录”这两种方式的切换,并通过transition组件结合animate.css实现切换时的动画效果 一、用Vue 做一个简单的比较两个数字的大小的页面1、 考核知识点创建vue实例和对v-model内置指令的使用2、 练习目标...
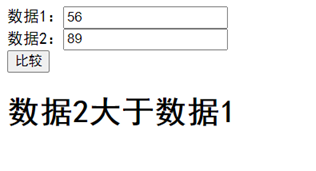
一、用Vue 做一个简单的比较两个数字的大小的页面
1、 考核知识点
创建vue实例和对v-model内置指令的使用
2、 练习目标
创建vue实例。
掌握v-model内置指令的使用。
3、 需求分析
用户输入的两个数据,得到其大小返回比较结果。
4、 案例分析
- 效果如图所示。
<!DOCTYPE html>
<html lang="en">
<head>
    <meta charset="UTF-8">
    <meta http-equiv="X-UA-Compatible" content="IE=edge">
    <meta name="viewport" content="width=device-width, initial-scale=1.0">
    <title>比较大小</title>
    <style>
        .compare{
              margin: 0 auto;
              width: 500px;
            }
            ul{
              padding: 0;
            }
            ul li {
              list-style: none;
              margin-top: 0px;
            }
        .result{
          font-size: 30px;
        }
         </style>

    <script src="vue.js"></script>
</head>
<body>
    <div id="app">
        <!-- 定义页面结构 -->
        <div class="compare">
          <ul>
            <li>数据1:<input type="text" v-model="num1"></li>
            <li>数据2:<input type="text" v-model="num2"></li>
            <li><input type="button" value="比较" @click='compare()'></li>
          </ul>
          <div class="result">{{result}}</div>
        </div>
    </div>
    <script>
        var vm = new Vue({
          el: '#app',
          // 定义初始数据
          data: {
            num1: '',
            num2: '',
            result: ''
          },
          // 定义事件处理函数compare
          methods: {
            compare() {
              if (!this.num1 || !this.num2) {
                this.result = '输入的数不能为空'
              } else {
                this.result = parseInt(this.num1) == parseInt(this.num2) ? '两个数相等' : parseInt(this.num1) > parseInt(this.num2) ? '数据1大于数据2' : '数据2大于数据1'
              }
            }
          }
        })
      </script>

</body>
</html>
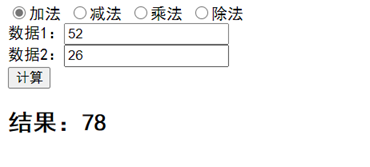
二、用Vue做一个简单网页计算器
1、 考核知识点
2、 创建vue实例和对v-model内置指令的使用
3、 练习目标
创建vue实例。
掌握v-model内置指令的使用。
4、 需求分析
用户通过选择计算方法和数据输入,得到计算结果。
5、 案例分析
- 效果如图所示。

<!DOCTYPE html>
<html lang="en">
<head>
    <meta charset="UTF-8">
    <meta http-equiv="X-UA-Compatible" content="IE=edge">
    <meta name="viewport" content="width=device-width, initial-scale=1.0">
    <title>计算器</title>
    <script src="vue.js"></script>
    <style>
      .result{
        font-size: 30px;
      }
    </style>
</head>
<body>
    <div id="app">
        <!-- 定义页面结构 -->
        <div class="calc">
          <input type="radio"  value="1" v-model="fuhao"/>加法
          <input type="radio"  value="2" v-model="fuhao"/>减法
          <input type="radio"  value="3" v-model="fuhao"/>乘法
          <input type="radio"  value="4" v-model="fuhao"/>除法
          <ul>
            <li>
              数据1:<input type="text" v-model="num1">
            </li>
            <li>
              数据2:<input type="text" v-model="num2">
            </li>
            <li>
              <input type="button" value="计算" @click='calc()'>
            </li>
          </ul>
          <div class="result">结果:{{result}}</div>
        </div>
      </div>
      <script>
        var vm = new Vue({
          el: '#app',
          // 定义初始数据
          data: {
            fuhao: '1',
            num1: '',
            num2: '',
            result: ''
          },
          // 定义事件处理函数Calc
          methods: {
            calc() {
              if (!this.num1 || !this.num2) {
                this.result = '输入的数不能为空'
              } else {
                if (this.fuhao == 1) {
                  this.result = parseInt(this.num1) + parseInt(this.num2)
                }
                if (this.fuhao == 2) {
                  this.result = parseInt(this.num1) - parseInt(this.num2)
                }
                if (this.fuhao == 3) {
                  this.result = parseInt(this.num1) * parseInt(this.num2)
                }
                if (this.fuhao == 4) {
                  this.result = parseInt(this.num1) / parseInt(this.num2)
                }
              }
            }
          }
        })
      </script>
</body>
</html>
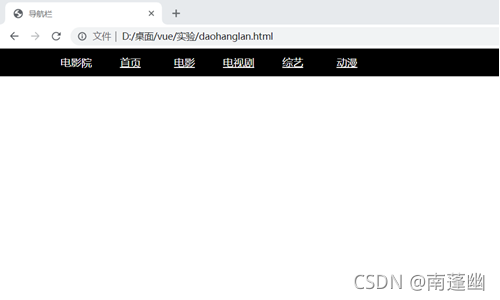
用插槽实现一个导航栏
每次访问电影网站,都会看到一个导航栏,今天就仿照一个导航栏结构。
<!DOCTYPE html>
<html lang="en">
<head>
    <meta charset="UTF-8">
    <meta http-equiv="X-UA-Compatible" content="IE=edge">
    <meta name="viewport" content="width=device-width, initial-scale=1.0">
    <title>导航栏</title>
    <style>
        * {
          margin: 0;
          padding: 0
        }
        ul {
          list-style: none;
        }
        .c-nav {
          width: 900px;
          height: 42px;
          margin: 0 auto;
          border-radius: 5px;
          position: relative;
        }
        .c-nav li {
          float: left;
          width: 83px;
          text-align: center;
          line-height: 42px;

        }
        .c-nav li a {
          color: rgb(253, 252, 252);
          display: inline-block;
          height: 42px;
        }
        header {
          background: rgb(0, 0, 0);
        }
        .c-nav li.current a {
          color: rgb(54, 17, 221);
          background-color: rgb(255, 0, 0);
        }
      </style>
      <script src="./vue.js"></script>
</head>
<body>
    <div id="app">
        <my-component>
          <!-- 定义导航栏结构 -->
          <template v-slot:header>
            <div id="c_nav" class="c-nav">
              <ul><li><a>电影院</a></li></ul>
              <ul ref='nav'>
                <li v-bind:class="name" v-for="item,key in list" @mouseenter="current(key)" @mouseleave="cancel(key)" :id=key>
                  <a href="https://www.baidu.com/">{{item}}</a>
                </li>
              </ul>
            </div>
          </template>
        </my-component>
      </div>
      <script>
        // 注册组件
        Vue.component('my-component', {
          render(createElement) {
            return createElement('div', [
              createElement('header', this.$slots.header),
            ])
          }
        })
        var vm = new Vue({
          el: '#app',
          // 定义初始数据
          data: {
            list: ['首页', '电影', '电视剧', '综艺', '动漫'],
            name:' '

          },
          methods: {
            // 定义事件处理函数
            current(key) {
              vm.$refs.nav.getElementsByTagName('li')[key].className = 'current'; //鼠标悬停
            },
            cancel(key) {
                vm.$refs.nav.getElementsByTagName('li')[key].className = ''; //鼠标离开
            }
          }
        })
      </script>
</body>
</html>
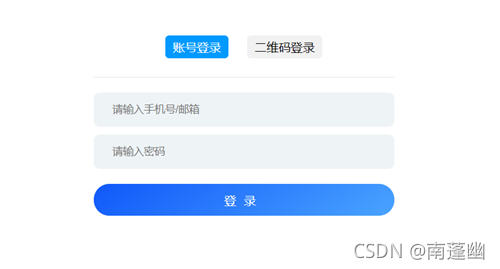
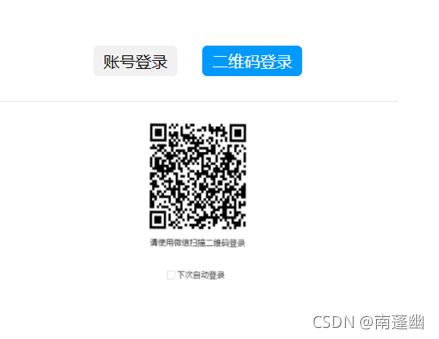
编写一个登录页面,使用Tab栏实现“账号登录”和“二维码登录”这两种方式的切换,并通过transition组件结合animate.css实现切换时的动画效果
1.CSS样式
编写自己想要的大小,颜色等
#content{
    width: 400px;;
    margin: 60px auto;
  }
  .title{
    height: 50px;
    border-bottom: 1px solid #e1e7ec;
    text-align: center;
  }
  #content a{
    text-decoration: none;
    color: black;
    font-size: 16px;
    background: #f1f1f1;
    padding: 5px 10px;
    margin: 0 10px;
    border-radius: 5px;
  }
  .form-input{
    height: 46px;
    line-height: 46px;
    margin-top: 10px;;
  }
  input{
    box-sizing: border-box;
    padding: 0 25px;
    background: #eef3f5;
    border-radius: 8px;
    width: 100%;
    height: 100%;
    border: 0;
    outline: 0;
    font-size: 14px;
  }
  #content .active{
    background-color: #09f;
    color: #fff;
  }
  .primary-button{
    background: linear-gradient(325deg,#4aa4ff,#1058fa);
    width: 100%;
    height: 42px;
    border-radius: 23px;
    border: 0;
    outline: none;
    color: #fff;
    letter-spacing: 10px;
    font-weight: 500;
    font-size: 16px;
    cursor: pointer;
    margin-top: 30px;
  }
  .pic{
    width: 200px;
    height: 200px;
    margin: 0 auto;
  }
  .pic img{
    width: 100%;
    height: 100%;
  }
2.页面结构
<!-- 定义登录组件 -->
  <template id="example1">
    <div>
     <!-- 唯一的根容器 -->
     <div class="form-input">
       <input type="text" name="user" placeholder="请输入手机号/邮箱" class="form-input">
     </div>
     <div class="form-input">
         <input type="password" name="psd" placeholder="请输入密码" class="form-input">
     </div>
     <button type="button" class="primary-button"><span>登录</span></button>
    </div>
   </template>
   <!-- 二维码登录 -->
   <template id="example2">
     <div class="pic">
       <img src="./erweima.png">
     </div>
   </template>
   <div id="content">
     <div class="title">
       <a href="javascript:;" @click="compontentName = 'example1',cur=0" :class="{active:cur == 0}">账号登录</a>
       <a href="javascript:;" @click="compontentName = 'example2',cur=1" :class="{active:cur == 1}">二维码登录</a>
     </div>
     <transition enter-active-class="animated bounceInDown">
       <component :is="compontentName"></component>
     </transition>
   </div>
3.Javascript
    Vue.component('example1',{template:'#example1'})
    Vue.component('example2',{template:'#example2'})
    var vm = new Vue({
      el: '#content',
      data: {
        compontentName :'example1',
        cur:0
        }
    });
全代码:
<!DOCTYPE html>
<html lang="en">
<head>
    <meta charset="UTF-8">
    <meta http-equiv="X-UA-Compatible" content="IE=edge">
    <meta name="viewport" content="width=device-width, initial-scale=1.0">
    <title>登录</title>
    <script src="https://cdn.staticfile.org/vue/2.2.2/vue.min.js"></script>
    <link href="https://cdn.jsdelivr.net/npm/animate.css@3.5.1" rel="stylesheet" type="text/css">
<style>
  #content{
    width: 400px;;
    margin: 60px auto;
  }
  .title{
    height: 50px;
    border-bottom: 1px solid #e1e7ec;
    text-align: center;
  }
  #content a{
    text-decoration: none;
    color: black;
    font-size: 16px;
    background: #f1f1f1;
    padding: 5px 10px;
    margin: 0 10px;
    border-radius: 5px;
  }
  .form-input{
    height: 46px;
    line-height: 46px;
    margin-top: 10px;;
  }
  input{
    box-sizing: border-box;
    padding: 0 25px;
    background: #eef3f5;
    border-radius: 8px;
    width: 100%;
    height: 100%;
    border: 0;
    outline: 0;
    font-size: 14px;
  }
  #content .active{
    background-color: #09f;
    color: #fff;
  }
  .primary-button{
    background: linear-gradient(325deg,#4aa4ff,#1058fa);
    width: 100%;
    height: 42px;
    border-radius: 23px;
    border: 0;
    outline: none;
    color: #fff;
    letter-spacing: 10px;
    font-weight: 500;
    font-size: 16px;
    cursor: pointer;
    margin-top: 30px;
  }
  .pic{
    width: 200px;
    height: 200px;
    margin: 0 auto;
  }
  .pic img{
    width: 100%;
    height: 100%;
  }
</style>
</head>
<body>
    <!-- 定义登录组件 -->
  <template id="example1">
    <div>
     <!-- 唯一的根容器 -->
     <div class="form-input">
       <input type="text" name="user" placeholder="请输入手机号/邮箱" class="form-input">
     </div>
     <div class="form-input">
         <input type="password" name="psd" placeholder="请输入密码" class="form-input">
     </div>
     <button type="button" class="primary-button"><span>登录</span></button>
    </div>
   </template>
   <!-- 二维码登录 -->
   <template id="example2">
     <div class="pic">
       <img src="./erweima.png">
     </div>
   </template>
   <div id="content">
     <div class="title">
       <a href="javascript:;" @click="compontentName = 'example1',cur=0" :class="{active:cur == 0}">账号登录</a>
       <a href="javascript:;" @click="compontentName = 'example2',cur=1" :class="{active:cur == 1}">二维码登录</a>
     </div>
     <transition enter-active-class="animated bounceInDown">
       <component :is="compontentName"></component>
     </transition>
   </div>
   <script>
    Vue.component('example1',{template:'#example1'})
    Vue.component('example2',{template:'#example2'})
    var vm = new Vue({
      el: '#content',
      data: {
        compontentName :'example1',
        cur:0
        }
    });
  </script>
</body>
</html>
【版权声明】本文为华为云社区用户原创内容,转载时必须标注文章的来源(华为云社区)、文章链接、文章作者等基本信息, 否则作者和本社区有权追究责任。如果您发现本社区中有涉嫌抄袭的内容,欢迎发送邮件进行举报,并提供相关证据,一经查实,本社区将立刻删除涉嫌侵权内容,举报邮箱:
cloudbbs@huaweicloud.com
- 点赞
- 收藏
- 关注作者
评论(0)